
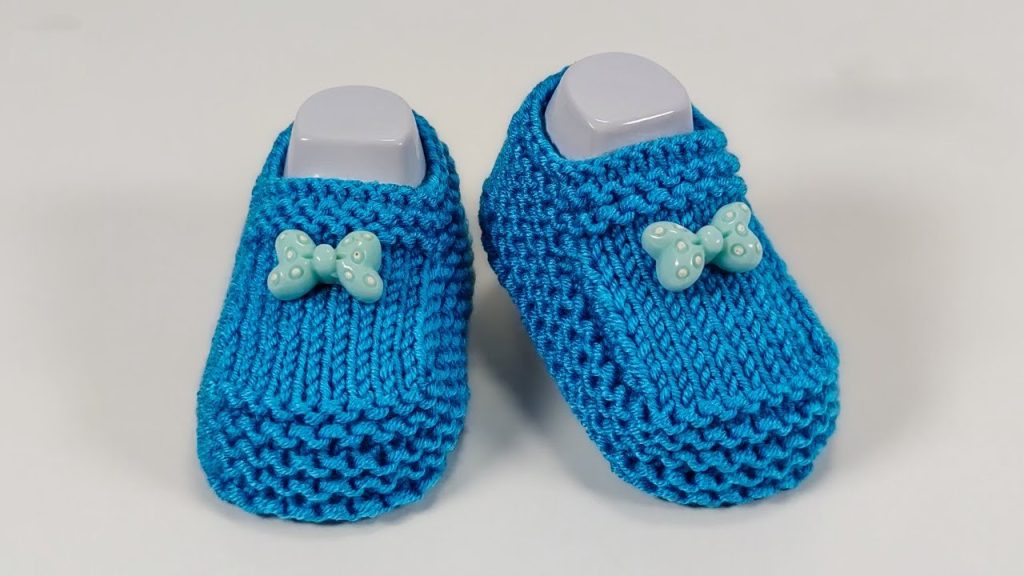
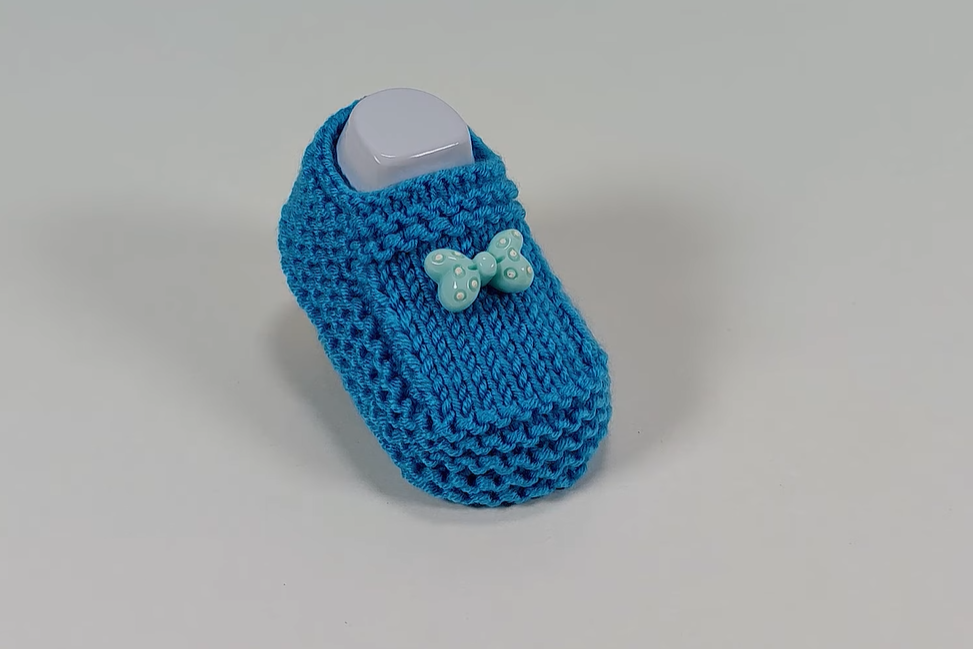
Welcome, knitters! Craft the coziest little shoes with this pattern for the Little Skipper Booties. This classic design features a soft, cushioned Garter Stitch body and sole, which is ideal for a baby’s delicate feet, and a classic, neat shape that ensures they stay put. The shape is achieved through a simple “T-shaped” construction worked flat and meticulously seamed.
This comprehensive pattern is written for two popular infant sizes and includes guidance on construction and customization.
📐 Sizing and Fit Guide
The following instructions cover two sizes. The finished bootie is designed for a comfortable, snug fit.
| Size | Age (Approx.) | Foot Length (Approx.) |
| Newborn (Instructions in Parentheses) | 0 – 3 Months | 3 – 3.5 inches (8 – 9 cm) |
| Infant (Instructions Without Parentheses) | 3 – 6 Months | 3.5 – 4 inches (9 – 10 cm) |
Export to Sheets
🛠️ Materials Needed
- Yarn: Approximately 75 – 100 yards (70 – 90 meters) of a soft DK weight (light worsted/8-ply) yarn in your main color (Skipper Blue).
- Select a yarn that is machine washable, as this is ideal for baby garments.
- Needles: A pair of US size 5 (3.75 mm) straight knitting needles.
- Using a slightly smaller needle helps create the dense, warm fabric needed for booties.
- Notions:
- Tapestry Needle for robust seaming and weaving in ends.
- Sharp Scissors.
- 2 Decorative Bows or 2 small buttons for the embellishment.
📏 Gauge (Vital for Accurate Sizing)
- Gauge: 22 stitches and 44 rows (22 garter ridges) equals 4 inches (10 cm) in Garter Stitch.
- Note: Checking your gauge is critical. Slight differences in tension can significantly impact the finished size of baby items.
ℹ️ Key Techniques & Abbreviations
This pattern is worked entirely flat using basic stitches and simple shaping techniques.
- K = Knit
- st(s) = Stitch(es)
- RS = Right Side
- WS = Wrong Side
- K2tog = Knit two stitches together (a decrease).
- ssk = Slip, Slip, Knit (a decrease).
- M1 = Make 1 (a simple increase).
- Garter Stitch: Knit every row.
👶 The Pattern: Little Skipper Booties
Work all instructions for Size Infant (3-6 Months). Use the numbers in the (parentheses) for Size Newborn (0-3 Months).
1️⃣ The Base Strip (Toe to Heel)
This strip forms the core of the bootie, including the toe shaping and the sole structure.
| Step | Instructions | Stitch Count |
| Cast On | Cast on 37 (33) stitches loosely. | 37 (33) sts |
| Rows 1–10 | Work in Garter Stitch (Knit every row) for 10 rows. This forms the rounded toe end. | 37 (33) sts |
| Row 11 (RS) | K2tog, K to the last 2 sts, ssk. | 35 (31) sts |
| Row 12 (WS) | Knit all stitches. | 35 (31) sts |
| Rows 13–16 | Repeat Rows 11 and 12 twice (4 rows total). | 31 (27) sts |
| Rows 17–28 (17–26) | Continue working in Garter Stitch (Knit every row) for 12 (10) rows. This creates the main sole section. | 31 (27) sts |

2️⃣ The Sides (The Cuff Flaps)
Increases are worked to create the side flaps that will wrap around the ankle to form the cuff.
| Row | Instructions | Stitch Count |
| Row 29 (27) (RS) | K 1, M1, K to the last st, M1, K1. | 33 (29) sts |
| Row 30 (28) (WS) | Knit all stitches. | 33 (29) sts |
| Rows 31–36 (29–34) | Repeat Rows 29 (27) and 30 (28) three times (6 rows total). | 39 (35) sts |
| Row 37 (35) (RS) | K 1, M1, K to the last st, M1, K1. | 41 (37) sts |
| Rows 38–44 (36–42) | Continue working in Garter Stitch for 7 rows. This is the full width of the cuff flaps. | 41 (37) sts |
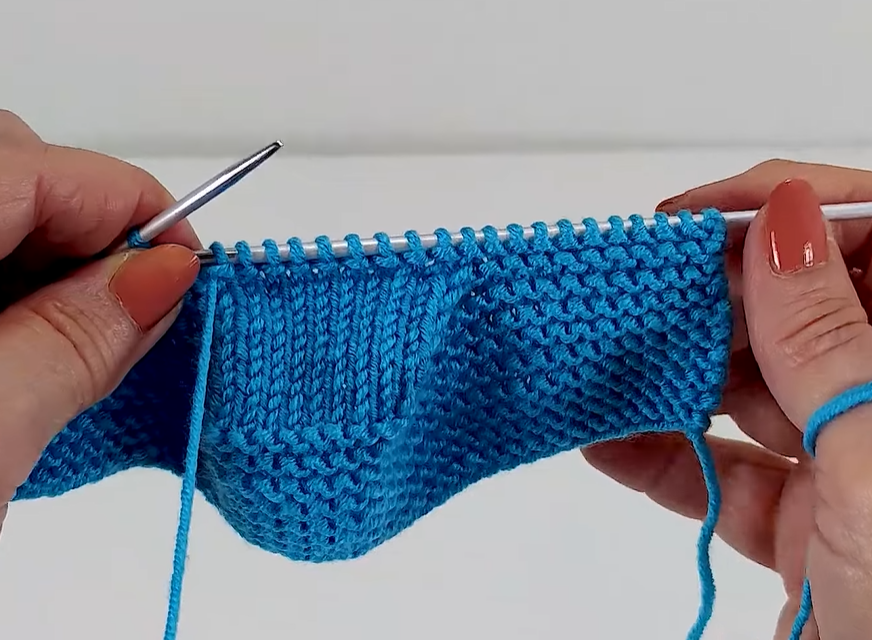
3️⃣ Central Bind Off and Ankle Opening
We create the opening for the foot by binding off central stitches and then casting them back on immediately to create a neat border.
| Row | Instructions | Stitch Count |
| Row 45 (43) (RS) | K 14 (12) sts. Bind off 13 (13) stitches loosely. K the remaining 14 (12) sts. | 28 (24) sts |
| Row 46 (44) (WS) | K 14 (12) sts. Cast on 13 (13) stitches over the bound-off gap. K the remaining 14 (12) sts. | 41 (37) sts |
| Rows 47–56 (45–54) | Continue working in Garter Stitch for 10 rows. This stabilizes the opening edge. | 41 (37) sts |
4️⃣ Final Heel Shaping
The last few rows shape the top of the heel before the final bind-off and seaming.
| Row | Instructions | Stitch Count |
| Row 57 (55) (RS) | K2tog, K to the last 2 sts, ssk. | 39 (35) sts |
| Row 58 (56) (WS) | Knit all stitches. | 39 (35) sts |
| Rows 59–64 (57–62) | Repeat Rows 57 (55) and 58 (56) three times (6 rows total). | 33 (29) sts |
| Last Row | Bind off all 33 (29) stitches loosely. FO, leaving a long tail (at least 20 inches / 50 cm) for seaming. | Bind Off |
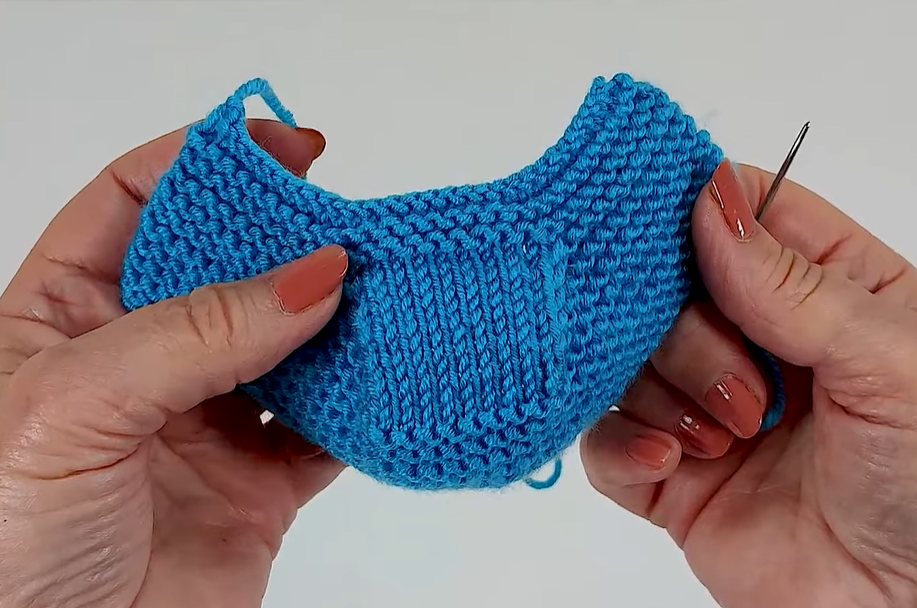
🧵 Finishing and Assembly (The Contoured Fit)
The final shape of the bootie is defined by the strategic folding and seaming of the knit piece.
- Seam the Heel:
- Fold the entire knit piece in half lengthwise.
- Using the long tail from the final bind-off, seam the final 10 rows of the heel together using the Mattress Stitch. This closes the back of the bootie.
- Seam the Sole:
- Continue the seam down the entire bottom edge (the sole), running from the center heel, under the foot, and towards the toe.
- For the last 10 rows toward the toe, gently cinch the seam tighter as you go to create the rounded, pointed toe shape.
- Secure the seam firmly at the toe tip.
- Embellishment: Stitch the decorative bow or button securely onto the top center of the toe/instep (approximately over Row 20) as shown in the original image.
- The Second Bootie: Repeat the entire process for a perfect, mirrored pair.
Video Tutorial:
✨ Pro-Tips and Customization
Alternative Closure (Mary Jane Style)
To ensure the bootie never slips off, you can knit a functional button strap:
- Knit the Strap: After seaming the bootie, pick up 10 stitches on the side of the slipper opening (about 1 inch below the cuff edge).
- Knit in Garter Stitch for 6 rows.
- Buttonhole Row: K2, K2tog, yo (yarn over), K to end (or reverse for the second bootie).
- Knit 2 more rows, then bind off.
- Sew a small button to the opposite side of the slipper opening to secure the strap.
Enhancing Cushion and Warmth
- Yarn Choice: Using a Merino wool blend will significantly increase the softness and breathability while maintaining excellent warmth and stretch.
- Cuff Finish: For a slightly more snug cuff, pick up stitches around the ankle opening after seaming, and knit 4 rows of 1×1 Rib on smaller needles (US 4 / 3.5 mm) before binding off.
- Sole Liner: For an extra layer of soft padding, cut a piece of felt or fleece to the shape of the finished sole and stitch it to the inside of the bootie.


