
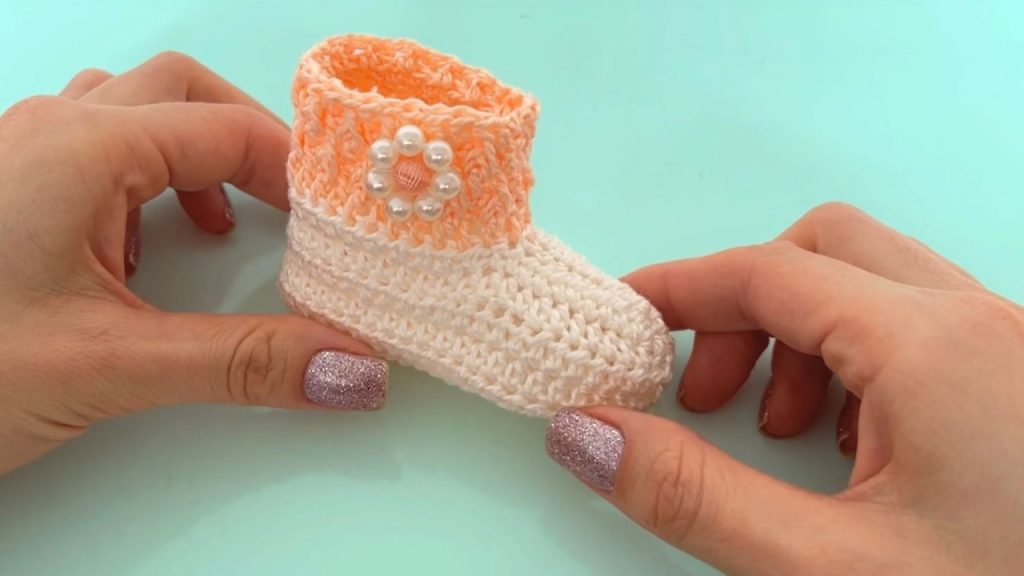
Welcome to a truly special project! If you’re looking for a baby bootie that combines simple construction with a sophisticated texture, the Perfect Textured Bootie is for you. This design uses a flat, rectangular base that is cleverly seamed to form the foot and a beautiful alternating Front Post Double Crochet (FPDC) stitch pattern to create a knit-like, ribbed texture on the ankle.
This pattern is easily customizable and suitable for both boys and girls by simply changing your color and embellishment choices. This guide is written for a standard newborn size.
🧶 Materials & Tools
Gather your supplies! We will be using two colors to achieve the lovely contrast between the sole/base and the main body.
- Yarn: Light Worsted or DK weight yarn (Category 3). Use soft, baby-safe fibers like acrylic, cotton, or a blend.
- Color A (Sole/Base): Approx. 30g (e.g., Pink/Blue)
- Color B (Main Body/Texture): Approx. 20g (e.g., White/Cream)
- Hook: 3.5 mm or 4.0 mm crochet hook (or size needed to meet your desired fabric density).
- Notions:
- Tapestry needle (essential for seaming).
- Scissors.
- Stitch marker (optional).
- Embellishments (optional: small pearls, buttons, or a simple chain bow).
📏 Sizing & Gauge
The dimensions for the starting chain determine the circumference of the foot. The following measurements are for the finished size.
Standard Size: Newborn (0-3 Months)
- Initial Chain: 50 chains (approximately 20 cm / 8 inches long).
- Finished Base Width: 49 stitches (HDC).
- Finished Base Height: Approximately 5 cm (2 inches).
Adjusting Sizing
To adjust the size for a larger baby, measure the length of the baby’s foot from heel to toe.
- Rule of Thumb: Chain a length equal to double the foot length. For example, if the foot measures 10 cm, chain 20 cm worth of stitches.
- Ensure your initial chain count is an even number (50, 52, 54, etc.) as the pattern skips an even number of stitches in the second section.
📘 Abbreviations & Special Stitches (US Terms)
This pattern uses common crochet abbreviations and a few special texture stitches.
| Abbreviation | Stitch Name |
| ch | Chain |
| st(s) | Stitch(es) |
| sl st | Slip Stitch |
| sc | Single Crochet |
| hdc | Half Double Crochet (Meio Ponto Alto) |
| dc | Double Crochet (Ponto Alto) |
| FPDC | Front Post Double Crochet (Ponto Alto em Relevo) |
Special Stitch Instructions
FPDC (Front Post Double Crochet): Yarn over, insert hook from front to back around the post of the specified stitch, yarn over, pull up a loop, yarn over, pull through two loops, yarn over, pull through last two loops.
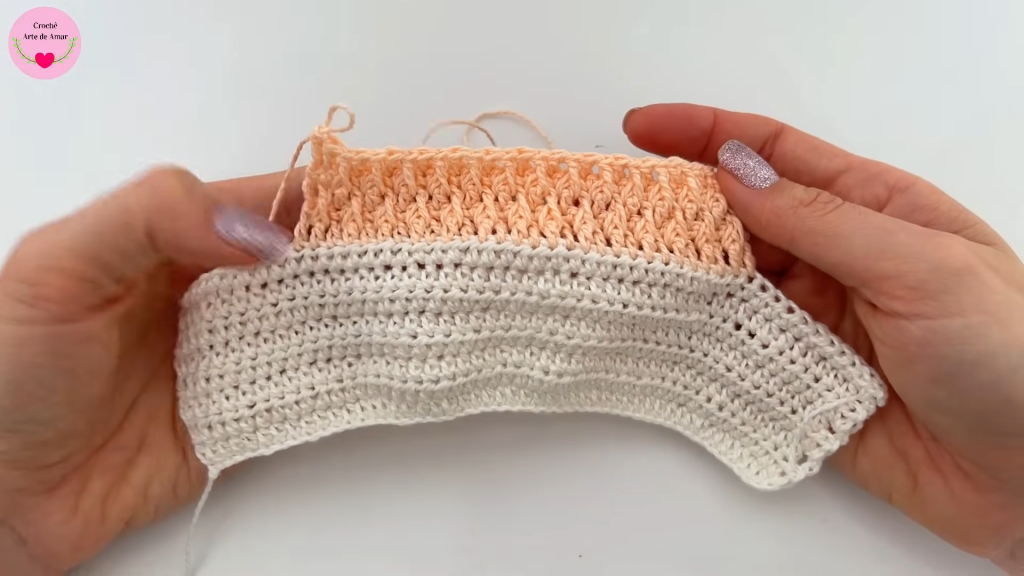
👣 Part 1: The Base Rectangle (Color A)
This first section forms the entire sole, sides, and heel of the bootie. It is worked flat in rows using Half Double Crochet (HDC).
Preparation: With Color A, chain 50.
Row 1 (Starting Row):
- Yarn over, insert hook into the 3rd ch from the hook.
- HDC in that chain and in every chain across the row.(49 HDC)
Row 2:
- Ch 2 (counts as first HDC). Turn your work.
- HDC in the next st and in every st across.
- Ensure your final HDC is worked into the top of the turning chain from the previous row.(49 HDC)
Rows 3 – 8 (HDC Base):
- Repeat Row 2 until you have completed a total of 8 rows.
The rectangle should measure approximately 5 cm (2 inches) high.
Finishing Color A:
- At the end of Row 8, ch 1. Cut the yarn and pull through the loop to fasten off.
- Weave in the starting tail and the end tail neatly along the edges of the rectangle.
🌈 Part 2: The Main Body & Textured Ankle (Color B)
The second section starts the shaping for the toe and creates the defining textured pattern on the ankle. This section is worked over the center portion of the base.

Preparation:
- Lay your Color A rectangle flat.
- Count 10 stitches from the right edge and 10 stitches from the left edge. These stitches will be left unworked in this section to form the toe gap.
- Join Color B with a sl st in the 11th stitch from the right edge. (This leaves 29 stitches for the main body).
Row 9 (First Body Row – DC):
- Ch 3 (counts as first DC).
- DC in the next st and in each st across until you have 10 stitches remaining unworked on the left edge.(29 DC)
Row 10 (SC Stabilizer Row):
- Ch 1 (does not count as a st). Turn your work.
- SC in the same st and in every st across the row.(29 SC)
Row 11 (Texture Row 1 – FPDC):
- Ch 3 (counts as first DC). Turn your work.
- DC in the next st (the SC from the row below).
- Starting the Rib: FPDC around the post of the next DC from Row 9.
- Alternate:
DC in next st, FPDC around the post of the next stacross the row. - Your final stitch should be a DC worked into the top of the turning chain of Row 9.(15 DC, 14 FPDC = 29 sts)
Row 12 (SC Stabilizer Row):
- Ch 1. Turn your work.
- SC in the same st and in every st across the row.(29 SC)
Row 13 (Texture Row 2 – Inverted Rib):
This row inverts the ribbing pattern, creating a woven look.
- Ch 3 (counts as first DC). Turn your work.
- Look at the stitches below (Row 11):
- If the stitch below is a DC, work FPDC around its post.
- If the stitch below is a FPDC, work DC into the stitch top.
- Work
FPDC around post of next DC, DC in next stacross the row. - Your final stitch should be a DC worked into the turning chain.(29 sts)
Finishing Color B:
- At the end of Row 13, cut the yarn, leaving an extremely long tail (at least 60 cm / 24 inches) for seaming. Pull the tail through the loop to fasten off.
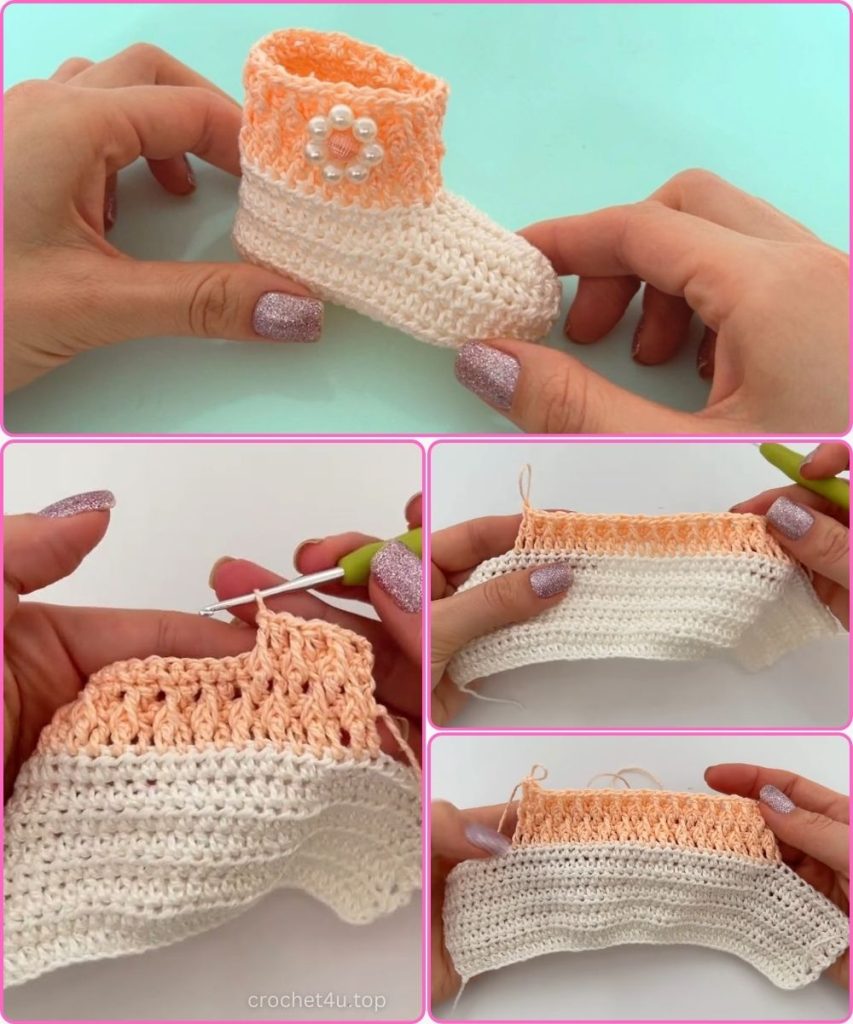
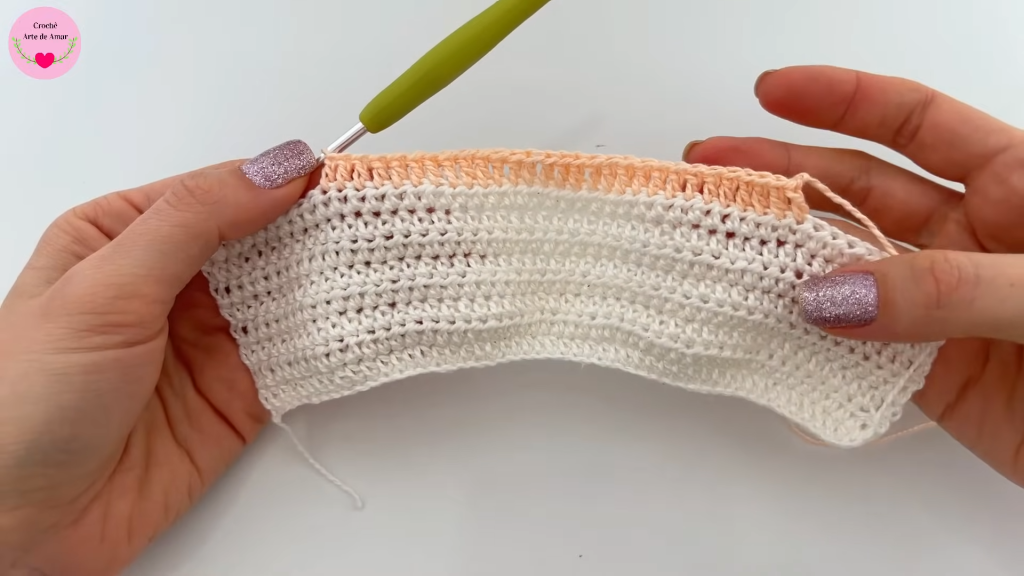
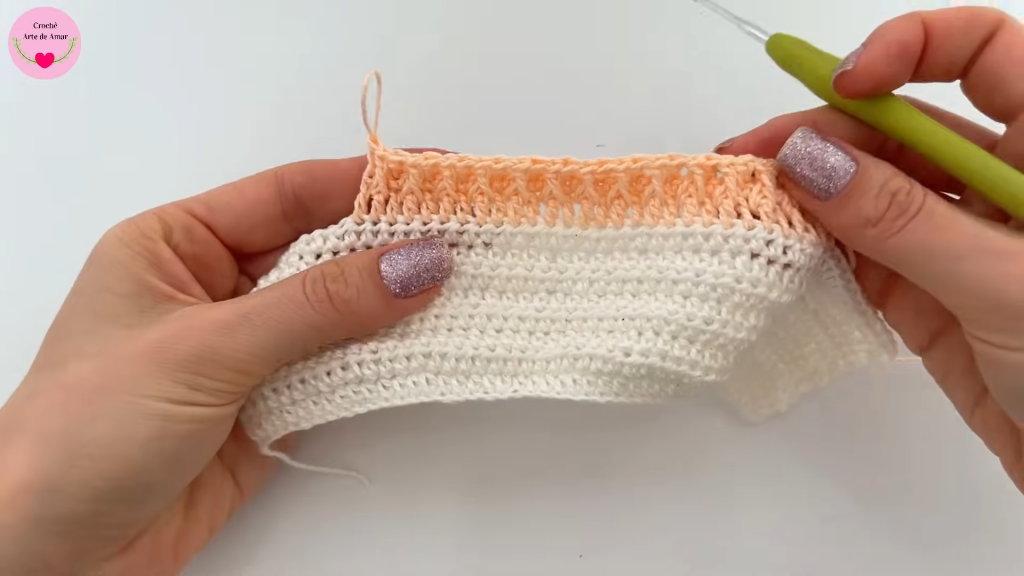
✂️ Part 3: Assembly & Finishing
The final shape of the bootie is achieved entirely through strategic seaming and cinching.
1. Seam the Ankle/Heel
- Fold: Turn the entire piece to the Wrong Side (WS). Fold the Main Body section (Rows 9-13) in half so the short ends align.
- Seam: Use the long Color B tail and a tapestry needle to securely sew this short edge together (the back of the heel/ankle). Use a firm whipstitch or mattress stitch.
- Secure: Knot securely and weave the excess tail into the seam to hide it.
2. Seam the Sole (Color A Rectangle)
- Thread: Thread the tail of Color A (if you still have a long one from weaving the end) or attach a new length of Color A yarn to your tapestry needle at one corner of the base (where the heel seam meets the sole).
- Heel Cinch: Starting at the back corner, work a running stitch (or zig-zag) across the first 1 cm (approx. 4 stitches) of the base, then pull the thread to slightly cinch and round the heel corner. Knot securely.
- Sole Seam: Continue seaming the long edges of the Color A rectangle together, working from the heel towards the toe. Use a strong, aligned stitch.
- Toe Cinch: When you reach the final corner/tip (the starting chain edge), stop seaming about 1 cm from the end. Work a running stitch through the loops along that final 1 cm of the edge.
- Pull Tightly: Pull the thread firmly to cinch the entire toe tip closed, giving the bootie its rounded toe shape. Knot securely and weave in the tail.
3. Final Touches
- Turn the bootie Right Side Out.
- Gently model the toe and heel with your fingers.
- Embellish: This bootie looks stunning with simple adornments:
- Glue or sew small pearl beads along the toe line.
- Weave a ribbon or a decorative crochet chain (made with 40-50 chs) through the ribbing of the texture rows and tie a bow at the front.
Repeat all steps for the second bootie. Enjoy your beautifully textured, handcrafted baby shoes!


