
🧶 Materials & Gauge
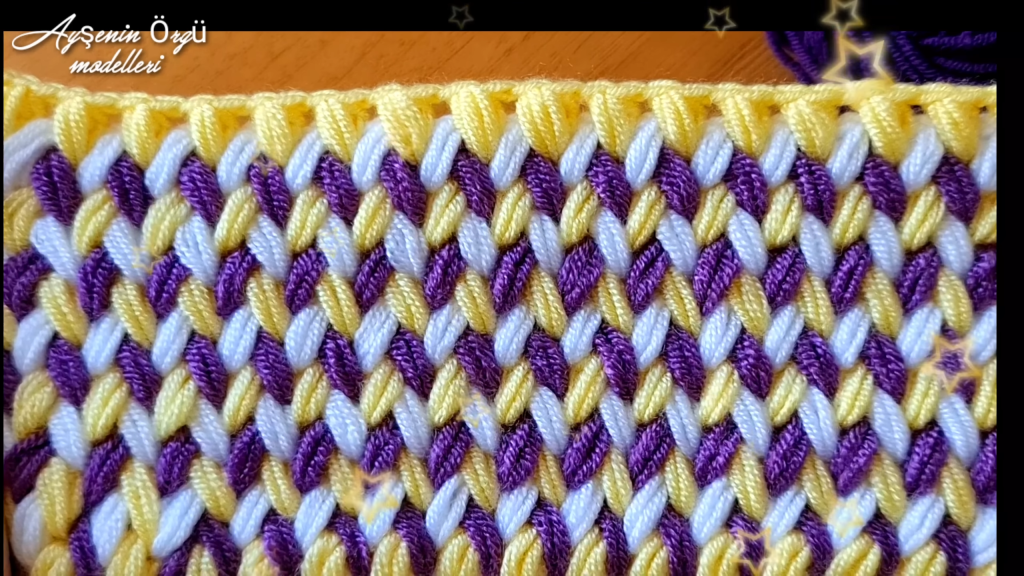
Before we start, gather your supplies! The stitch in the image uses three contrasting colors to create that lovely woven effect.
- Yarn:
- Color A (CA): Yellow (The lightest color, used for the top and base row)
- Color B (CB): White (The secondary color)
- Color C (CC): Purple (The main contrasting color)
- Recommendation: Use a medium worsted weight (Category 4) yarn for a blanket or bag, or a lighter weight for a scarf. Acrylic or a smooth cotton blend works best to clearly show the stitch texture.
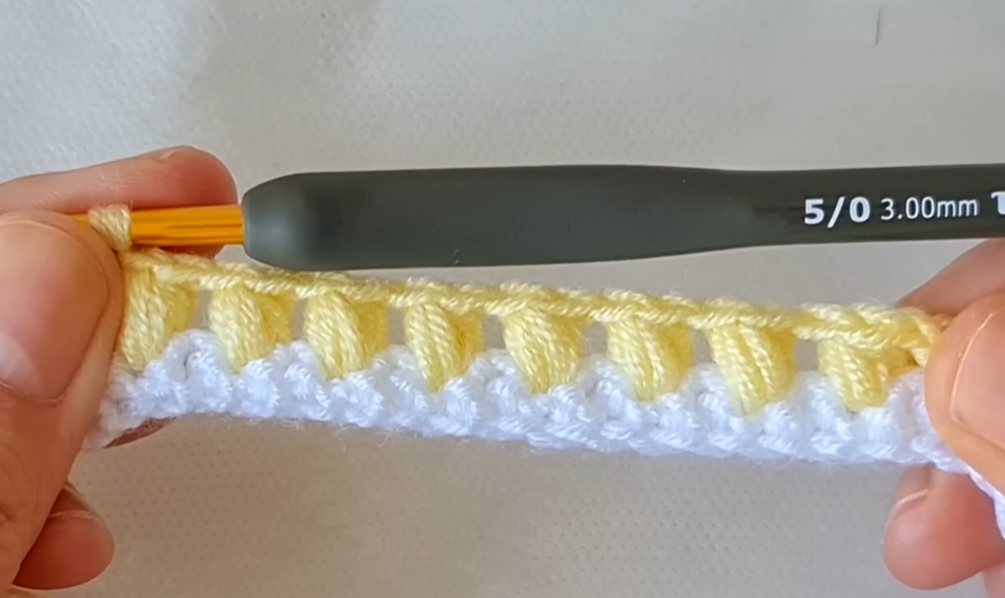
- Hook: A hook size appropriate for your yarn. For worsted weight yarn, a 5.0 mm (H-8) or 5.5 mm (I-9) hook is a good starting point. You might want to go up a size if you usually crochet tightly, as this stitch can be dense.
- Notions: Tapestry needle for weaving in ends, scissors.
| Measurement | Detail |
| Gauge | Not critical for non-fitted items, but aim for a firm, dense fabric. |
| Stitch Multiplier | Chain a multiple of 2 plus 2 (for the foundation chain). |
💡 Blogger Tip: Using high-contrast colors like in the image (yellow, white, purple) makes the ‘woven’ effect pop!
📝 Stitch Abbreviations (US Terms)
- Ch: Chain
- St(s): Stitch(es)
- Sl St: Slip Stitch
- SC: Single Crochet
- TSS: Tunisian Simple Stitch (Insert hook under the vertical bar, yarn over, pull up a loop)
- Lp(s): Loop(s)
- Yo: Yarn Over
- FO: Finish Off
🧵 The Woven Crochet Stitch Pattern
This pattern is a combination of standard crochet and a modified version of the Tunisian Simple Stitch (TSS), where loops are kept on the hook and worked off in the reverse pass. We will be changing colors on every Forward Pass to achieve the distinct look.
🌟 Foundation Row (Set-up)
This row establishes the base and the correct number of loops.
- Start with Color A (Yellow).
- Chain: Ch a multiple of 2, plus 2 (e.g., 20 + 2 = 22 chains).
- Row 1 (SC): SC in the 2nd Ch from the hook and in every Ch across. (Your final stitch count will be the multiple of 2, e.g., 20 SCs).
- Row 2 (Base Forward Pass): Ch 1 (does not count as a stitch). SC in the first st and in every st across. DO NOT finish the last SC. Drop Color A. (20 SCs).
🌈 Color Sequence & Stitch Technique
We will be working in a 3-color rotation. Each full row consists of a Forward Pass and a Return Pass.
| Row Type | Color Used |
| Row 3 (Woven Pass) | Color B (White) |
| Row 4 (Woven Pass) | Color C (Purple) |
| Row 5 (Woven Pass) | Color A (Yellow) |
Repeat the sequence Color B, Color C, Color A until your project reaches the desired length.

✂️ Row 3: Color B (White) – First Woven Pass
This is where the magic begins. We will be working loops off in pairs and inserting the hook in a unique spot: between the posts of the SCs from the previous row.
- Attach Color B (White): Insert the hook into the working loop from the previous row (the one you left unfinished). Yo with Color B, pull through the loop. Ch 1 with Color B (this secures the loop).
- Forward Pass (FP):
- Stitch 1: Insert hook into the first space between the first and second vertical posts of the SCs below. Yo, pull up a loop (2 loops on hook).
- Stitch 2: Insert hook into the next space between the second and third vertical posts. Yo, pull up a loop (3 loops on hook).
- Work Off Loop Pair: Yo, pull through the last 2 loops on hook. (2 loops remaining on hook).
- Repeat Across:
- Insert hook into the next space. Yo, pull up a loop.
- Insert hook into the next space. Yo, pull up a loop (4 loops on hook).
- Yo, pull through the last 2 loops on hook (3 loops remaining on hook).
- Continue this paired increase and decrease until you reach the very last space.
- Final St: Insert hook into the very last st (the side of the last SC). Yo, pull up a loop.
- Return Pass (RP): Yo, pull through the last 2 loops on hook. DO NOT complete the final stitch of the return pass. Drop Color B. Leave the working loop on the hook.
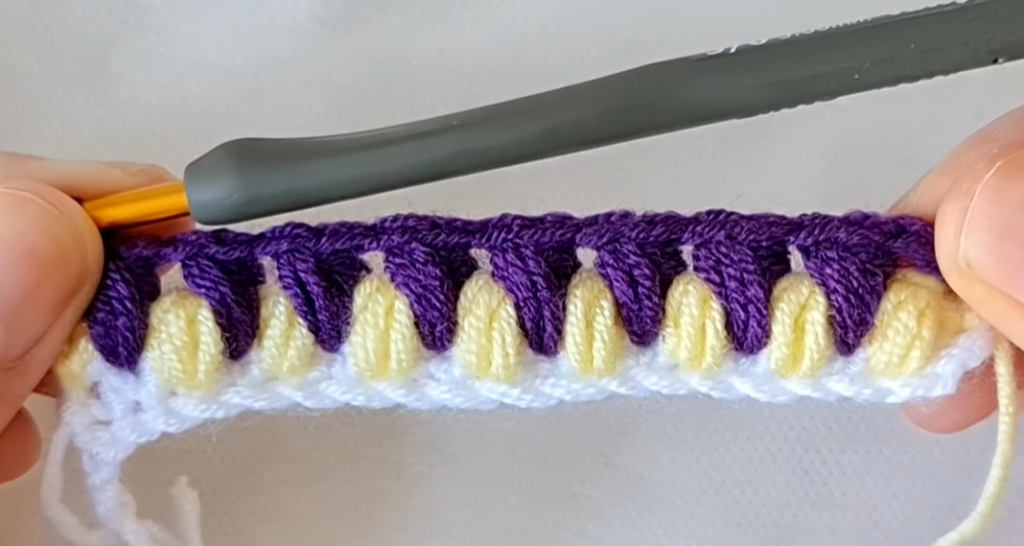
💜 Row 4: Color C (Purple) – Second Woven Pass
We are now working into the structure created by the white yarn.
- Attach Color C (Purple): Insert the hook into the working loop (from the unfinished RP of Row 3). Yo with Color C, pull through the loop. Ch 1 with Color C.
- Forward Pass (FP):
- Stitch 1: Insert hook into the first space between the vertical posts created by the working yarn from the previous row. Yo, pull up a loop (2 loops on hook).
- Stitch 2: Insert hook into the next space between the vertical posts. Yo, pull up a loop (3 loops on hook).
- Work Off Loop Pair: Yo, pull through the last 2 loops on hook (2 loops remaining on hook).
- Repeat Across: Continue the sequence: (Insert hook into next space, Yo, pull up a loop) twice. Then (Yo, pull through 2 loops).
- Final St: Insert hook into the side of the last vertical stitch/post. Yo, pull up a loop.
- Return Pass (RP): Yo, pull through the last 2 loops on hook. DO NOT complete the final stitch of the return pass. Drop Color C. Leave the working loop on the hook.
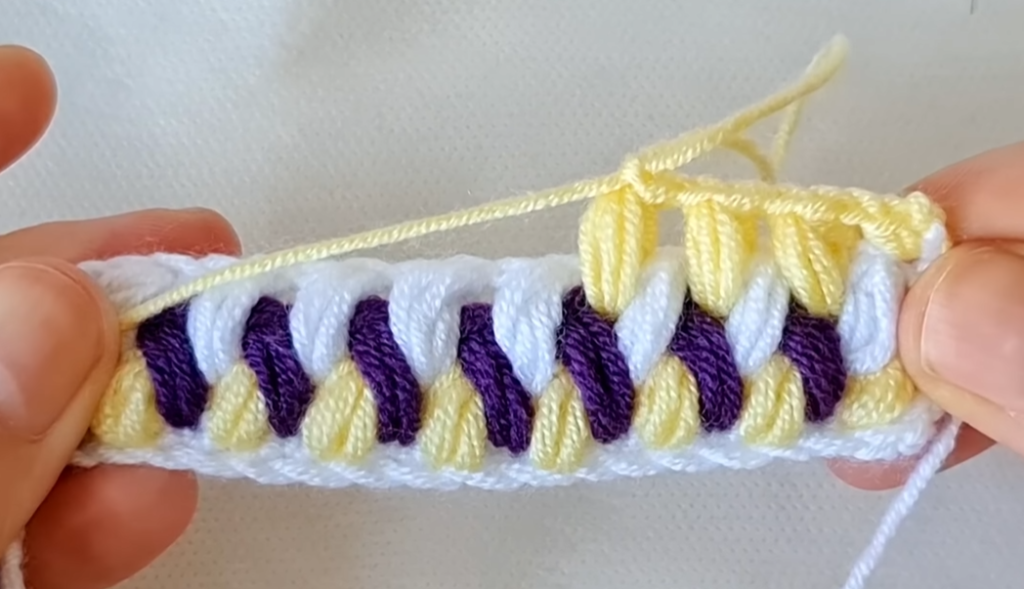
☀️ Row 5: Color A (Yellow) – Third Woven Pass
The structure remains the same; only the color is changing.
- Attach Color A (Yellow): Insert the hook into the working loop. Yo with Color A, pull through the loop. Ch 1 with Color A.
- Forward Pass (FP):
- Repeat the same Forward Pass sequence as in Row 4. You are always inserting the hook between the vertical posts of the previous row.
- Return Pass (RP): Yo, pull through the last 2 loops on hook. DO NOT complete the final stitch of the return pass. Drop Color A. Leave the working loop on the hook.
Video Tutorial:
🔄 Repeat for Length
Repeat Rows 3, 4, and 5 (Color B, Color C, Color A) in sequence until your project is the desired size.
🔳 Finishing the Edge
To square off the top edge and match the SC bottom, finish your project after a Return Pass with Color B or C.
- Finishing Row (SC): With the color from the last Return Pass, Ch 1. SC into the first space/stitch (not the vertical post itself) and SC evenly across, placing one SC in each ‘loop’ or space from the last row. Sl St into the final stitch/space.
- Final Touches: FO, weave in all your ends securely using a tapestry needle.
⚠️ Important Note on Color Changes: You will be carrying the non-working colors up the side of your work. Since this is a very dense stitch, the carried yarn will likely be covered by the natural thickness and texture of the fabric, but always keep your floats loose so they don’t pucker the edge.
💖 Project Ideas for the Woven Stitch
This dense, squishy fabric is perfect for items that need structure and warmth:
- Basket/Bag: The thickness of the stitch makes it self-supporting.
- Throw Blanket or Afghan: Creates a heavy, luxurious weight.
- Hot Pads/Trivets: Excellent heat insulation due to the density.
- Scarves or Cowls: The reversible nature is perfect for wearable accessories.
Would you like me to search for a video tutorial to visually demonstrate the technique for the Forward Pass?


