
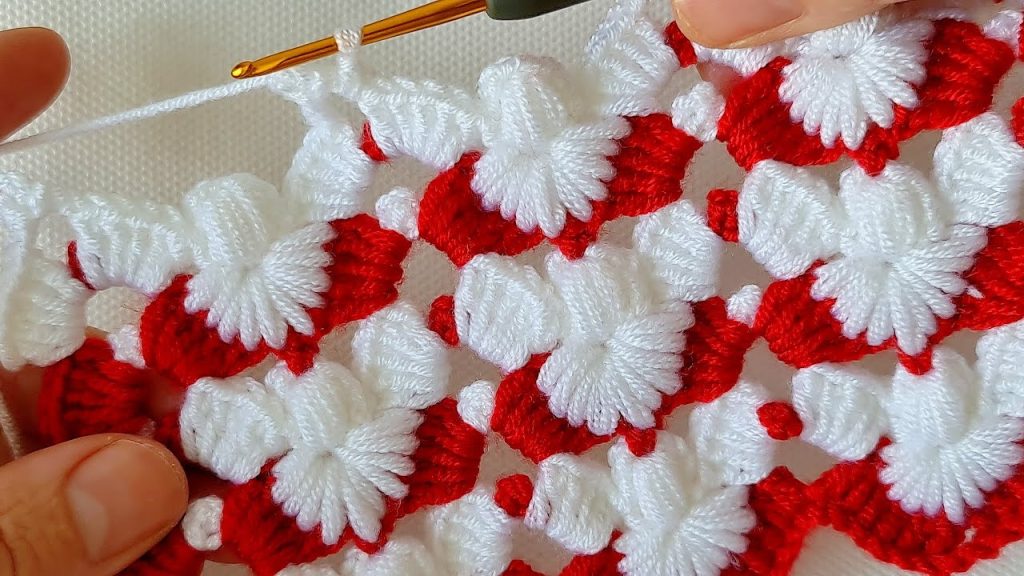
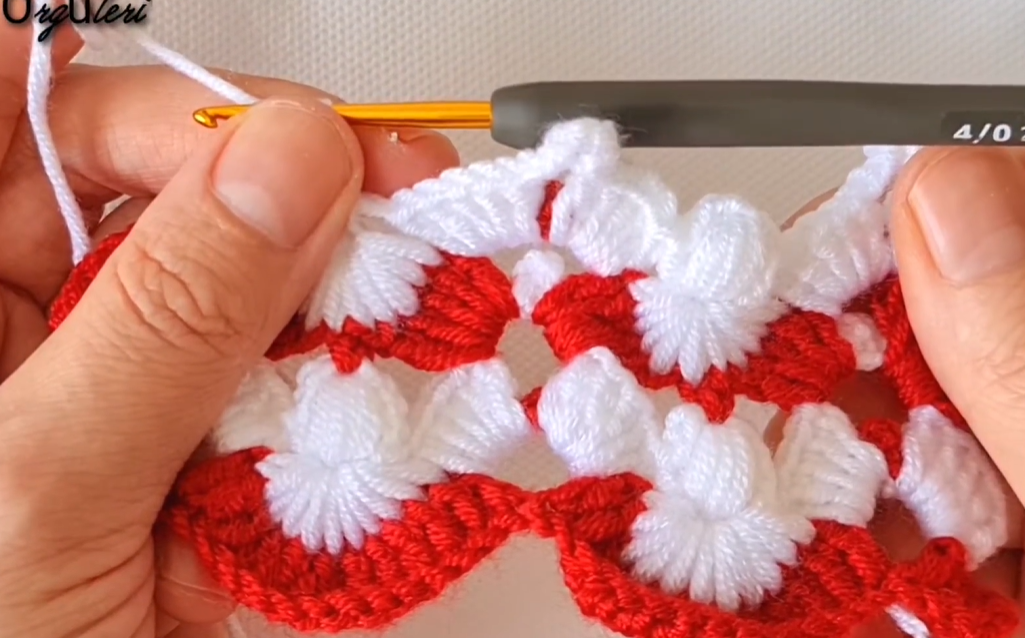
This stitch creates a stunning, plush texture by alternating rows of solid puff flowers with rows that connect them using a contrasting color. The resulting fabric is incredibly squishy and warm!
🧶 Materials & Gauge
To achieve the best texture, choose a soft yarn that works up well into puff stitches.
- Yarn:
- Color A (CA): White (The main color for the flowers)
- Color B (CB): Red (The contrasting color for the connecting rows)
- Recommendation: A medium worsted weight (Category 4) acrylic, alpaca, or soft wool blend works wonderfully. A slightly fuzzy yarn enhances the cloud-like look.
- Hook: A hook size appropriate for your yarn. For worsted weight yarn, a 5.0 mm (H-8) or 5.5 mm (I-9) hook is ideal.
- Notions: Tapestry needle for weaving in ends, scissors.
| Measurement | Detail |
| Gauge | Not critical for non-fitted items, but aim for flowers that puff nicely. |
| Stitch Multiplier | Chain a multiple of 4 plus 2 (for the foundation chain). |
Export to Sheets
💡 Blogger Tip: Keep your tension consistent, especially when pulling up the loops for the Puff Stitch, to ensure all your flowers are the same size.
📝 Special Stitch Abbreviations (US Terms)
This pattern relies heavily on the Puff Stitch (PS) and the Half Double Crochet (HDC).
- Ch: Chain
- St(s): Stitch(es)
- Sl St: Slip Stitch
- SC: Single Crochet
- HDC: Half Double Crochet (Yo, insert hook, Yo, pull up loop, Yo, pull through all 3 loops.)
🌼 Puff Stitch (PS) – 5 Loop Version
The core of our flower.
- [Yo, insert hook into designated stitch/space, Yo, pull up a loop] 5 times. (You will have 11 loops on your hook: the original loop + 5 sets of Yo and pulled-up loops).
- Yo, pull through all 11 loops on the hook.
- Ch 1 to close the puff stitch.
🌺 3-Puff Flower Cluster (3-PS CL)
This creates the main flower shape in Color A.
- Work 1 PS in the designated space.
- Ch 1.
- Work 1 PS in the same designated space.
- Ch 1.
- Work 1 PS in the same designated space.
- Ch 1 to secure the cluster.
☁️ The Flower Stitch Pattern (Step-by-Step)
We will work this pattern in a two-row repeat, alternating between Color A (Flowers) and Color B (Connectors).
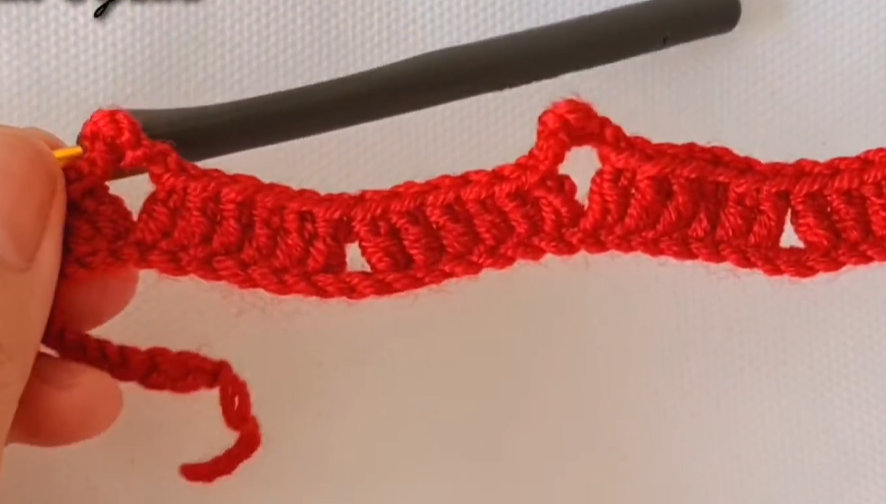
☀️ Foundation & Set-up
- Start with Color B (Red).
- Chain: Ch a multiple of 4, plus 2 (e.g., 4 x 10 = 40 + 2 = 42 chains).
- Row 1 (SC): SC in the 2nd Ch from the hook and in every Ch across. Ch 1, turn. (41 SCs).
- Row 2 (HDC – Base Row): HDC in the first st and in every st across. Do not finish the last HDC (leave the last 3 loops on the hook). Drop Color B. (41 HDCs).
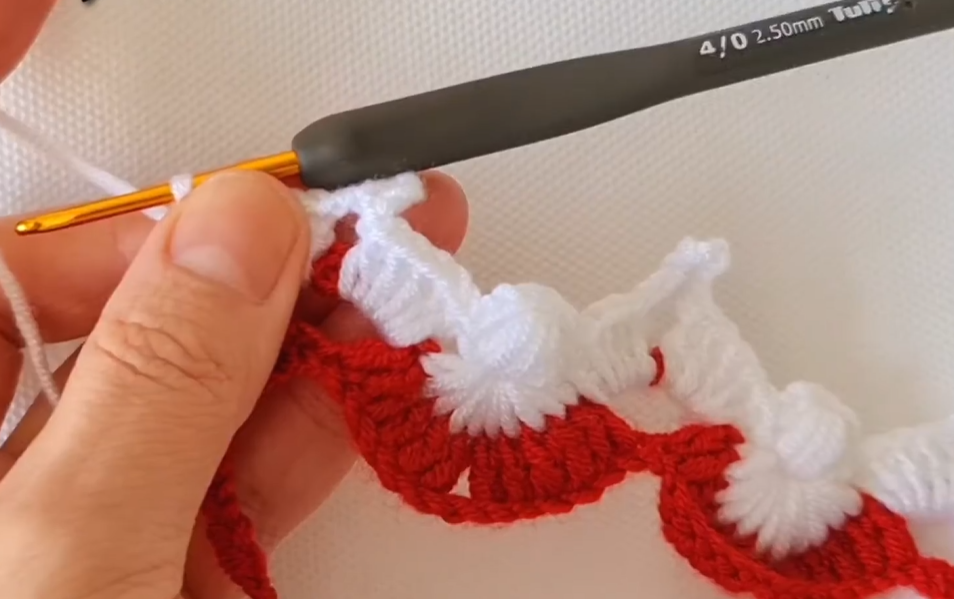
⚪ Row 3: Color A (White) – Flowers
This row establishes the puff flower motif. You will be working into the spaces between the HDCs from the previous row.
- Attach Color A: Yo with Color A and pull through the last 3 loops on the hook to complete the last HDC. Ch 3 (counts as HDC and Ch 1 space), turn.
- Skip 2 HDC posts. Work 1 3-PS CL (3-Puff Flower Cluster) in the space between the 2nd and 3rd HDC posts.
- HDC Connector: Ch 1. Skip the next 4 HDC posts (this is the space the flower spans). Work 1 HDC in the space between the 4th and 5th HDC posts.
- Repeat across:
- Ch 1.
- Skip the next 4 HDC posts.
- Work 1 3-PS CL in the space between the last skipped post and the next post.
- Ch 1.
- Skip the next 4 HDC posts.
- Work 1 HDC in the space between the last skipped post and the next post.
- Finishing St: Repeat the sequence until you reach the end. Skip the last 2 HDC posts. Work 1 HDC into the top of the turning chain of Row 2. Do not finish the last HDC. Drop Color A. (You should have a repeat of Flower, HDC across the row).
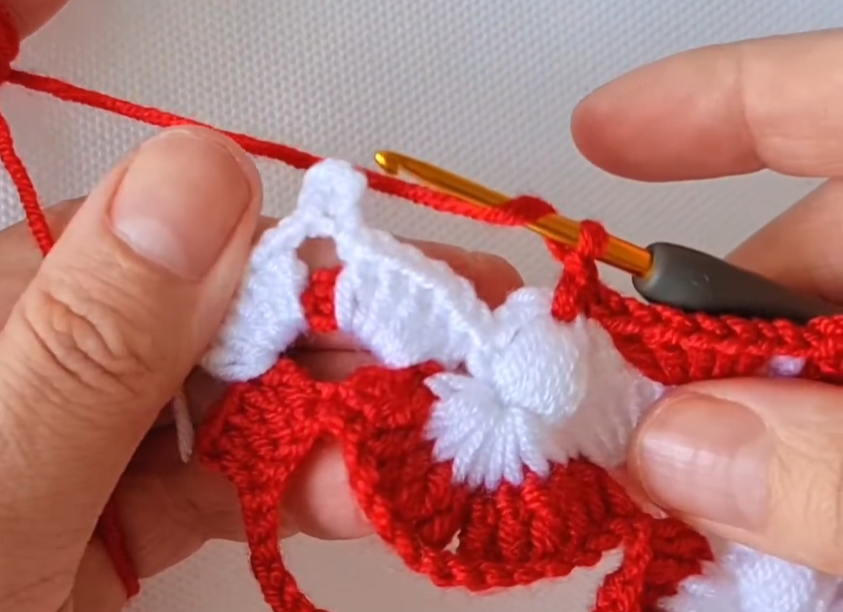
⚫ Row 4: Color B (Red) – Connectors
This row uses Color B to connect the white flowers, positioning the next row’s flowers to nest perfectly in the gaps.
- Attach Color B: Yo with Color B and pull through the last 3 loops on the hook to complete the last HDC. Ch 1, turn.
- SC Base: SC in the first HDC st (the one you just completed).
- SC in Spaces: SC in the Ch-1 space before the first flower cluster.
- Flower Center: SC in the center Ch-1 space of the 3-PS CL (between the second and third puffs).
- Connecting Space: SC in the Ch-1 space after the flower cluster. SC in the HDC post from the previous row.
- Repeat across: SC in the Ch-1 space before the next flower cluster, SC in the center Ch-1 space of the cluster, SC in the Ch-1 space after the cluster, SC in the HDC post from the previous row.
- Finishing St: SC in the last Ch-1 space. SC into the 3rd chain of the turning chain from the previous row. Do not finish the last SC. Drop Color B.
💖 Row 5: Color A (White) – Nested Flowers
This row creates the next layer of white flowers, nesting them between the flowers from Row 3.
- Attach Color A: Yo with Color A and pull through the last 2 loops on the hook to complete the last SC. Ch 3 (counts as HDC and Ch 1 space), turn.
- Skip 2 SC posts. Work 1 3-PS CL in the space between the 2nd and 3rd SC posts (this space should be positioned directly over the HDC connector from Row 3).
- HDC Connector: Ch 1. Skip the next 4 SC posts. Work 1 HDC in the space between the 4th and 5th SC posts (this space should be positioned directly over the center of the flower from Row 3).
- Repeat across: Continue the repeat of Ch 1, skip 4 SCs, 3-PS CL into the next space, Ch 1, skip 4 SCs, HDC into the next space.
- Finishing St: Repeat the sequence until you reach the end. Skip the last 2 SC posts. Work 1 HDC into the last SC st. Do not finish the last HDC. Drop Color A.
Video Tutorial:
🔁 Repeat for Length
Repeat Row 4 (Connector) and Row 5 (Nested Flowers) until your project reaches the desired length.
✂️ Finishing Touches
To create a clean, crisp edge:
- Finishing Row (SC): After completing a Row 4 (Connector), Ch 1, turn. SC evenly across the row, placing one SC in the top of every SC stitch.
- Final Touches: FO, weave in all your ends securely using a tapestry needle. The carried colors along the side add a nice textured edge!
Would you like me to find a video demonstrating the Puff Stitch Flower Cluster technique?


