✨ Introduction: Creating Texture and Depth
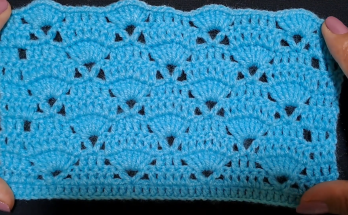
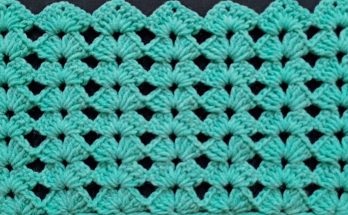
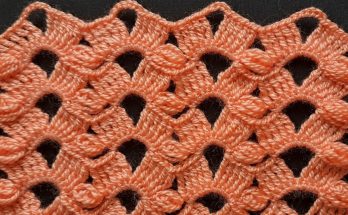
Welcome to a world of beautiful, dimensional crochet! This pattern guides you through creating the stunning Interlocking Basketweave Motif, a textured and dense stitch pattern featured in the video. This technique uses simple Double Crochet stitches worked in a unique way to create an embossed, woven look.
Because this stitch is thick and warm, it is perfect for high-wear items where durability and texture are key.

Suggested Projects
- Home Decor: Luxurious throw blankets, textured pillows, or floor mats.
- Apparel: Warm scarves, beanies, or cozy cardigan panels.
- Accessories: Sturdy market bags or laptop sleeves.
📌 Pattern Notes & Abbreviations
This pattern requires a careful stitch count to maintain the interlocking motif. The stitch pattern is a multiple of 6 stitches, plus 4 for the turning/edge stitches.
Stitch Multiple
Chain a multiple of 6 + 4. (Example: $6 \times 6 = 36$ stitches, plus $4 = 40$ starting chains).
Abbreviations (US Terms)
| Abbreviation | Meaning |
| ch | Chain |
| st(s) | Stitch(es) |
| sl st | Slip Stitch |
| sc | Single Crochet |
| dc | Double Crochet |
| sk | Skip |
| sp | Space |
| FO | Fasten Off |
Materials
- Yarn: Medium Worsted Weight (Weight 4) yarn is recommended for best definition. The video uses a soft, light-colored acrylic.
- Hook: A hook appropriate for your yarn. The video uses a 1.70 mm hook, but for standard Worsted Weight yarn, a G/6 (4.0 mm) or H/8 (5.0 mm) hook is typically used.
- Tools: Scissors, tapestry needle.
✂️ Special Stitch: The Interlocking Motif
The core of this pattern is a unique sequence that uses one group of stitches to overlap a second group, creating the woven texture.

The Motif Sequence
- Work Forward: Sk 4 stitches. In the 5th st, work 4 DC.
- Work Backward: Do not chain or turn. Take a yarn over (for DC). Insert your hook into the 4th skipped stitch (the stitch before the 5th stitch you just worked into), and work 4 DC into that single stitch.
- The second group of 4 DC will cross over the top of the first group, forming the interlocking look.
📐 The Pattern Repeat: 4-Row Sequence
This motif is created using a 4-Row Vertical Repeat. Rows of Single Crochet are worked in between the Motif Rows to provide a solid base for the interlocking stitches.
Foundation and Row 1 (Base Row)
- Chain: Ch a multiple of 6 + 4. (For the sample, Ch 40).
- Row 1 (Base): Dc in the 4th ch from the hook (this counts as the first 2 DC) and dc in every ch across. (38 DC)([01:40] – [02:30])

Motif Row 1 (The Initial Interlock)
- Row 2: Ch 3 (counts as first dc), turn. Dc in the next 3 sts. (4 DC Border)([02:41] – [03:00])
- Interlocking Motif (First Placement):
- Sk 4 dc from the previous row.
- Work 4 DC in the 5th dc.
- Work Backward: Yarn over, work 4 DC in the 4th skipped dc. (This forms the cross.)([03:14] – [04:12])
- V-Stitch:
- Sk 4 dc.
- In the 5th dc, work (1 DC, Ch 1, 1 DC).([04:19] – [04:37])
- Repeat:
- [Work Interlocking Motif (sk 4, 4 DC in 5th, 4 DC in 4th sk st), sk 4, work V-Stitch (1 DC, Ch 1, 1 DC) in 5th st.] Repeat the sequence across the row.
- End: You should have 4 stitches remaining. Work 1 DC in each of the last 4 sts.([07:33] – [07:38])
Separation Row 1
- Row 3 (SC Row): Ch 1, turn. Sc in the first 4 sts (the DC Border).([07:49] – [08:04])
- Work SC across: Sc in every DC of the Interlocking Motifs.
- Crucial Detail: When you reach the V-Stitch (the 1 DC, Ch 1, 1 DC), work 1 SC into the first DC, 1 SC into the Ch-1 sp, and 1 SC into the second DC.([08:38] – [08:41])
- Continue SC across all stitches of the row until you reach the final 4 DC Border stitches.
- Sc in the last 4 sts (the DC Border).
Motif Row 2 (The Shifted Interlock)
This row shifts the placement to align the motifs over the V-Stitches and the V-Stitches over the previous motifs.

- Row 4: Ch 3 (counts as first dc), turn. Dc in the next 3 sts. (4 DC Border)([10:06] – [10:27])
- Shifted Motif Placement (Starts with Interlock):
- Sk 4 sc from the previous row.
- Work 4 DC in the 5th sc.
- Work Backward: Yarn over, work 4 DC in the 4th skipped sc. (The Interlocking Motif should sit directly over the previous row’s V-Stitch area.)([10:33] – [11:27])
- Shifted V-Stitch Placement:
- Sk 4 sc.
- Work V-Stitch (1 DC, Ch 1, 1 DC) into the 5th sc. (This stitch should land roughly in the center of the previous row’s Interlocking Motif.)([11:39] – [11:54])
- Repeat:
- [Work Interlocking Motif (sk 4, 4 DC in 5th, 4 DC in 4th sk st), sk 4, work V-Stitch (1 DC, Ch 1, 1 DC) in 5th st.] Repeat the sequence across the row.
- End: You should have 4 stitches remaining. Work 1 DC in each of the last 4 sts.
Separation Row 2
- Row 5 (SC Row): Ch 1, turn. Sc across the entire row, treating the V-Stitch Ch-1 sp as one stitch to work into, just like Row 3.([14:44] – [16:15])
🔁 Continuing the Pattern
To continue the Interlocking Basketweave Motif, simply repeat the 4-Row Sequence:
Repeat Rows 2, 3, 4, and 5 until your project reaches the desired length.
Enjoy the beautiful texture of your new creation!


