
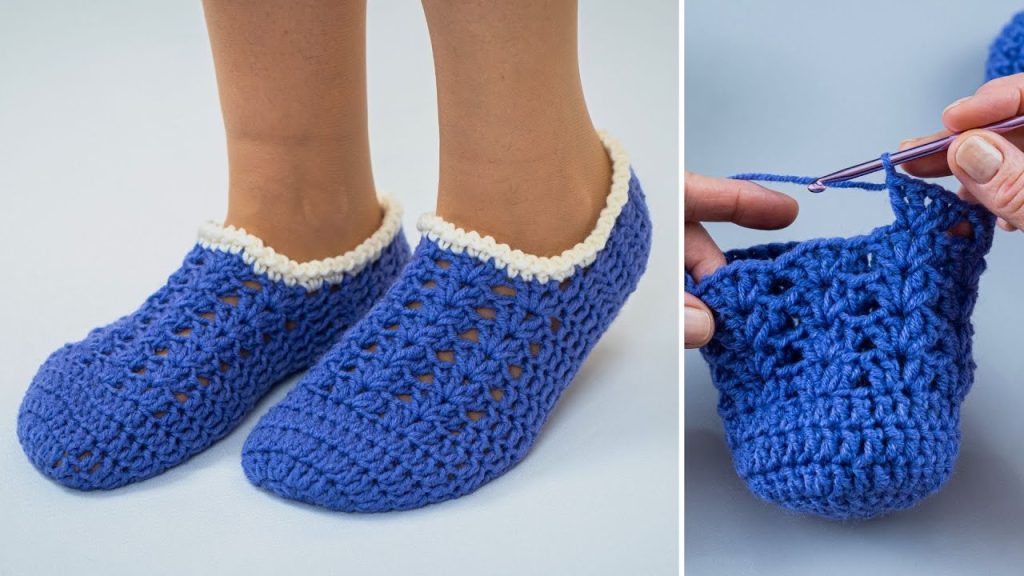
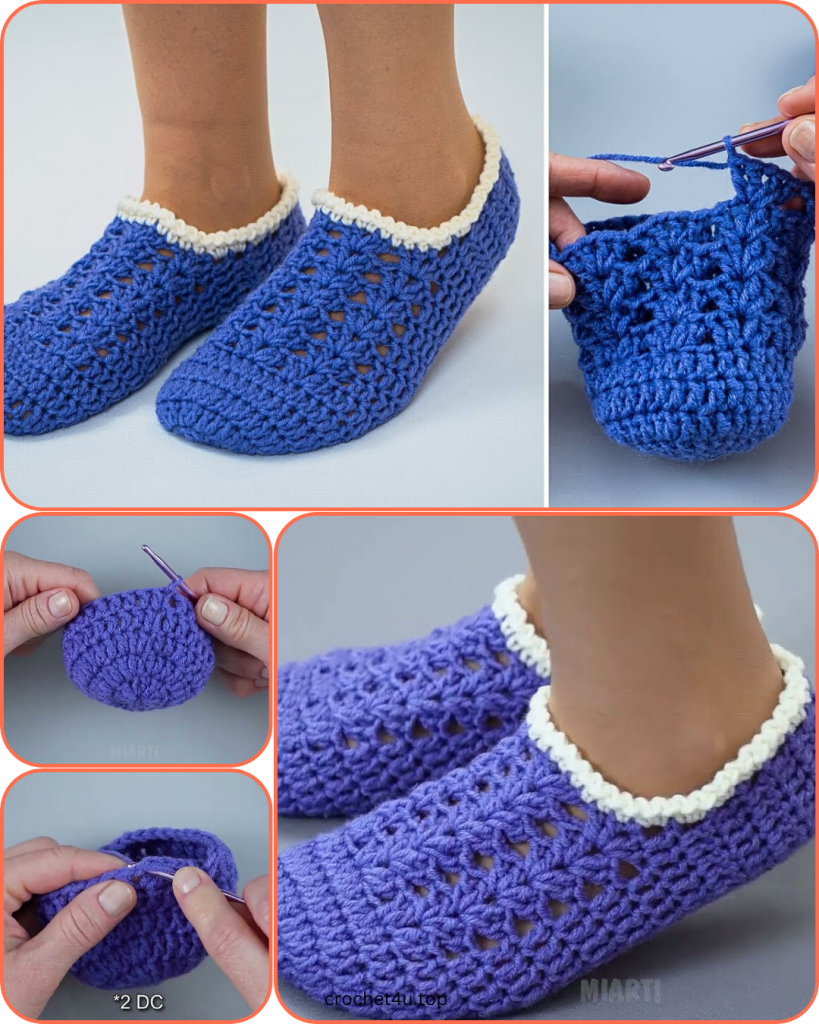
Crocheting a pair of cozy slippers is a great way to treat your feet (or a loved one’s!). This pattern creates a snug, sock-like slipper with a unique texture using the star stitch. This stitch gives the slippers a beautiful, dense fabric that is both warm and comfortable. The pattern is written for a women’s size medium (US 7-8), with notes on how to adjust for other sizes.
Materials
- Worsted-weight yarn: Approx. 150-200 yards (2 skeins of a standard worsted weight yarn). I used a super soft acrylic yarn for this.
- Crochet hook: US size H/8 (5.0 mm), or the size needed to obtain gauge.
- Tapestry needle: For weaving in ends.
- Stitch marker: This is optional but highly recommended to mark the beginning of each round.
Gauge
Before you begin, make a gauge swatch to ensure your slippers fit correctly.
- In half-double crochet (HDC): 4 rows of 5 HDC should measure 1 inch by 1 inch.
Adjust your hook size if your gauge is off. If your swatch is too small, use a larger hook. If it’s too big, use a smaller hook.
Pattern Notes
- This pattern is worked in continuous rounds, so you will not join with a slip stitch at the end of each round unless otherwise stated.
- The beginning chain of each round does not count as a stitch unless specified.
- The pattern is worked from the toe up to the ankle, with a final trim added around the opening.
- Star Stitch Tutorial:
- To start a new star stitch row: Chain 2. Insert hook into 2nd chain from hook, pull up a loop (2 loops on hook). Insert hook into the next stitch, pull up a loop (3 loops on hook). Insert hook into the next stitch, pull up a loop (4 loops on hook). Insert hook into the next stitch, pull up a loop (5 loops on hook). Insert hook into the next stitch, pull up a loop (6 loops on hook). Yarn over and pull through all 6 loops on the hook. Chain 1 to close the star and create the “eye”.
- To continue a star stitch row: Insert hook into the “eye” of the last star just made, pull up a loop (2 loops on hook). Insert hook into the back loop of the last stitch of the previous star, pull up a loop (3 loops on hook). Insert hook into the same stitch as the last loop of the previous star, pull up a loop (4 loops on hook). Insert hook into the next stitch, pull up a loop (5 loops on hook). Insert hook into the next stitch, pull up a loop (6 loops on hook). Yarn over and pull through all 6 loops on the hook. Chain 1 to close the star and create the “eye”.
- Finishing a star stitch row: The final stitch of a star stitch row is a half-double crochet (HDC) into the last stitch of the row. This provides a clean edge.
Slipper Construction
Part 1: The Toe (Making the circle)
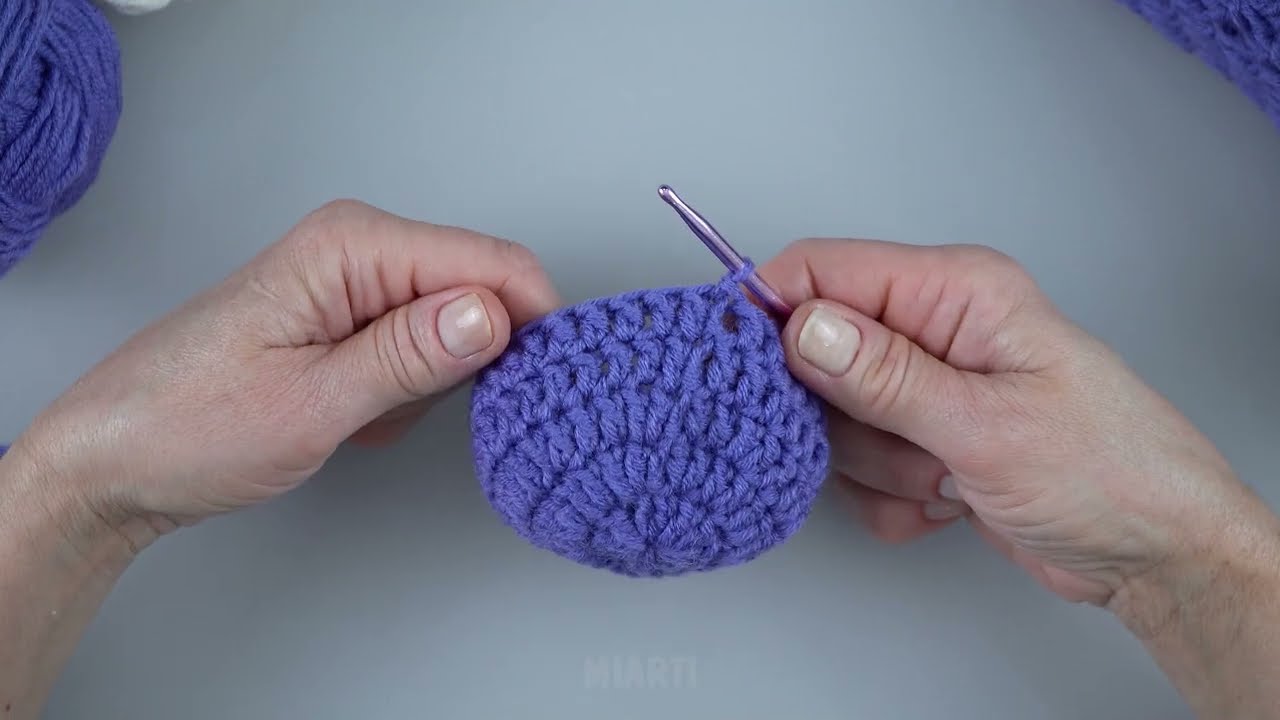
- Round 1: Create a magic ring. Chain 2. Work 10 half-double crochet (HDC) into the magic ring. Pull the ring tight. Do not join. Place a stitch marker in the first stitch. (10 stitches)
- Round 2: 2 HDC in each stitch around. (20 stitches)
- Round 3: *1 HDC in the next stitch, 2 HDC in the next stitch.* Repeat from * to * around. (30 stitches)
- Round 4: *1 HDC in the next 2 stitches, 2 HDC in the next stitch.* Repeat from * to * around. (40 stitches)
- Round 5: HDC in each stitch around. (40 stitches)
- Round 6: *1 HDC in the next 3 stitches, 2 HDC in the next stitch.* Repeat from * to * around. (50 stitches)
- Round 7: HDC in each stitch around. (50 stitches)
Note: For a smaller size, you can stop increasing after Round 6. For a larger size, add another round of increases (e.g., Round 8: *1 HDC in the next 4 stitches, 2 HDC in the next stitch.* Repeat from * to * around). Make sure your stitch count is an even number for the star stitch section.
Part 2: The Body (Working the Star Stitch)
- Round 8: This is your first star stitch round. Chain 2. Work your first star stitch using the next 5 stitches. Continue working star stitches around. Your last star stitch will be worked into the last 5 stitches of the round. (25 stars)
- Round 9: Chain 2. Work your first star stitch using the chain 2 and the first 4 stitches of the round (the “eyes” of the previous row). Continue working star stitches, with each star using the “eye” and back loop of the previous stitch.
- Rounds 10-20 (or until desired length): Repeat Round 9.
To check your fit, try the slipper on. It should cover the top of your foot and feel snug. The last few rounds of star stitches will form the sides of the slipper, so continue until it covers your ankle bone.
Part 3: The Heel
Now, we’ll start to shape the heel.
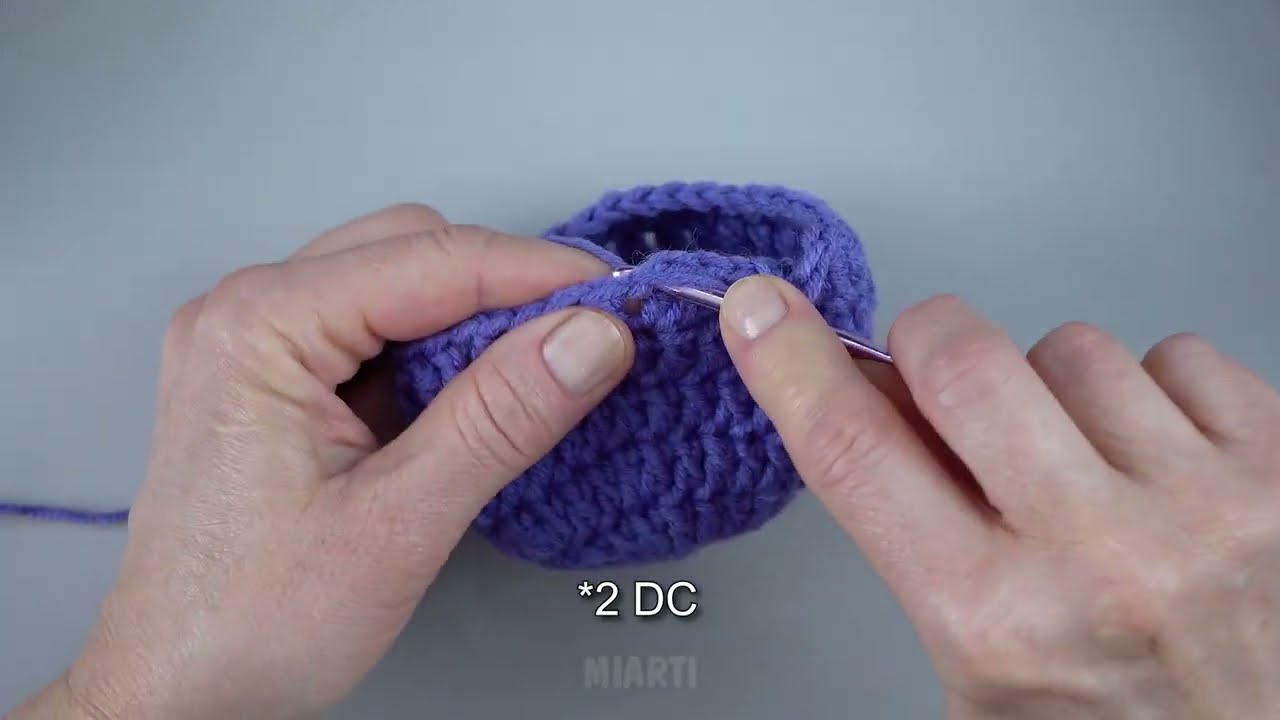
- Row 21: We will now work in rows instead of continuous rounds. Turn your work. HDC in the first 25 stitches. Leave the remaining 25 stitches unworked. Chain 1 and turn. (25 stitches)
- Row 22: HDC in each of the 25 stitches. Chain 1 and turn. (25 stitches)
- Rows 23-28: Repeat Row 22.
You should now have a flat flap that will be seamed to create the heel.
Video Tutorial:
Finishing
- Seaming the heel: Fold the heel flap in half, with the wrong sides facing each other. Use a tapestry needle and the tail of your yarn to whip stitch or mattress stitch the two sides together. This creates a clean, vertical seam up the back of the slipper. Weave in your ends securely.
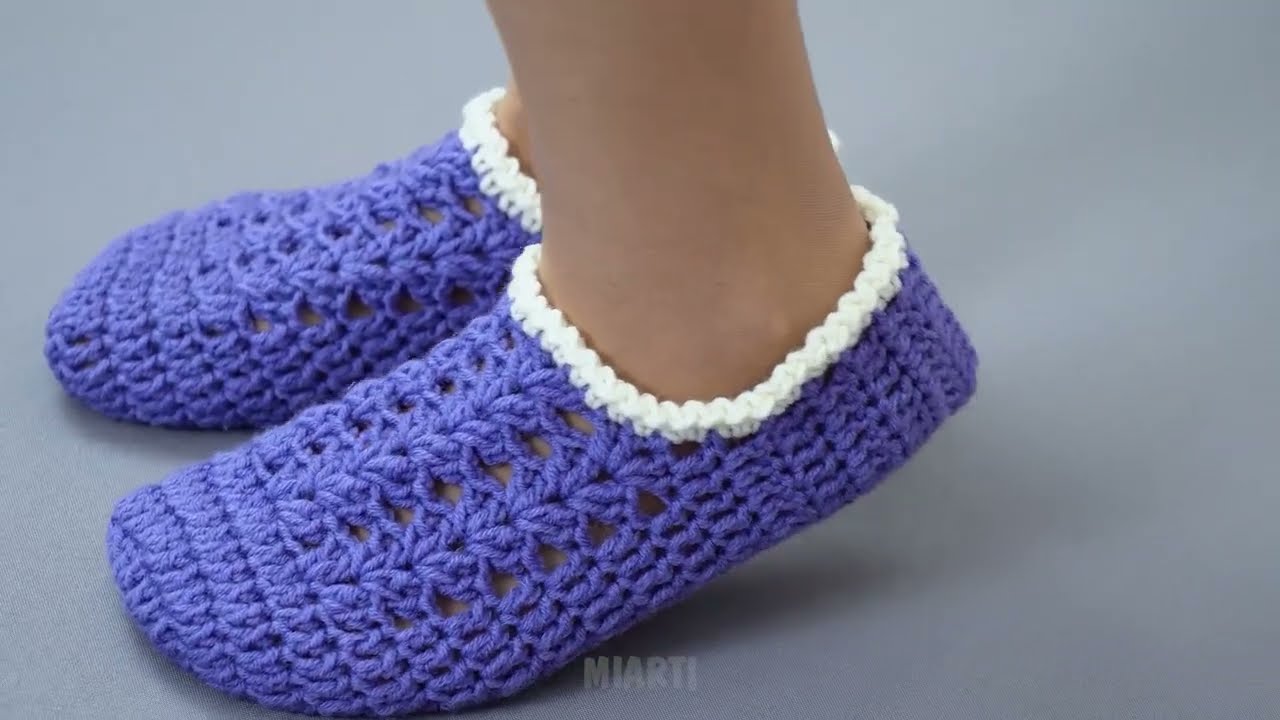
- Optional Edging:
- Round 1: Join a contrasting color yarn (like the white in the picture) at the back of the heel. Single crochet (SC) evenly around the entire opening of the slipper. Join with a slip stitch to the first SC.
- Round 2: Chain 1. SC in each stitch around. Join with a slip stitch. Fasten off and weave in ends.
- Repeat the entire process to create your second slipper.
Your cozy, handmade slippers are now ready to wear! They make a perfect gift for any occasion or a special treat for yourself on a chilly evening.
If you have any questions, feel free to drop a comment below! Happy crocheting!


