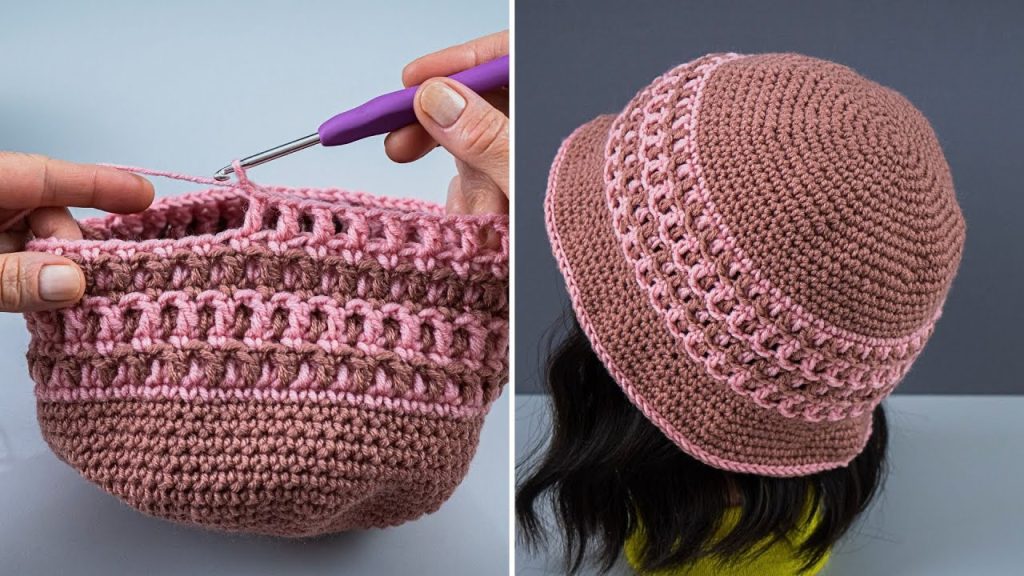
Step out in style with a hat that’s as unique as you are! Inspired by the elegant two-toned design you saw, this pattern is all about creating a piece with beautiful texture and classic charm. The “Vintage Bloom” Bucket Hat combines a simple, structured shape with a captivating decorative band, making it the perfect project to add to your repertoire.
This hat is a fantastic way to practice your single crochet skills while also learning a new, textured stitch that creates a stunning visual effect. The contrasting colors highlight the unique design and give the hat a truly custom, handcrafted feel.
Let’s grab our hooks and yarn and get ready to create this chic and timeless accessory!
Materials You’ll Need:
- Yarn: Approximately 150-200 yards (137-183 meters) total of a Worsted Weight (Aran/10 ply) yarn. A cotton or sturdy acrylic blend will give the hat the best shape.
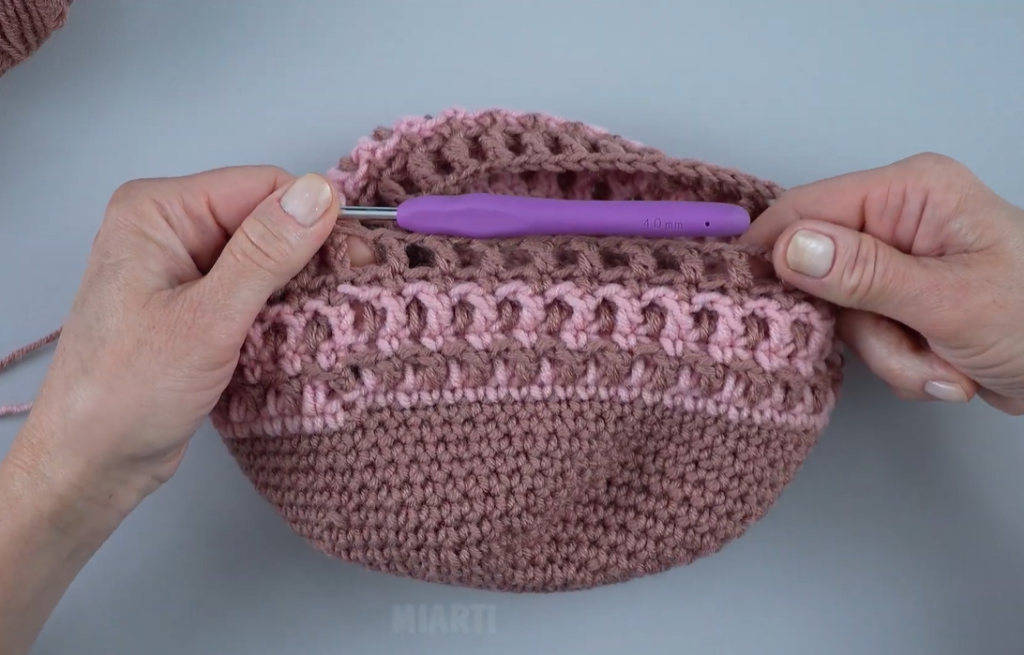
- Main Color (MC): Approx. 100-120 yards (e.g., the brown in the image).
- Contrasting Color (CC): Approx. 50-80 yards (e.g., the light pink in the image).
- Crochet Hook: 4.0 mm (G/6) or size needed to obtain gauge. A hook that creates a slightly dense fabric is key for hat structure.
- Stitch Marker: Essential for working in continuous rounds.
- Yarn Needle: For weaving in ends.
- Scissors
Gauge:
Getting the right gauge is crucial for a well-fitting hat!
- Using single crochet with your chosen yarn and hook: 18 stitches and 20 rounds = 4 inches (10 cm).
Please make a small swatch in single crochet to check your gauge. If your swatch is too large, try a smaller hook. If it’s too small, try a larger hook.
Abbreviations:
- ch: chain
- st(s): stitch(es)
- sl st: slip stitch
- sc: single crochet
- hdc: half double crochet
- inc: increase (2 single crochet in the same stitch)
- PM: place marker
- MC: Main Color
- CC: Contrasting Color
Special Stitch: 4-Hdc Puff Stitch
This is the stitch that creates the raised, textured ‘puffs’ in the decorative band.
- To make a 4-Hdc Puff Stitch: Yarn over, insert hook into the indicated stitch, yarn over, pull up a loop (3 loops on hook). [Yarn over, insert hook into the same stitch, yarn over, pull up a loop] 3 more times. You will have a total of 9 loops on your hook. Yarn over, pull through all 9 loops on the hook. Chain 1 to close the puff.
Pattern Notes:
- This hat is worked from the top down in continuous rounds. Do not join rounds unless specified. Use a stitch marker to keep track of the first stitch of each round.
- Ch 1 at the beginning of a round does not count as a stitch.
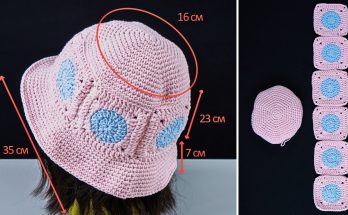
- The pattern is written for an average adult head size (approx. 22-23 inches circumference). Adjustments for size are noted.
- When changing colors, complete the last yarn over of the previous stitch with the new color.
Part 1: The Crown of the Hat
We’ll start with a solid, flat circle that will form the top of your hat.

With Main Color (MC):
Round 1: Make a magic ring. Sc 6 into the ring. Do not join. PM in the first sc. (6 sc)
Round 2: Inc in each st around. (12 sc)
Round 3: (Sc in the next st, inc in the next st) 6 times. (18 sc)
Round 4: (Sc in the next 2 sts, inc in the next st) 6 times. (24 sc)
Round 5: (Sc in the next 3 sts, inc in the next st) 6 times. (30 sc)
Round 6: (Sc in the next 4 sts, inc in the next st) 6 times. (36 sc)
Round 7: (Sc in the next 5 sts, inc in the next st) 6 times. (42 sc)
Round 8: (Sc in the next 6 sts, inc in the next st) 6 times. (48 sc)
Round 9: (Sc in the next 7 sts, inc in the next st) 6 times. (54 sc)
Round 10: (Sc in the next 8 sts, inc in the next st) 6 times. (60 sc)
Round 11: (Sc in the next 9 sts, inc in the next st) 6 times. (66 sc)
Round 12: (Sc in the next 10 sts, inc in the next st) 6 times. (72 sc)
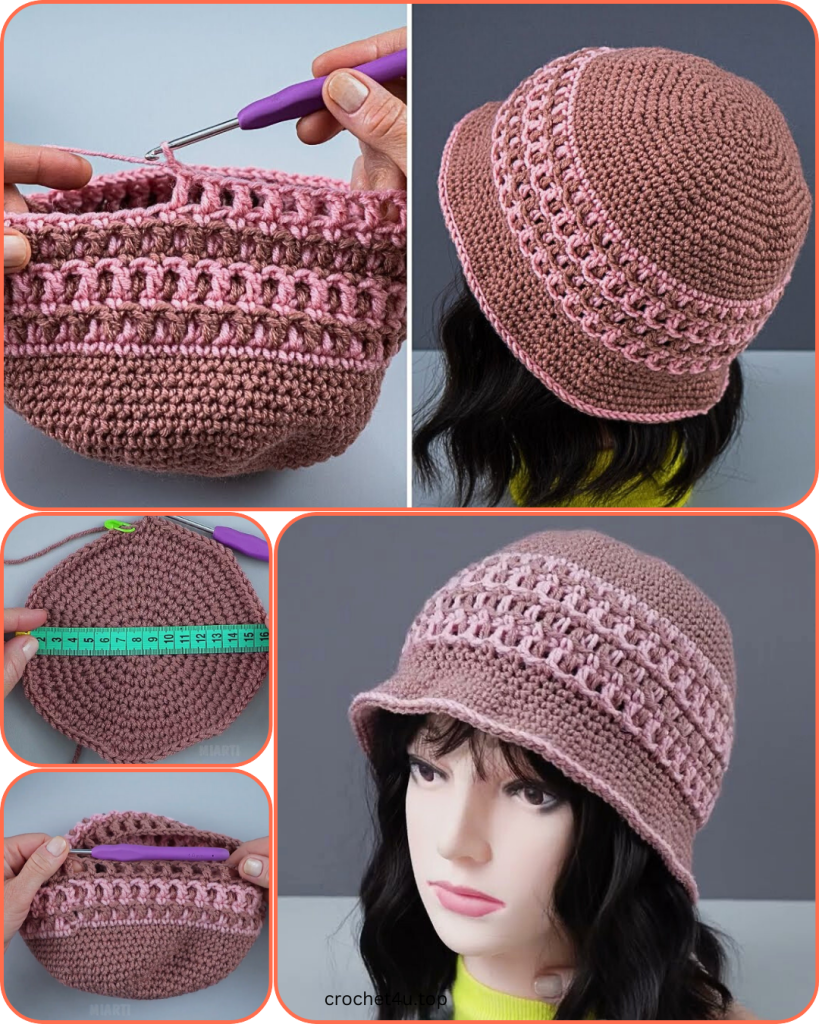
- To adjust crown size: Continue increasing in this manner until your crown measures approximately 6.5 – 7 inches (16.5 – 18 cm) in diameter, or the size that fits the crown of your head.
Part 2: The Hat Body (Main Color)
Now we will work a few straight rounds to create the sides of the hat, with no more increases.
Rounds 13-17: Sc in each st around. (72 sc)
Part 3: The Textured Band
Now for the beautiful decorative section!
Change to Contrasting Color (CC):
- Remember to complete the last yarn over of the last stitch of Round 17 with your new CC yarn.
Round 18: Ch 1. Sc in each st around. Join with a sl st to the first sc. (72 sc)
- This round of sc helps to create a clean base for the textured stitches.
Round 19: Ch 1. Sc in the first st. Sk next st, make a 4-Hdc Puff Stitch in the next st. Repeat from … around, ending with a sc in the last st. Join with a sl st to the first sc. (36 puffs)
Round 20: Ch 1. Sc in each st around. Join with a sl st to the first sc. (72 sc)
Change back to Main Color (MC):
Round 21: Ch 1. Sc in each st around. Join with a sl st to the first sc. (72 sc)
Round 22: Ch 1. Hdc in each st around. Join with a sl st to the first hdc. (72 hdc)
Round 23: Ch 1. Sc in each st around. Join with a sl st to the first sc. (72 sc)

Part 4: The Final Body and Brim
We will now work the final solid section and then the brim.
Rounds 24-26: Sc in each st around. (72 sc)
Round 27 (Beginning of Brim Flare): (Sc in the next 11 sts, inc in the next st) 6 times. (78 sc)
Rounds 28-30: Sc in each st around. (78 sc)
Round 31 (Optional final increase): (Sc in the next 12 sts, inc in the next st) 6 times. (84 sc)
Round 32 (Final Brim Row): Sc in each st around. (84 sc)
FO, weave in all ends securely.
Video Tutorial:
Congratulations!
You’ve just crocheted your very own “Vintage Bloom” Bucket Hat! This project is a wonderful blend of structured design and beautiful texture. You’ll love the way the puff stitch band stands out and how the hat holds its classic shape. Enjoy your new, beautifully crafted hat!