
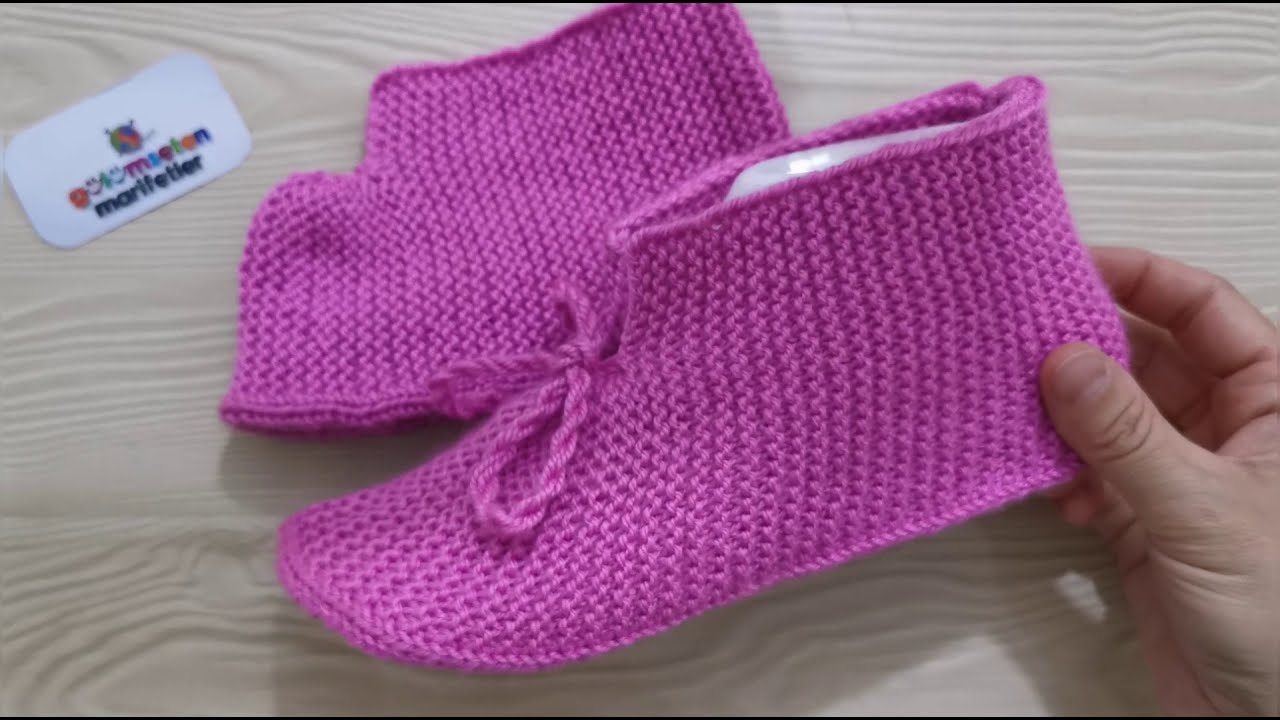
There’s nothing quite like slipping your feet into a pair of warm, handmade slippers after a long day. If you’ve ever thought knitting slippers was a complicated affair involving multiple needles and intricate shaping, I’m here to show you a knitting secret! These “Cozy Comfy” Garter Stitch Slippers are worked completely flat on two needles, using nothing but the simple, beautiful garter stitch.
The magic of this pattern lies in its clever construction. You’ll knit a single, flat piece, and with just a few simple seams, it transforms into a three-dimensional slipper that perfectly hugs your foot. The garter stitch creates a thick, squishy fabric that is wonderfully warm and durable, making these slippers perfect for padding around the house.
This project is quick, rewarding, and ideal for knitters of all skill levels. It’s an excellent way to practice your tension and seaming skills while creating a pair of slippers that you, or a loved one, will adore. So, pick out a beautiful skein of worsted weight yarn and let’s make some cozy magic!
Pattern Details
- Skill Level: Advanced Beginner
- Size: Women’s US Shoe Size 7-8 (approximately 9.5 inches / 24 cm sole length)
- Gauge: 18 stitches and 36 rows in Garter Stitch = 4 inches (10 cm).
- Gauge is important for a good fit! Knit a swatch and adjust your needle size if needed to match.
Materials
- Yarn: Approximately 200 yards of Worsted (weight 4) yarn. A wool or wool blend is recommended for warmth and durability.
- Needles: One pair of straight knitting needles, size US 8 (5.0 mm), OR size needed to obtain gauge.
- Notions:
- Yarn needle for seaming and weaving in ends
- Scissors
- Stitch markers (optional)
Abbreviations (US Terms)
- CO: Cast on
- k: knit
- st(s): stitch(es)
- BO: Bind off
- k2tog: knit two together (a decrease)
- (…): The number of stitches at the end of the row
Pattern Notes
- The slipper is worked in one flat piece from the sole up. The entire pattern uses only the knit stitch.
- The pattern is written for the left slipper. To create the right slipper, you will reverse the shaping instructions (see “Shape for Heel” below).
- The ties shown in the photo are a simple I-cord or chain of yarn. Instructions for a basic tie are included in the finishing section.
The Pattern
Make 2 slippers.
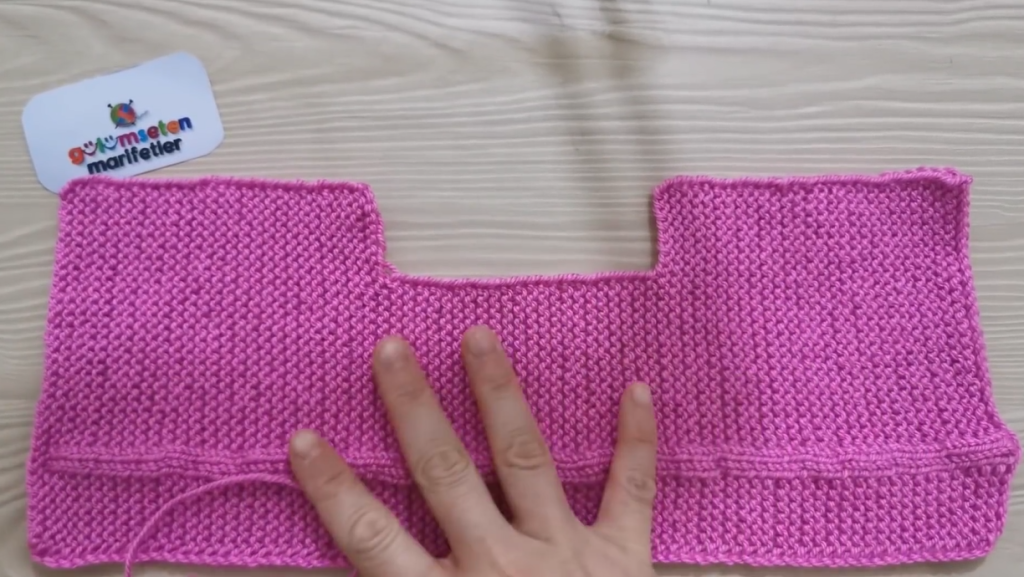
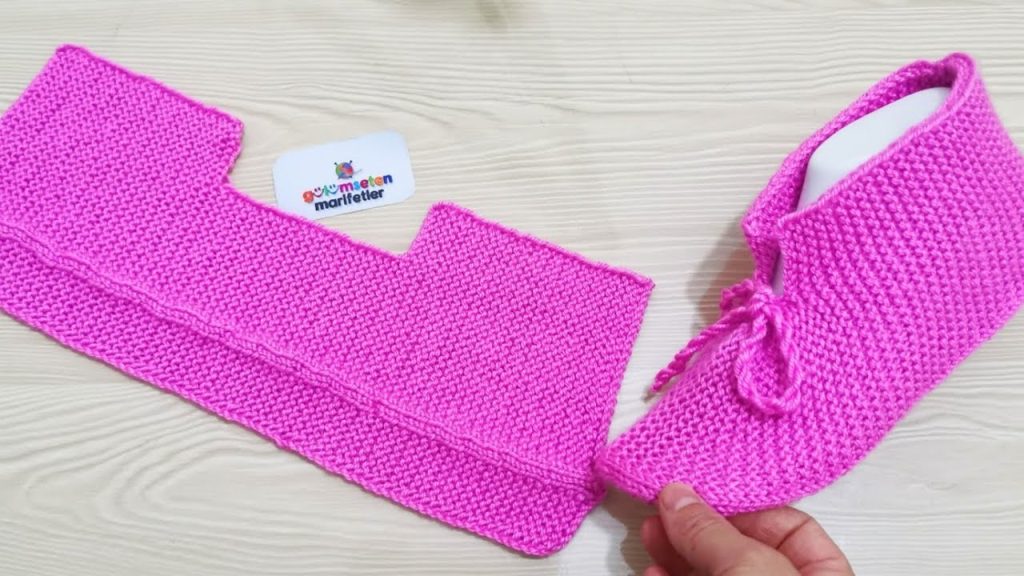
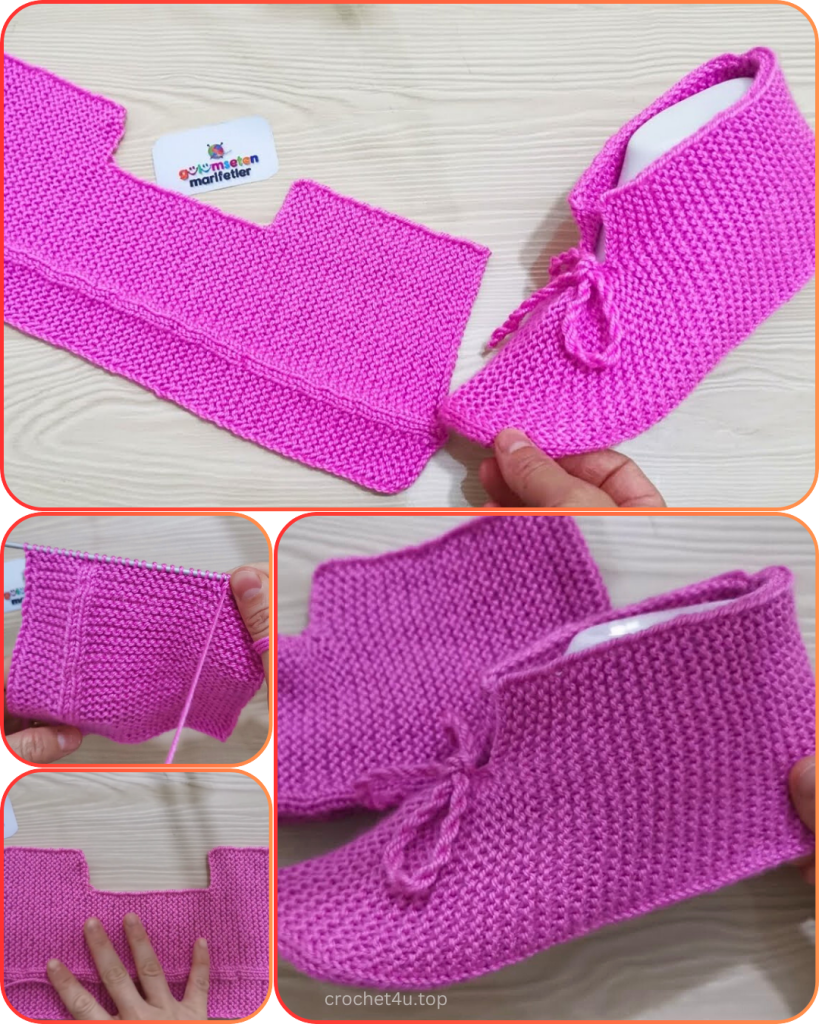
Sole and Side Panel
Foundation: CO 38 sts.
Rows 1-28: K across all stitches. (38 sts)
This is the sole of your slipper. It should measure approximately 6 inches (15 cm) from the cast-on edge. You can adjust the length here for a larger or smaller foot.
Shape for Heel (Left Slipper)
You will now work a small section to create the opening for the ankle.
Row 1: K 19 sts. BO the next 19 sts. You will have 19 stitches remaining on your needle. (19 sts)
Rows 2-16: K across all 19 sts. (19 sts)
Row 17 (Joining Row): K 19 sts. CO 19 sts to complete the row. (38 sts)
You have now created the ankle opening and are ready to knit the top and toe of the slipper.
Top and Toe Section
Rows 17-54: K across all stitches. (38 sts)
This section should be about 8 inches (20 cm) long. If you adjusted the sole, adjust this section to be the same length.
Row 55: K2tog across all stitches. (19 sts)
Row 56: K2tog across all stitches until 1 stitch remains. K1. (10 sts)
Row 57: K2tog across all stitches. (5 sts)
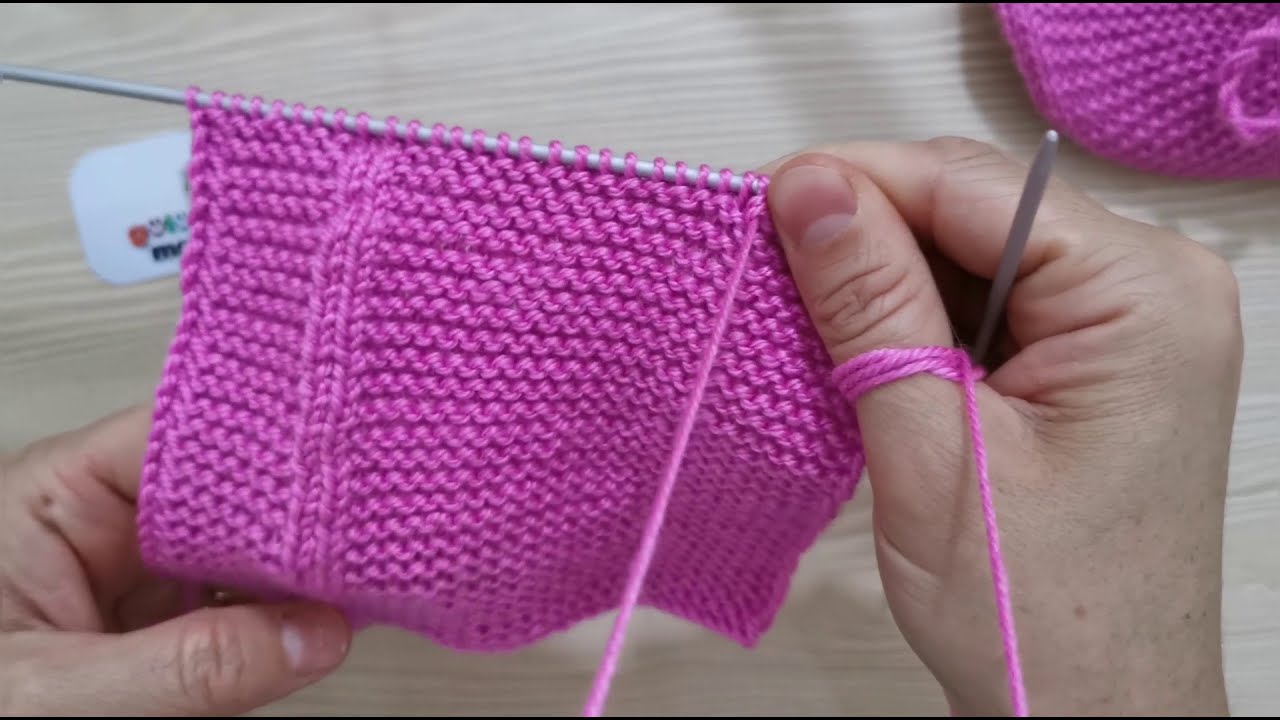
Cut yarn, leaving a long tail (about 12 inches / 30 cm) for seaming. Thread the tail through the remaining 5 stitches on your needle and pull tight to cinch closed. Secure with a knot.
Finishing and Seaming
- Fold the Slipper: Fold the piece in half lengthwise with the wrong side facing out. You should have a long rectangle.
- Seam the Toe: Use your yarn needle and the long tail to seam the front of the slipper, from the cinched toe down the front of the foot to the instep. Use a simple whipstitch or a mattress stitch for an invisible seam.
- Seam the Heel: Go back to the heel section. You’ll notice a seam from where you bound off and cast on. Use your yarn needle and a new piece of yarn to seam the sides of the heel together from the ankle opening down to the sole, creating a small gusset at the bottom to form the heel.
- Weave in Ends: Neatly weave in all loose ends.
- Create the Tie (Optional): Cut 3-4 strands of yarn about 30 inches (75 cm) long. Knot them together and braid them. Thread the braided tie through the garter stitch rows around the ankle opening and knot to secure.
- Make the Right Slipper: To make the right slipper, you will reverse the shaping instructions for the heel. On the “Shape for Heel” section, you will BO 19 sts, then k 19 sts. This will create a mirror image of the first slipper.
Video Tutorial:
Congratulations! You’ve just made a pair of cozy, comfy slippers using a beautifully simple knitting method. Enjoy padding around the house in them! I would love to see your finished projects! Share a photo on social media and tag me or use the hashtag #CozyComfySlippers so I can admire your work. Happy knitting!


