
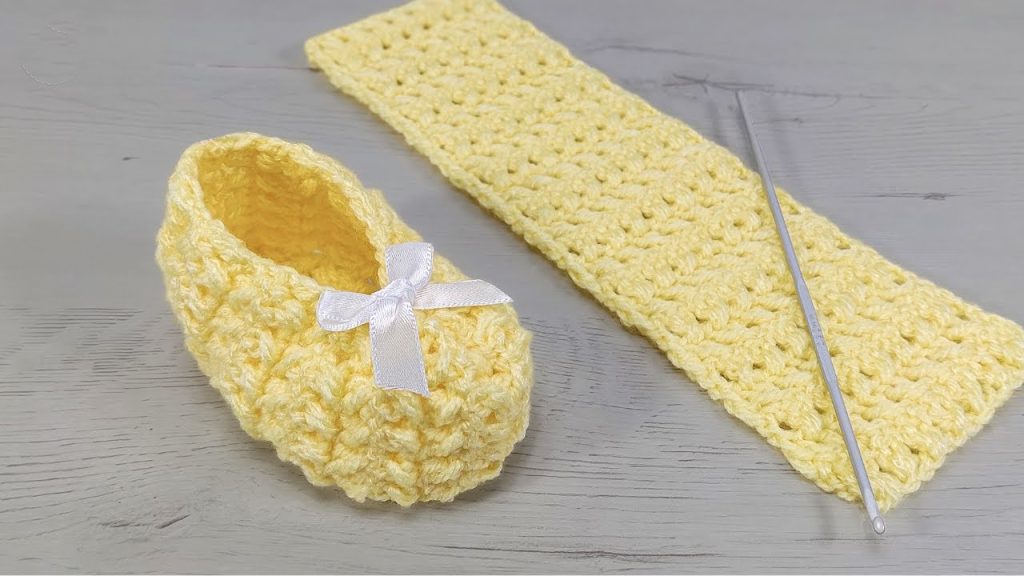
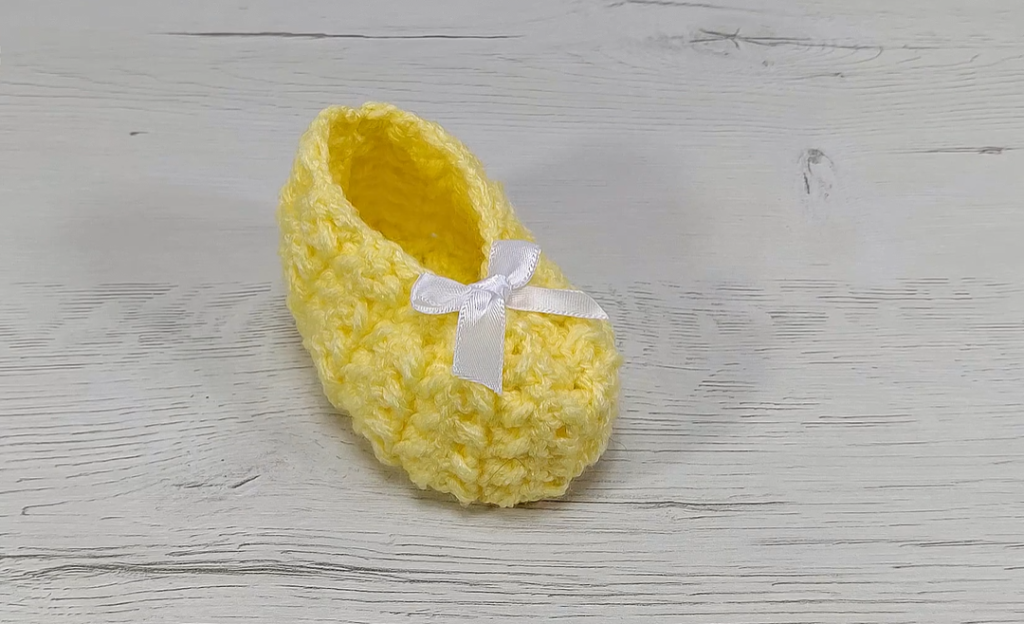
Welcome a little one with these soft, textured baby booties! Featuring a delightful, plush stitch (we’ll use the Double Crochet Shell Stitch) and a simple flat construction, these slippers are quick to make and perfect for baby showers. The finishing touch of a small ribbon bow adds a classic, elegant charm.
⭐️ Project Overview and Skill Check
| Feature | Detail |
| Skill Level | Easy. Suitable for confident beginners who know the basic crochet stitches. |
| Stitches Used | Chain (ch), Slip Stitch (sl st), Single Crochet (sc), Double Crochet (dc), Shell Stitch. |
| Construction | Crocheted flat as a simple rectangle, then folded and seamed to form the bootie. |
| Sizing | Detailed instructions for Newborn to 3 Months. Customization tips are included. |
| Gauge Importance | Crucial for baby wear! Be sure to match the gauge to ensure the slipper fits the tiny foot. |
🧵 Materials & Gauge
Yarn
- Weight: Light Worsted or DK (Category 3) yarn. Using a soft baby yarn is highly recommended for comfort. The color in the photo is a cheerful pale yellow.
- Fiber: Look for a yarn that is soft, breathable, and easily washable, such as baby acrylic, cotton, or a cotton blend.
- Yardage: Approximately 50−75 yards per pair of booties.
Hook
- Size: 3.5 mm (E-4) or 3.75 mm (F-5) hook. We want a dense fabric to keep the shape, so err on the smaller side.
Notions
- Tapestry Needle for seaming and weaving in ends.
- Scissors.
- Ribbon: About 12−14 inches of narrow 1/4-inch wide satin ribbon per bootie for the decorative bow.
Gauge
To ensure the slipper fits the newborn size:
- In Shell Stitch Pattern: 4 repeats of the shell stitch × 5 rows = 3 inches by 3 inches (∼7.5 cm×7.5 cm).
- Finished Flat Piece: Should measure approximately 3.5 inches wide ×7 inches long before seaming.
📝 Stitch Guide: The Shell Pattern
This stitch gives the bootie its puffy, textured surface. It is worked over a multiple of 4 stitches, plus 3.
- Shell Stitch (S): Work 5 dc into the same stitch.
- Starting Shell Stitch (at the beginning of a row): 3 dc into the first stitch.
Pattern Repeat:
- Row 1 (RS): ch 3 (counts as dc), 2 dc in the first sc (Starting Shell made). sk 3 sc, S in the next sc. Repeat sk 3 sc,S to the end of the row. The last shell will be in the last stitch.
- Row 2 (WS): ch 1 (does not count as a stitch), sc in the first dc, sc in each dc across, placing sc in the ch 3 turning chain.
👶 Pattern Instructions (Make 2)
1. Foundation Chain and Setup Row
This foundation determines the length of the bootie.
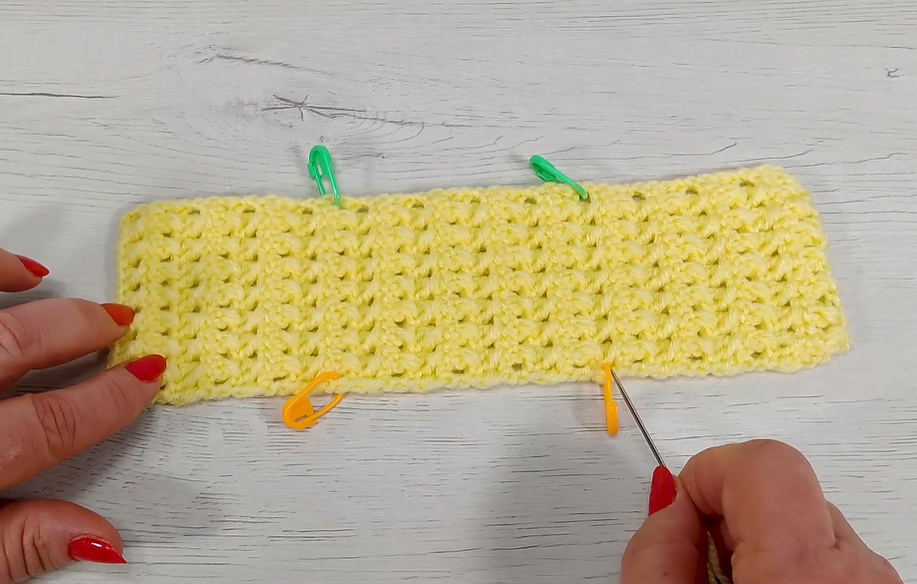
Row 1 (Foundation – WS): ch 31 (for Newborn/3 Months size). sc in the 2nd ch from the hook and in each ch across. (30 sc)
2. The Textured Body (Shells)
This section creates the textured part that wraps around the foot.
Row 2 (Shells – RS): ch 3 (counts as dc), 2 dc in the first sc (Starting Shell made). sk 3 sc, S in the next sc.
- sk 3 sc,S in the next sc. Repeat this pattern 5 times more. (6 full shells plus the starting half shell.) sk 3 sc, 3 dc in the last sc (ending half shell). (7 shells total)
Row 3 (Single Crochet – WS): ch 1, turn. sc in the first dc and in each dc across. You should have 30 sc.
Rows 4 – 11 (Body): Repeat Row 2 (Shells) and Row 3 (sc) for 4 more sets. (You will end after a sc row, Row 11).
- At the end of Row 11, your piece should measure approximately 3.5 inches wide and 7 inches long.
3. The Cuff/Opening Edge
This section provides a tidy, non-stretchy finish for the ankle opening.
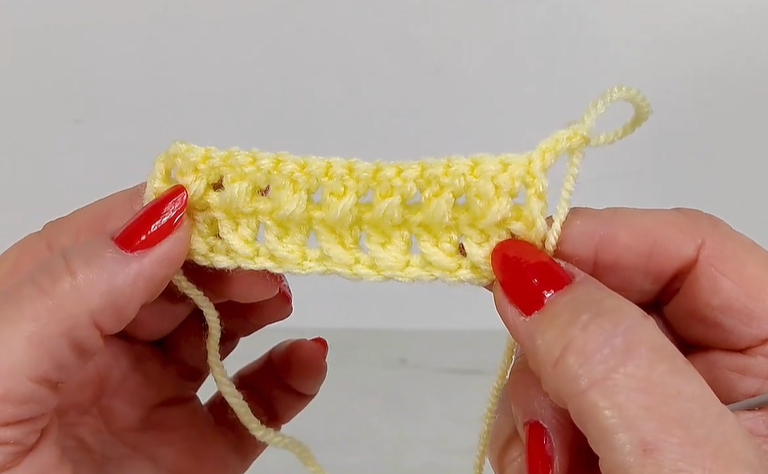
Row 12 (RS – Finishing Edge): ch 1, turn. sc in the first sc and in each sc across. (30 sc)
Row 13 (WS – Ribbon Slits): This row creates the space to weave the decorative ribbon. ch 1, turn. sc in the first 3 sc, (ch1,sk 1 sc,sc in next sc). Repeat this sequence to the last 3 sc. sc in the last 3 sc.
Row 14 (RS – Final Edge): ch 1, turn. sc in each sc and ch 1 space across. (30 sc)
Fasten off, leaving a long tail (∼18 inches) for seaming.
✂️ Finishing and Assembly
1. The Seams
The flat piece is magically transformed into a bootie with just two seams.
- Fold: Fold the rectangle in half lengthwise, with the right sides facing in. Align the 30-stitch edges.
- Toe Seam: Using the long yarn tail and your tapestry needle, start at the corner of the Shell Pattern and stitch the two folded edges together. Seam across ∼15 stitches to close the toe box. Use a sturdy Whipstitch or Mattress Stitch.
- Heel Seam: Using the same tail, continue stitching down the edge. This time, stitch the two short ends together (the start of the piece and the end of the toe seam). This closes the heel.
- Turn: Turn the bootie right-side out. The textured side will now be facing out, and the seams will be on the inside.
2. The Ribbon Bow
- Cut a 12−14 inch length of narrow ribbon.
- Weave: Starting at the center front of the bootie (where the toe seam begins), weave the ribbon through the ch 1 spaces created in Row 13, going all the way around the ankle opening.
- Pull the ends of the ribbon out the front center and tie a pretty, small bow. Trim the ends of the ribbon neatly.
3. Final Touches
- Gently shape the toe and heel with your fingers.
- Weave in any remaining yarn ends securely on the inside.
- Repeat all steps for the second bootie!
Video Tutorial:
💡 Sizing Adjustments
To fit different ages, the primary change is the starting chain (length). The width (number of rows) generally stays the same for a basic bootie style.
| Size | Foot Length Target | Starting Chain (ch) |
| 0-3 Months | 3.5 in / 9 cm | ch 31 |
| 3-6 Months | 4 in / 10 cm | ch 35 |
| 6-9 Months | 4.5 in / 11.5 cm | ch 39 |
Export to Sheets
Enjoy making these charming baby booties! They make a perfect gift for any new arrival.
Do you have a specific color you’d like to use for the yarn and ribbon, or are you leaning toward the classic yellow and white?


