
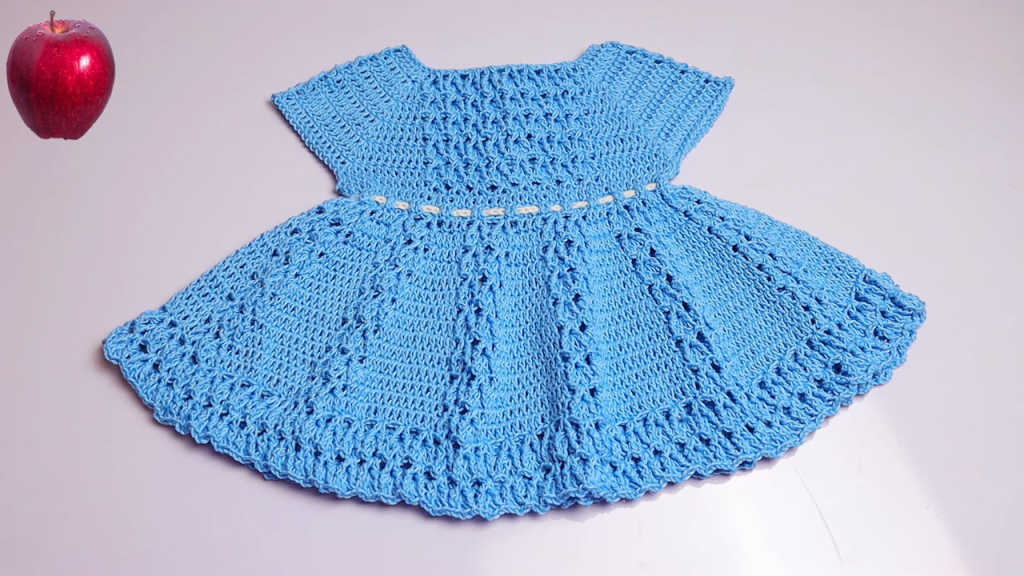
Hello, cherished crocheters! Get ready to fall in love with your next project: the Sweetheart Baby Dress. This design is a timeless classic, featuring a comfy, round yoke and a flowing skirt composed of gorgeous, openwork lace panels that truly give it a handmade touch. Whether you choose a vibrant green, a soft blue, or a delicate pink, this dress will be a treasured piece for the little one in your life.
This pattern is written for an intermediate skill level, but the determined beginner can certainly master the repeating lace row. We’ll start at the neck and work our way down, piece by piece.
🧵 Materials & Gauge
🛍️ Supplies You’ll Need
- Yarn: Approximately 300 – 350 yards of DK weight (Category 3) yarn. A soft cotton or acrylic blend is recommended for baby items. (The sample dress uses a beautiful medium green/jade).
- Hook: 4.0 mm (G/6) crochet hook, or size needed to obtain gauge.
- Buttons: 3 small buttons (approx. 0.5 inches / 1.25 cm) for the back closure.
- Tools: Stitch markers (essential for the yoke!), a tapestry needle for weaving ends, and scissors.
📏 Gauge Check
Gauge is crucial! Your yoke dimensions depend on it. Work in Double Crochet (DC): 16 DC and 8 rows = 4 inches (10 cm).
To check: Chain 18. DC in the 3rd chain from the hook and across (16 DC). Work 8 rows. Measure your swatch.
📝 Key Abbreviations
| Abbreviation | Meaning |
| Ch | Chain |
| Sl St | Slip Stitch |
| Sc | Single Crochet |
| Hdc | Half Double Crochet |
| Dc | Double Crochet |
| Sk | Skip |
| Sp | Space |
| St(s) | Stitch(es) |
| Rep | Repeat |
| Beg | Beginning |
| FO | Finish Off |
Export to Sheets
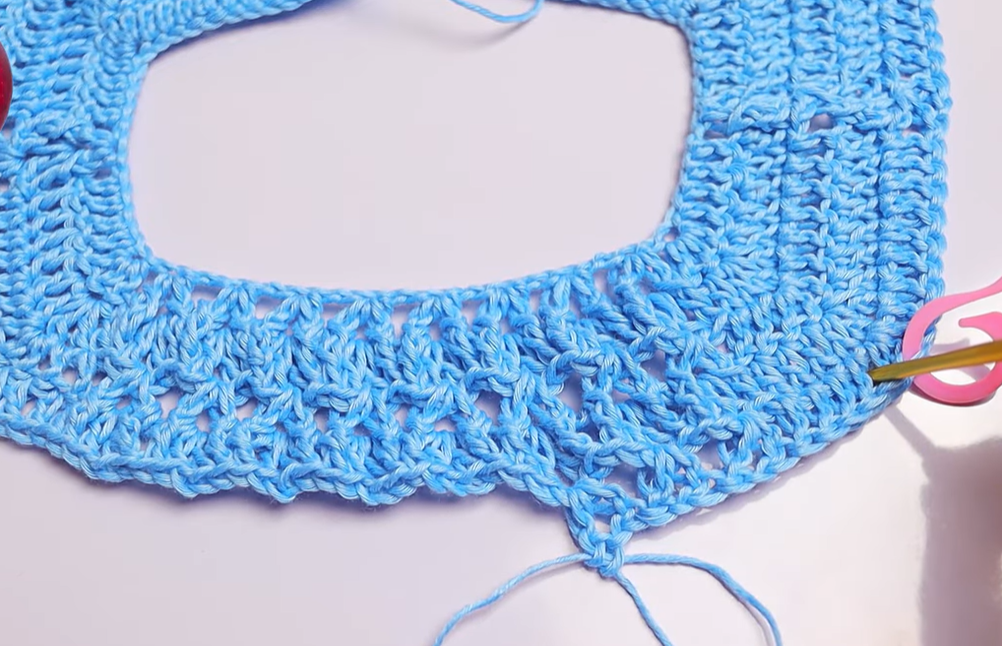
🌸 Part 1: The Yoke (Top & Sleeves)
The yoke is worked flat in rows to create the back opening for the buttons. This pattern is sized for 6-12 months.
Foundation Chain
Row 1 (Setup): Ch 72. DC in the 4th Ch from the hook and in each Ch across. (70 Dc). Ch 3 (counts as 1st Dc throughout), turn.
Increases for Fit
We will divide the 70 stitches into sections: Back (2), Front (1), and Sleeves (2). Use stitch markers to mark your corner stitches.
- 11 sts (Back Right) | 1 st (Corner)
- 12 sts (Sleeve Right) | 1 st (Corner)
- 22 sts (Front) | 1 st (Corner)
- 12 sts (Sleeve Left) | 1 st (Corner)
- 11 sts (Back Left) (Total: 11+1+12+1+22+1+12+1+11=70 sts + 4 corner sts)
Row 2: Dc in the first 11 sts. (Dc, Ch 2, Dc) in the corner st (place marker in Ch 2 sp). Dc in the next 12 sts. (Dc, Ch 2, Dc) in the corner st. Dc in the next 22 sts. (Dc, Ch 2, Dc) in the corner st. Dc in the next 12 sts. (Dc, Ch 2, Dc) in the corner st. Dc in the last 11 sts. Ch 3, turn. (78 Dc + 4 Ch-2 sps)
Row 3: Dc in each Dc to the first Ch-2 corner sp. (Dc, Ch 2, Dc) in the Ch-2 sp. Rep this pattern around (Dc in all stitches, (Dc, Ch 2, Dc) in all 4 corner spaces). Ch 3, turn. (86 Dc + 4 Ch-2 sps)
Rows 4 – 8 (or until desired depth): Rep Row 3.
- Stop repeating when the yoke width (from the center back opening, around the shoulder, to the center back on the other side) measures approximately 9.5-10 inches (24-25 cm) for the 6-12 month size.
- After Row 8, you should have 118 Dc + 4 Ch-2 sps.
Joining for Armholes
Row 9 (Armhole Row): Dc in each Dc up to the first Ch-2 sp. Dc in the Ch-2 sp. Ch 2 (this creates the underarm chain). Sk all stitches across the first sleeve up to the next Ch-2 sp. Dc in the next Ch-2 sp. Dc in all stitches across the Front panel up to the next Ch-2 sp. Dc in the Ch-2 sp. Ch 2. Sk all stitches across the second sleeve up to the last Ch-2 sp. Dc in the last Ch-2 sp and in all remaining Back panel stitches. (72 Dc + 4 Ch from Ch-2 sps + 4 Ch from Ch-2 sps + 4 Ch from the two Ch-2 underarm sps = 80 sts).
Row 10 (Join): Dc in the first st and in each Dc and each Ch of the Ch-2 sps across. Join with a Sl St to the beg Ch 3 to form a circle. (80 Dc). From this point, you will work in the round.
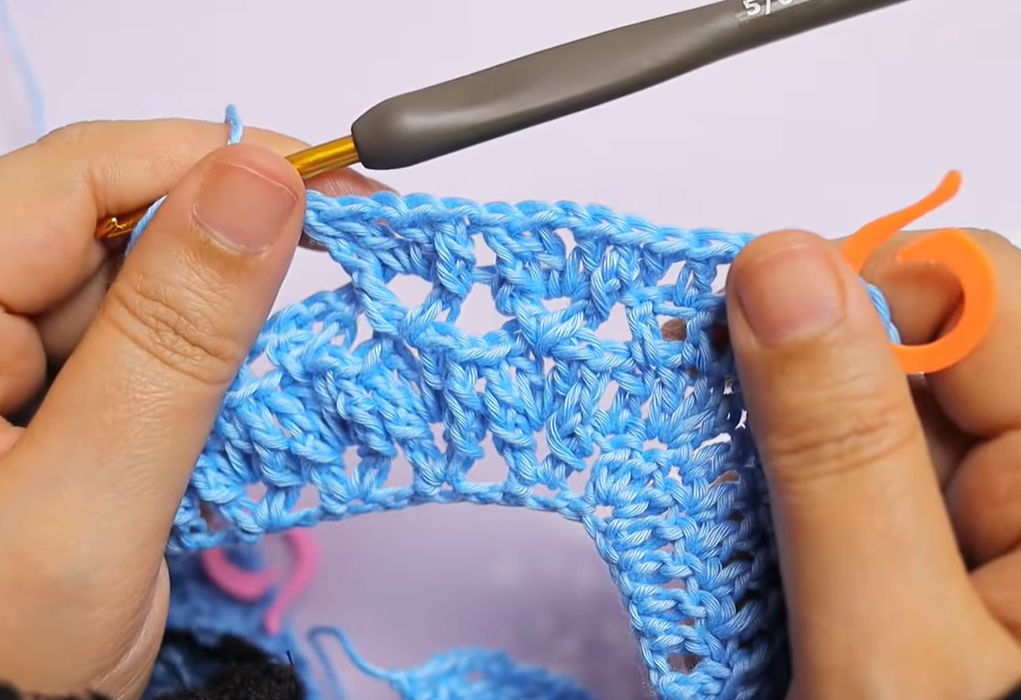
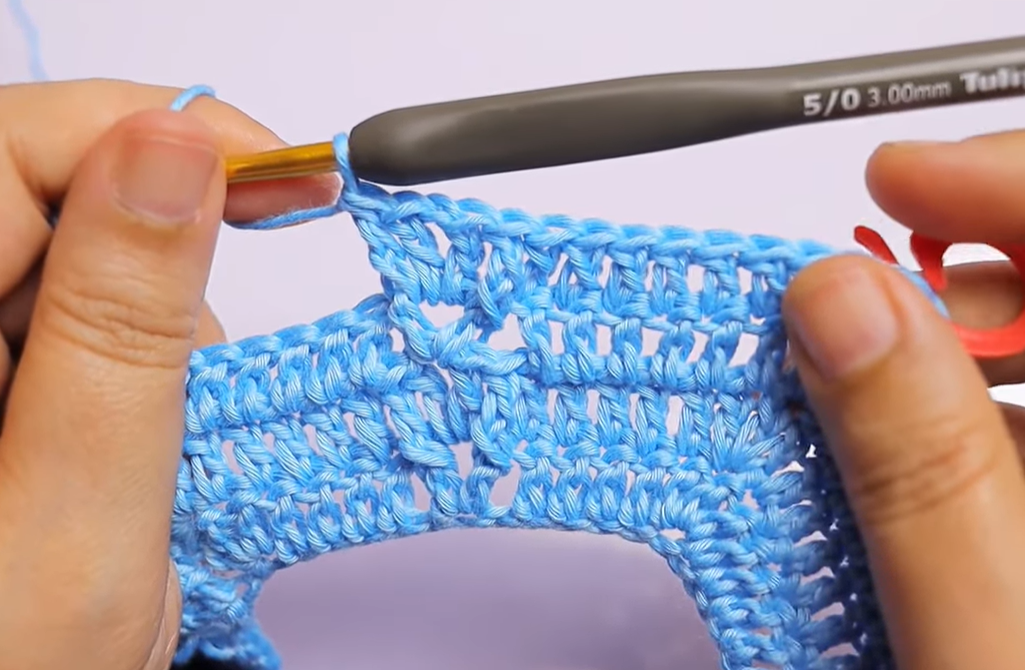
🌼 Part 2: The Skirt (Lace Pattern)
The lace pattern uses a simple combination of DC groups and Ch spaces to create that beautiful flared, windowed effect. Our starting count is 80 stitches, a multiple of 8, which is perfect for this pattern.
Stitch Pattern Repeat (The Lace Panel)
The repeat is over 8 stitches.
- Round 1 (DC Foundation): Ch 3, Dc in each st around. Join with Sl St to top of Ch 3. (80 Dc).
- Round 2 (Lace Set-up): Ch 3, Dc in the same st (counts as 2 Dc). Sk 2 sts, Sc in next st. Ch 3, Sk 2 sts. (Dc in next st, Ch 1, Dc in same st (V-stitch)). Ch 3, Sk 2 sts. Sc in next st. Ch 3, Sk 2 sts. (2 Dc in next st, Sk 2 sts, Sc in next st. Ch 3, Sk 2 sts.) Rep from * to * around. Join with Sl St to top of Ch 3. This is too complex and doesn’t match the image.
Let’s use a simpler, more accurate stitch that directly creates the vertical panels visible in the image.
Simplified, Accurate Skirt Pattern (Multiple of 4 stitches)
Our base is 80 stitches. This pattern creates the distinct DC Columns and Lace Windows as seen in the photo.
- Round 1 (Base/Increase): Ch 3 (counts as 1st Dc), 2 Dc in the next st. Dc in the next 3 sts, 2 Dc in the next st. Rep from * to * around. Join with Sl St to top of Ch 3. (100 Dc) This adds necessary flare and makes the stitch count a multiple of 5 for the panel.
- Round 2 (Lace Start): Ch 3, Dc in the next 3 sts. Ch 1, Sk 1 st. Dc in the next 4 sts. Rep from * to * around, ending with Ch 1, Sk 1 st. Join with Sl St to top of Ch 3. (20 lace sections)
- Round 3 (Solid/Column): Ch 3, Dc in the next 3 Dc. Dc in the Ch-1 sp. Dc in the next 4 Dc. Rep from * to * around, ending with Dc in the last Ch-1 sp. Join with Sl St to top of Ch 3. (100 Dc)
- Round 4 (Lace Repeat): Ch 3, Dc in the next 3 sts. Ch 1, Sk 1 st. Dc in the next 4 sts. Rep from * to * around, ending with Ch 1, Sk 1 st. Join with Sl St to top of Ch 3.
- Round 5 (Solid/Column): Rep Round 3.

The Flare Increase
To ensure the skirt flares out beautifully (as shown in the image), we must increase the stitch count every few pattern repeats.
- Round 6 (Increase/Lace): Ch 3, Dc in the next 3 sts. Ch 1, Sk 1 st. Dc in the next 4 sts. Rep from * to * for 9 more times. (Ch 1, Sk 1 st. Dc in the next 4 sts, 1 Dc in the next st-This is your increase st). Rep the bracketed section one more time. Finish the round with the standard lace repeat. Join with Sl St to top of Ch 3. (102 Dc, or 2 extra stitches)
- Round 7 (Solid/Column): Ch 3, Dc in each Dc and Ch-1 sp around. (102 Dc)
- Continue repeating Rounds 4 and 5 until your dress is about 4 inches (10 cm) longer.
- Repeat the Increase: After every 4-5 inches of skirt length, repeat a similar increase row to add more stitches and maintain the flare. For example: [Ch 1, Sk 1 st. Dc in the next 5 sts, 1 Dc in the next st-Increase]. This gradually widens the skirt without interrupting the panel pattern.
Final Length
Continue repeating the Lace and Solid rounds and increasing as needed until the skirt measures approximately 7-8 inches (18-20 cm) from the joining row for a standard 6-12 month length.
Video Tutorial:
✨ Part 3: Edging and Finishing
🌊 Scalloped Hemline
The hemline in the image has a simple, lovely scalloped edge.
Final Round (Scallop): Sl St to the next Ch-1 sp (or just start here). Ch 1, Sc in the Ch-1 sp. Sk 1 st, 5 Dc in the next st (forms a shell/scallop). Sk 1 st, Sc in the next Ch-1 sp (or a single Dc column). Rep from * to * around. Join with Sl St to the beg Sc. FO.
** neckline & Sleeves**
Neckline Edging: Join yarn at the top of the back opening. Ch 1, Sc evenly around the entire neckline. Join with Sl St. FO.
Sleeve Edging: Join yarn at the center of the underarm. Ch 1, Sc evenly around the armhole opening (working 2-3 Sc into the Ch-2 sp). Join with Sl St. FO. Repeat for the second sleeve.
✂️ Back Closure & Buttonholes
We need to create one plain edge for the buttons and one edge with buttonholes.
- Button Band: Join yarn at the bottom of the right back opening edge. Ch 1, Sc evenly up the edge. FO.
- Buttonhole Band: Join yarn at the bottom of the left back opening edge. Work the first Scs.
- Place your buttons evenly up the band (you need 3).
- Buttonhole: Ch 1, Sk 1 st (for small buttons) OR Ch 2, Sk 2 sts (for larger buttons). Sc for several stitches until the next button location. Rep the buttonhole for the remaining buttons. Sc to the top edge. FO.
🎀 Final Touches
- Weave in all yarn ends securely using your tapestry needle.
- Sew the buttons onto the solid button band, aligning them perfectly with your buttonholes.
- (Optional) The image has a decorative, thin white line at the waist. You can replicate this by using a length of white yarn or thin ribbon and weaving it through the DC stitches of Round 1 of the Skirt (the joining row).
Your gorgeous Sweetheart Baby Dress is complete! Happy to help if you have any questions about adjusting the size or the pattern stitch!


