
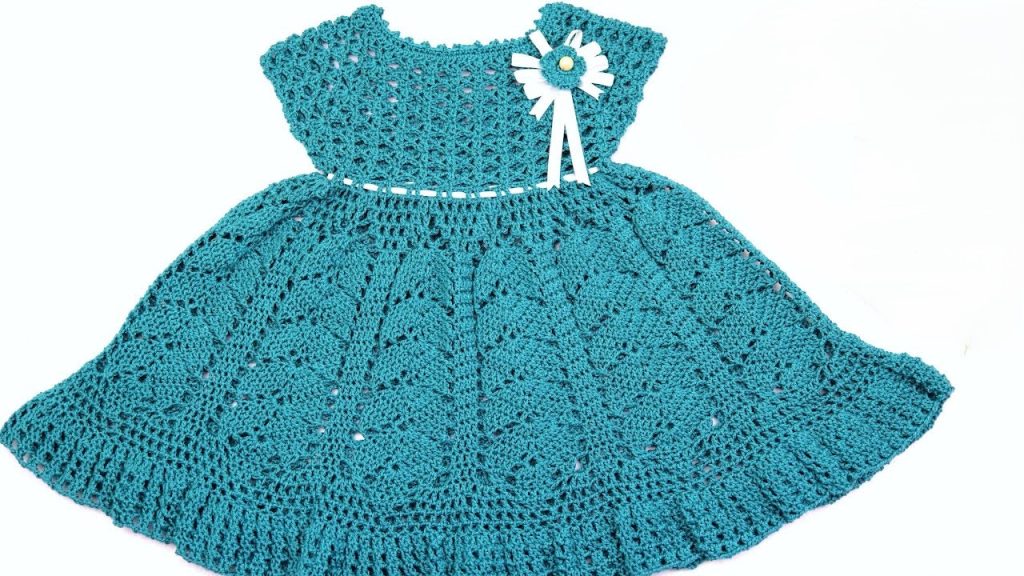
Hello, brilliant crafters! Get ready to crochet a garment that is both delicate and richly textured: the Jeweled Aqua Leaf Dress. This design pairs an openwork, lacy yoke with a voluminous skirt featuring a sophisticated Leaf or Pineapple Lace motif. The contrast created by weaving a ribbon through the waistline makes this dress an absolute showstopper.
This pattern is written for an Intermediate to Advanced Intermediate skill level. The yoke is straightforward, but the intricate repeating lace pattern in the skirt requires careful counting and placement.
🛍️ Section 1: Materials & Gauge
🧶 Supplies You’ll Need
- Yarn: Approximately 400 – 550 yards of Fingering/Sport weight (Category 2 or 3) yarn. The sample uses a gorgeous, saturated teal or aqua blue. A soft cotton or blend is highly recommended for drape.
- Hook: 3.5 mm (E/4) or 4.0 mm (G/6) crochet hook, or size needed to obtain gauge. (A smaller hook creates the lovely fine lace shown). We’ll use 3.5 mm.
- Buttons: 3 small buttons (approx. 0.5 inches / 1.25 cm) for the back neck closure.
- Ribbon: About 1 yard (1 meter) of 1/4-inch wide white ribbon for the waist tie.
- Embellishment: 1 small crocheted or fabric flower with a pearl/bead center for the yoke.
- Tools: Stitch markers (for the yoke corners!), a tapestry needle, and scissors.
📏 Gauge Check
Work in Double Crochet (DC): 18 DC and 9 rows = 4 inches (10 cm).
- Your yoke sizing depends heavily on meeting this gauge!
📝 Key Abbreviations
| Abbreviation | Meaning | Abbreviation | Meaning | |
| Ch | Chain | Dc | Double Crochet | |
| Sl St | Slip Stitch | Tr | Treble Crochet | |
| Sc | Single Crochet | V-st | V-Stitch (Dc, Ch 1, Dc in the same space) | |
| Hdc | Half Double Crochet | Lace Shell | (3 Dc, Ch 2, 3 Dc) in the same space | |
| Sk | Skip | Sp | Space |
Export to Sheets
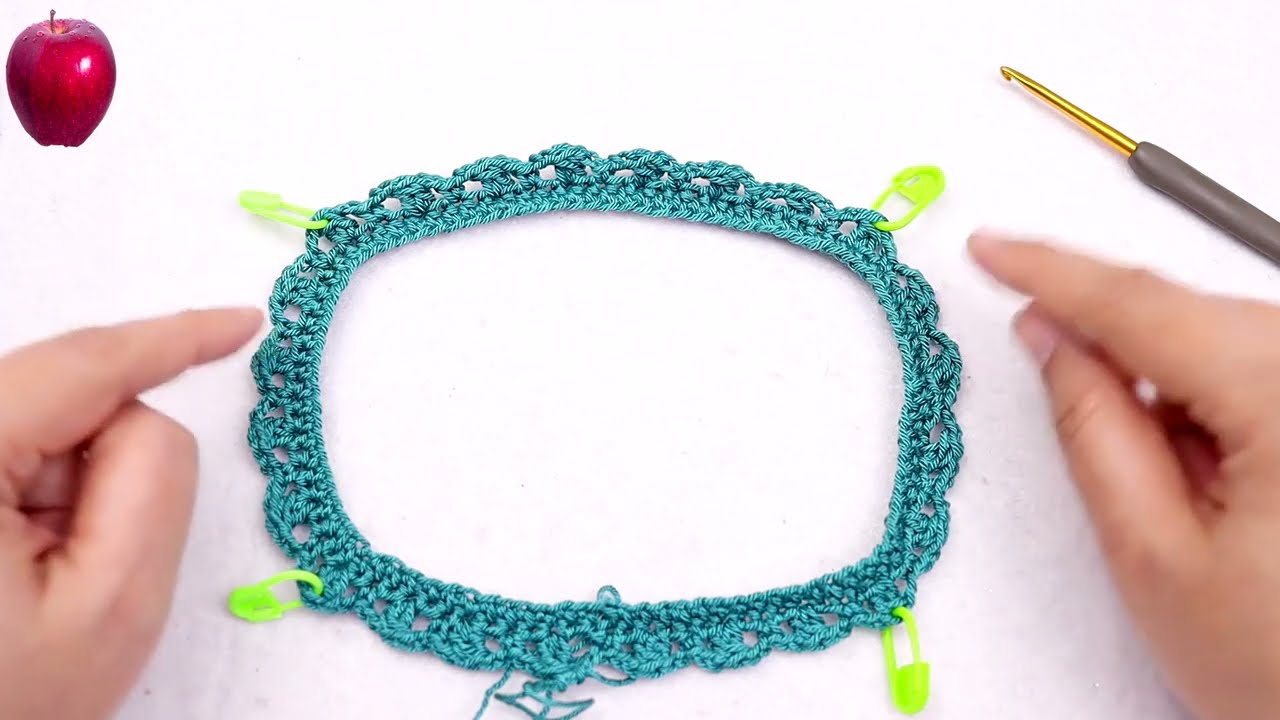
🌸 Section 2: The Yoke (Top & Sleeves)
The yoke is worked flat in rows to create the back opening. This size is for 6-12 months. The yoke utilizes a simple V-stitch or openwork pattern.
Foundation & Shaping (Lacy V-Stitch)
Row 1 (Foundation): Ch 76. Dc in the 4th Ch from the hook and in each Ch across. (74 Dc). Ch 3 (counts as 1st Dc throughout), turn.
Yoke Shaping & Division
Divide the 74 stitches for the corners: 12 (Back Right) | 1 (Corner) | 12 (Sleeve Right) | 1 (Corner) | 24 (Front) | 1 (Corner) | 12 (Sleeve Left) | 1 (Corner) | 12 (Back Left).
- Row 2 (V-Stitch Start): Dc in the first st. (Ch 1, Sk 1 st, V-st in the next st) up to the corner. (Dc, Ch 2, Dc) in the corner st. Continue the pattern, placing (Dc, Ch 2, Dc) in each corner st. End with a V-st, Ch 1, Sk 1, Dc in the last st. Ch 3, turn.
- Row 3: Work Dc in each Dc and Ch-1 sp across. Work (Dc, Ch 2, Dc) in each Ch-2 corner sp. Ch 3, turn.
- Row 4 (V-Stitch): Work V-st in the center Dc of the previous V-st. Work (Dc, Ch 2, Dc) in each Ch-2 corner sp. Ch 3, turn.
Rows 5-8: Repeat Rows 3 and 4 (alternating solid and V-stitch rows) until the yoke measures approximately 5-5.5 inches (12.5-14 cm) from the top.
Joining for Armholes
- Next Row (Solid Finish/Ribbon Loops): Work Dc across the Back Panel up to the first Ch-2 sp. Dc in the Ch-2 sp. Ch 2 (underarm chain). Sk all stitches across the Sleeve Panel up to the next Ch-2 sp. Dc in the Ch-2 sp. Dc in all stitches across the Front Panel. Repeat the Ch 2, Sk Sleeve step for the second armhole. Continue the pattern across the Back Panel. Join with Sl St to the beg Ch 3 to form a circle. (Approx. 110-120 stitches).
- Round 1 (Ribbon Weave): Ch 3 (counts as 1st Dc). Dc in the next st. (Ch 1, Sk 1 st, Dc in the next 2 sts). Rep from the parentheses around. Join with Sl St to top of Ch 3. FO.

🌿 Section 3: The Skirt (Leaf/Pineapple Lace)
The skirt is worked in the round and uses a petal-like repeating motif.
Skirt Setup & Leaf Start
- Round 1 (Base/Increase): Join yarn in any st. Ch 3 (counts as 1st Dc). Work 1 Dc in the same st. Dc in the next 2 sts, 2 Dc in the next st. Rep from * to * around. Join with Sl St. (Adjust count to be a multiple of 12 for the skirt pattern—aim for 132-144 stitches).
- Round 2 (Leaf Anchor): Ch 1, Sc in the same st. Ch 5, Sk 5 sts, Sc in the next st. Rep from the parentheses around. Join with Sl St to the beg Sc. (11 or 12 Ch-5 anchors).
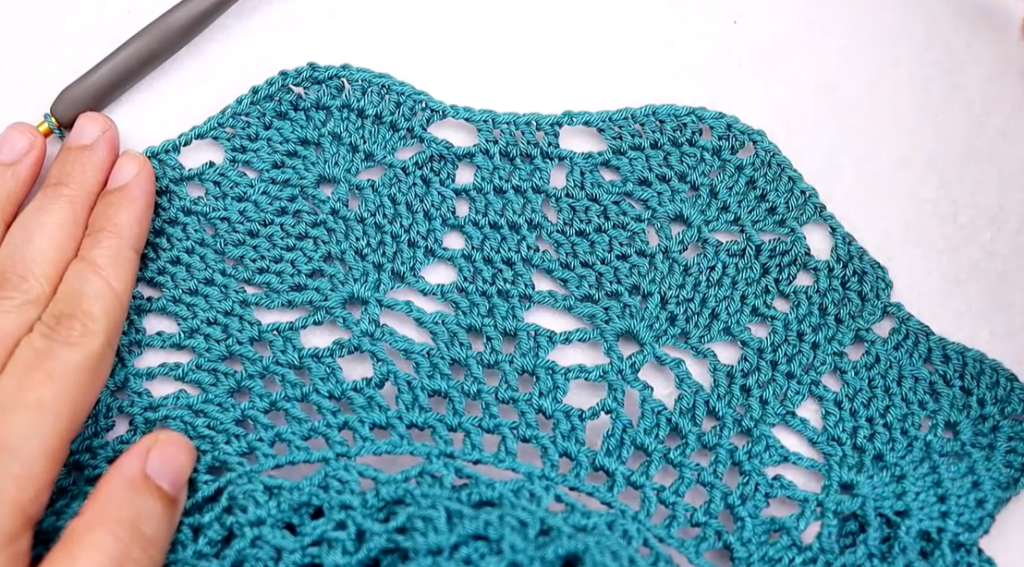
Leaf/Pineapple Repeats
- Round 3: Sl St into the Ch-5 sp. Ch 3, 3 Dc in the same sp, Ch 1, 4 Dc in the same sp (Lace Shell). Sc in the next Sc. Rep the Lace Shell and Sc around. Join with Sl St to top of Ch 3.
- Round 4: Sl St to the center of the first Shell (Ch-1 sp). Ch 3, 2 Dc in the Ch-1 sp, Ch 2, 3 Dc in the same sp (Lace Shell). Ch 1, Sk Sc. Rep the Lace Shell and Ch 1 around. Join with Sl St to top of Ch 3.
- Round 5: Sl St to the center of the first Shell (Ch-2 sp). Ch 3, 2 Dc in the Ch-2 sp, Ch 2, 3 Dc in the same sp (Lace Shell). Ch 3, Sk Ch-1 sp. Rep the Lace Shell and Ch 3 around. Join with Sl St to top of Ch 3.
- Round 6 (Increase): Sl St to the center of the first Shell (Ch-2 sp). Ch 3, 2 Dc in the Ch-2 sp, Ch 2, 3 Dc in the same sp (Lace Shell). Ch 5, Sk Ch-3 sp. Rep the Lace Shell and Ch 5 around. Join with Sl St to top of Ch 3.
- Continue repeating Rounds 4 and 6 (alternating the chain count to increase the flare) until the skirt reaches the desired length, approximately 10-12 inches (25-30 cm) from the waistline. The repeated increases in the chain/shell count will give the skirt its wonderful, flowing shape.
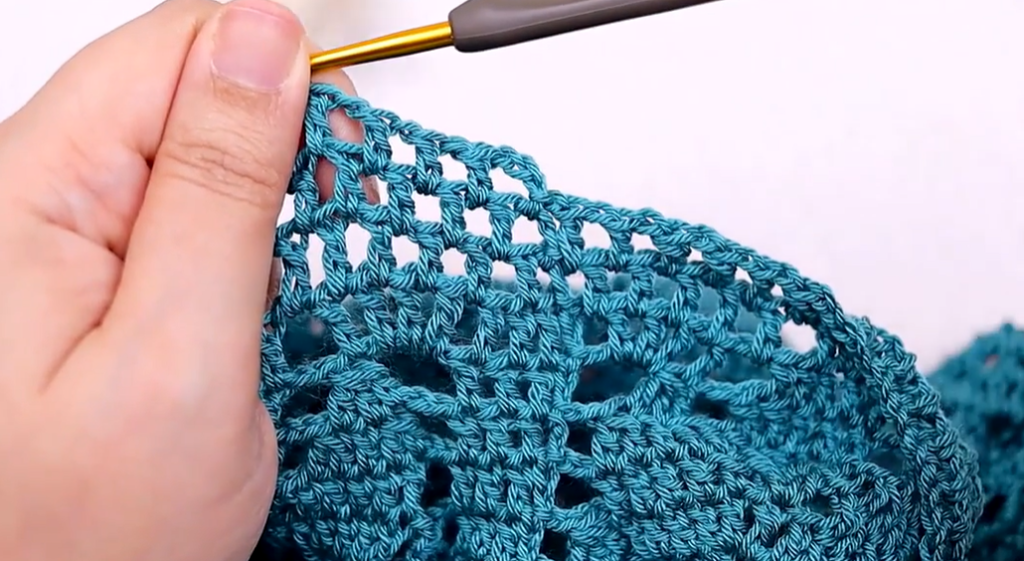
Final Hem
The skirt pattern naturally creates a beautiful scallop. End on a Shell Row (Round 6 repeat). FO.
🎀 Section 4: Finishing Touches
✨ Ribbon & Embellishment
- Waist Ribbon: Weave the white satin ribbon through the Ch-1 spaces of the Ribbon Weave Round at the waist. Tie a neat bow at the center back or center front.
- Flower: Securely stitch the decorative flower/brooch onto the left shoulder area of the yoke.
✂️ Edging & Closure
- Neckline & Back Slit: Join yarn at the bottom of the back opening. Ch 1, Sc evenly up the edge, around the entire neckline (add a small scallop edge if desired: Sc, Sk 1, 3Dc in next, Sk 1), and back down the other side of the slit. FO.
- Sleeve Edging: The cap sleeves are the finished yoke edge. Work one round of Sc evenly around the armhole opening for neatness. FO.
- Button Closure:
- Button Band: Use one side of the back slit. Sc evenly up the edge.
- Buttonhole Band: Use the opposite side. Work one row of Sc. In the next row, create the 3 buttonholes (Ch 1, Sk 1 st) evenly spaced. FO.
- Sew Buttons onto the solid button band.
Video Tutorial:
💖 Final Assembly
- Weave in all loose yarn ends securely.
Your exquisite Jeweled Aqua Leaf Dress is complete! The delicate lace makes this a true heirloom piece.
Would you like help calculating the yarn needed if you were to adjust the size of this dress?


