
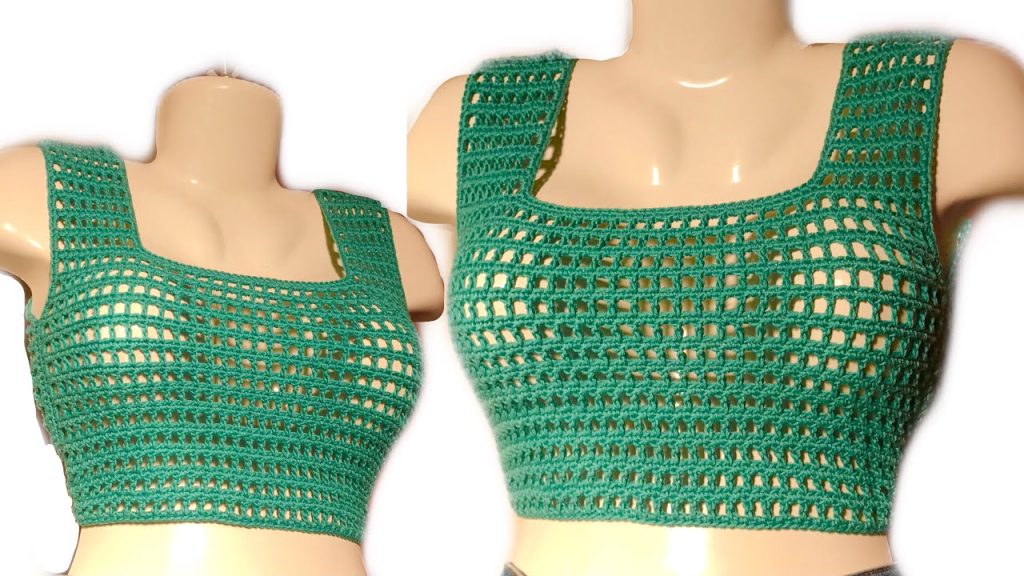
Welcome to your next favorite crochet project! This Modern Mesh Blouse is the ultimate summer essential—light, airy, and incredibly stylish. The design features a classic grid-like mesh pattern that is surprisingly simple to achieve, making it perfect for beginners and seasoned crocheters alike.
Whether you’re heading to the beach or styling it with high-waisted jeans, this top is a versatile piece you’ll reach for again and again. Let’s pick up our hooks and get started!
🧶 Materials & Tools
To get that beautiful drape and soft feel, we recommend the following:
- Yarn: Approximately 150-200g of Mercerized Cotton (2mm thickness).
- Hook: 2.5 mm crochet hook.
- Essential Notions: * Measuring tape (the most important tool for a custom fit!).
- Stitch markers.
- Tapestry needle for seaming.
- Scissors.
📐 Sizing & Measurements
This pattern is designed to be fully customizable to your body. Here is how to calculate your dimensions:
- The Width: Measure your chest circumference at the widest point. Divide this number by 2. This will be the width of your front and back panels.
- The Length: Decide how long you want your top to be (Crop top vs. full length). In the tutorial, the body section is roughly 20 cm (about 8 inches) long before starting the straps.
- The Straps: Measure from the top of your chest, over the shoulder, to the corresponding point on your back to determine the strap length.
📚 Stitch Key (US Terms)
- Ch: Chain
- St: Stitch
- SC: Single Crochet
- DC: Double Crochet
- Sk: Skip
- Sp: Space
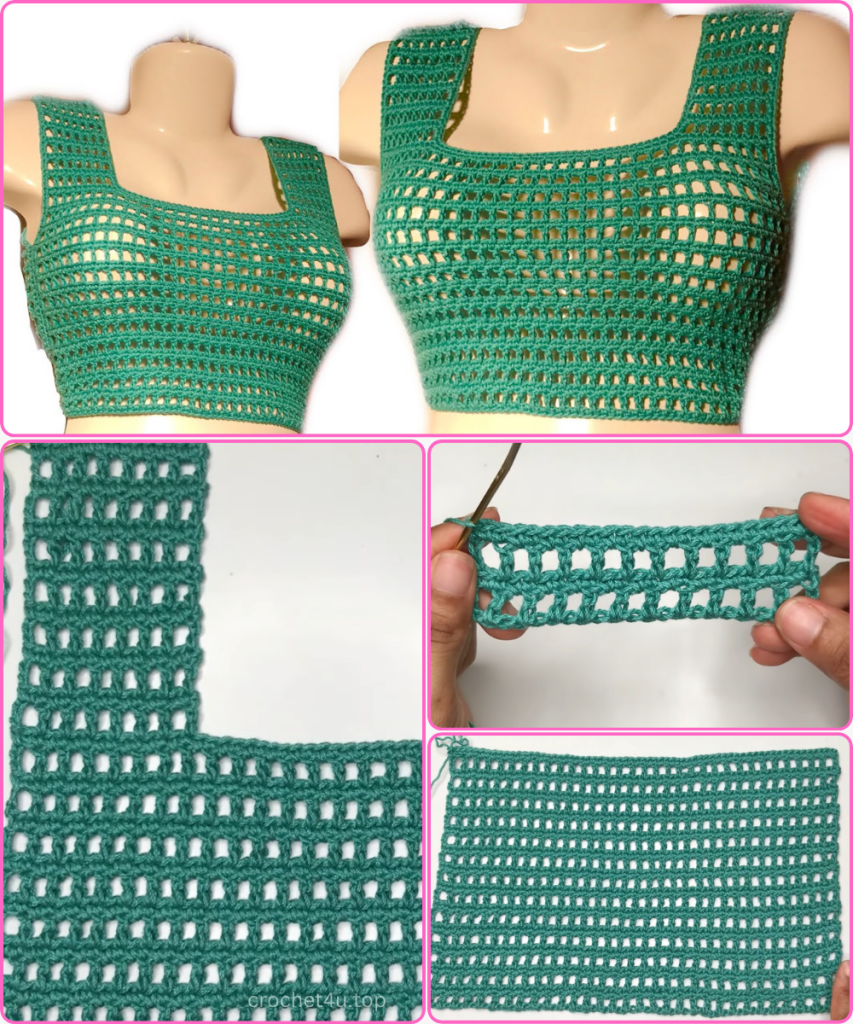
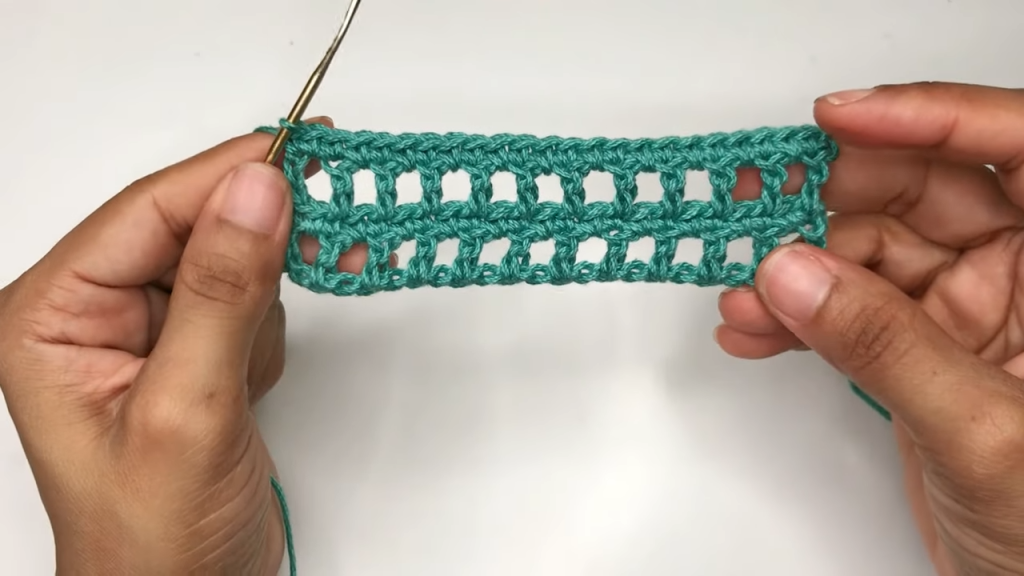
✨ The Signature Mesh Pattern (2-Row Repeat)
This top is built on a simple yet elegant repeat. Master these two rows, and the rest is a breeze!
- Foundation: Start with an odd number of chains to reach your required width.
- Row 1 (Grid Row): Ch 4 (counts as 1 DC + Ch 1). Sk 1 ch, DC in next ch, Ch 1. Repeat from * to * across the row. End with a DC in the final stitch.
- Row 2 (Solid Base Row): Ch 1, turn. SC in the first DC, SC in the Ch-1 space, SC in the next DC. Repeat across, working an SC into every stitch and every space.

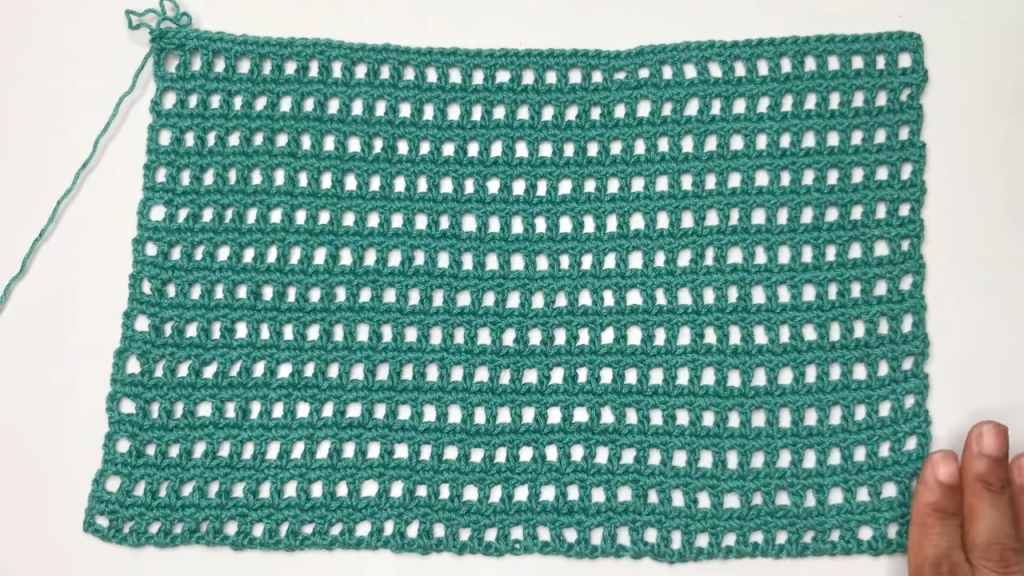
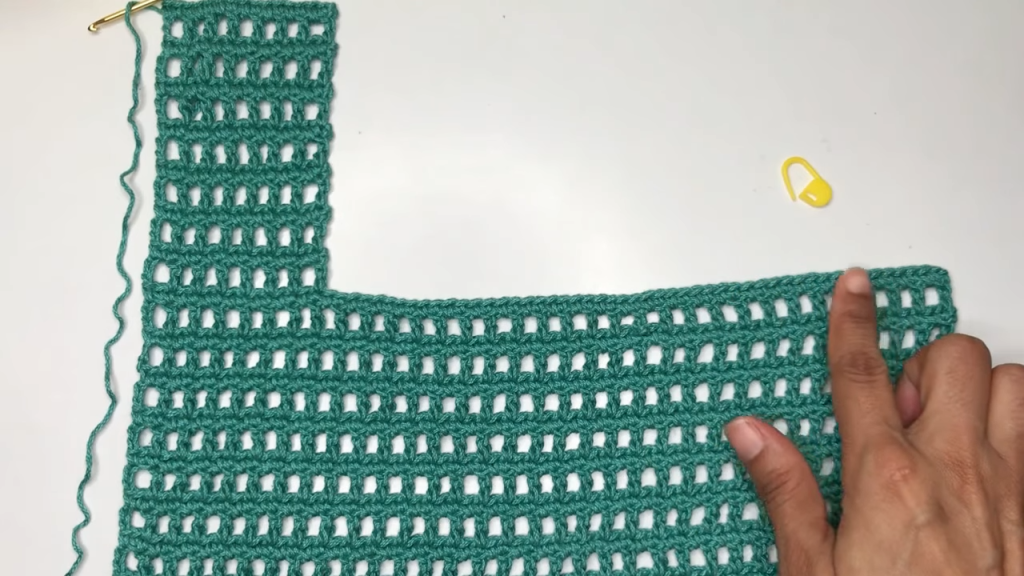
🧱 Section 1: The Main Body Panels
You will need to crochet two identical panels (Front and Back).
- Start: Chain an odd number of stitches until you reach your “Half-Chest” width (e.g., 31 cm).
- Working the Mesh: Follow the 2-row repeat (Grid Row followed by Solid Base Row).
- Growth: Continue this pattern until the panel reaches your desired length from the hem to the underarm (e.g., 20 cm or 13 full pattern repeats).
- Finish: End on a Solid Base Row (SC). Do not fasten off yet; we will move straight into the first strap.
🎗️ Section 2: Creating the Integrated Straps
Instead of sewing straps on later, we build them directly onto the panels for a seamless look.
- Placement: On your finished body panel, count 15 stitches in from the edge and place a stitch marker.
- Strap Foundation: Starting from the edge, work the Grid Row pattern only across those 15 stitches.
- Strap Growth: Continue the 2-row pattern (Grid and SC) on just these 15 stitches.
- Length: Repeat until the strap is roughly 12 cm long (or your desired shoulder height).
- Second Strap: Attach yarn to the opposite corner of the panel, count 15 stitches in, and repeat the process.
- Repeat for the Second Panel: You should now have two identical pieces with “U” shaped necklines.
🎀 Section 3: Professional Edging (The Border)
To give the blouse a polished, “boutique” look, we add a clean border.
- The Technique: Working around the entire perimeter of each panel (including the inner neckline and armhole edges), work a round of Single Crochet.
- Corner Turn: When working along the vertical sides of the DC rows, place 2 SC per DC post to keep the edge flat and prevent puckering.
- Result: This stabilizes the mesh and makes the final seaming much easier.
🪡 Section 4: Assembly & Seaming
Now, it’s time to bring your blouse to life!
- Alignment: Lay your two panels on top of each other with the right sides facing.
- Shoulder Joins: Use a tapestry needle and a whip stitch (or your preferred joining method) to sew the top edges of the straps together.
- Side Seams: Measure your armhole depth to ensure your arm can move comfortably. Mark this point. Sew the side seams from the bottom hem up to your marker.
- Check: Try the blouse on to ensure the fit is perfect before weaving in your ends.
Video Tutorial:
🌟 Final Flourish
Turn your blouse right-side out and admire your handiwork! The beauty of the Modern Mesh Blouse is its simplicity—it lets the craftsmanship of your stitches shine.
Styling Tip: This top looks incredible when paired with a matching bralette or camisole underneath. Feel free to experiment with different yarn colors; a soft cream for a boho look, or a bold black for an edgy summer vibe.
Happy Crocheting! If you enjoyed this pattern, don’t forget to share your finished project with the community! 🧶✨


