
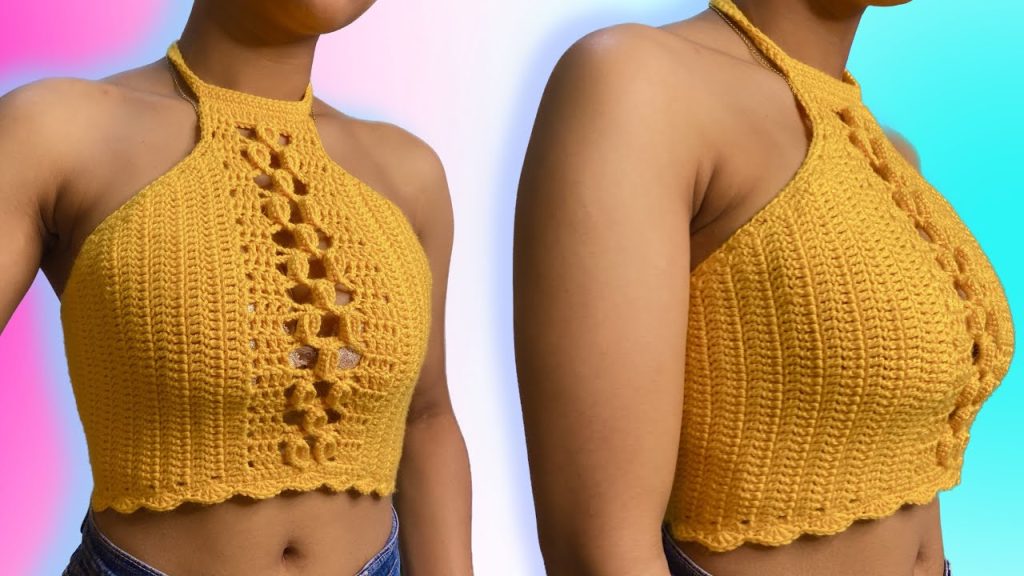
Welcome to the ultimate guide for creating the Flora Shell Blouse! This piece is a masterclass in texture, combining elegant central “motifs” that look like delicate floral buds with a structured, ribbed-style body and a feminine scalloped hem.
This pattern is worked in sections: starting with the intricate central panel, then adding side panels with shaping for the bust, and finishing with custom straps and a beautiful shell border. It’s a sophisticated design that looks high-end but is explained here step-by-step for you to conquer!
🧶 Materials & Customization
- Yarn: Lightweight or DK weight (Weight 3) yarn. Cotton or a cotton-bamboo blend is recommended for great stitch definition and a comfortable summer feel.
- Hook: 3.0mm to 3.5mm crochet hook (or size needed to meet gauge).
- Tools: Measuring tape, stitch markers, tapestry needle, and scissors.
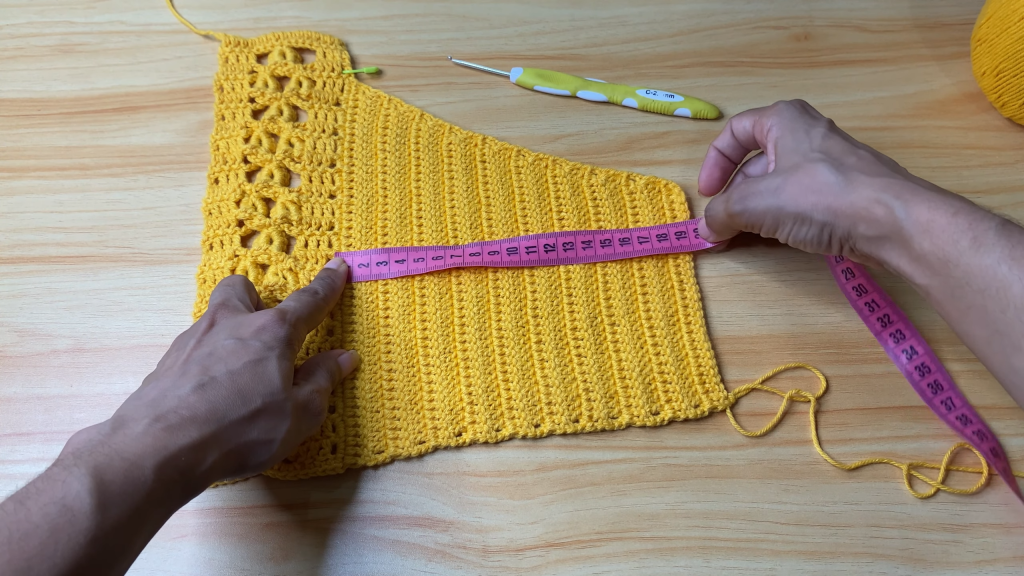
- Sizing Note: The center panel in this example is approximately 28 cm long. You can adjust the length by adding or subtracting row repeats.
📚 Key Stitches & Techniques (US Terms)
- Ch: Chain
- SC: Single Crochet
- HDC: Half Double Crochet
- DC: Double Crochet
- BLO: Back Loop Only
- Sl St: Slip Stitch
- Motif Stitch: A unique decorative stitch created by working multiple stitches around the post of a stitch from a previous row.
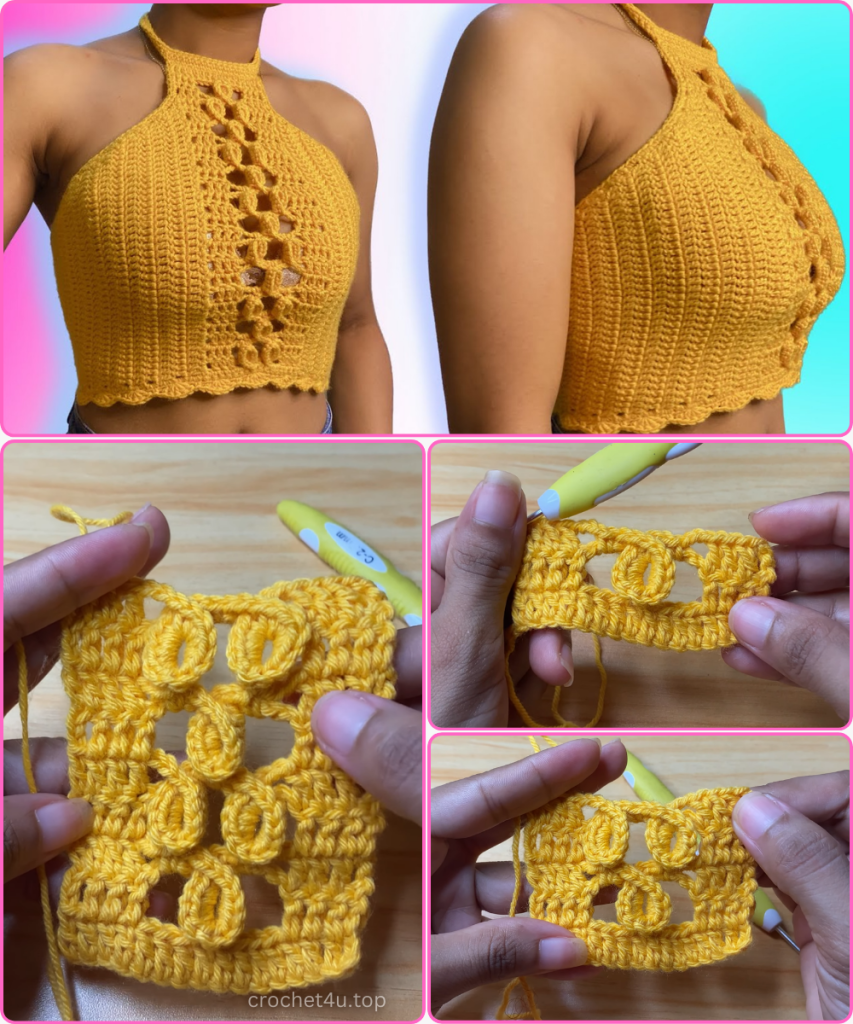
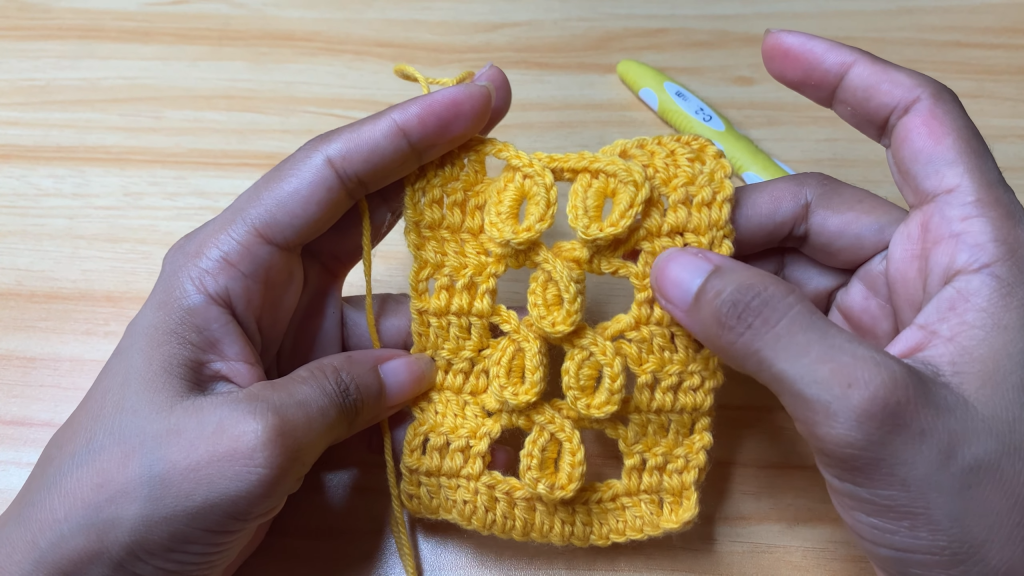
✨ Section 1: The Decorative Central Panel
The heart of this blouse is the central panel. It features a unique 4-row repeat that creates the “bud” motifs.
Foundation & Base Row
- Ch 15. (Hold the last chain with your finger).
- Row 1: Ch 3 (counts as first DC). DC into the 4th ch from the hook and in each ch across. (Total: 16 DC).
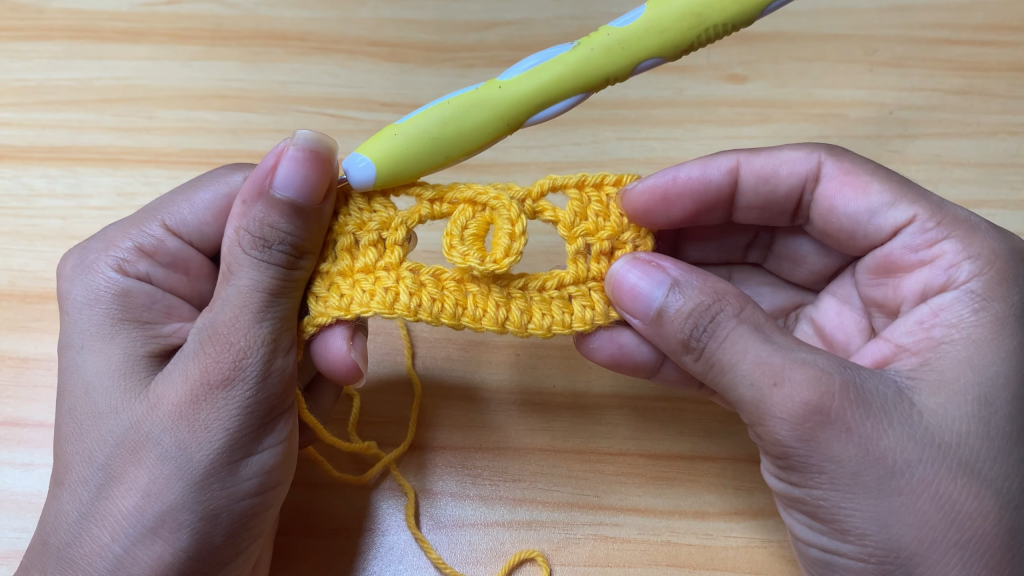
The 4-Row Motif Repeat
Row 1 (Framework Row):
- Ch 3, turn. DC in next 3 sts (4 total DC including turning chain).
- Ch 4, Sk 3 sts. 2 DC into the next st.
- Ch 4, Sk 4 sts. DC in the last 4 sts.
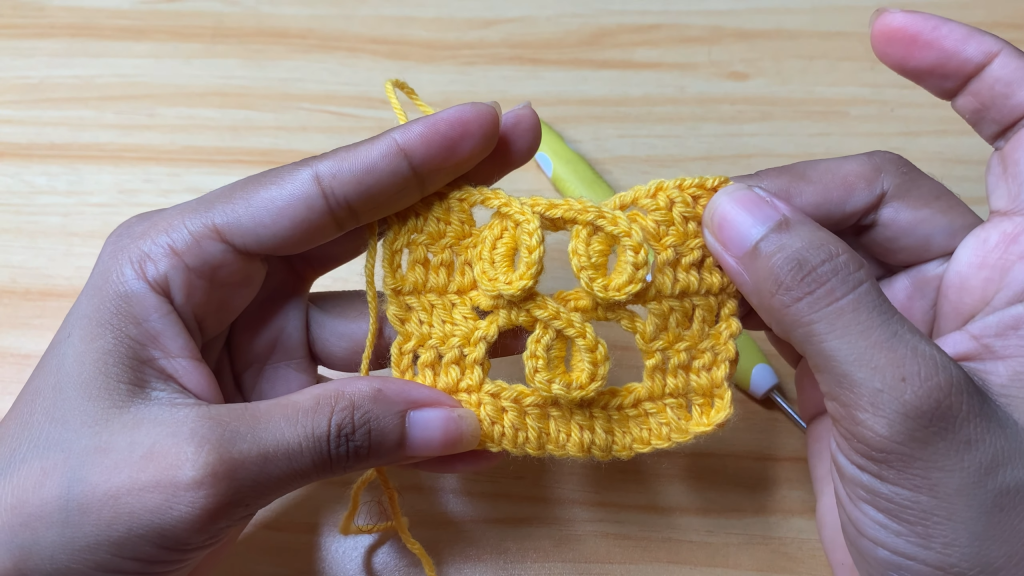
Row 2 (First Motif Row):
- Ch 3, turn. DC in next 3 sts.
- Ch 3, SC into the Ch-4 space. Ch 3.
- The Motif: Work 6 SC around the post of the first of the two central DCs. Then, rotate your work and work 6 SC around the post of the second central DC.
- Ch 3, SC into the next Ch-4 space. Ch 3, DC in the last 4 sts.
Row 3 (Alternating Framework):
- Ch 3, turn. DC in next 3 sts.
- Ch 3. In the SC from the previous row, work 2 DC.
- Ch 5. DC in the last 4 sts.
Row 4 (Second Motif Row):
- Ch 3, turn. DC in next 3 sts.
- Ch 3. Work the Motif (6 SC around each of the 2 central DCs).
- Ch 3, SC into the Ch-5 space. Ch 3. Work another Motif on the next set of central DCs.
- Ch 3, DC in the last 4 sts.
Repeat Rows 1–4 until the panel reaches your desired length (e.g., 28 cm).
📐 Section 2: Shaping the Side Panels (The Bodice)
Once the center panel is done, we work sideways from the long edges of the center panel to create the bust shaping.
- Preparation: Rotate the center panel. Attach yarn to the long side edge.
- Base Row: Work 2 SC for every horizontal DC row edge along the side of the center panel. Leave the top 3 rows of the center panel unworked (place a stitch marker here) to form the armhole/neckline transition.
- Shaping Rows (Decreases):
- Row 1: Ch 3, turn. DC in next st. Work a DC2Tog (decrease) over the next 2 sts. DC across to the end.
- Row 2: Ch 3, turn. DC across until 3 sts remain. DC2Tog over the next 2 sts. DC in the last st.
- Continue: Repeat these decrease rows (decreasing only at the top edge of the garment) for about 19 rows. This creates a diagonal “v” shape for the bust.
- The Back Extension: After the shaping is complete, work several rows of straight DC (no decreases) to create the section that wraps around to the back (e.g., 10 rows or 11 cm).
- Final Mesh Row: Work one row of: Ch 4 (counts as DC + Ch 1), Sk 1, DC in next, Ch 1. Repeat across. This creates a mesh for the back lacing.
🎀 Section 3: Finishing & Edges
- The Straps:
- Attach yarn to the top corner of the bust shaping.
- Ch 50 (or length needed for your size).
- Turn and SC in each chain back to the bodice.
- SC along the top edge of the bodice and repeat for the other strap.
- The Scalloped Hem (Shell Border):
- Attach yarn to the bottom edge of the blouse.
- SC in the first st.
- Sk 2 sts, work 5 DC into the next st (The Shell), Sk 2 sts, SC in next.
- Repeat the shell pattern all the way around the bottom hem.
- Back Lacing: Crochet a long chain (approx. 100+ cm) and lace it through the mesh rows on the back panels in a corset style.
Video Tutorial:
🎨 Final Polish
Weave in all your ends and block your garment to open up the central motifs. Your Flora Shell Blouse is ready! The adjustable back ensures a perfect fit, while the floral-inspired center makes it a true statement piece. Happy crocheting! 🧶✨


