
✨ Introduction: Elegance and Structure
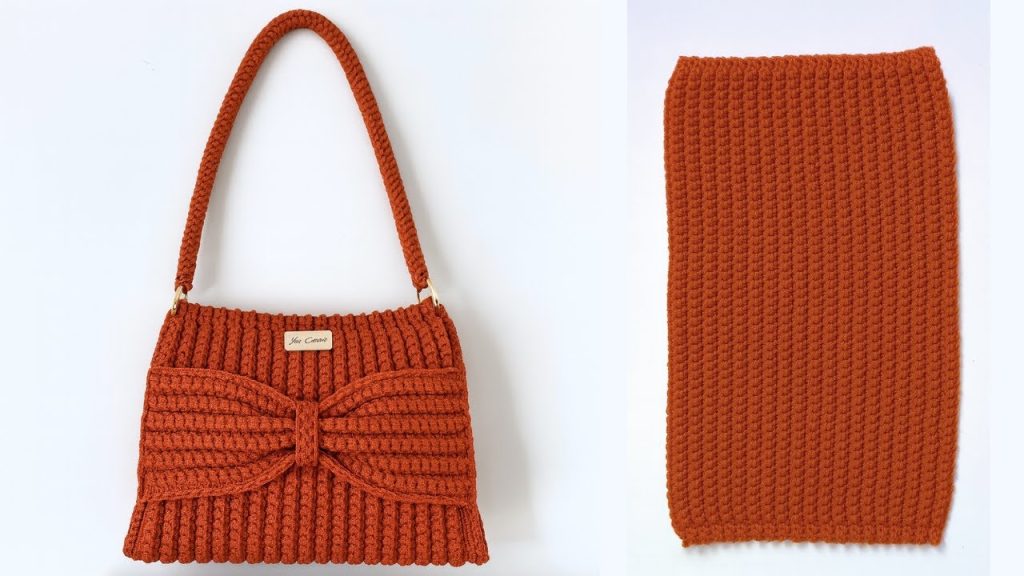
Welcome to the detailed pattern for the “Maria” Structured Shimmer Tote, a chic and robust handbag designed with a gorgeous texture and a stunning decorative ribbon detail. Inspired by the durable and stylish design in the video, this bag utilizes a specialized single crochet technique to create a dense, woven fabric that stands up beautifully without needing a stiff lining. The use of polypropylene or nautical yarn gives the bag a lovely subtle sheen, making it perfect for an elegant night out or a vibrant holiday party.
This pattern is ideal for intermediate crocheters familiar with basic stitches and shaping. The main body is worked in one flat piece and then seamed, showcasing a unique side border created with simple slip stitches.
Key Design Features
- Woven Texture (Center Single Crochet): The body is worked in a dense stitch, often called Center Single Crochet (CSC) or Split Single Crochet, which mimics the look of knit V’s and provides superior structure.
- Integrated Border: Each row begins and ends with two Slip Stitches, creating a tight, decorative, and sturdy vertical edge that eliminates the need for separate edging.
- Customizable: The length and width can be easily adjusted by changing the foundation chain count and the number of rows.
- Elegant Finish: The separate, central ribbon panel adds a tailored, luxurious finish.
📚 Materials & Terminology
| Abbreviation | Meaning |
| ch | Chain |
| st(s) | Stitch(es) |
| sl st | Slip Stitch |
| sc | Single Crochet |
| csc | Center Single Crochet (also known as Split Single Crochet, worked into the ‘V’ of the previous stitch) |
| rep | Repeat |
| RS | Right Side |
| WS | Wrong Side |
Materials Needed
- Yarn: Approximately 350 grams (12.3 oz) of 3mm Nautical (Polypropylene) Yarn or a T-shirt yarn alternative for structure.
- Hook: 4.5 mm crochet hook.
- Tools:
- Scissors and a tapestry needle (with a large eye to accommodate the thick yarn).
- Stitch Markers.
- 18 mm Magnetic Button or clasp for closure.
- Needle and matching nylon thread (0.30mm recommended) for attaching the button.
- Two 3 cm Carabiner Clips or D-rings (Mosquetões) for the strap.
- Lighter (optional, for sealing the ends of polypropylene yarn).
📐 Gauge & Sizing
Gauge is crucial for this project. Your tension should be firm to maintain the bag’s structure.
- Foundation Chain (55 ch): Should measure approximately 38.5 cm (15 inches).
- Finished Panel Width (54 sts): Should measure approximately 23.5 cm (9.25 inches).
- Finished Bag Dimensions (Folded, after 38 rows):
- Height: ~38 cm (15 inches)
- Width: ~23.5 cm (9.25 inches)
Sizing Note: The bag’s height is determined by the number of rows, and the width is determined by the foundation chain.
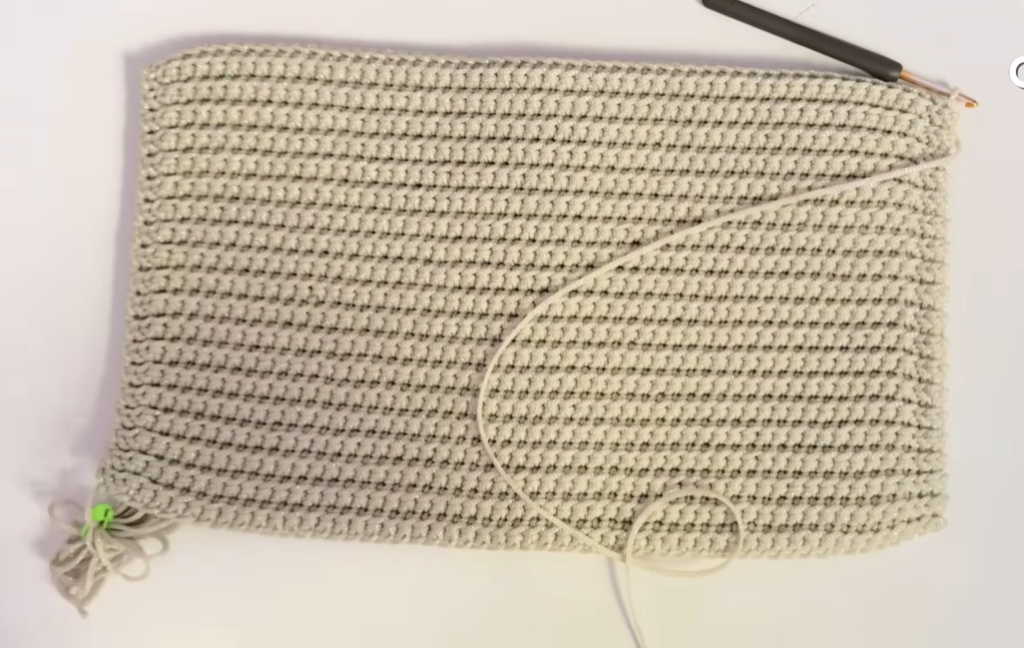
🔝 Part 1: The Main Body Panel
The body is crocheted flat in rows. Be sure to leave a long tail at the beginning and end for seaming.
Prep: Measure and cut a 160 cm (63 inches) long tail. This will be used to seam the first side of the bag.
Foundation Chain & Setup (Row 1)
- Start with the working yarn after the long seaming tail. Make a slip knot.
- Ch 55.
Row 1: The Foundation Row
- This row is worked into the back bumps of the foundation chain for a clean bottom edge.
- Sk first ch (the first st is worked in the 2nd ch from the hook).
- 2 Sl St into the next two back bumps (Place a marker in the 2nd Sl St).
- 50 SC into the next 50 back bumps.
- 2 Sl St into the last two back bumps. (Place a marker in the 2nd Sl St).
- [Total 54 stitches: 4 Sl St, 50 SC]
- Ch 1, turn.
The Body Rows (Rows 2–38)
- The body rows use the Center Single Crochet (CSC) technique for the middle section to build the woven fabric.
- Start Border: 2 Sl St into the first two stitches. (Move the marker up to the 2nd Sl St).
- Middle Section (CSC): Work 50 CSC across the next 50 stitches.
- To execute CSC: Insert your hook into the center of the ‘V’ of the stitch from the previous row, instead of under the top loops.
- End Border:2 Sl St into the last two stitches (the marked stitch and the one before it). (Move the marker up to the 2nd Sl St).
- [Total 54 stitches]
- Ch 1, turn.
Repeat this pattern for a total of 38 rows.
Finish: Cut the yarn, leaving another 160 cm (63 inches) tail for seaming the second side. Pull the tail through the last loop to secure.
🎀 Part 2: The Decorative Ribbon
The ribbon is worked as a flat rectangle, similar to the main body, but without the slip stitch border, and then finished with a central band.
Ribbon Panel (Rows 1–15)
- Ch 33.
- Row 1: SC in the 2nd ch from the hook and in each ch across. [32 SC] Ch 1, turn.
- Rows 2–15: SC in each st across, working into the center of the stitch (CSC) for the most dense and attractive fabric.
- Ch 1, turn. (Total 15 rows, or desired height for the ribbon).
Finish: Fasten off, leaving a short tail to weave in.
Ribbon Central Band
- Ch 15 (or enough to wrap snugly around the pinched center of the ribbon panel).
- Row 1: Sl St in the 2nd ch from the hook and in each ch across.
- Fasten off, leaving a tail for assembly.
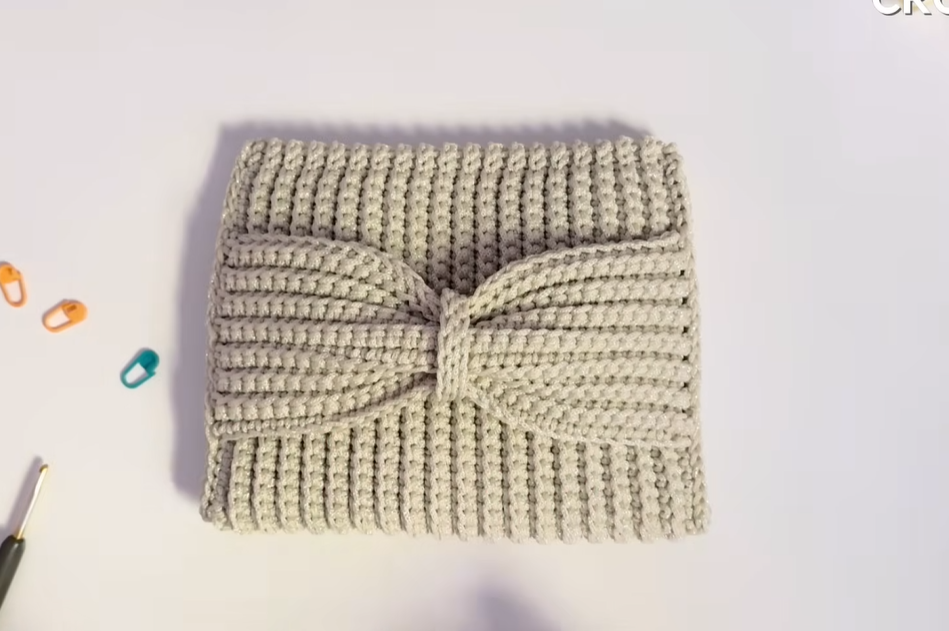
Ribbon Assembly
- Take the ribbon panel and pinch it tightly in the center to create the bow shape.
- Wrap the Central Band around the pinched section.
- Use the tail to sew the ends of the Central Band together at the back of the bow, hiding the join.
- Weave in all remaining ends on the ribbon piece.
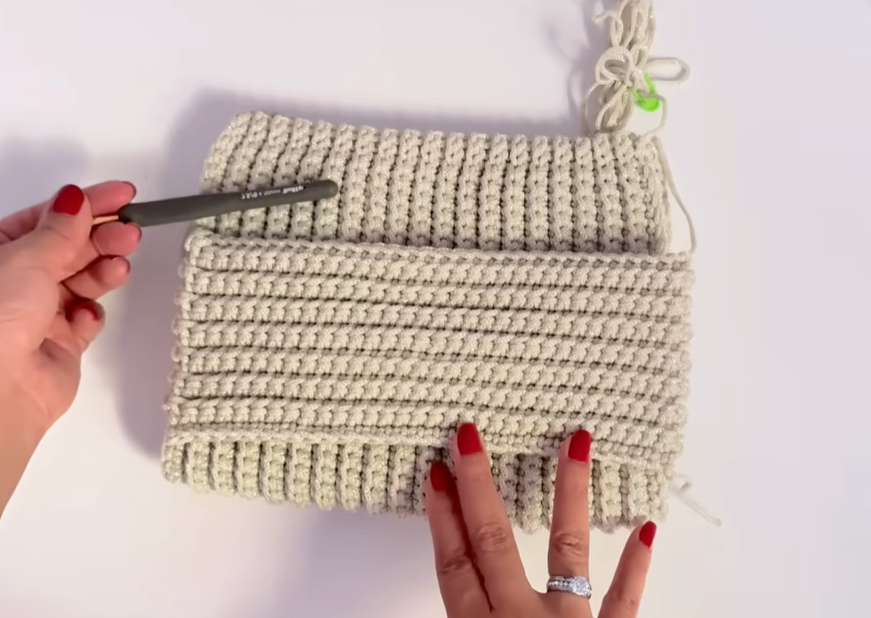
🔗 Part 3: Assembly & Seaming
You will now fold the panel and use the long tails to sew the sides closed.
- Fold: Fold the main body panel flat, aligning Row 1 and Row 38. This forms the side seams.
- Placement of Ribbon: Pin the completed ribbon piece onto the front of the bag, centering it on the panel. The video suggests placing it about 7 rows down from the top edge.
- Seaming the Sides (Side 1):
- Thread the tapestry needle with the starting tail (160 cm).
- Starting at the bottom corner, use a Slip Stitch Join method (or a simple overcast stitch if using a needle) to seam the side closed. Work through the outer loop of each corresponding stitch to create a durable, tight join.
- Crucial Step (Joining the Ribbon): When you reach the ribbon, continue the seam, but stitch through the edge of the ribbon, securing it to the bag panel as you close the side seam.
- Continue to the top of the bag. Weave in the remainder of the tail securely on the inside.
- Seaming the Sides (Side 2):
- Repeat the seaming process using the ending tail (160 cm) on the second side, ensuring the ribbon is also secured into this seam.
🔩 Part 4: The Strap and Final Hardware
The Strap
The strap is a round cord made entirely of slip stitches.
- Start with a slip knot, but keep it loose. Ch 3 (or 4).
- Sl St into the 2nd ch from the hook, and Sl St into the next ch.
- Twist your work so you are working into the edge of the previous sl st.
- Continue working Sl St into the side/edge loops of the previous stitch. The work will naturally begin to curl and form a round, rope-like cord.
- Continue until the strap measures your desired length (45 cm / 17.7 inches is suggested for a small shoulder/wrist strap).
- Fasten off, leaving a tail for attachment.
Attaching the Hardware
- Attach Carabiner Clips: Thread the tail through the end loops of the strap and then through the loop of the carabiner clip/D-ring. Secure the tail by sewing it back down the strap for about 1 inch. Trim and seal (if using nautical yarn).
- Attach to Bag: The carabiner clips attach directly to the top corners of the bag opening, where the seam finishes.
Video Tutorial:
Attaching the Magnetic Button
- Using a normal sewing needle and nylon thread, determine the center placement for the magnetic button on the inside of the bag opening.
- Sew the first part of the magnetic button to the back panel of the bag, near the top edge.
- Close the bag and align the second part of the button directly across from the first. Mark the placement.
- Sew the second part of the magnetic button to the front panel of the bag.
Your beautiful and sturdy “Maria” Tote is complete!


