
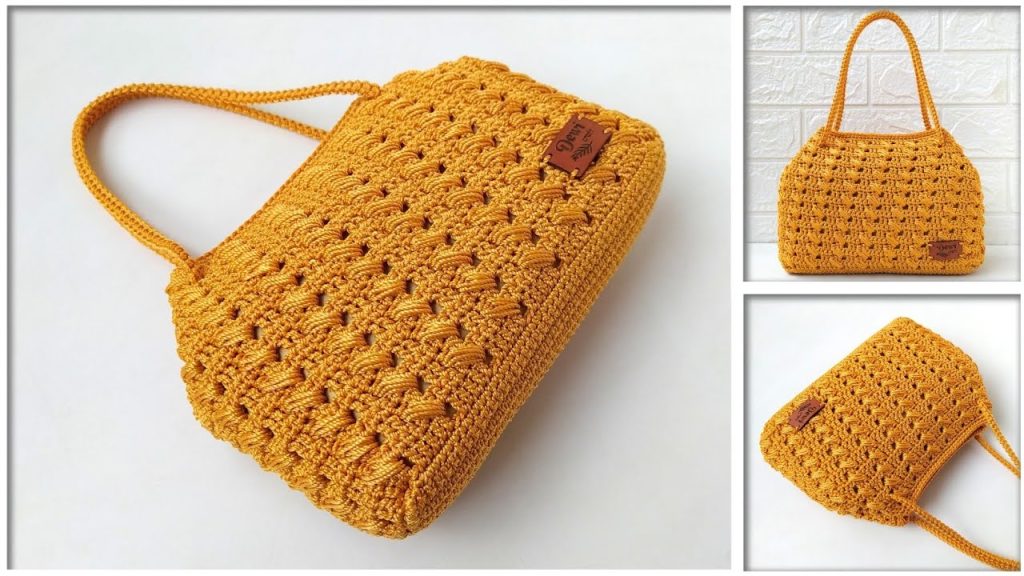
Welcome to a comprehensive guide for crocheting the stylish and sturdy “Serpentine Wave” Shoulder Bag! Inspired by the elegant, alternating texture and clear instructions from SANG DEWI CRAFT, this pattern uses a combination of Double Crochet (DC) rows, a textured Puff Stitch row, and Single Crochet (SC) transition rows to create a unique, wavy, and durable fabric.
This is a detailed, long pattern guide for an intermediate-level project worked in turned rounds, resulting in a firm rectangular base and a finished bag approximately 26 cm wide by 17 cm high.
🧶 Materials & Key Tools
The structure of this bag relies on using a durable, non-stretchy cord yarn to maintain its shape and defined lines.
| Icon | Item | Details |
| Hook | Crochet Hook | 4.0 mm (or size needed to achieve very firm tension). |
| Yarn | Main Color (MC) | Approximately 150g of sturdy cord yarn (Nylon or Polyester cord). |
| Hardware | Shoulder Strap | A separate crocheted cord or thin strap (approx. 90 cm long). |
| Notions | Markers & Needle | Stitch Markers (especially for the base and strap placement), Scissors, and a Yarn Needle. |
| Size | Finished Bag | Approx. 26 cm (Length) x 17 cm (Height) x 6 cm (Depth). |
| Weight | Finished Weight | Approx. 175 grams. |
📝 Abbreviations & Special Stitches (U.S. Terms)
Familiarize yourself with these terms. Note that all body rounds are turned to eliminate a noticeable seam line.
| Abbreviation | U.S. Terminology | Description |
| ch | Chain | |
| sl st | Slip Stitch | |
| sc | Single Crochet | |
| dc | Double Crochet | |
| st(s) | Stitch(es) | |
| rep | Repeat |
Special Stitch: 3-Loop Puff Stitch (Puff)
A puff stitch made by drawing up three yarn-overs in the same space.
- Yo, insert hook into st/space, pu a lp (pull up a loop to the height of a DC).
- [ Yo, insert hook into the same st/space, pu a lp ] Repeat two more times (7 loops on hook).
- Yo, pull through all 7 loops to close the puff. No chain to secure is used in this pattern’s puff round.
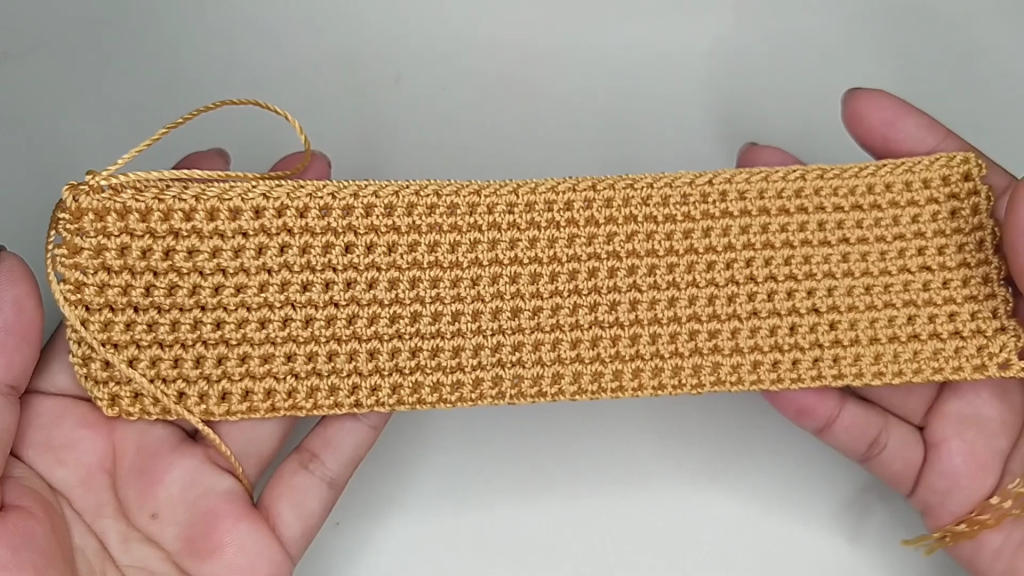
📐 Part 1: The Rigid Foundation Base
We start with a flat, rigid base worked in rows of Single Crochet, then edged in the round. The final stitch count must be a multiple of 6 for the motif pattern.
Initial Chain (MC):
Make a slip knot and ch 45. Chain 1 more for turning.
Rows 1 – 12 (Base Core):
- Sc in the 2nd ch from the hook, and sc in each ch across. (45 sc).
- Ch 1 (does not count as st), turn. Sc in the first st and in each st across. (45 sc).
- Repeat Row 2 until you have completed a total of 12 rows.
Edging (SC in the Round):
After Row 12, do not turn. We work SC around the entire perimeter.
- Corners: Work 3 sc into the four corner stitches.
- Long Sides (Row Ends): Sc evenly down the side edge, placing 1 sc per row end. (12 sc total per side).
- Top/Bottom Edges: Sc across the 45 SC of the top and bottom rows.
- Count & Adjust: Count your total stitches (e.g., approximately 114 sts). If necessary, evenly distribute increases on the long straight sides to ensure your final count is a multiple of 6 (e.g., 114 or 120 sts).
- Sl st to the first sc to join.

🌟 Part 2: The Serpentine Wave Body Motif
The main body motif is built upon a 4-round repeat that alternates between solid DC, Puff Stitch texture, and SC transition rounds. The body is worked in turned rounds throughout.
Round 1 (DC Foundation):
- Ch 3 (counts as 1 dc), turn the work. Dc in the next st.
- Dc in each st around.
- Sl st to the top of the starting ch-3 to join.
Round 2 (Puff Stitch Texture):
- Ch 1 (does not count as st), turn. Sc in the same st.
- Dc in the next st.
- Puff in the next st.
- Dc in the next st.
- Sc in the next st.
- *Dc in the next st, Puff in the next st, Dc in the next st, Sc in the next st*. (This sequence is a multiple of 4).
- Repeat from * to * around. (The video pattern has a slightly different count for the puff section, which we adjust to fit the multiple of 6).
- ADJUSTED PATTERN (Multiple of 6): Ch 1, turn. Dc in the same st.
- *Dc in the next 4 sts, Puff in the next st, Sc in the next st*.
- Repeat from * to * around.
- Sl st to the first DC to join.
Round 3 (SC Transition):
- Ch 1 (does not count as st), turn. Sc in each st around.
- Sl st to the first sc to join.
Round 4 (DC Transition/Setup):
- Ch 3 (counts as 1 dc), turn. Dc in each st around.
- Sl st to the top of the starting ch-3 to join.
Motif Repetition:
- Repeat the sequence of Rounds 2, 3, and 4 for a total of 11 Puff rows (approx. 33 rounds total) or until the bag reaches the desired height of 17 cm.

⛓️ Part 3: Top Border and Strap Placement
We now finish the top with a smooth Single Crochet border and mark the areas for strap attachment.
SC Border Rounds (MC):
- Ch 1 (does not count as st), turn. Sc in the same st and in each st around. Sl st to join.
- Repeat for a total of 2 rounds of SC border. This creates a dense, sturdy rim.
Strap Placement Marking:
- Lay the bag flat. Locate the two side edges (the narrowest part).
- From the center of each side, measure 3.5 cm out toward the corners on the top edge. Place a marker at the 3.5 cm points. You will have two markers on each side, defining the area where the strap will be attached.
✂️ Part 4: The Shoulder Strap (Optional Technique)
The pattern video uses a simple flat cord technique for the strap.
- Strap Foundation (MC): Make a slip knot and ch 2. Sc in the 2nd ch from the hook.
- Strap Rows: Ch 1, turn. Sc in the stitch.
- Repeat Row 2 until the desired length of 90 cm is reached.
- Fasten off, leaving a long tail for sewing.
Strap Assembly:
- Using the long tail, position one end of the strap onto the top of the bag at the marked area on one side.
- Sewing: Using a yarn needle, securely sew the strap to the bag for approximately 3-4 SC stitches across the marked area. Sew the entire width of the strap securely to the bag’s body.
- Repeat the sewing process for the other end of the strap on the opposite side of the bag.
Video Tutorial:
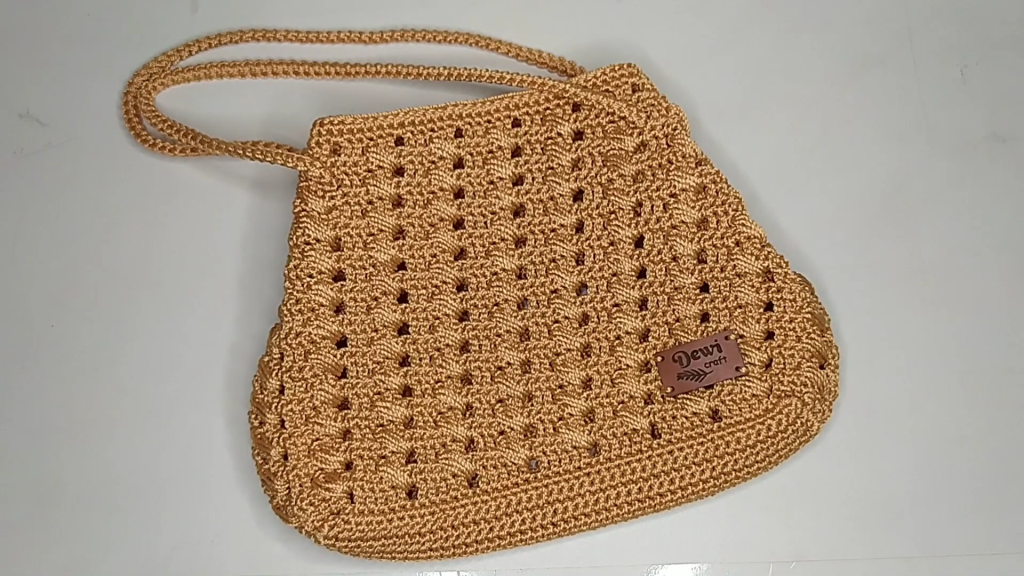
✅ Final Touches & Dimensions
- Weave in Ends: Ensure all yarn tails are neatly and securely woven into the dense fabric.
- Lining & Zipper (Recommended): To ensure stability, prevent stretching, and for a professional finish, it is highly recommended to sew a custom fabric lining and a zipper into the purse.
Your finished “Serpentine Wave” Shoulder Bag should measure:
- Length: 26 cm
- Height: 17 cm
- Weight: Approximately 175 grams.
Enjoy your durable, structured, and beautifully textured bag!


