
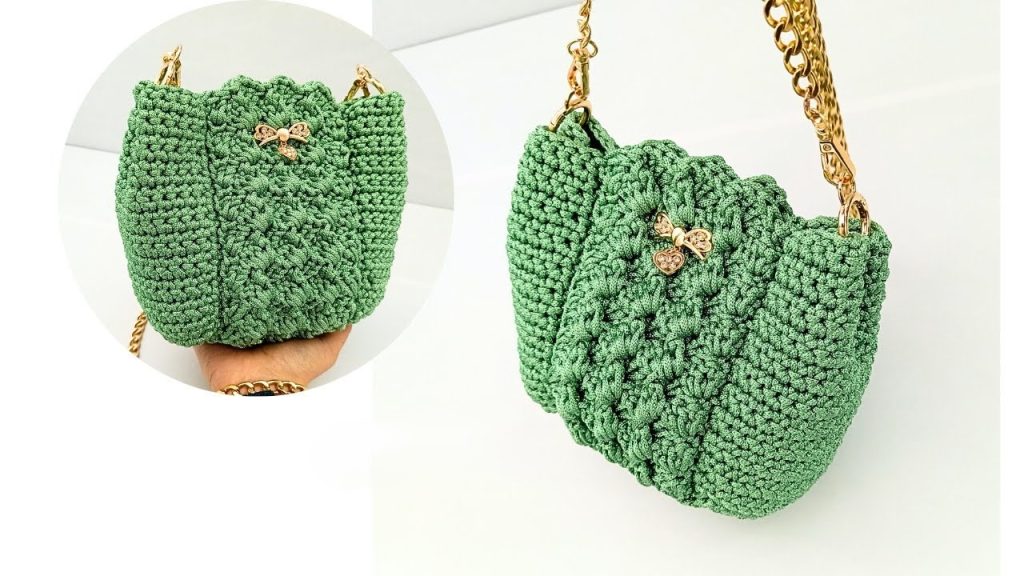
Welcome to a brand-new crochet journey! Today, we are diving into a project that looks high-end, sophisticated, and incredibly textured. This design features a unique variation of the Crocodile Skin stitch, giving the bag a 3D, layered appearance that is both sturdy and stylish. Whether you’re heading to a brunch or a formal event, this bag is designed to be your most-complimented accessory.
Let’s pick up our hooks and create something extraordinary!
🛍️ Materials & Essentials
To achieve the structure and definition seen in this design, choosing the right yarn is key.
- Yarn: 3mm Polyester Macramé Thread (approx. 400 grams). This thread provides the perfect balance of sheen and stiffness.
- Hook Size: 5mm crochet hook.
- Hardware: Optional magnetic locks, a zipper, or metal rings for side shaping.
- Tools: Tapestry needle, stitch markers, and sharp scissors.
📏 Design & Dimensions
The finished bag features a spacious rectangular body with tapered side gussets. The “Crocodile Skin” texture covers the front and back panels, while the sides are worked in a clean, classic single crochet to provide contrast and stability.
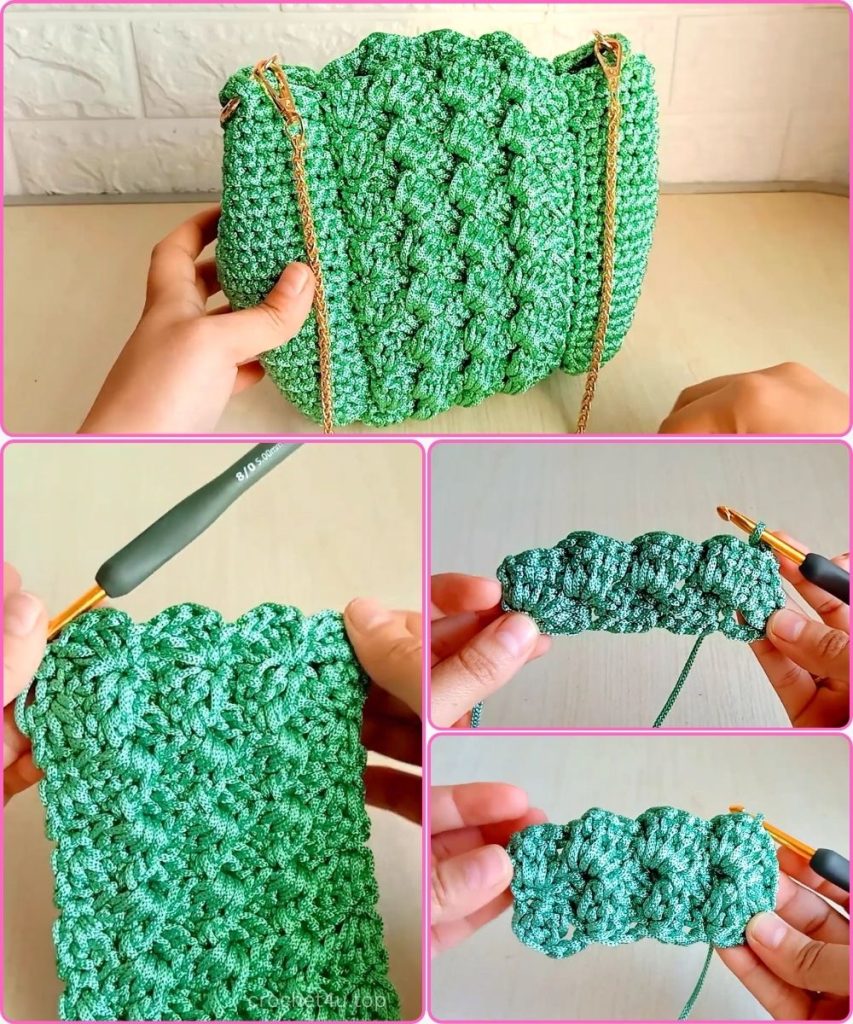
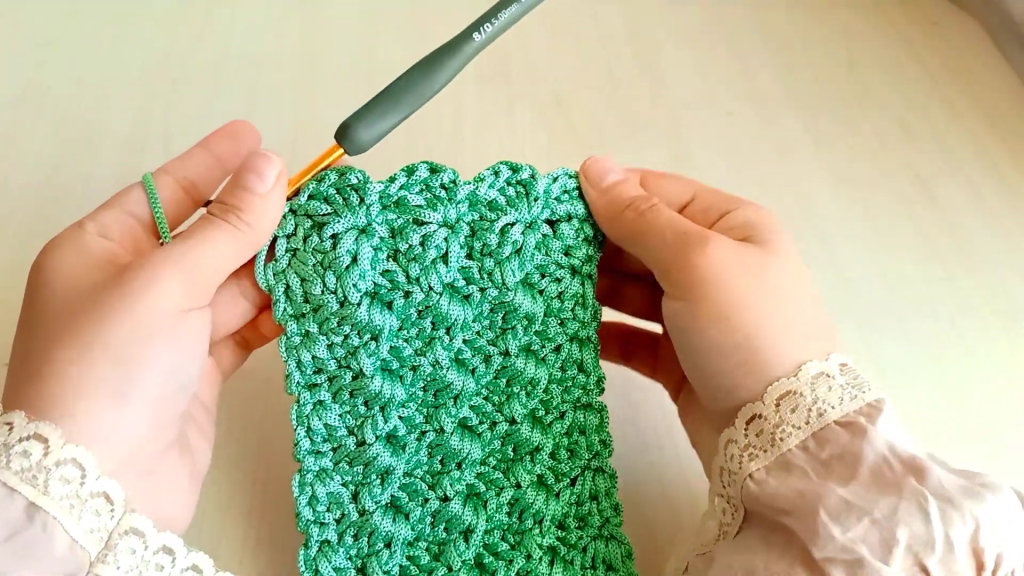
🧺 Part 1: The Textured Main Body
The main body is worked in two directions starting from a central foundation chain. This ensures the “scales” of the stitch flow beautifully on both the front and back of the bag.
The Foundation:
- Start with a slip knot and 17 chains.
- Add 2 more chains (this counts as your first height).
Row 1 (The Setup):
- In the 3rd chain from the hook, work 2 Double Crochets (DC).
- Skip 3 chains. In the 4th chain, work a Single Crochet (SC).
- Chain 1, then work 3 DC in that same stitch.
- Repeat: Skip 3 chains, SC in the next, Chain 1, 3 DC in the same stitch.
- End the row with a single SC in the final chain.
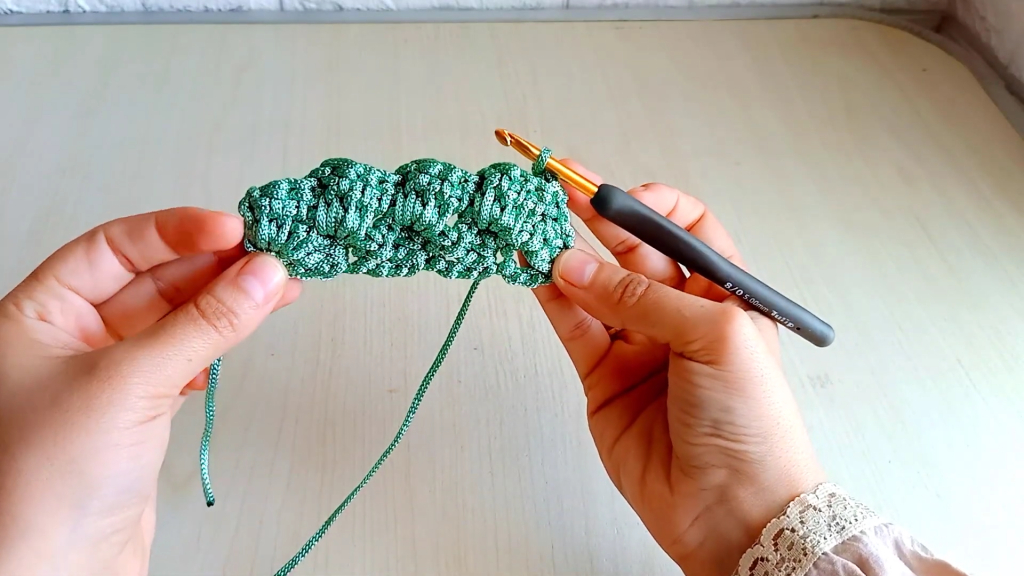
Row 2 (The Scale Variation):
- Chain 2 and turn. Work 2 DC in the very first stitch.
- Now, locate the 3rd DC of the cluster from the previous row. Insert your hook under it to create a Front Post Single Crochet.
- Chain 1, then work 3 DC under the chain-1 space created in the previous row.
- Repeat: Front Post SC on the 3rd DC of the next cluster, Chain 1, 3 DC under the chain space.
- End the row with an SC in the top of the turning chain.
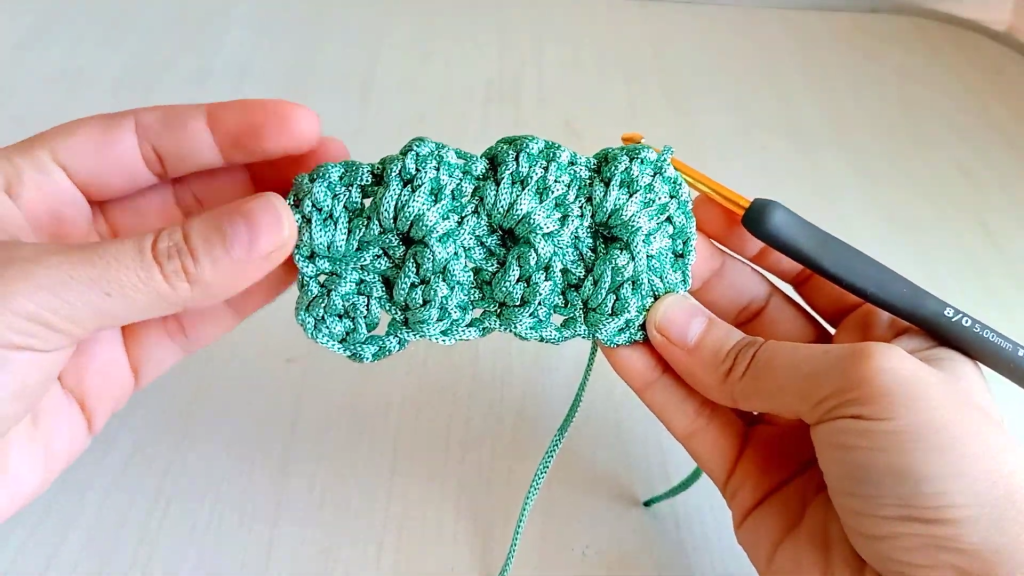
Continuing the Pattern:
- Repeat Row 2 until you have completed 18 rows. Fasten off.
- Flip your work: Join the thread to the opposite side of your starting foundation chain.
- Work another 18 rows exactly like the first part. You now have a long, textured panel that will fold to become the front and back of your bag.
📐 Part 2: The Side Gussets (Make 2)
The side pieces give the bag its “depth” and a professional, tapered silhouette.
- Foundation: Chain 19 (to result in 18 stitches).
- Rows 1–21 (Stability Rows): Work 18 SC in both loops for each row. This creates a firm, flat fabric.
- Row 22 (The Taper): Work a decrease at the very beginning and at the very end of the row.
- Rows 23–25: Continue to decrease at the start and end of every row.
- Finish: By Row 25, you should have 10 stitches remaining. Fasten off, leaving a long tail for sewing.
🪡 Part 3: Professional Assembly
Now, it’s time to transform your flat pieces into a 3D masterpiece.
- Preparation: Turn your textured main panel so the “wrong side” (the flatter side) is facing you.
- Centering: Find the two middle stitches of your side gusset and align them with the center foundation chain of the main body.
- The Join: Using slip stitches or a tapestry needle, connect the edges. If using slip stitches, work from the inside of the bag to keep the exterior seams clean.
- Symmetry: Repeat the process for the second side gusset, ensuring both sides are perfectly aligned so the bag stands straight.
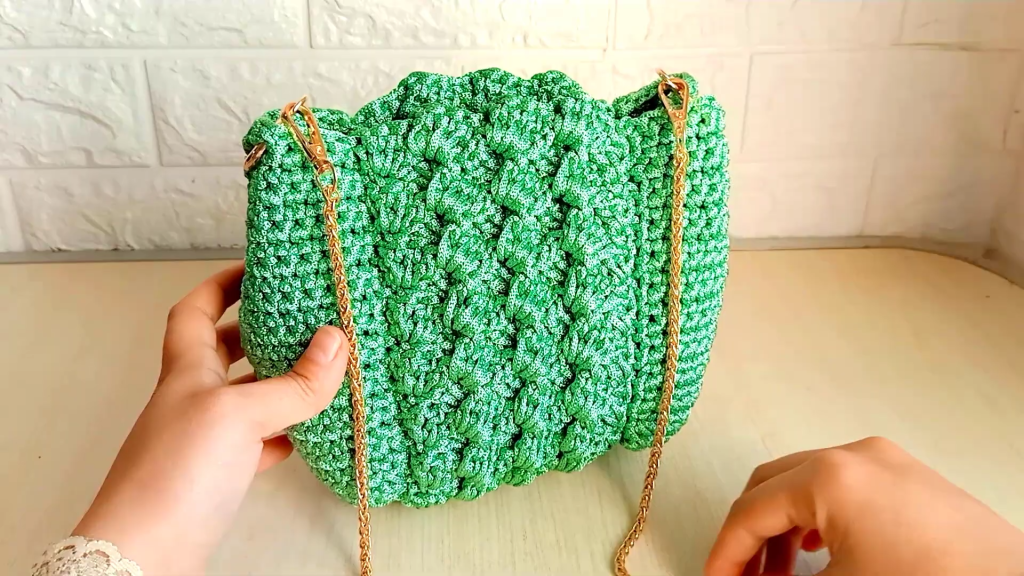
✨ Part 4: The Finishing Touches
The beauty of this design is its versatility. You can finish it in one of three ways:
- The Modern Look: Install a zipper along the top opening for total security.
- The Classic Look: Use magnetic snap locks hidden on the inside of the panels for a sleek, hardware-free exterior.
- The Structured Look: Add metal rings to the corners of the side gussets. This allows the sides to “pinch” inward, giving the bag a trendy, bucket-like shape.
Video Tutorial:
🌟 Conclusion
Your Emerald Scales Bag is now complete! The 3mm macramé thread ensures that the Crocodile Skin stitch stays plump and defined, making this bag a true statement piece.
Pro Tip: For an extra touch of luxury, consider adding a fabric lining to the inside to protect your belongings and give the bag even more structure.
Happy Crocheting! Don’t forget to share your finished photos and let us know which color you chose!


