
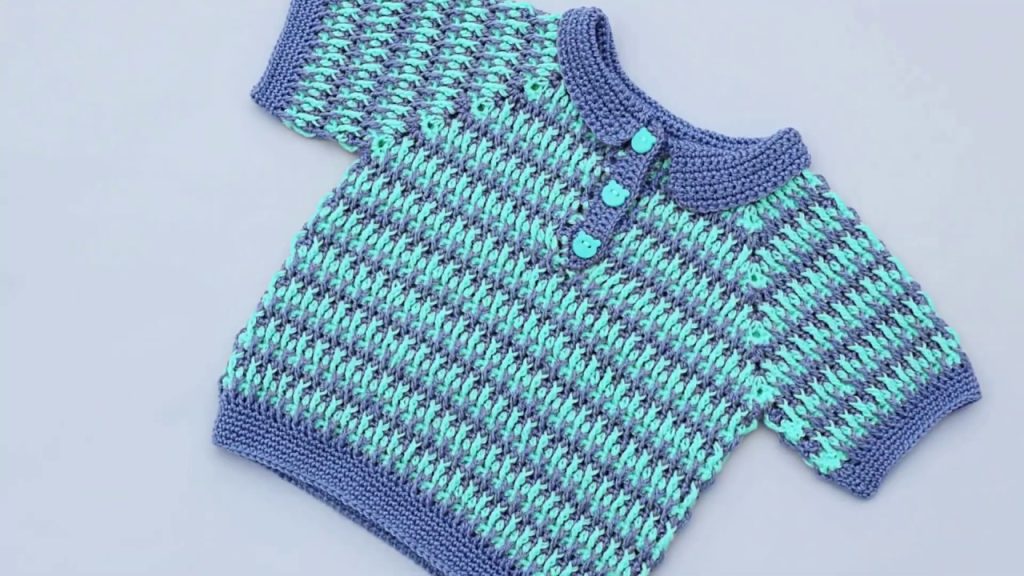
This striking sweater features an all-over two-color woven texture that provides warmth without being heavy, thanks to the construction and yarn choice. The classic polo-style collar, short sleeves, and front button placket make this a chic and practical garment for layering during cooler summer evenings or transitioning seasons.
This pattern is written for the 6-12 Month size and is suited for the Advanced Intermediate crocheter due to the two-color stitch work and garment shaping.
Materials Needed 🧶
- Yarn: Approximately 350-400 yards of DK Weight (Light Worsted / #3) yarn. Choose a blend like cotton/acrylic or merino for good drape and stitch definition.
- Main Color (MC): Approx. 200 yards (Deep Lilac/Mauve for Collar/Ribbing/Background)
- Contrast Color (CC): Approx. 200 yards (Aqua Teal/Mint for the Textured Color)
- Crochet Hook: 4.0 mm (US G-6), or the size needed to obtain gauge.
- Buttons: 3 small (1/2 inch) matching buttons (Teal or Lilac).
- Tapestry Needle: For weaving in ends and seaming.
- Stitch Markers: 4 markers for the raglan corners.
Skill Level & Notes 💡
- Skill Level: Advanced Intermediate. Requires familiarity with top-down raglan shaping, working an alternating two-color stitch (carrying yarn), and creating a ribbed collar/placket.
- Construction: The sweater is worked flat from the top-down with a front opening that forms the button placket.
- Two-Color Stitch: The pattern uses a variation of the Woven Stitch. You will carry the unworked color loosely up the side edge. Change color on the final yarn over of the last stitch of the previous row.
- Chains: Ch 2 at the beginning of HDC rows always counts as the first HDC unless noted otherwise.
Gauge 📏
In Half Double Crochet (HDC) (Yoke section) using a 4.0 mm hook: 16 HDC stitches and 10 rows = 4 inches (10 cm) square.
Abbreviations 📚
| Abbreviation | Description |
| ch | chain |
| sl st | slip stitch |
| sc | single crochet |
| hdc | half double crochet |
| dc | double crochet |
| st(s) | stitch(es) |
| rep | repeat |
| sk | skip |
| BLO | Back Loop Only |
| MC | Main Color (Lilac) |
| CC | Contrast Color (Aqua) |
Export to Sheets
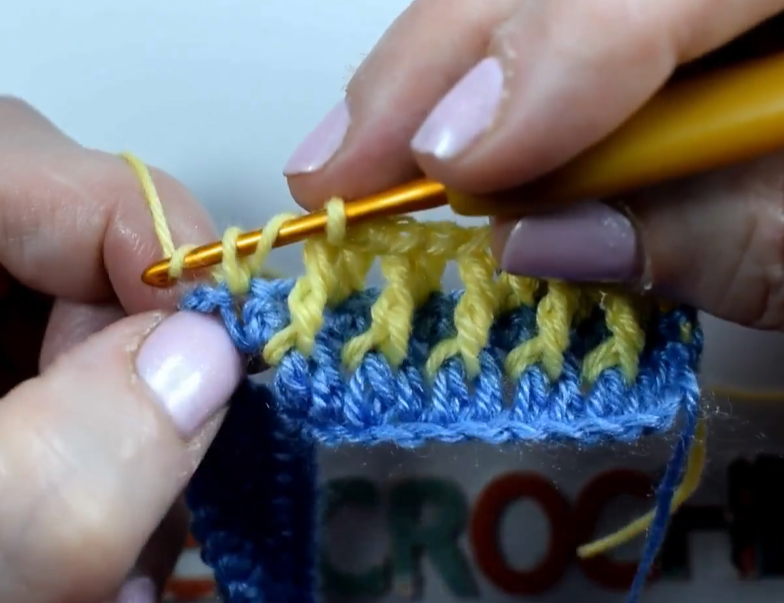
Special Stitch ✨
Two-Tone Textured Stitch (TTTS)
This two-row repeat creates the dense, woven texture:
- Row A (Color 1): Sc in the first st. [Hdc in the next st, sc in the next st] rep across.
- Row B (Color 2): Hdc in the first st. [Sc in the next st, hdc in the next st] rep across. (Note: This is also known as the Lemon Peel or Griddle Stitch worked in two colors.)
Part 1: The Yoke (MC & CC) ⬆️
The yoke is worked flat in rows with a front opening.
Row 1 (MC – Foundation): Ch 54. Hdc in the 2nd ch from hook (counts as 2 hdc). Hdc in the next 6 ch. [Hdc, ch 2, hdc] in the next ch (PM in ch-2 sp). Hdc in the next 8 ch (Shoulder). [Hdc, ch 2, hdc] in the next ch (PM). Hdc in the next 14 ch (Back). [Hdc, ch 2, hdc] in the next ch (PM). Hdc in the next 8 ch (Shoulder). [Hdc, ch 2, hdc] in the next ch (PM). Hdc in the last 7 ch. Change to CC. (62 hdc, 4 ch-2 sps)
Row 2 (CC – TTTS Row A): Ch 1, turn. Sc in the first st. [Hdc in the next st, sc in the next st] rep across to the first ch-2 sp. [Sc, ch 2, sc] in the ch-2 sp. Rep the pattern and corner increase sequence 3 more times. Continue [hdc in the next st, sc in the next st] across remaining sts. Change to MC.
Row 3 (MC – TTTS Row B): Ch 2, turn (counts as hdc). Hdc in the first st. [Sc in the next st, hdc in the next st] rep across to the first ch-2 sp. [Hdc, ch 2, hdc] in the ch-2 sp. Rep the pattern and corner increase sequence 3 more times. Continue [sc in the next st, hdc in the next st] across remaining sts. Change to CC.
Rows 4-12: Repeat Rows 2 and 3, maintaining the TTTS pattern and increasing in the ch-2 spaces at the 4 marked corners.
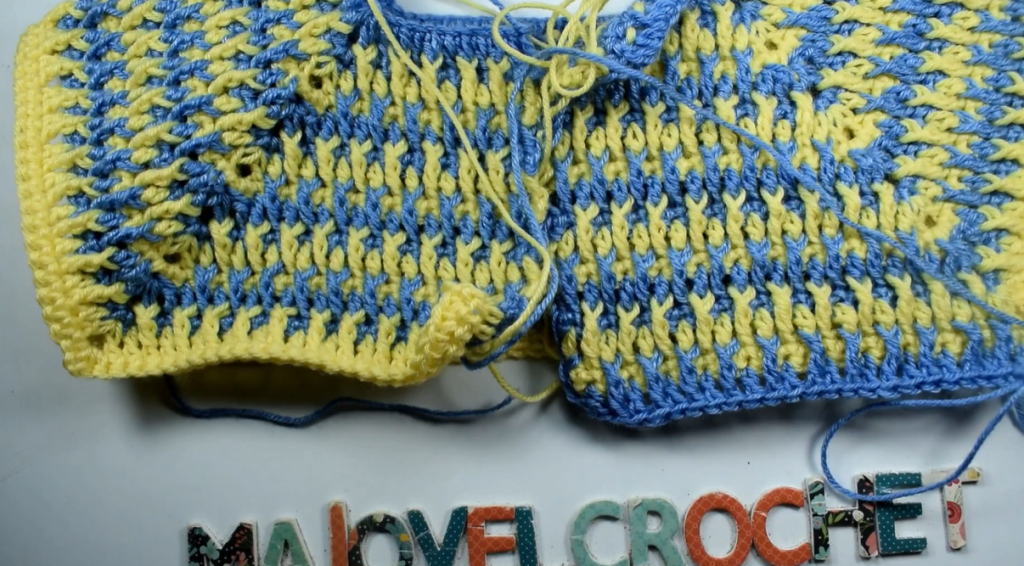
Part 2: Body Separation & Sleeve Split 👚
Row 13 (CC – TTTS Row A): Ch 1, turn. Work the TTTS Row A until the first ch-2 sp. Sc in the ch-2 sp. Ch 4 (skips the sleeve). Sc in the ch-2 sp of the second raglan corner. Continue the TTTS Row A across the back to the third ch-2 sp. Sc in the ch-2 sp. Ch 4 (skips the second sleeve). Sc in the ch-2 sp of the fourth raglan corner. Continue TTTS Row A to the end. Change to MC.
Row 14 (MC – TTTS Row B): Ch 2, turn. Work the TTTS Row B across the body and work 4 TTTS sts (2 sc/2 hdc pairs) evenly into each ch-4 underarm space. Do not join the round; continue working flat.
Rows 15-28: Continue the TTTS pattern flat, alternating Rows 2 and 3 across the body, maintaining the front opening.
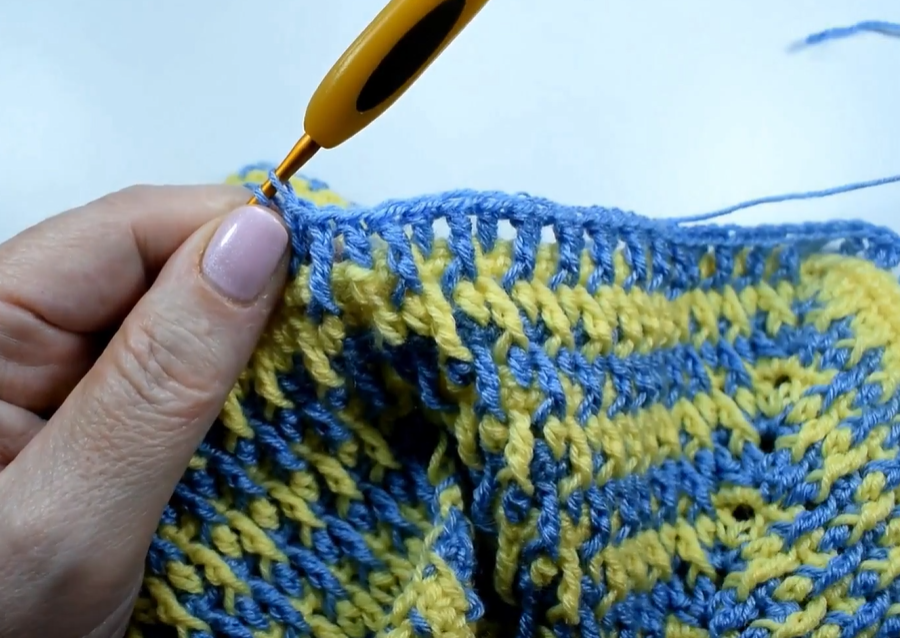
Part 3: Collar and Placket Edging (MC – Lilac) 🎀
We will now add the button placket and collar.
A. Front Placket (Lilac):
- Row 1 (MC): Attach MC to the bottom right front opening. Ch 1, sc evenly up the entire front opening edge and around the neck opening, sl st to the first st of the neck band, and sc down the left front opening. Turn.
- Row 2 (Buttonhole Placket): Ch 1, sc in the first st. [Ch 2 (buttonhole), sk 2 sts, sc in the next 5 sts] rep 3 times up the right front placket. Sc to the top of the neck. Work sl st across the neck edge. Work sc down the left front placket. Turn.
- Row 3 (Finish Placket): Ch 1, sc in each st and 2 sc in each ch-2 sp across the entire placket edge.
B. Collar (Lilac): The collar is worked in rows, only across the neck edge.
- Row 4 (Collar Setup – BLO): Ch 2, turn. Hdc in the BLO of each st across the neck edge only. Leave the front placket sc rows unworked. (Approx. 52 hdc)
- Row 5 (Collar Increase): Ch 2, turn. [Hdc in the next 2 sts, 2 hdc in the next st (increase)] rep across. (Approx. 69 hdc)
- Rows 6-8 (Collar Ribbing – BLO): Ch 2, turn. Hdc in the BLO of each st across. Fasten off after Row 8.
Part 4: Sleeves and Hem Ribbing 🫧
A. Short Sleeves (Make 2):
- Attach MC to the underarm ch-4 sp. Rnd 1: Ch 1, sc evenly around the armhole opening, placing 1 sc in the body sts and 2 sc in the ch-4 sp. Sl st to join. (Approx. 40 sc)
- Rnd 2 (Ribbing): Ch 2, hdc in the BLO of each st around. Sl st to join.
- Rnd 3 (Ribbing): Ch 1, sl st in each st around for a clean, tight edge. Fasten off.
B. Hem Ribbing:
- Attach MC to the bottom edge. Row 1: Ch 2, hdc in each st across. Turn.
- Row 2-3 (Ribbing – BLO): Ch 2, turn. Hdc in the BLO of each st across. Fasten off after Row 3.
Video Tutorial:
Assembly and Final Touches 🌸
- Weave in all ends securely. Use your needle to close up any small gaps at the underarm or collar join.
- Sew Buttons: Sew the 3 small buttons onto the Left Front Placket, aligning them with the buttonholes created on the Right Front Placket (Row 2 of the edging).
- Blocking: Gently block the garment, paying attention to flatten the collar and placket and smooth the short sleeves.
Your beautiful Aqua Breeze Textured Summer Sweater is now complete!


