
Hello, fellow makers!
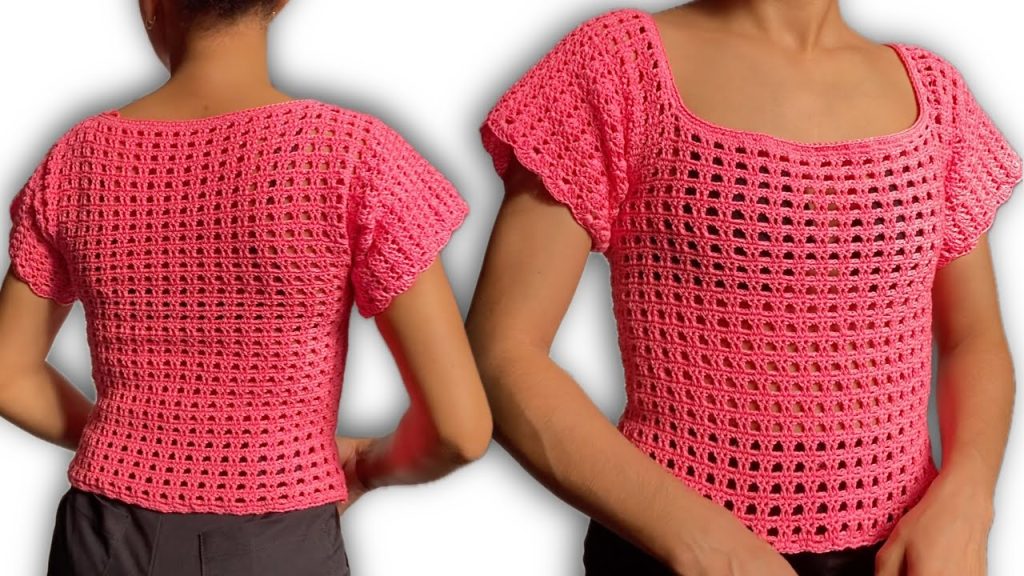
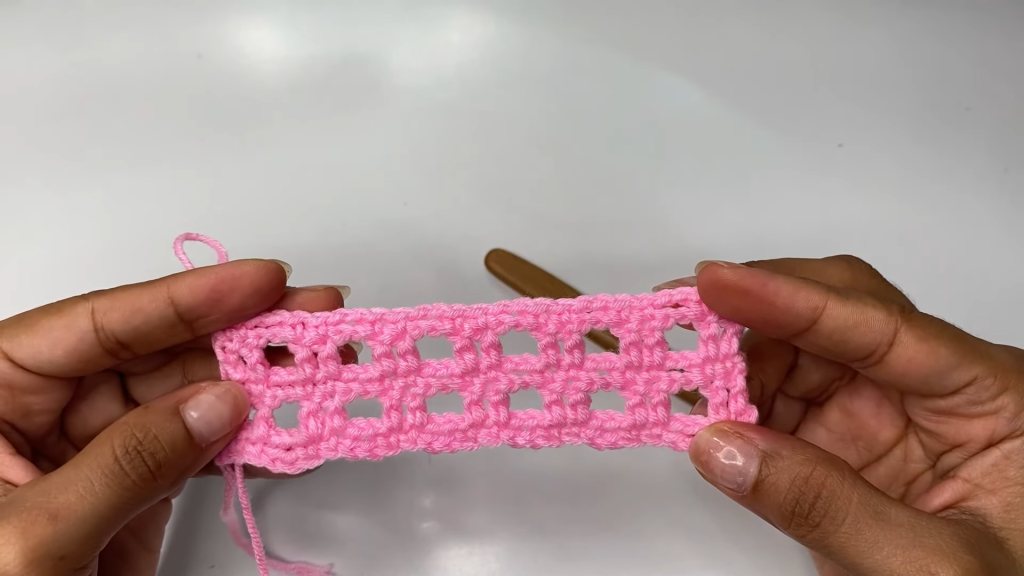
If you’ve been on the hunt for a stitch that is both incredibly fast to work up and utterly timeless in its appeal, you have found your match. The stitch we are diving into today—which I’ve named the Simple Basketweave Mesh—is an elegant openwork pattern defined by stacked blocks of stitches separated by a clean row of chains.
This simple design is perfect for lightweight garments, making it the ideal choice for summer blouses, breezy cardigans, or even market bags. It is a fantastic beginner-friendly project that focuses on mastering a simple two-row repeat, giving you maximum visual impact with minimum complexity.
Ready to create a piece that looks complex but feels like a relaxing rhythm? Let’s gather our supplies and begin this beautiful pattern!
🧶 Materials You Will Need
The simplicity of the stitch allows it to shine with almost any yarn, but for the best drape and definition, here is what I recommend:
- The Yarn:DK or Light Worsted Weight (Weight 3 or 4).
- Best for Garments: Mercerized Cotton or a Cotton/Bamboo Blend. These fibers are cool, breathable, and provide excellent stitch definition, ensuring your “windows” and “blocks” look crisp.
- For a Cozier Feel: A smooth acrylic or wool blend works well for a scarf or blanket, but ensure it’s not overly fuzzy, as that can obscure the mesh detail.
- The Hook: Size appropriate for your yarn (commonly 4.0mm to 5.0mm). Check your yarn label and select a hook that gives you a fabric that is slightly airy but not too floppy.
- Tools:
- Sharp scissors.
- Tapestry needle for weaving in ends.
- Stitch markers (helpful for marking the turning chain at the end of the rows).
📝 Abbreviations & Key Terms (US Terminology)
To ensure we are all working with the same language, here is a quick review of the terms used in this pattern:
- Ch: Chain
- St(s): Stitch(es)
- SC: Single Crochet (The low, sturdy stitch)
- DC: Double Crochet (The tall, height-giving stitch)
- Sk: Skip
- Ch-sp: Chain space (the empty gap created by the chains in the previous row)
- Rep: Repeat
📏 Pattern Notes and The Math
Getting your foundation chain correct is the key to perfectly symmetrical edges for this pattern.
- The Multiple: The stitch repeat is a Multiple of 4, plus 2.
- Chain Calculation: Ch a number that is divisible by 4 (e.g., 20, 40, 60), and then add 2 extra chains for the width.
- Turning Chain Logic:
- For Single Crochet Rows (Low Rows), we use Ch 1 (does not count as a stitch).
- For Double Crochet Rows (High Rows), we use Ch 3 (counts as the first DC).
- The Core Repeat: Once established, the pattern is just a repetition of Row 3 and Row 4.
🧵 Step-by-Step Instructions
Phase 1: Foundation and Setup
- Start: Chain your calculated length (Multiple of 4 + 2). Then, add 1 extra chain for the turning height.
- Row 1 (Foundation Row – All SC):
- Insert hook into the 2nd chain from the hook.
- Make 1 SC in that chain and in every chain across to the end.
- Stitch Count Check: The final count should be (Initial Chain) – 1.
- Row 2 (SC Mesh Setup): This row establishes the blocks and the first row of mesh windows.
- Ch 1 and turn.
- Make a SC in the very first stitch.
- Make a SC in the next stitch.
- The Repeat Begins: Ch 2, Sk 2 stitches on the row below.
- Make a SC in the next stitch.
- Make a SC in the stitch after that.
- Repeat the sequence [Ch 2, Sk 2, SC in next 2] all the way across.
- End: Finish the row with 2 SCs in the last two stitches.
- Row 3 (DC Mesh Setup): This row builds up the height using Double Crochets, stacking the solid blocks.
- Ch 3 and turn (this counts as your first DC).
- DC in the next SC stitch.
- The Repeat Begins: Ch 2, Sk the Ch-2 space below.
- DC in the next SC stitch.
- DC in the stitch after that.
- Repeat the sequence [Ch 2, Sk Ch-2 sp, DC in next 2] all the way across.
- End: Finish the row with 2 DCs in the last two SC stitches.

Phase 2: The Continuous 2-Row Repeat
From this point, you will repeat Row 4 and Row 5 until your desired length is reached.
- Row 4 (Repeat of SC Mesh): You are placing SC blocks over DC blocks.
- Ch 1 and turn.
- SC in the first DC stitch.
- SC in the next DC stitch.
- The Repeat Begins: Ch 2, Sk the Ch-2 space below.
- SC in the next DC stitch.
- SC in the stitch after that.
- Repeat the sequence [Ch 2, Sk Ch-2 sp, SC in next 2] across the row.
- The Critical Finish: Place the final SC in the top (3rd chain) of the turning Ch 3 from the previous row.
- Row 5 (Repeat of DC Mesh): You are placing DC blocks over SC blocks.
- Ch 3 and turn (counts as the first DC).
- DC in the next SC stitch.
- The Repeat Begins: Ch 2, Sk the Ch-2 space below.
- DC in the next SC stitch.
- DC in the stitch after that.
- Repeat the sequence [Ch 2, Sk Ch-2 sp, DC in next 2] across the row.
- End: Finish the row with a DC in the last SC stitch, and a DC in the starting Ch 1/SC combo from Row 4.
Continue repeating Row 4 and Row 5 for the rest of your project.
✨ Expert Tips and Troubleshooting
This pattern is easy, but achieving those crisp, professional edges requires attention to detail!
- The Turning Chain Trap:
- Always count your turning chains (Ch 3) as a stitch on the DC rows.
- Crucially, when working back across the row, you must work your final stitch into the third chain of that turning chain. Missing this step will cause your edges to dramatically slope inward. Use a stitch marker on the third chain to help you find it!
- Tension Control for the Mesh:
- Maintain consistent tension on your Ch 2 sections. If your chains are too tight, the fabric will pucker. If they are too loose, the “windows” will look uneven and sloppy. A moderate, relaxed tension works best.
- Visual Check (Reading Your Crochet):
- The pattern is self-correcting if you check every row. The solid stitches (SC or DC) must always land directly on top of the solid stitches from the row before. The Ch 2 spaces must always float directly above the Ch 2 spaces from the row before. If you notice a block of stitches landing over a chain space, you’ve made an error in skipping or placing a stitch.
- Blocking:
- While simple, this stitch benefits greatly from blocking. The combination of SC and DC can sometimes cause the fabric to draw up unevenly. Wet the finished piece, gently pin it out to its final shape, and let it dry. This will make the grid pattern crisp and straight.
Video Tutorial:
👗 Project Inspiration
The Simple Basketweave Mesh is highly versatile due to its balance of texture and airiness.
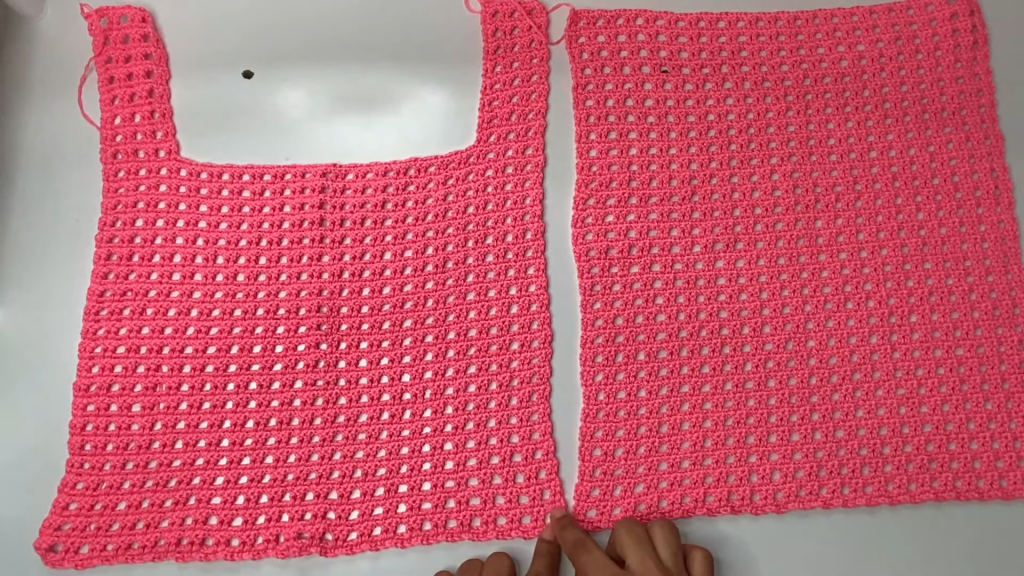
- The Effortless Blouse: Use a soft cotton yarn to create a simple front and back panel, then seam them together. The open structure is perfect for warm weather.
- Lightweight Scarf or Wrap: The straight lines make this a wonderful gender-neutral accessory. Use a self-striping yarn to let the mesh highlight the color changes.
- Reusable Market Bag: Use a durable, plied cotton and a hook slightly smaller than recommended. The mesh provides the necessary stretch for groceries while remaining sturdy.
- Baby Blanket: Use a soft acrylic or cotton yarn. The holes are small enough to be safe, and the fabric is wonderfully light for summer babies.
Happy stitching, and enjoy creating your beautiful, textured fabric!


