✨ Introduction: A Textured Twist on a Classic
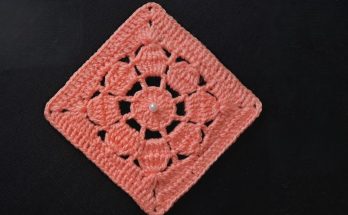
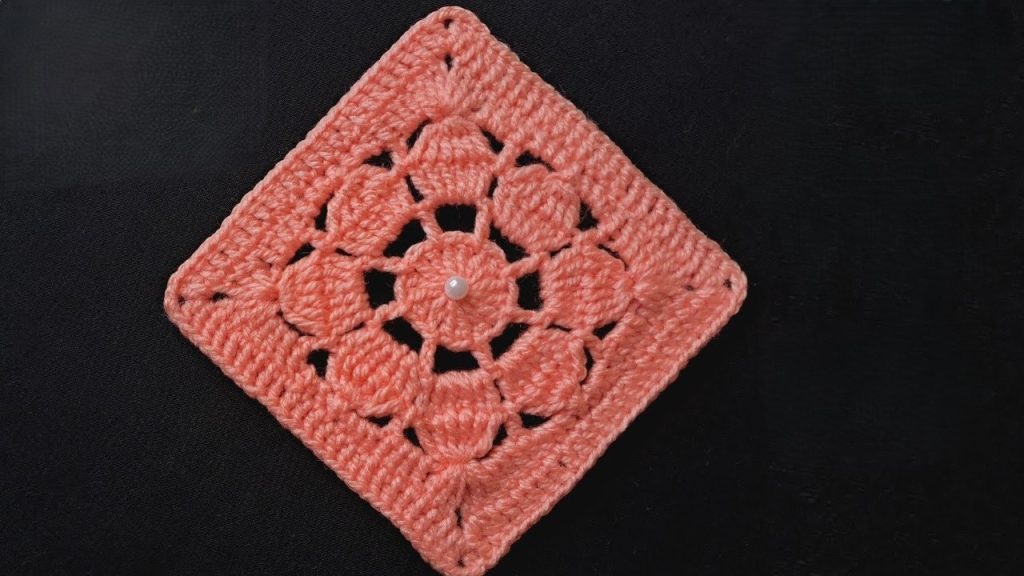
Welcome to the pattern for the gorgeous Starburst Shell Granny Square! This motif takes the simplicity of a classic Granny Square and elevates it with a rich, central texture, transitioning seamlessly into a sharp, solid square border. The result is a substantial, beautiful piece perfect for blankets, bags, and cozy wearables.
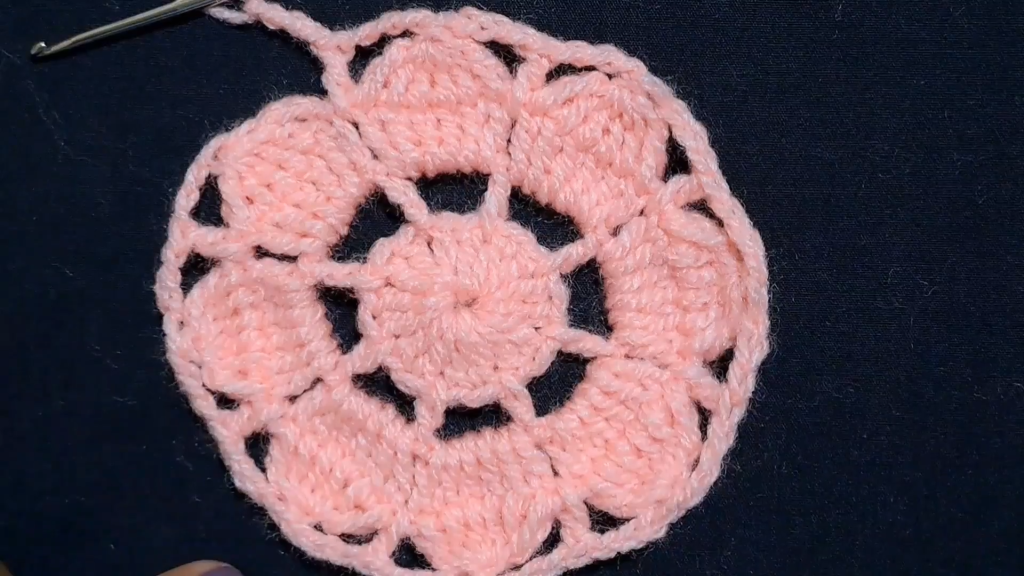
The core of this design is the contrast between the tight, dimensional Popcorn stitches and the wide, open shells, all squared off with clean Double Crochet blocks. It’s an engaging pattern that builds from a circle into a perfect square in just a few rounds.
Why You’ll Love This Motif
- Rich Texture: The combination of solid shells and Popcorn stitches creates a dynamic, high-relief center.
- Structural: The final solid rounds provide excellent stability for projects like handbags or cushion covers.
- Modular: Designed to be joined with other squares for blankets, throws, or garments.
- Engaging: The distinct rounds ensure you’re never bored, moving from round work to shell work, to texture, and finally to the square shaping.
Suggested Projects
| Project Type | Yarn Weight | Notes |
| Blankets & Throws | Worsted (4) or Bulky (5) | Use a soft acrylic or wool for a cozy feel. |
| Handbags or Totes | Cotton or Sturdy Worsted | The solid edges provide good structure. |
| Cushion Covers | Medium Weight | Highlights the central starburst texture beautifully. |
| Garments (Cardigans) | DK (3) or Light Worsted | Join multiple squares for the back or front panels. |
📌 Pattern Notes & Gauge
This pattern is worked in the round, starting with a circular motif and gradually increasing the stitch count to form the four corners of a square.
Stitch Multiple
The initial circular motif establishes 8 segments. This is converted into a square with 4 corners and 4 sides in Round 5.
Terminology
This pattern is written in U.S. Crochet Terms.
Gauge (Approximate)
Gauge is not critical, but for a medium-sized square using DK or Sport weight yarn (as in the video) and a 2.0 mm hook, the finished square should measure approximately 6 to 8 inches across after Round 7.
📚 Abbreviations & Special Stitches
| Abbreviation | Meaning |
| ch | Chain |
| st(s) | Stitch(es) |
| sl st | Slip Stitch |
| sc | Single Crochet |
| hdc | Half Double Crochet |
| dc | Double Crochet |
| sk | Skip |
| sp | Space |
| Beg | Beginning |
| Popcorn | Popcorn Stitch (See special instruction below) |
Special Stitch: Popcorn Stitch (6-DC Popcorn)
- Work 6 DC into the indicated stitch.
- Drop the loop from your hook.
- Insert your hook into the top of the first of the 6 DC stitches made.
- Pick up the dropped loop with your hook.
- Pull the dropped loop through the top of the first DC to join the stitches, cinching them into a “popcorn” shape.
🧶 Materials
- Yarn: Light to Medium weight yarn (Sport or DK Weight is ideal for detail). The video uses a 2-strand yarn.
- Hook: A hook size appropriate for your yarn. A 2.0 mm hook is recommended for the yarn shown, or use a 3.5 mm (E/4) hook for a common DK weight yarn.
- Tools: Scissors and a tapestry needle.
⭕ The Circular Center (Rounds 1-4)
Round 1: Foundation Ring
- Start: Make a magic ring (or Ch 4 and join with sl st to form a ring).
- Ch 3 (counts as first DC). Work 15 DC into the ring.
- Pull the tail tight to close the ring. Sl st to the top of the beg Ch 3 to join.
- (Stitch Count: 16 DC)
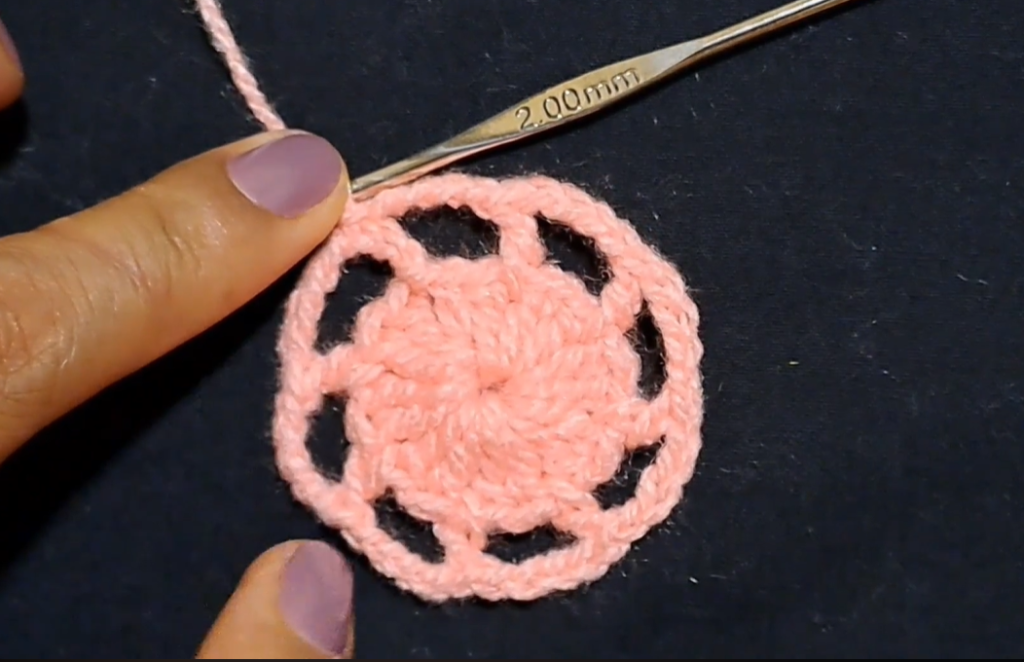
Round 2: The Spokes
- Sl st into the space between the first and second DC from R1.
- Ch 7 (counts as 1 DC and Ch 4).
- Sk 2 DC. Work 1 DC into the space between the third and fourth DC.
- Repeat: [Ch 4. Sk 2 DC. Work 1 DC into the space between the DCs.] Rep from * 6 more times. (You will have 8 DC spokes and 8 Ch-4 spaces).
- Join with sl st to the 3rd ch of the beg Ch 7.
- (Stitch Count: 8 DC, 8 Ch-4 spaces)
Round 3: Shells
- Sl st into the first Ch-4 space.
- Ch 3 (counts as 1 DC). Work 5 DC into the same Ch-4 space. (First 6-DC Shell).
- Repeat: Work 6 DC into every Ch-4 space around. (You will have 8 shells).
- Join with sl st to the top of the beg Ch 3.
- (Stitch Count: 48 DC total)
Round 4: Popcorn Texture

- Ch 3 (counts as first DC of the Popcorn). Work 5 incomplete DC into the next 5 DC stitches. Complete a 6-DC Popcorn.
- Ch 3.
- Work 1 DC into the space between the two 6-DC shells from R3.
- Ch 3.
- Repeat: [Work 1 Popcorn over the next 6 DC shell. Ch 3. Work 1 DC into the space between the two shells. Ch 3.] Rep from * 6 more times. (You will have 8 Popcorns and 8 single DCs).
- Join with sl st to the top of the first Popcorn.
- (Stitch Count: 8 Popcorns, 8 DC, 16 Ch-3 spaces)
◻️ Squaring the Circle (Rounds 5-7)
Round 5: Corner Foundation
The 8 motifs from R4 will be divided into 4 corners and 4 sides.
- Sl st into the first Ch-3 space.
- Corner 1: Ch 3 (counts as 1 DC). Work 2 DC, Ch 2, 3 DC into the same Ch-3 space.
- Side 1:
- Work 3 DC into the next Ch-3 space.
- Work 1 DC into the top of the single DC from R4.
- Work 3 DC into the next Ch-3 space.
- Corner 2: Work (3 DC, Ch 2, 3 DC) into the next Ch-3 space.
- Side 2:
- Work 3 DC into the next Ch-3 space.
- Work 1 DC into the top of the Popcorn stitch.
- Work 3 DC into the next Ch-3 space.
- Repeat: Continue the sequence of [Corner, Side 1, Corner, Side 2] 1 more time.
- Join with sl st to the top of the beg Ch 3.
- (You have now formed a 4-sided square with 4 corners and 4 sides.)
Round 6: The Transition Row
This row uses shorter stitches over the side motifs to balance the tension and prepares for the final solid border.
- Sl st to the corner Ch-2 space.
- Corner: Ch 3 (counts as 1 DC). Work 2 DC, Ch 2, 3 DC into the corner space.
- Work 1 DC into each of the next 7 DC stitches (the first half of the side).
- Transition: Work 1 HDC (or SC, depending on your preferred tension) into each of the next 7 stitches (over the previous round’s side motif).
- Work 1 DC into each of the next 7 DC stitches.
- Repeat: Work a Corner (3 DC, Ch 2, 3 DC) in the next corner space. Rep the side sequence: [7 DC, 7 HDC/SC, 7 DC] 3 more times.
- Join with sl st to the top of the beg Ch 3.
Round 7: Final Solid Border
This round locks in the square shape and provides a clean, solid edge.

- Sl st to the corner Ch-2 space.
- Corner: Ch 3 (counts as 1 DC). Work 1 DC, Ch 2, 2 DC into the corner space.
- Work 1 DC into every stitch along the side (including over the HDC/SC stitches from the previous round) until you reach the next corner space.
- Repeat: Work a Corner (2 DC, Ch 2, 2 DC) in the corner space. Work 1 DC into every stitch along the next side. Rep from * 2 more times.
- Join with sl st to the top of the beg Ch 3.
✂️ Finishing & Joining
Finishing
- Fasten off, leaving a 6-inch tail.
- Use a tapestry needle to weave the tail into the back of the stitches, securing the knot and hiding the tail.
- Weave in the starting center tail (pulling it tight to fully close the magic ring).
Video Tutorial:
Blocking is Recommended!
Due to the change from a circular to a square shape, blocking is essential to ensure a flat, perfect square ready for joining.
- Dampen: Wet the finished square completely (or use a steamer).
- Shape: Pin the square to a flat, padded surface, pulling gently but firmly on the 4 corners to establish a sharp 90-degree angle.
- Dry: Allow the square to dry completely before unpinning.
Enjoy your beautifully textured and solid Starburst Shell Granny Square!