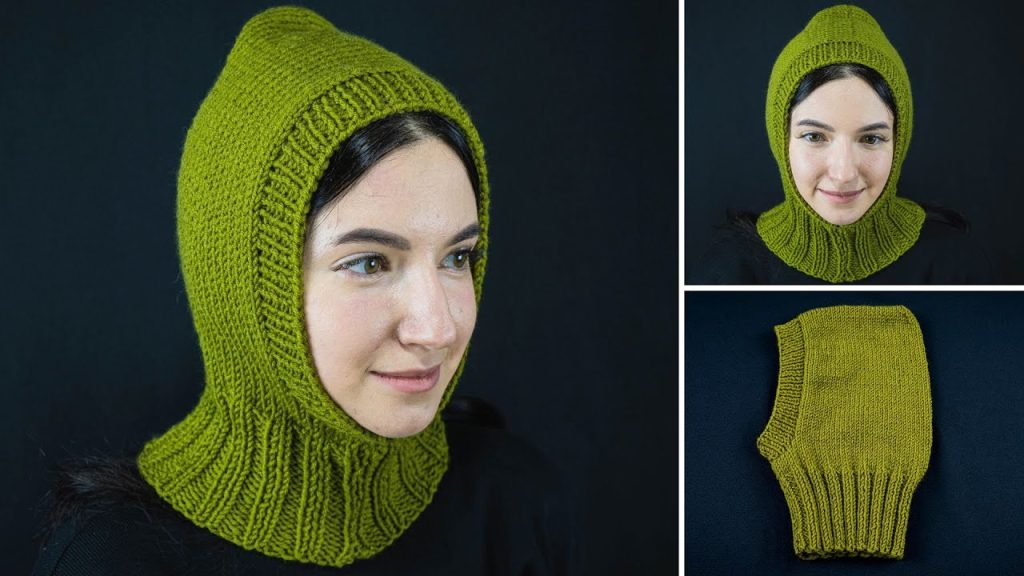
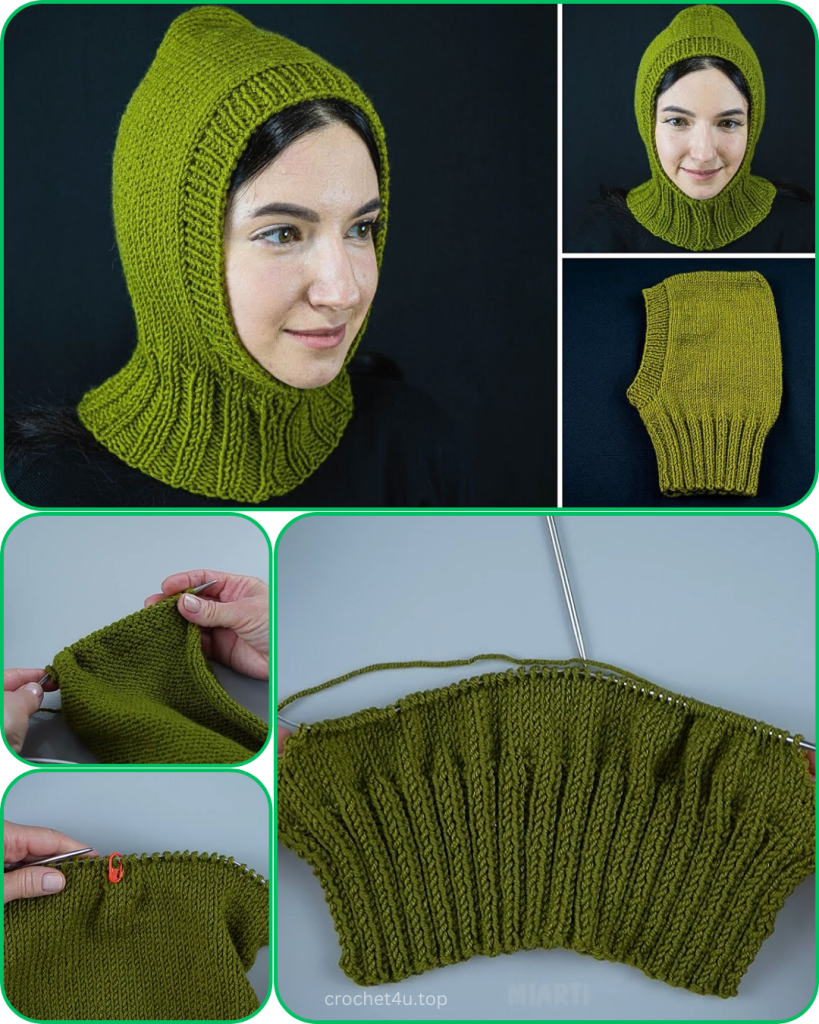
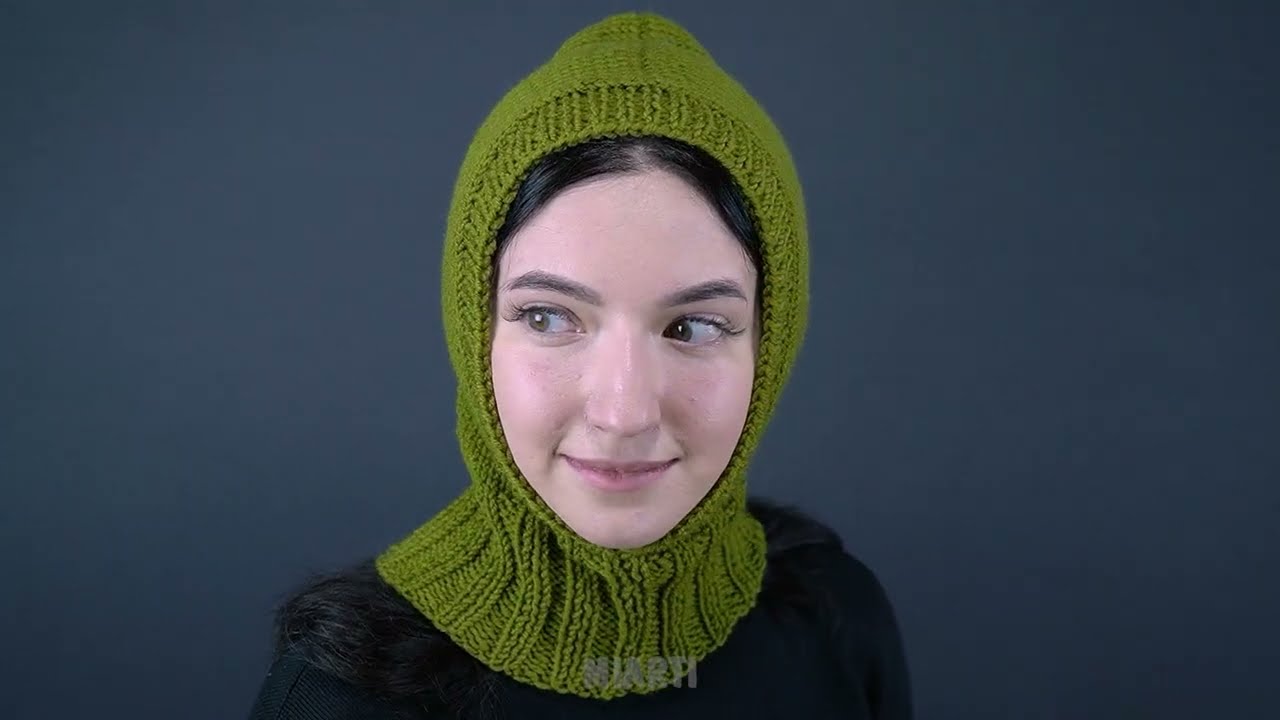
The balaclava is a timeless winter accessory, and for good reason! It’s the ultimate combination of a hat, scarf, and neck warmer, providing complete protection from the cold. This pattern creates a classic balaclava with a stretchy ribbed brim for a snug fit and a clean stockinette stitch body for a smooth, stylish look. It’s perfect for a wide range of skill levels, from confident beginners to experienced knitters.
Materials
- Worsted-weight yarn (Category 4): Approximately 150-200 yards. I recommend a soft, warm wool or a wool blend for this project. The yarn in the image appears to be a natural wool in a classic off-white shade.
- Knitting needles:
- One 16-inch circular needle in US size 6 (4.0 mm) for the ribbing.
- One 16-inch circular needle in US size 8 (5.0 mm) for the body of the hat.
- A set of US size 8 (5.0 mm) double-pointed needles (DPNs) or a longer circular needle for the magic loop method, for the crown decreases.
- Stitch marker: For marking the beginning of each round.
- Tapestry needle: For weaving in ends and seaming.
Gauge
Before you begin, knit a gauge swatch to ensure your finished balaclava fits correctly.
- In stockinette stitch (knit one row, purl one row) using the larger needles (US 8 / 5.0 mm): 4.5 stitches and 6 rows should measure 1 inch by 1 inch.
If your swatch is too small, try using a larger needle size. If it’s too big, go down a needle size.
Pattern Notes
- This pattern is worked in the round from the bottom up.
- The brim and neck are worked in a 2×2 rib stitch for a stretchy and comfortable fit.
- The body of the balaclava is worked in a simple stockinette stitch.
- This pattern is written for an average adult size (fits a head circumference of approximately 21-23 inches), with notes on how to adjust.
Balaclava Construction
Part 1: The Neck and Bottom Ribbing
Using your smaller circular needles (US 6 / 4.0 mm), cast on 88 stitches using a stretchy cast-on method like the Long-Tail Cast-On. Place a stitch marker and join to knit in the round, being careful not to twist your stitches.
- Rounds 1-20: *Knit 2, Purl 2.* Repeat from * to * around.
Note: For a longer neck, continue knitting in this rib pattern for more rounds. For a shorter neck, stop after 10-15 rounds.
Part 2: The Main Body
Switch to your larger circular needles (US 8 / 5.0 mm).
- Round 21: Knit all stitches around.
- Rounds 22-25: Knit all stitches around.
You should now have a smooth stockinette fabric forming. Try the piece on to check the fit. It should feel comfortable around your neck and shoulders.
- Round 26: Knit all stitches around.
Continue knitting in stockinette stitch until your piece measures approximately 9 inches from the cast-on edge. For a custom fit, continue knitting until the fabric reaches the top of your ears.
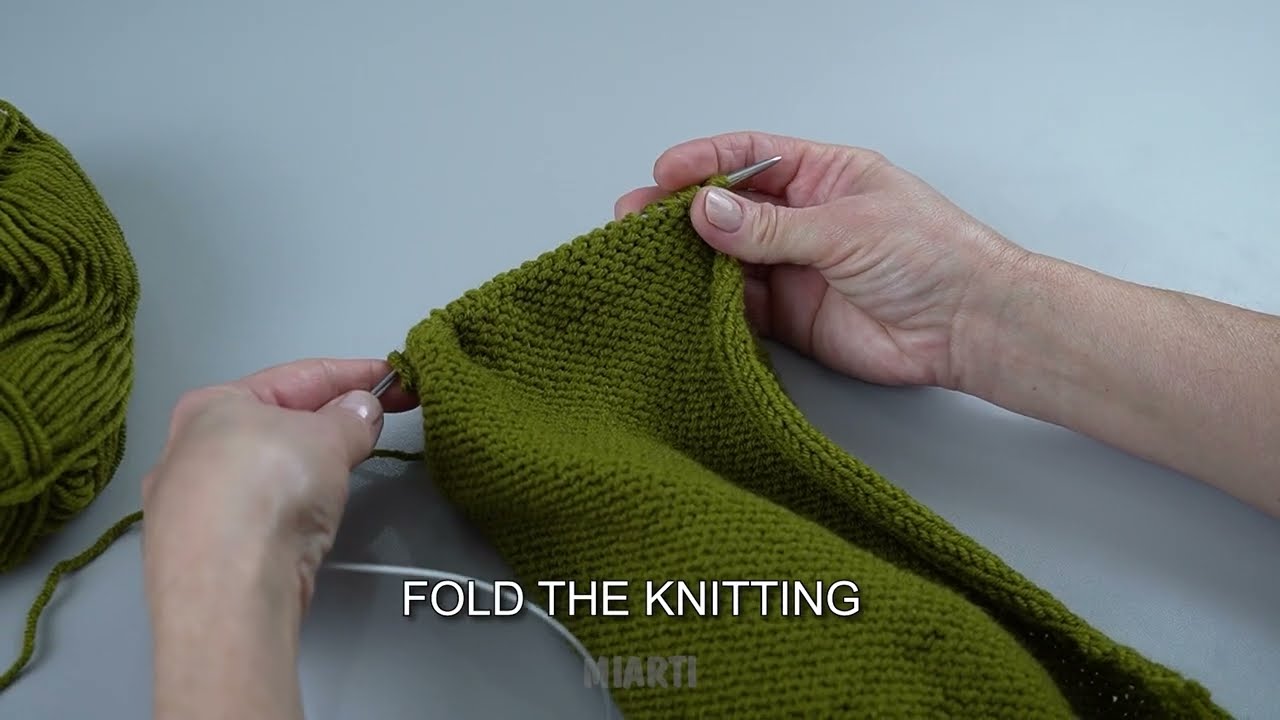
Part 3: Creating the Face Opening
Now we will work back and forth in rows to create the opening for the face.
- Row 1 (Right Side): Knit the first 44 stitches. Turn your work.
- Row 2 (Wrong Side): Purl all 44 stitches. Turn your work.
- Row 3: Knit all 44 stitches. Turn your work.
Continue knitting in stockinette stitch (knitting the right-side rows, purling the wrong-side rows) on these 44 stitches only. Work for approximately 5-6 inches, or until the opening is long enough to cover your forehead and chin comfortably, leaving an opening for your face.
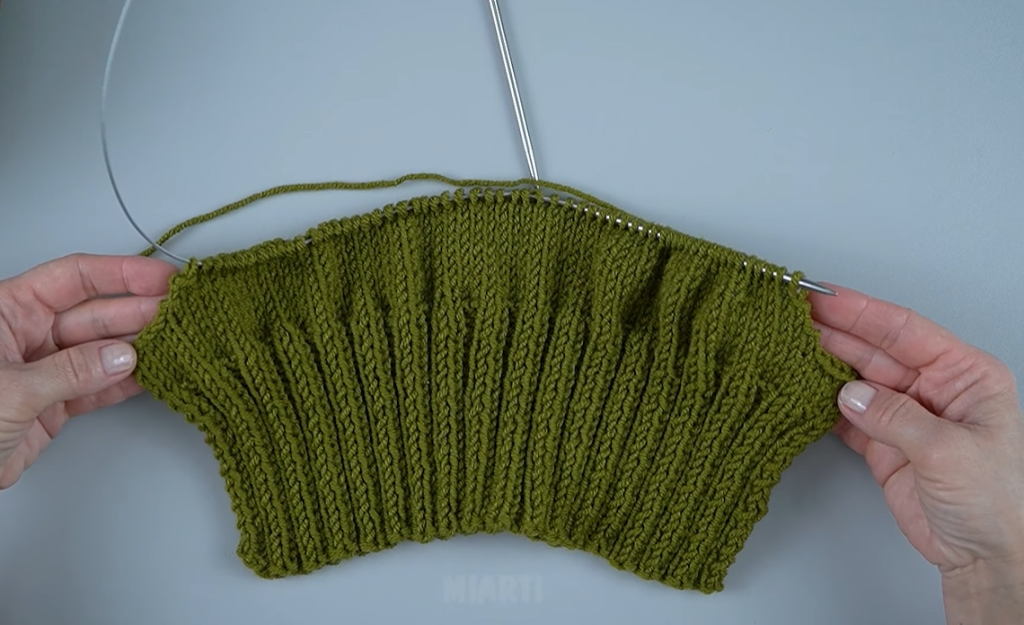
Part 4: Rejoining and Shaping the Top of the Head
Now, we will rejoin the knitting in the round.
- Next Round (Right Side): Continue knitting the 44 stitches you just worked on. When you reach the end, pick up and knit 20 stitches along the side edge of the opening. Knit across the remaining 44 stitches. Then, pick up and knit 20 stitches along the other side of the opening. Place a new stitch marker and join to knit in the round. (Total stitches should be 128: 44 + 20 + 44 + 20).
- Next 2 Rounds: Knit all stitches around.
Part 5: Decreasing the Crown
Now it’s time to shape the top of the balaclava. You can switch to DPNs or use the magic loop method as the number of stitches decreases.
- Round 1: *Knit 14, Knit 2 Together (K2tog).* Repeat from * to * around. (120 stitches)
- Round 2: Knit all stitches around.
- Round 3: *Knit 13, K2tog.* Repeat from * to * around. (112 stitches)
- Round 4: Knit all stitches around.
- Round 5: *Knit 12, K2tog.* Repeat from * to * around. (104 stitches)
- Round 6: Knit all stitches around.
Continue decreasing in this manner, knitting one fewer stitch between each K2tog decrease round, with a plain knit round in between, until you are left with approximately 12 stitches.
Video Tutorial:
Finishing
- Cut the yarn, leaving a long tail (about 10 inches).
- Thread the tail onto a tapestry needle.
- Weave the needle through the remaining stitches, pulling them tight to cinch the top of the balaclava closed.
- Knot the yarn securely on the inside of the hat and weave in all remaining ends.
Enjoy your warm, classic, and beautifully handmade balaclava!