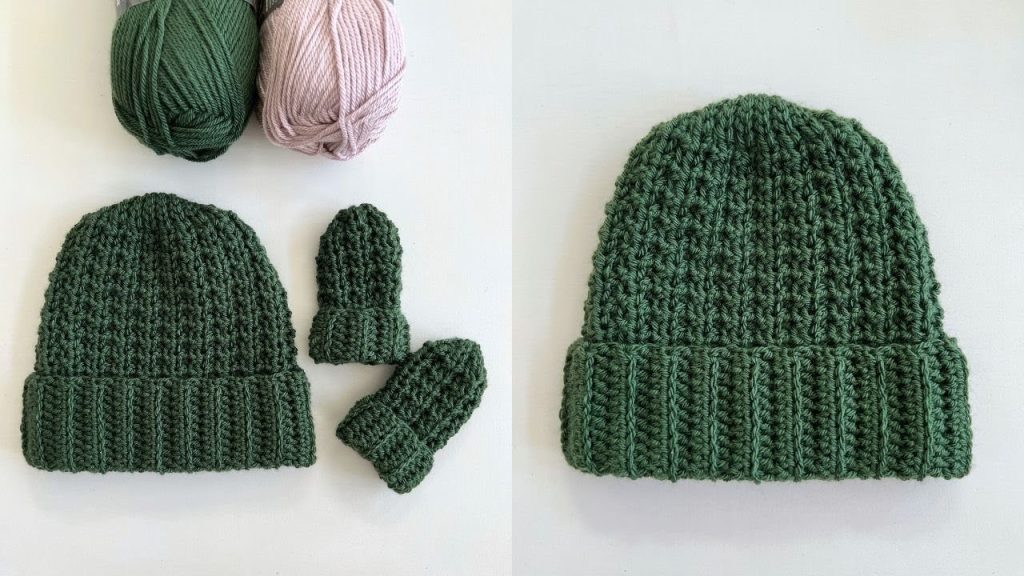
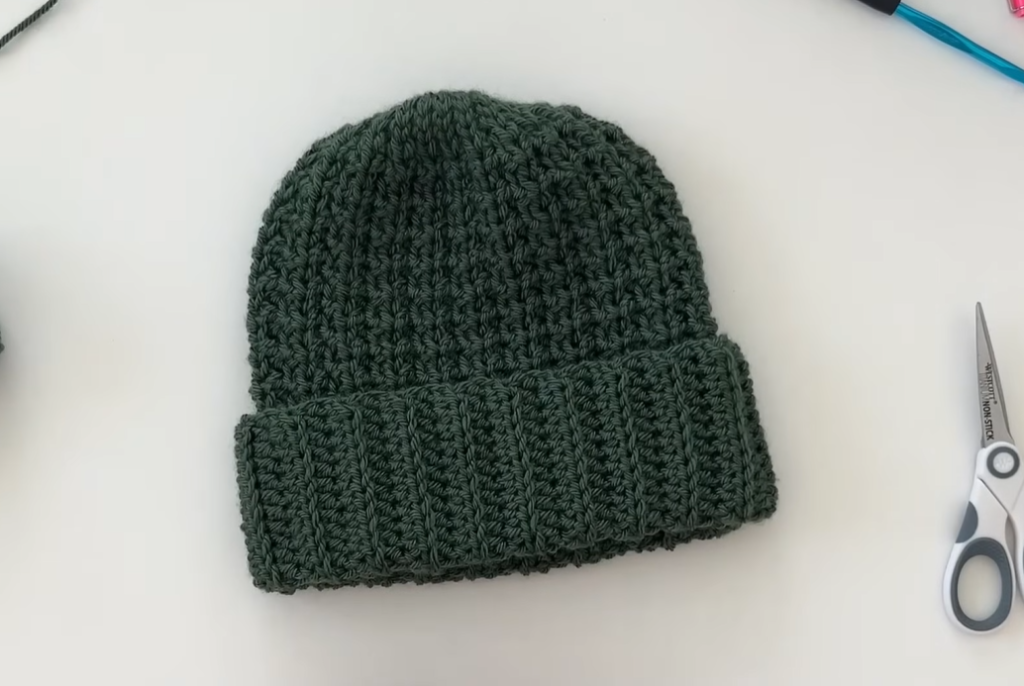
Embrace rugged elegance with The Forest Canopy Ribbed Beanie! This classic, unisex design features a textured crown worked in a simple alternating stitch for warmth and stability, seamlessly transitioning into a deep, stretchy cuff created with HDC-BLO ribbing. The result is a substantial, warm hat with a timeless style, perfect for outdoor adventures or everyday wear.
This detailed pattern is written for the Adult Medium size (Head Circumference: 21–23 inches) and is suited for the Intermediate crocheter due to the texture stitch and the joined ribbing technique.
Materials Needed 🧶
- Yarn: Approximately 250-300 yards of Worsted Weight (Aran / #4) or Light Bulky yarn. A soft, slightly rustic wool or acrylic blend will enhance the texture.
- Main Color (MC): Forest Green/Deep Hunter Green (Solid)
- Crochet Hook: 6.0 mm (US J-10), or the size needed to obtain gauge.
- Tapestry Needle: For seaming and weaving in ends.
- Scissors.
- Stitch Marker: To mark the beginning of rounds.
Skill Level & Notes 💡
- Skill Level: Intermediate. Requires working in the round, maintaining a simple repeating stitch pattern, and executing the short-row ribbing that is joined to the main body.
- Construction: The crown and body are worked top-down in the round. The brim is worked sideways in short rows and slip-stitched directly onto the hat body.
- Texture Stitch: The crown uses an alternating sequence of HDC and SC to create a subtle, dense texture.
- Chains: The starting chain (ch 2) at the beginning of rounds always counts as the first HDC unless noted otherwise.
Gauge 📏
In HDC/SC Alternating Stitch (measured after Round 8, before body rounds) using a 6.0 mm hook: Crown Diameter = 6.5 inches (16.5 cm). 12 sts and 8 rows = 4 inches (10 cm) square.
Abbreviations 📚
| Abbreviation | Description |
| ch | chain |
| sl st | slip stitch |
| sc | single crochet |
| hdc | half double crochet |
| st(s) | stitch(es) |
| rep | repeat |
| BLO | Back Loop Only |
| HDC-BLO | Half Double Crochet Back Loop Only |
Export to Sheets
Special Stitches ✨
HDC/SC Alternating Stitch (Crown Texture)
- Simply work (1 hdc, 1 sc) in alternating sequence around the round.
HDC-BLO (Ribbing)
- HDC-BLO: Half Double Crochet worked into the Back Loop Only of the stitch from the previous row.
Part 1: The Crown (Textured Rounds) 👑
Round 1 (Foundation): Make a magic ring. Ch 2 (counts as hdc). Work (sc, hdc) 6 times into the ring. Sl st to the top of the beg ch-2 to join. (13 sts)
Round 2 (Increase): Ch 2. Sc in the same st. [Hdc, sc] in the next st. [2 hdc in the next st, 2 sc in the next st] rep 5 times. Hdc in the last st. Sl st to join. (25 sts)
- Note: The alternating HDC/SC should line up naturally as you increase.
Round 3 (Increase): Ch 2. Sc in the next st. [Hdc in the next st, 2 sc in the next st] rep around. Sl st to join. (37 sts)
Round 4 (Increase): Ch 2. Sc in the next st. [Hdc in the next st, sc in the next st, 2 hdc in the next st] rep around. Sl st to join. (49 sts)
Round 5 (Increase): Ch 2. Sc in the next st. [Hdc in the next 2 sts, 2 sc in the next st] rep around. Sl st to join. (61 sts)
Round 6 (Increase): Ch 2. Sc in the next st. [Hdc in the next 3 sts, 2 sc in the next st] rep around. Sl st to join. (73 sts)
Round 7 (Increase): Ch 2. Sc in the next st. [Hdc in the next 4 sts, 2 sc in the next st] rep around. Sl st to join. (85 sts)
Round 8 (No Increase): Ch 2. Sc in the next st. [Hdc in the next st, sc in the next st] rep around. Sl st to join. (85 sts)
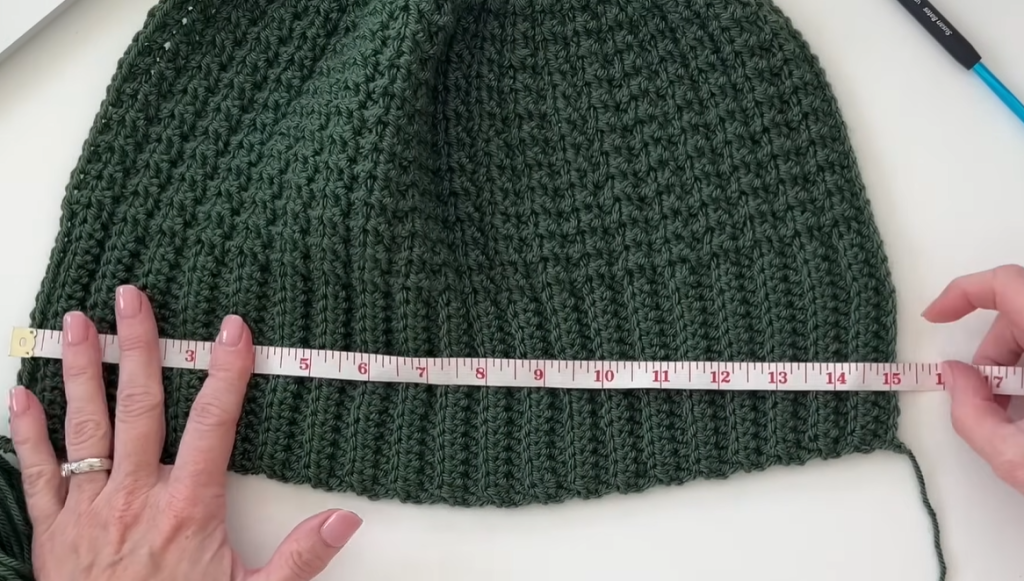
- Crown Diameter check: Should measure approx. 6.5 inches across.
Part 2: The Body (Straight Rounds) ◼️
Rounds 9-18: Ch 2. Continue the HDC/SC Alternating Stitch pattern (HDC over the previous HDC, SC over the previous SC) around. Sl st to join. (85 sts)
- Work until the hat measures approximately 6 inches from the crown to the last row (where the brim will attach). Do not fasten off.
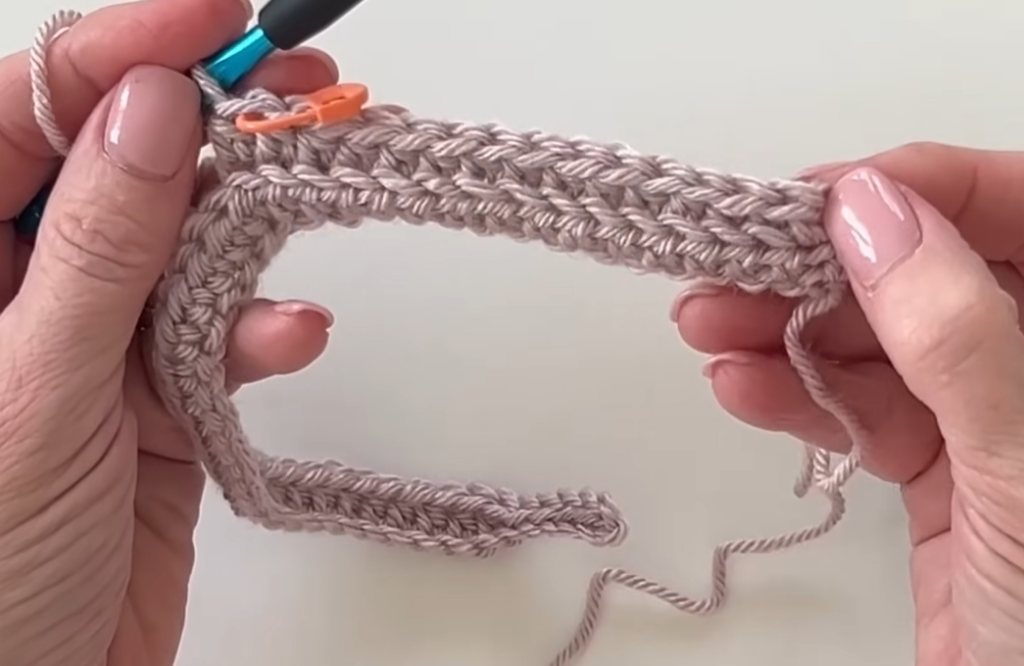
Part 3: The Ribbed Brim (HDC-BLO) 👒
The brim is worked in rows, perpendicularly to the hat body, and joined to the hat as you go.
- Brim Foundation: Ch 16 (This determines the width/fold length of the brim). Hdc in the 2nd ch from hook and in each ch across. (15 hdc)
- Row 1 (Joining): Hdc in the BLO of the first 14 sts. Sl st in the last hdc. Sl st into the next unworked stitch on the hat body to join.
- Row 2 (Working Away): Ch 1, turn. Skipping the two sl sts just made, hdc in the BLO of each st across. (15 hdc)
- Row 3 (Working Back & Joining): Ch 2 (counts as hdc), turn. Hdc in the BLO of each st across. Sl st into the next unworked stitch on the hat body to join.
- Repeat: Repeat Rows 2 and 3 until you have worked your way around the entire bottom edge of the hat. You should have 85 rows total for the brim.
- Final Brim Seam: Sl st the first row of the brim to the last row of the brim (through the back loops of the last row and the starting chain loops of the first row). Fasten off.
Video Tutorial:
Finishing and Final Touches 🫧
- Weave in all remaining ends securely on the inside of the hat.
- Blocking: Gently steam or wet block the hat. Blocking is essential to ensure the body drapes well and the HDC-BLO ribbing achieves its full stretch and definition.
- Cuff Formation: Fold the ribbed brim up neatly to the desired height (approx. 2.5–3 inches).
Your cozy and durable Forest Canopy Ribbed Beanie is now ready!