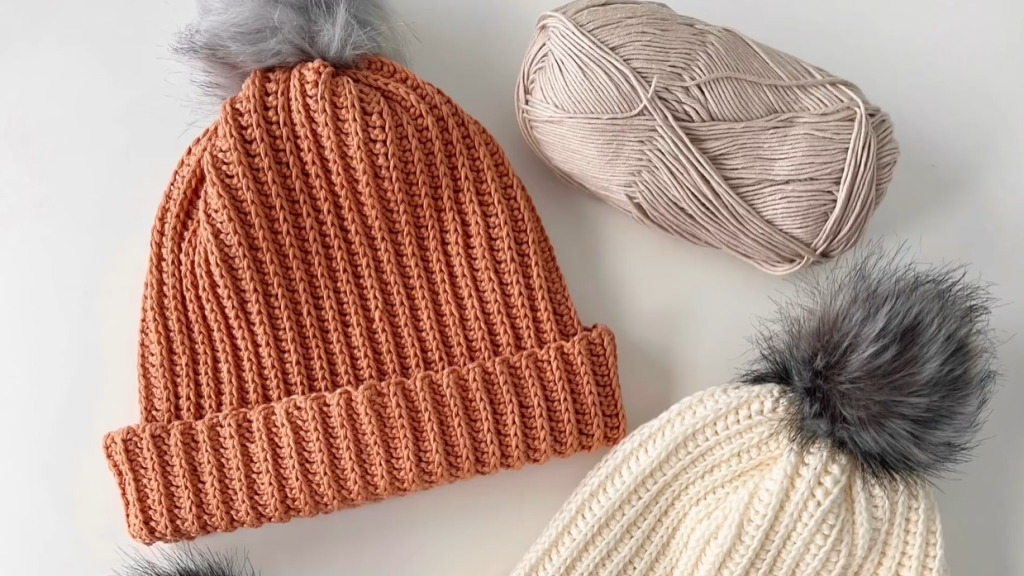
Meet your new favorite cold-weather accessory: The Autumn Sunset Ribbed Pom Beanie! This hat is a modern classic, featuring a rich, textural ribbing that mimics knitting, created entirely with the Half Double Crochet in the Back Loop Only (HDC-BLO) stitch. The construction is simple—a single flat rectangle—making it incredibly stretchy, comfortable, and a fast project for any crocheter. Top it off with a fluffy faux fur pom for a perfect finish!
This detailed pattern is written for the Adult Medium/Large size (Head Circumference: 22–24 inches) and is suitable for the Easy-Intermediate crocheter.
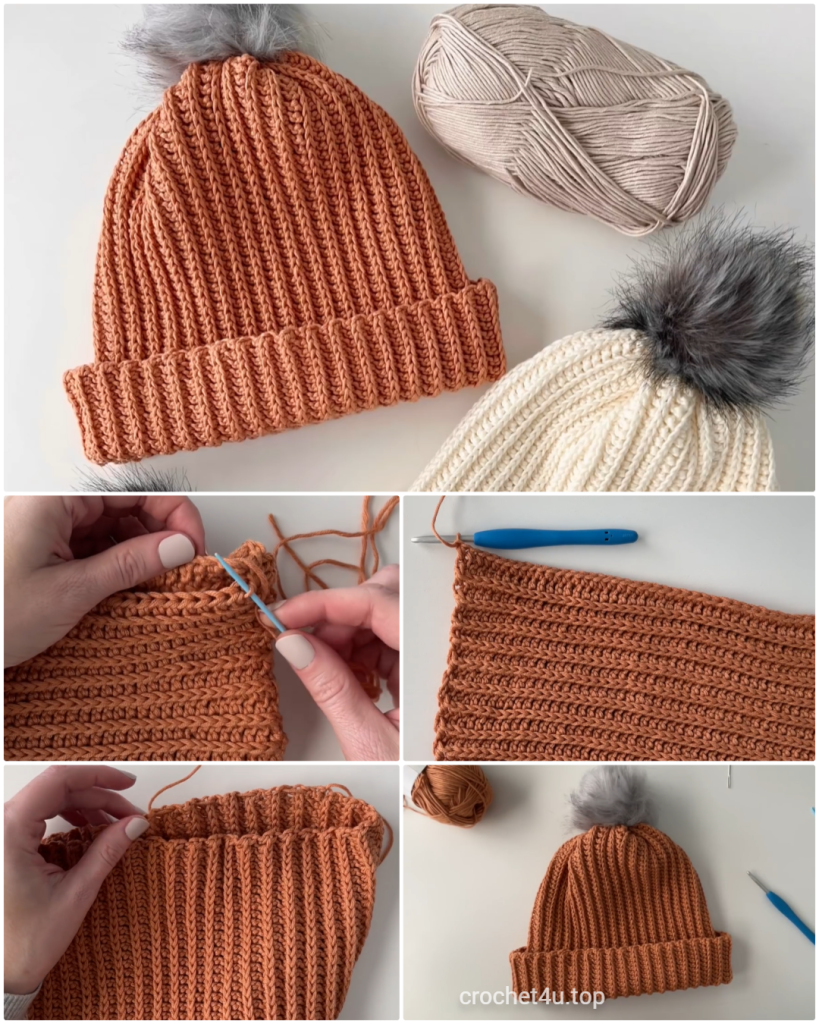
Materials Needed 🧶
- Yarn: Approximately 200-250 yards of Worsted Weight (Aran / #4) yarn. A soft acrylic or wool blend is recommended for optimal stretch and comfort.
- Main Color (MC): Rust Orange/Terra Cotta (Solid)
- Crochet Hook: 5.5 mm (US I-9), or the size needed to obtain gauge.
- Tapestry Needle: For seaming and cinching the crown.
- Faux Fur Pom-Pom (Optional): One large pom-pom (gray/silver is recommended, as shown).
- Scissors.
Skill Level & Notes 💡
- Skill Level: Easy/Intermediate. Relies on a single repeating stitch (HDC-BLO). Requires accurate counting for the decrease rows and a clean seam.
- Construction: The hat is worked flat in rows (rows run from brim to crown) to create the vertical ribbing. It is then seamed into a tube, and the crown is cinched closed.
- Sizing: The initial chain determines the height (including the folded cuff). The number of rows determines the circumference.
Gauge 📏
In Half Double Crochet in the Back Loop Only (HDC-BLO) using a 5.5 mm hook: 14 HDC-BLO rows (measured horizontally) and 10 HDC sts (measured vertically) = 4 inches (10 cm) square.
- The finished rectangle should measure approximately 20–21 inches long by 10.5 inches high before seaming.
Abbreviations 📚
| Abbreviation | Description |
| ch | chain |
| sl st | slip stitch |
| sc | single crochet |
| hdc | half double crochet |
| st(s) | stitch(es) |
| rep | repeat |
| BLO | Back Loop Only |
| HDC-BLO | Half Double Crochet Back Loop Only |
Special Stitches ✨
HDC-BLO (Ribbing)
This creates the vertical ribbing and stretch:
- HDC-BLO: Half Double Crochet worked into the Back Loop Only of the stitch from the previous row.
HDC2TOG-BLO (Decrease)
Used for crown shaping:
- HDC2TOG-BLO: Yarn over, insert hook into the BLO of the next st, yarn over, pull up a loop (3 loops on hook). Insert hook into the BLO of the next st, yarn over, pull up a loop (5 loops on hook). Yarn over, pull through all 5 loops on the hook.
Part 1: The Ribbed Rectangle (HDC-BLO) ◼️
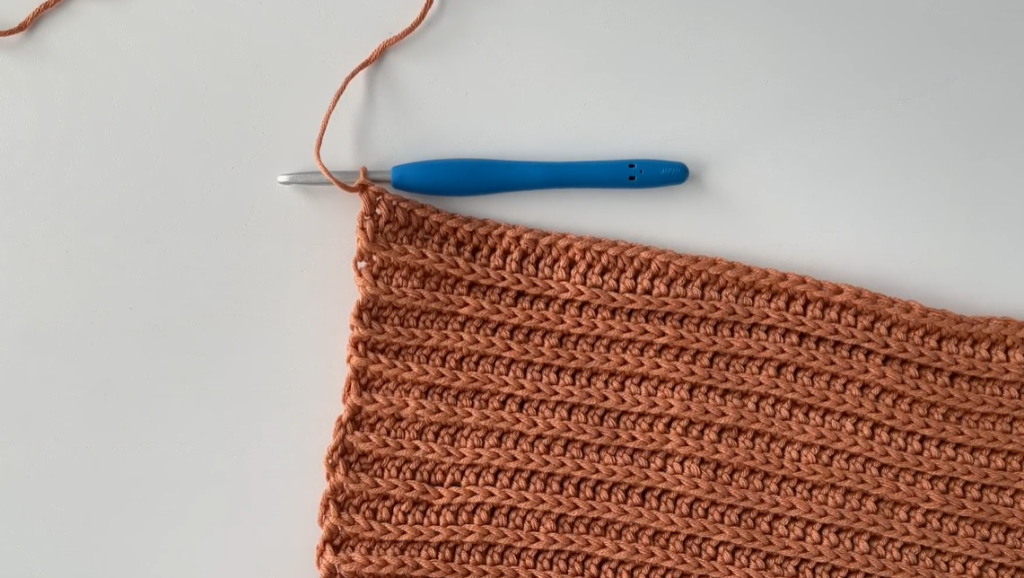
The height of the chain below includes the length needed for a generous fold-up cuff.
Row 1 (Foundation/Height): Ch 41. Hdc in the 2nd ch from hook and in each ch across. (40 hdc)
Row 2 (Ribbing): Ch 1, turn. Hdc in the BLO of each st across. (40 hdc)
Rows 3-64 (or until desired width): Repeat Row 2 until the piece measures approximately 20–21 inches long, when slightly stretched. This length should allow for a comfortable fit on an average adult head.
Part 2: Crown Shaping (Decreases) 👑
These rows gradually taper the top edge to allow the crown to cinch neatly. The bottom 8–10 stitches (the brim) will remain full-height.

Marker Placement: Place a stitch marker in the 10th stitch from the bottom edge (the brim edge). All decreases will happen above this marker.
Row 65 (Decrease Row 1): Ch 1, turn. Work HDC-BLO in the first 10 sts (brim section). HDC-BLO in the next 15 sts. Work HDC2TOG-BLO across the remaining stitches until 1 stitch remains. HDC-BLO in the last st. (34 sts)
Row 66 (No Decrease): Ch 1, turn. Hdc in the BLO of each st across. (34 hdc)
Row 67 (Decrease Row 2): Ch 1, turn. Work HDC-BLO in the first 10 sts (brim section). HDC-BLO in the next 10 sts. Work HDC2TOG-BLO across the remaining stitches until 1 stitch remains. HDC-BLO in the last st. (28 sts)
Row 68 (No Decrease): Ch 1, turn. Hdc in the BLO of each st across. (28 hdc)
Row 69 (Final Decrease): Ch 1, turn. Work HDC-BLO in the first 10 sts (brim section). Work HDC2TOG-BLO across the remaining stitches until 1 stitch remains. HDC-BLO in the last st. (19 sts)
Row 70 (Final Row): Ch 1, turn. Hdc in the BLO of each st across. (19 hdc). Do not fasten off.

Part 3: Assembly & Seaming 🧵
- Seam the Side: Keeping the working yarn attached, fold the rectangle in half so Row 1 (Foundation) edge meets Row 70 edge. Ch 1. Work a slip stitch seam by inserting the hook through the back loop of the working row (Row 70) and the starting chain loop of the foundation row (Row 1). Sl st all the way up the side to the crown edge. Fasten off, leaving a very long tail (approx. 24 inches) for cinching.
- Cinch the Crown: Thread the long tail onto your tapestry needle. Working only through the outermost loops of the final row (Row 70), weave the needle in and out around the entire top opening of the crown.
- Secure the Crown: Pull the yarn tail tightly to cinch the top hole closed. Stitch across the gathered center several times to secure the closure and flatten the top. Securely knot the yarn and weave in the remaining end.
Video Tutorial:
Finishing and Final Touches 🫧
- Cuff Formation: Fold the bottom ribbed edge of the hat up to form a wide cuff (approx. 3.5 inches).
- Weave in all remaining yarn tails securely.
- Attach Pom-Pom (Optional): Using the yarn or ties provided with the faux fur pom-pom, securely attach it to the center of the cinched crown.
- Blocking: Gently steam block the beanie to relax the ribbing and help the HDC-BLO fabric achieve maximum stretch. Allow it to dry completely.
Your beautifully textured Autumn Sunset Ribbed Pom Beanie is complete!

