
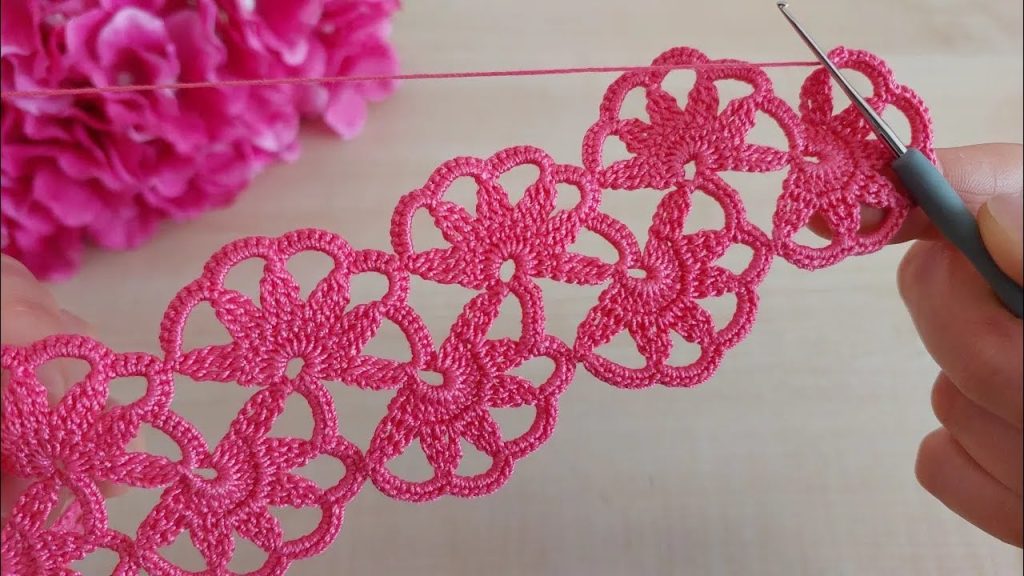
Welcome, fellow crafters! Have you ever wanted to add a touch of delicate elegance to a project? This pattern, which I’ve named the Blossom Chain Lace Trim, is the perfect way to do just that. It creates a stunning, continuous band of interconnected floral motifs that can be used for so many things: as an edging for a blanket or pillowcase, a decorative bookmark, a beautiful headband, or even as a unique necklace or bracelet.
The magic of this design lies in its “join-as-you-go” technique. You create each new flower motif and connect it to the previous one as you work, resulting in a seamless and enchanting piece. This project is suited for intermediate crocheters who are comfortable with counting stitches and working with delicate yarn.
Materials
- Yarn: Fine or fingering weight cotton yarn or crochet thread. The finer the thread, the more delicate the lace will be.
- Hook: A crochet hook appropriate for your yarn weight. For fingering weight yarn, a 1.5 mm to 2.25 mm hook works well. For thread, you may need a smaller hook, such as a 1.25 mm or even a 1.0 mm.
- Scissors
- Tapestry Needle for weaving in ends.
Special Stitches
- Picot: Chain 3, then slip stitch into the first chain. This creates a small decorative loop.
- Petal Cluster (PCl): This is a small group of stitches worked together. (Yarn over, insert hook into the specified space, yarn over, pull up a loop, yarn over, pull through 2 loops) 3 times in the same space. You will have 4 loops on your hook. Yarn over, pull through all 4 loops.
- Chain-3 space (ch-3 sp): The space created by a chain-3 from the previous round.
- Beginning Chain-3 space (Bch-3 sp): The chain-3 space at the beginning of the previous round.
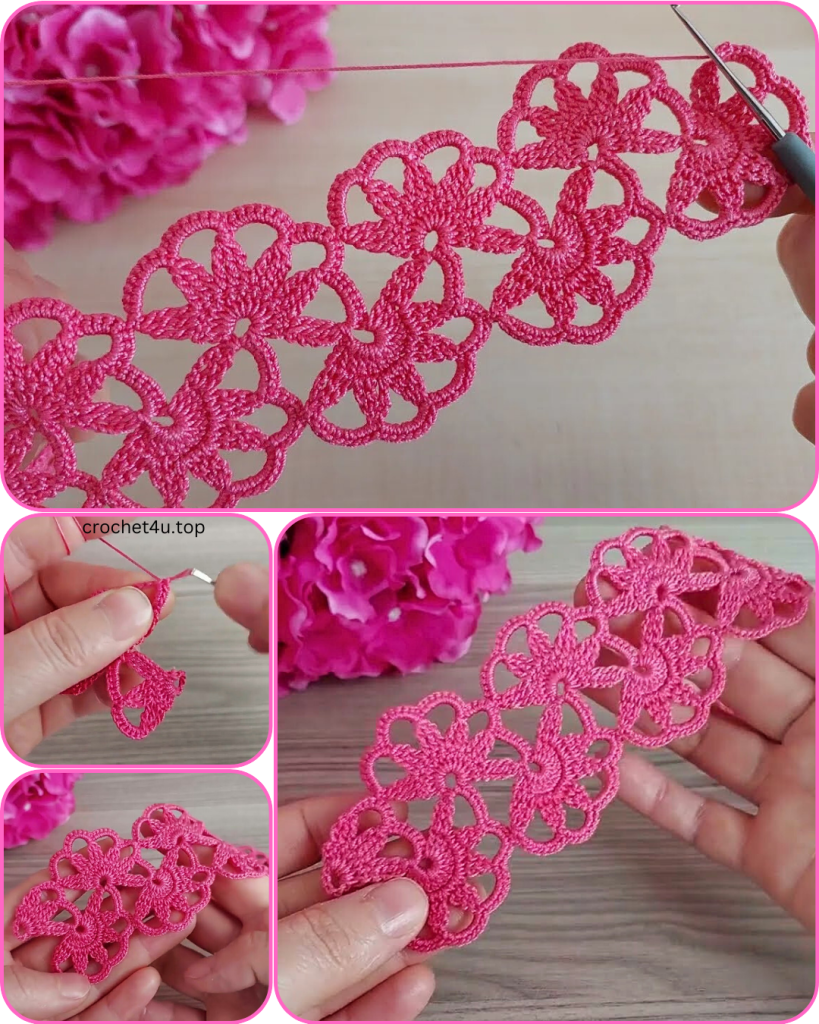
Part 1: The First Motif
This section will guide you through creating the first complete floral unit.

Round 1: The Center Make a magic ring. Chain 1 (does not count as a stitch), then make 12 single crochet (sc) in the ring. Join with a slip stitch (sl st) to the first sc. (12 sc)
Round 2: The Inner Petals Chain 3, skip the next sc, sc in the next sc. Repeat from * to * 5 more times. You will have 6 chain-3 spaces. Join with a sl st to the base of the beginning ch-3.
Round 3: The Outer Petals and Picots Slip stitch into the first ch-3 space. (Ch 3, 3 dc, ch 3) in the same ch-3 space. Slip stitch into the next sc. Repeat from * to * 5 more times. You will have 6 full petals. Join with a sl st to the base of the first petal.
Round 4: The Connecting Arches Chain 5, sc in the center of the next petal (in the ch-3 sp). Repeat from * to * 5 more times. Join with a sl st to the base of the beginning ch-5.
Round 5: The Final Edge In the first ch-5 space, make 5 sc. Make a Picot. Make 5 sc in the same space. Slip stitch into the next sc. Repeat from * to * around. Join with a sl st to the first sc.
Fasten off and weave in all ends securely. You have completed your first motif!
Part 2: Joining Motifs (The Repeat)
This is the most detailed part of the pattern, where you will create a new motif and join it to the previous one. We will be joining at the start of Round 4 of the new motif.

Step 1: Create the Inner Section (Same as the first motif) Complete Rounds 1 through 3 exactly as you did for the first motif.
Step 2: Begin the Connecting Arches (Round 4 of new motif) Chain 5, sc in the center of the next petal. Do this 3 times. You should have 3 ch-5 spaces on the new motif.
Step 3: The First Connection Chain 5, sl st into the center of the third ch-5 space of the previous motif. Chain 5, sc in the center of the next petal of your new motif.
Step 4: The Second Connection Chain 5, sl st into the center of the next ch-5 space of the previous motif. Chain 5, sc in the center of the next petal of your new motif.
Step 5: Finishing the Round Chain 5, sc in the center of the last petal on the new motif. Join with a sl st to the base of the beginning ch-5 of the new motif.
Round 5: The Final Edge (Same as the first motif, but modified for the join) In the first ch-5 space, make 5 sc. Make a Picot. Make 5 sc in the same space. Sl st into the next sc. Do this three times to complete the unjoined petals.
Now, you will work into the two joining arches. In the next joined ch-5 space, make 5 sc. Sc into the ch-5 space on the previous motif. Make a Picot on the new motif. 5 sc in the same ch-5 space on the new motif. Sl st into the next sc. Repeat the above step for the second joined ch-5 space.
Continue the pattern for the remaining ch-5 spaces on the new motif: In the next ch-5 space, make 5 sc. Make a Picot. Make 5 sc in the same space. Sl st into the next sc. Join with a sl st to the first sc of the round.
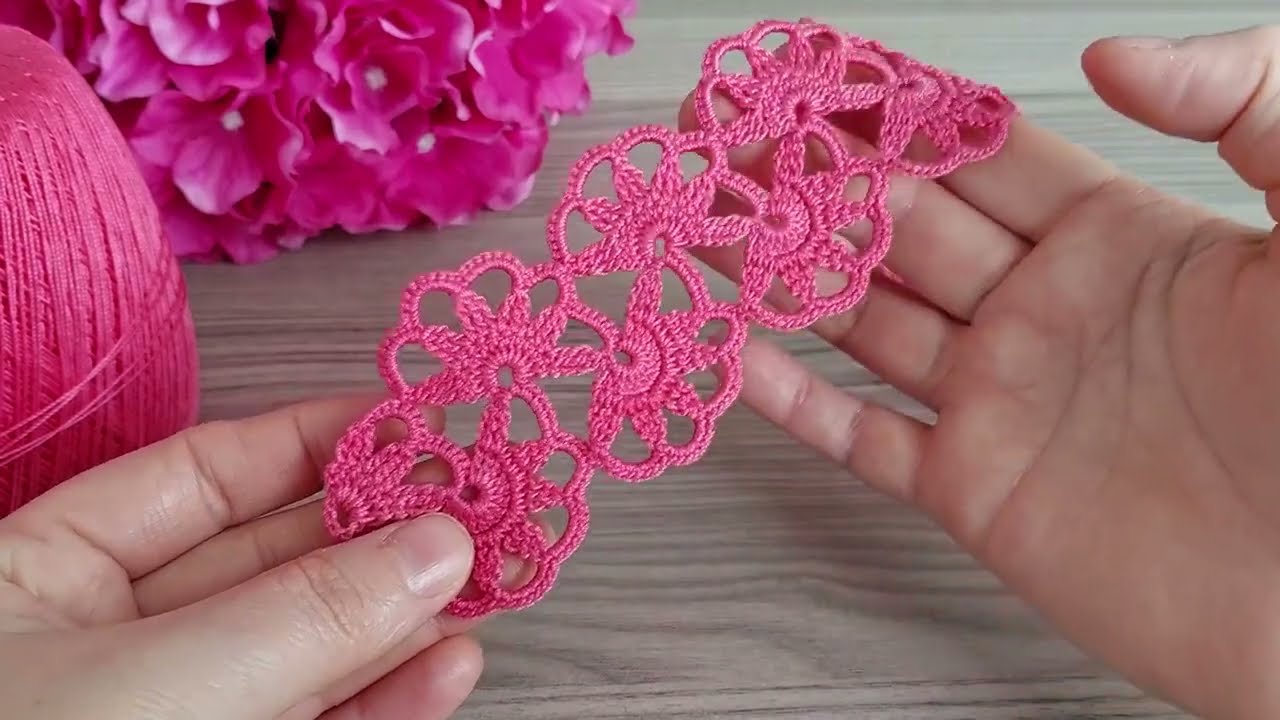
Fasten off and weave in your ends. You now have two connected motifs!
To continue your chain, simply repeat Part 2 (Step 1 through 5) for each new motif you want to add.
Video Tutorial:
Finishing Your Trim: Blocking for Perfection
Once you have crocheted your desired length of lace trim, the final and most important step is blocking. This will straighten the chain, open up the beautiful lace pattern, and give it a crisp, professional finish.
- Wet it: Gently soak your lace trim in cool water. You can add a tiny bit of yarn wash if you like.
- Squeeze out excess water: Gently squeeze the water out without wringing the lace, as this can distort your stitches.
- Pin it: Lay the damp lace flat on a foam mat, a thick towel, or a blocking board. Gently stretch the lace to its desired width and length. Use rust-proof pins to secure each point of each motif, ensuring they are all aligned neatly.
- Let it dry: Allow the lace to air dry completely. This can take several hours or even a full day.
- Unpin: Once it’s dry, carefully remove the pins. The lace will hold its new shape perfectly!
Enjoy your beautiful Blossom Chain Lace Trim! Use it to add a handmade touch to any of your projects. Happy crocheting!


