
Welcome, crochet enthusiasts! Are you ready to create something truly special and intricate? This pattern, which I’ve named the Rosette Square Motif, is a beautiful piece that combines four delicate, floral centers with a lovely, openwork lattice. The result is a stunning square that can be used as a coaster, a decorative mat, or even joined together to create larger projects like blankets, table runners, or shawls.
The pattern is designed to be worked in sections, with four individual rosette centers being joined together as you go. This method may seem a bit complex at first, but with clear instructions, you’ll find the process both logical and rewarding. This pattern is best suited for intermediate crocheters.
Materials
- Yarn: Fine or fingering weight cotton yarn or crochet thread (approximately 50-75 yards). The finer the thread, the more delicate the finished piece.
- Hook: A crochet hook appropriate for your yarn weight (e.g., a 1.5 mm to 2.25 mm hook).
- Scissors
- Tapestry Needle for weaving in ends.
- Stitch Markers (optional, but helpful for marking joining points).
Special Stitches
- Beginning Cluster (BCl): Chain 3 (counts as a double crochet), yarn over, insert hook into the same stitch or space, pull up a loop, yarn over, pull through 2 loops. (Yarn over, insert hook into the same stitch or space, pull up a loop, yarn over, pull through 2 loops) twice. You will have 4 loops on your hook. Yarn over, pull through all 4 loops.
- Cluster (Cl): Yarn over, insert hook into the specified stitch or space, pull up a loop, yarn over, pull through 2 loops. (Yarn over, insert hook into the same stitch or space, pull up a loop, yarn over, pull through 2 loops) 3 more times. You will have 5 loops on your hook. Yarn over, pull through all 5 loops.
- Picot: Chain 3, then slip stitch into the first chain.
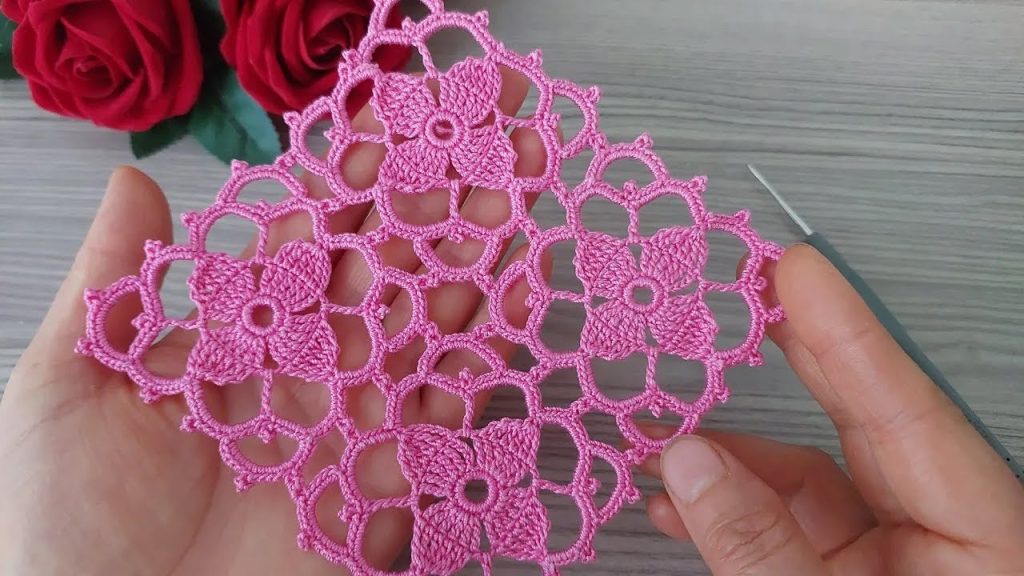
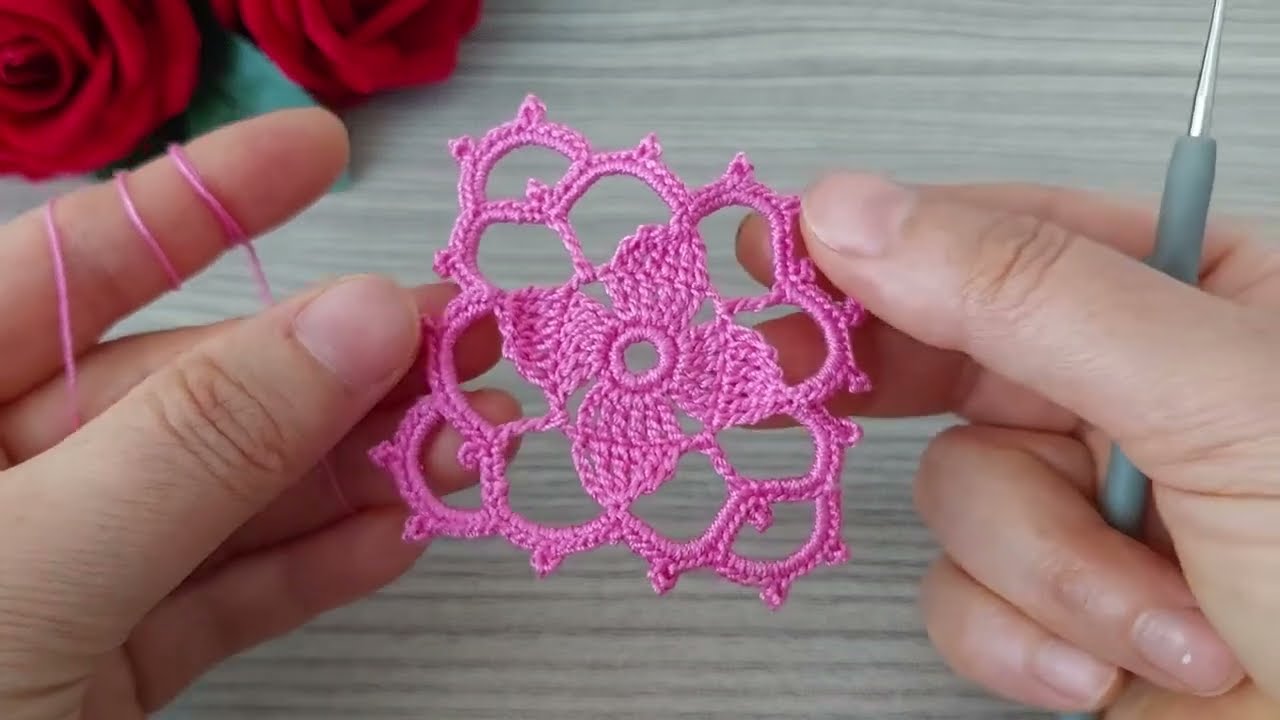
Part 1: The Rosette Center (Make 4)
You will make four of these identical motifs first. The joining will happen as you work the next sections.

Round 1: Make a magic ring. Chain 3 (counts as a dc). Make 11 dc in the ring. Join with a sl st to the top of the beginning ch-3. (12 dc)
Round 2: Chain 1 (does not count as a stitch). Sc in the same stitch. Chain 3, skip the next dc, sc in the next dc. Repeat from * to * 5 more times. You will have 6 ch-3 spaces. Join with a sl st to the first sc.
Round 3: Slip stitch into the first ch-3 space. Make a BCl in the same space. Chain 3. Make a Cl in the next ch-3 space. Repeat from * to * 4 more times. Chain 3, join with a sl st to the top of the beginning BCl. (6 clusters, 6 ch-3 spaces)
Round 4: Slip stitch into the first ch-3 space. Chain 1 (does not count as a stitch). In the ch-3 space, make (sc, ch 5, sc). Slip stitch in the top of the next Cluster. Repeat from * to * 5 more times. Join with a sl st to the first sc.
Fasten off and weave in ends. You have completed your first rosette. Repeat this process three more times to create all four rosettes. Do not cut the yarn on the fourth rosette; leave a long tail as you will use this to join the final pieces.
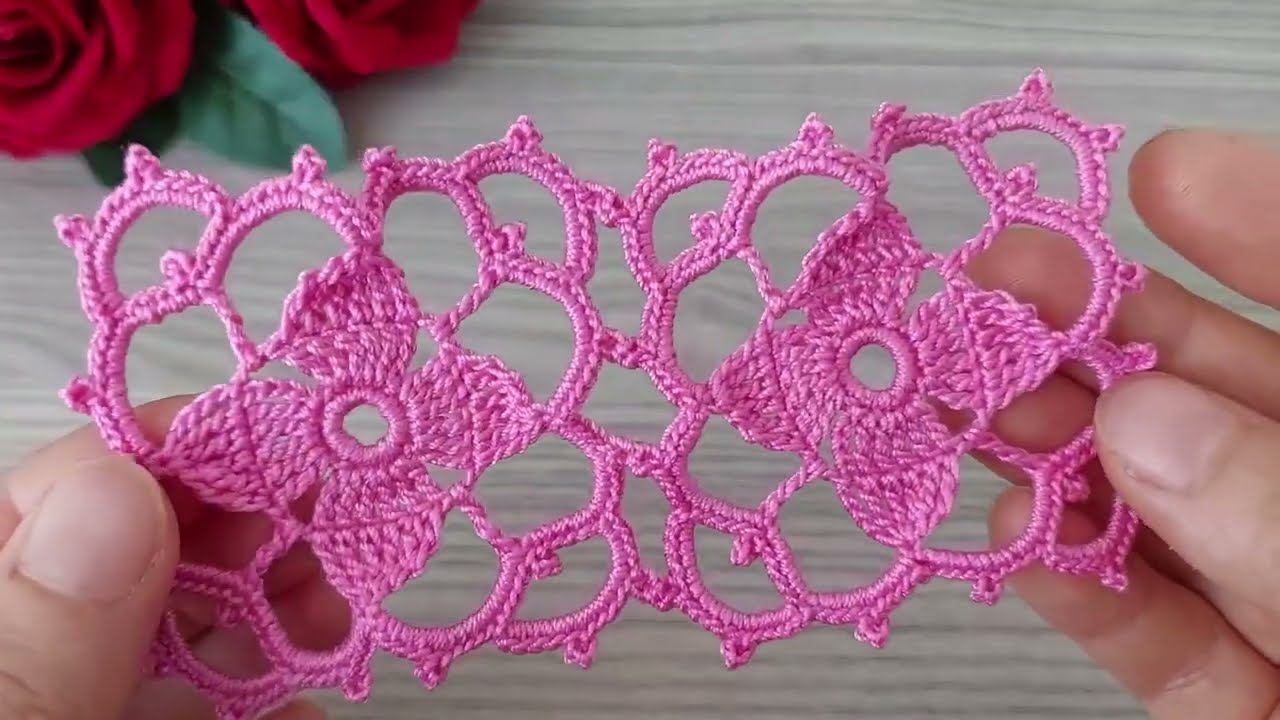
Part 2: Joining the Rosettes
Now, you will use the four rosettes to form the larger square motif.
- Rosette 1: Take the first rosette you completed. This will be the top-left rosette of your square.
- Rosette 2: Take a second rosette. With your yarn still attached from Round 4, prepare to join. In the last Round 4 ch-5 space, replace one ch-5 with a (ch 2, sl st into the center ch of any ch-5 space of Rosette 1, ch 2). This will be your first join. Continue working Round 4 of Rosette 2, joining the next ch-5 space in the same way to the next ch-5 space of Rosette 1. Fasten off. You should have two rosettes joined side-by-side.
- Rosette 3: Take a third rosette. With yarn attached to Round 4, join one of the ch-5 spaces to a ch-5 space on Rosette 1, then the next ch-5 space to the next ch-5 space on Rosette 1. Fasten off. You now have three rosettes in an ‘L’ shape.
- Rosette 4: Take the final rosette (the one with the long tail). This is the most complex join. You will work Round 4 as follows:
- Work the first ch-5 space normally.
- Work the next ch-5 space and join it to Rosette 2.
- Work the next ch-5 space and join it to Rosette 2.
- Work the next ch-5 space and join it to Rosette 3.
- Work the next ch-5 space and join it to Rosette 3.
- Work the last ch-5 space normally.
- Join with a sl st to the first sc.
You have now formed a large square with all four rosettes joined at the center.
Part 3: The Final Edging
This round will unify the entire piece and give it a crisp border.
Round 5: Reattach your yarn to any outer sc of the larger square. Chain 1 (does not count as a stitch). Sc in the same stitch.
- Along the side: Chain 5, sc in the center of the next ch-5 loop. Repeat 4 more times. (This covers the three outer loops and the two joining loops).
- At the corner: Chain 5. In the next ch-5 loop, make (sc, Picot, sc). Chain 5, sc in the next ch-5 loop.
- Repeat the “Along the side” and “At the corner” instructions for the next three sides and corners of the square.
Join with a sl st to the first sc.
Fasten off and weave in all ends securely.
Video Tutorial:
Finishing Your Doily: Blocking for Perfection
Blocking is a crucial step for any lacy crochet project. It helps the stitches settle, opens up the intricate pattern, and gives your doily a professional, crisp finish.
- Get it damp: Submerge your doily in cool water or use a spray bottle to saturate it completely. Avoid wringing or twisting it, which can distort your stitches.
- Remove excess water: Gently squeeze the water out and then roll the doily in a clean towel to absorb more moisture.
- Shape and pin: Lay your damp doily on a flat, soft surface suitable for pinning (like a foam blocking mat or a thick towel). Gently stretch and shape the doily into a perfect square, making sure the points of the outer border are neat and even. Use rust-proof pins to secure it in place.
- Dry: Leave the doily pinned until it is completely dry. This could take a day or two.
- Unpin: Once totally dry, carefully remove the pins. You’ll be amazed at how beautifully the pattern has opened up!
Your Rosette Square Motif is now ready to adorn your table, brighten a shelf, or be cherished as a thoughtful handmade gift. Happy crocheting!


