
This detailed pattern is your complete resource for creating a stunning lace square, perfect for a doily, a coaster, or as part of a larger project. We’ll go beyond the basic stitches and discuss yarn choice, tension, and the crucial finishing step of blocking. This guide is tailored for the intermediate crocheter who is comfortable with basic stitches and reading a pattern.
Understanding Your Materials
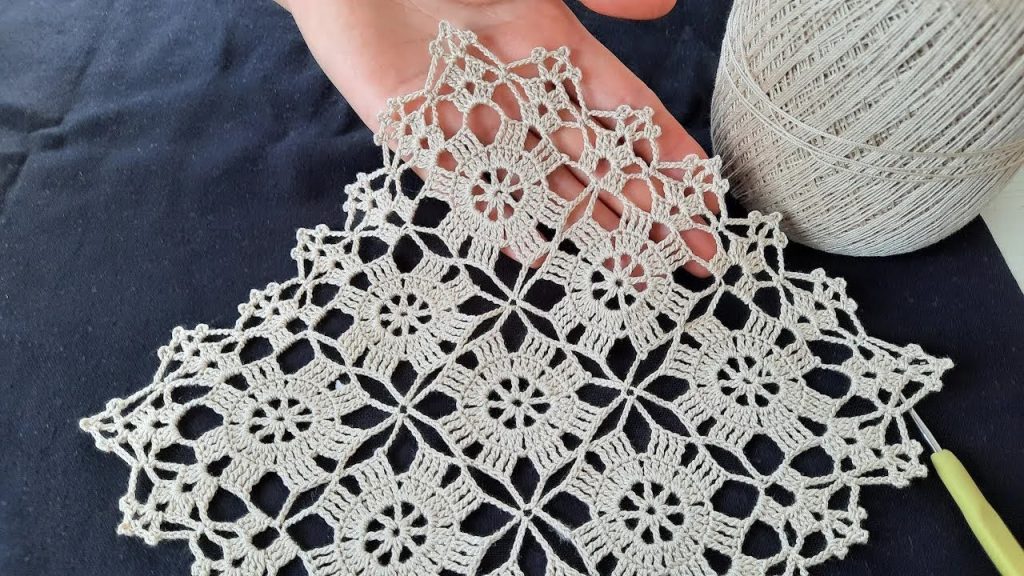
Your choice of materials is the first and most important step to achieving a finished piece that looks like the one in the photo.
- Yarn: The photo shows a fine size 10 crochet thread, which is a type of cotton yarn specifically designed for delicate lace work. It’s much thinner than the yarn you’d use for a scarf or a hat. The thinness allows for the intricate, open lacework you see in the image. Using a thicker yarn will result in a much larger, denser motif, which might not have the same elegant drape. A neutral color like cream, off-white, or ecru will best highlight the detailed stitch pattern.
- Hook: A steel crochet hook is a must for working with fine thread. The size is small—typically measured in millimeters (mm) rather than US letters. For size 10 thread, a 1.5mm to 1.75mm hook is a great starting point. Your personal tension (how tightly or loosely you hold the yarn) will affect the final result. If your stitches feel too tight and stiff, try a slightly larger hook (e.g., go from 1.75mm to 2.0mm). If your work feels too loose and floppy, try a smaller one.
- Tapestry Needle: This is a blunt-tipped, large-eye needle used for weaving in the yarn ends. It’s essential for a neat, professional finish.
- Blocking Supplies: I can’t stress this enough—blocking is not optional for this project if you want a perfect result. It’s the magical final step that transforms a slightly wrinkled, curled piece of lace into a perfectly flat, symmetrical work of art.
Pattern Breakdown: Row-by-Row Deep Dive
This pattern uses standard US crochet terminology. Take your time with each round and count your stitches and spaces to ensure your final piece is symmetrical.
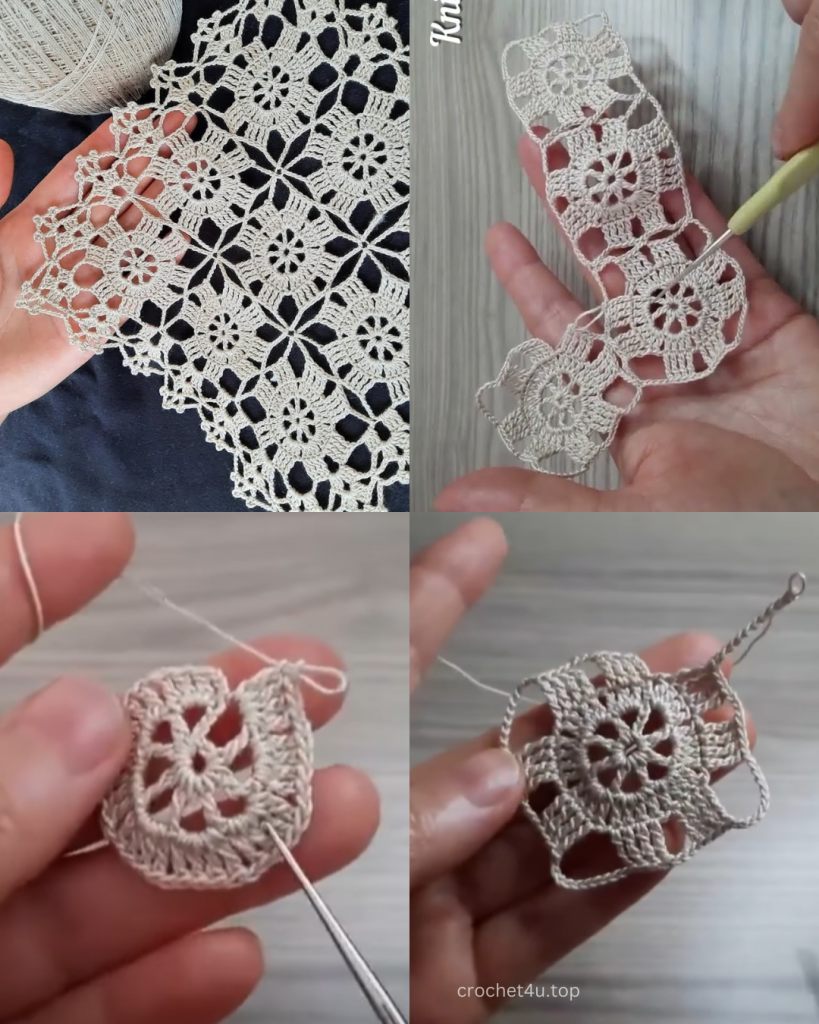
Round 1: The Foundation Start with a magic ring or chain 4, and join with a slip stitch. A magic ring creates a perfectly tight center with no visible hole, which is ideal for this design. If you’re not comfortable with a magic ring, a chain 4 loop works just as well. The first ch 3 counts as your first double crochet (dc), which is a common technique in crochet to begin a new round. You’ll then dc 11 more times into the ring, for a total of 12 dc stitches.
Round 2: The First Arches The ch 1 at the beginning of this round does not count as a stitch. It’s simply a turning chain to give you height for the first single crochet (sc). This round is all about creating the framework for the petals. You’ll make ch 5 loops, skipping a stitch between each sc. This creates 6 even loops, which will be the base for the 6 petals in the next round.
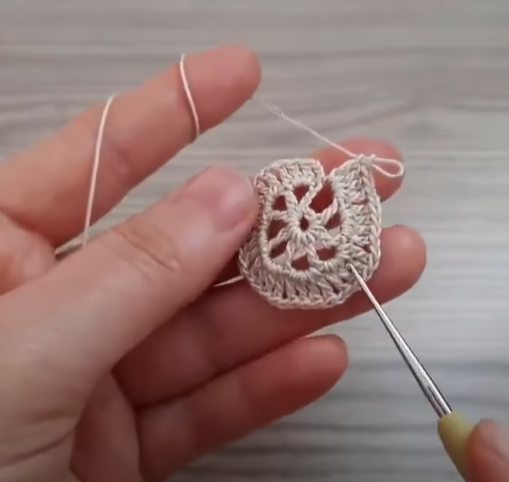
Round 3: The First Petals This round is a little tricky, so pay close attention. You’ll need to slip stitch into the first ch-5 loop to start your work right in the center of the arch. This positions your hook correctly for the first petal. Each petal is a [3 dc, ch 3, 3 dc] set worked into a ch-5 space. The ch 3 in the middle of the petal is the ‘point’ of the petal. A ch 1 is used to separate each petal group. This creates the first layer of the flower-like motif.
v
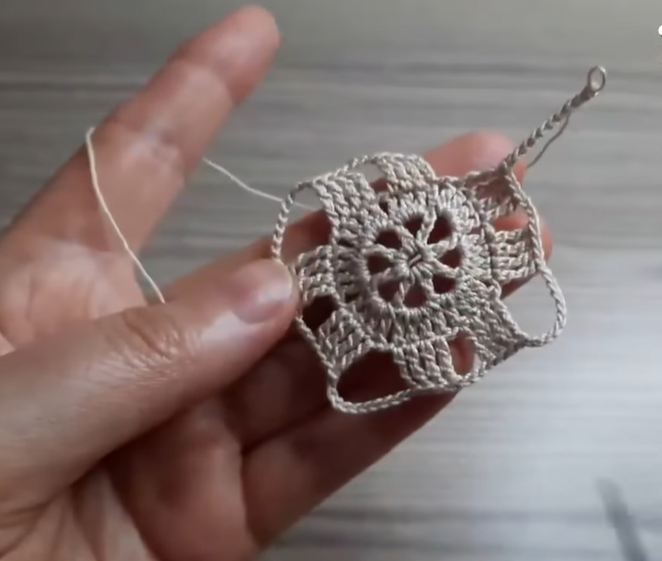
Round 4: The Connecting Lattice This round begins to create the outer, square-like shape. We’re connecting the points of the petals with a new ch-3, tr, ch-3 sequence. The tr (treble crochet) is taller than a dc, which helps to create the open, spiky look between the petals. Remember to sl st into the center of the petal’s ch-3 space to begin this round.
Round 5: Shaping the Square This is where the corners of the square begin to take definitive shape. The [3 dc, ch 3, 3 dc] group will form your four corners. The sc stitches and ch-3 spaces between the corners create the sides of the square. Think of this round as setting up the “grid” that will define the final shape.
Round 6: The Final Border This is the finishing touch. The corners are established with another [3 dc, ch 3, 3 dc], and the sides are made of graceful ch-5 loops connected by sc stitches. The longer ch-5 loops add more laciness and a delicate, scalloped edge to the final product. At the end of the round, you’ll join with a sl st, cut your yarn, and pull the tail through the final loop to fasten off.
The Magic of Blocking
Blocking is what takes your work from a nice piece of crochet to a professional, museum-quality textile. Here’s a more detailed breakdown of the process:

- Dampen: Gently soak your finished doily in a bowl of lukewarm water. You can add a tiny bit of no-rinse wool wash, but plain water is fine. Let it soak for about 15 minutes to fully relax the fibers.
- Remove Excess Water: Gently squeeze the water out, but do not wring or twist the piece. You can roll it up in a clean towel and gently press down to absorb more water. The piece should be damp, not dripping wet.
- Pin it Out: Place the doily on a foam blocking mat or a thick towel laid flat. Using rust-proof pins, carefully pin each of the corners and points of your motif. Gently stretch the fabric as you pin to open up the lace holes and make the corners crisp and square. Take your time to get the shape just right.
- Dry: Leave the piece pinned until it is completely dry. This could take a full day or even two, depending on the humidity. Do not rush this step. The fibers are setting in their new, beautiful shape.
- Unpin and Admire: Once dry, unpin the piece. It will hold its new shape perfectly, showing off every detail of your hard work.
Video Tutorial:
By following this detailed guide, you’ll be able to create a beautiful, professional-looking lace motif that you can use as a decorative coaster or as a starting point for a larger, more ambitious project.
Do you have any questions about a specific stitch or step in the pattern?


