
🌟 Introduction
Step into the timeless elegance of filet crochet with the Garden Lattice Square Doily! This beautiful pattern combines the classic gridwork of filet crochet in the center, creating a simple yet striking “lattice” effect, with an intricate and delicate lace border. Perfect for adding a touch of vintage charm to your table or as a cherished handmade gift, this doily is a delightful project for those who love working with crochet thread.
Skill Level: Intermediate (Familiarity with filet crochet graphing and techniques is helpful).
Finished Size (approximate): 9 inches x 9 inches (23 cm x 23 cm) when using thread.
🧵 Materials & Gauge
✨ Materials Needed
- Yarn/Thread: Approximately 100-120 yards of Size 10 Cotton Thread (Lace Weight/Fingering). Cotton thread is essential for the crisp stitch definition and delicate feel of the finished doily. (The sample is a clean white.)
- Hook: Steel Crochet Hook Size 7 (1.65 mm) or size needed to obtain gauge. (Always check your thread label for recommended hook size.)
- Notions: Small sharp scissors, tapestry needle for weaving in ends, and T-pins for blocking.
📏 Gauge (Crucial for Sizing!)
- Filet Crochet: 10 dc and 5 ch-2 spaces (a 5-square block) should measure approximately 1 inch (2.5 cm) square.
- Crucial Check: Your work must lie perfectly flat at the end of each section. If it cups, increase your hook size; if it ruffles, reduce your hook size.
💡 Special Stitches & Abbreviations
📝 Pattern Abbreviations (US Terms)
| Abbreviation | Meaning | | Abbreviation | Meaning | | :—: | :— | :—: | :— | | ch | chain | | st(s) | stitch(es) | | sl st | slip stitch | | rep | repeat | | sc | single crochet| | dc | double crochet | | tr | treble crochet| | ch-sp | chain space | | MR | Magic Ring | | sk | skip | | Sp | Space | | Cl | Cluster (dc2tog) | | BegCl | Beginning Cluster | | V-st | V-Stitch (dc, ch 1, dc) | | Open Sq| Open Square (dc, ch 2, sk 2, dc) | | Solid Sq| Solid Square (3 dc) |
⭐ Special Stitches (Written Instructions)
- Open Square (Open Sq): Dc, ch 2, sk 2 sts, dc in next st.
- Solid Square (Solid Sq): Work 3 dc over a ch-2 sp or 3 dc in next 3 sts.
- Cluster (Cl): (Yo, insert hook into st/sp, yo, pull up loop, yo, pull through 2 loops) 2 times in the same st/sp. Yo, pull through all 3 loops. (Basically a dc2tog worked into the same spot.)
- BegCl (Beginning Cluster): Ch 2, (yo, insert hook into st/sp, yo, pull up loop, yo, pull through 2 loops) 1 time. Yo, pull through all 2 loops. (A variant of dc2tog)
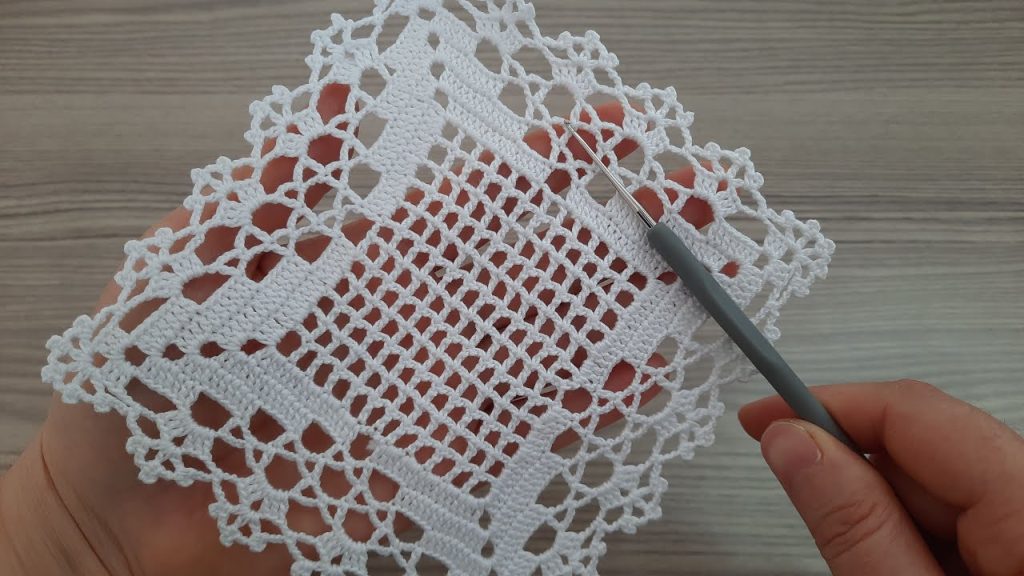
🌸 The Pattern: Garden Lattice Square Doily
Note: The pattern is worked in joined rounds. The ch-3 at the beginning of DC rounds counts as the first dc. We will start from the center and work outwards.
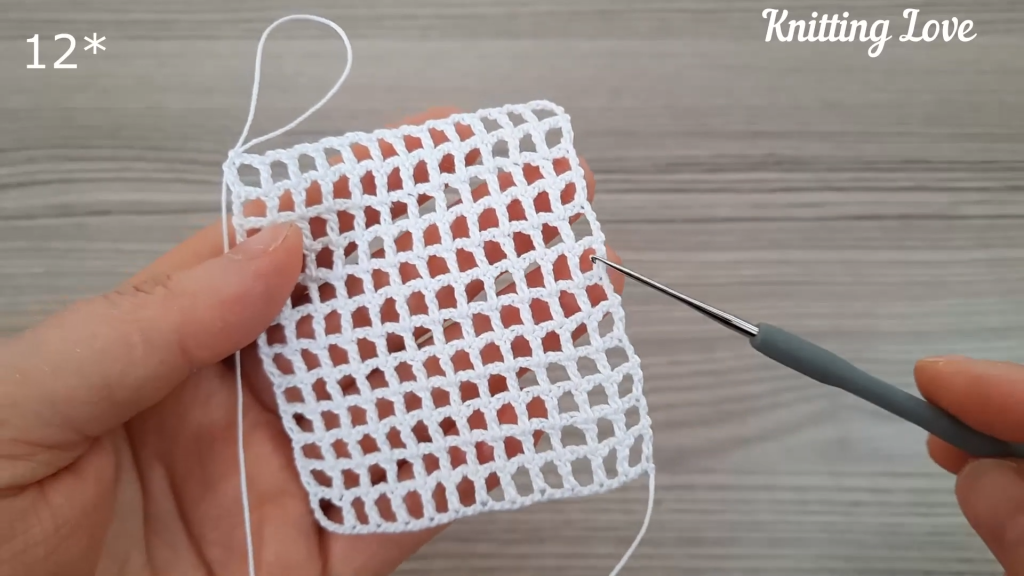
Part 1: The Filet Crochet Center
The center is a 13×13 grid of filet crochet squares.
Foundation: Ch 43 (This will give you 14 squares across).
Row 1: Dc in the 4th ch from hook (counts as 1 dc). (Dc, ch 2, sk 2 ch, dc in next ch) 13 times. You should have 13 Open Squares. Ch 3, turn. (14 dc, 13 ch-2 sps)
Row 2: Dc in the next dc. (Ch 2, sk ch-2 sp, dc in next dc) 13 times. Ch 3, turn. (14 dc, 13 ch-2 sps)
Rows 3 – 14: Repeat Row 2.
At the end of Row 14, do not fasten off. We will now turn the corner and begin working in rounds around the entire rectangle.

Part 2: Squaring the Filet Center
We will add stitches to create a solid frame around the filet grid, setting up for the border.
Round 15 (Edging around the filet – RS):
- Along the side (working down the rows): Work 2 dc into the side of each dc post (from the turning ch-3s) down the side, then 1 dc in the corner ch-sp from the foundation chain. (28 dc along side + 1 dc corner)
- Along the bottom (foundation chain): Work (dc, ch 2, sk 2 ch, dc) 13 times (13 Open Sq). Dc in the corner ch-sp. (14 dc, 13 ch-2 sps + 1 dc corner)
- Along the second side (working up the rows): Work 2 dc into the side of each dc post (from the turning ch-3s) up the side, then 1 dc in the corner ch-sp from the top of the filet. (28 dc along side + 1 dc corner)
- Along the top (last row of filet): Work (dc, ch 2, sk 2 ch, dc) 13 times (13 Open Sq). Sl st to the first dc of the round. (14 dc, 13 ch-2 sps)
Round 16 (Solid Frame): Ch 3. Work 2 dc in the first st (corner). Dc in each st and ch-sp around, working (2 dc, ch 2, 2 dc) into each of the 4 corner stitches (the single dc at the corner). Sl st to the top of the starting ch-3 to join. (Total stitches should be approx 160-170 dc)
Part 3: The Lacy Border
This creates the intricate edge of the doily.
Round 17 (First Lace Row): Ch 3, dc in the next 2 sts. [Corner] (ch 2, dc in the ch-2 sp, ch 2, sk 2 dc, dc in next dc). Ch 2, sk 2 dc, dc in next dc. Rep from * until 3 dc remain before the next corner. Ch 2, sk 2 dc, dc in the last dc. In the corner ch-2 sp: (dc, ch 3, dc) (Corner V-st). Dc in the next dc, ch 2, sk 2 dc, dc in the next dc. Rep from * along the next side. Continue this pattern around. Sl st to the top of starting ch-3 to join.
Round 18 (Cluster Mesh): Ch 1, sc in the first dc. Ch 3, sk ch-2 sp, sc in the next dc. Ch 3, sk ch-2 sp, sc in the next dc. Rep from * until the corner ch-3 sp. In the corner ch-3 sp: (sc, ch 5, sc). Rep from * around. Sl st to the first sc to join.
Round 19 (Shells and Arches): Sl st into the first ch-3 sp. Ch 3, 2 dc in the same ch-3 sp (Shell). Ch 3, sk ch-3 sp, sc in the next ch-3 sp, ch 3, sk ch-3 sp. Shell in the next ch-3 sp. Rep from * until the corner ch-5 sp. In the corner ch-5 sp: (tr, ch 2, tr, ch 2, tr) (Corner Fan). Rep from * around. Sl st to the top of the starting ch-3 to join.
Round 20 (Final Picot Edge): Ch 1, sc in the first dc of the Shell. [Shell Edging] (ch 3, Picot, ch 3, sc in next dc). Rep across the Shell. Ch 3, sc in the next ch-3 sp. Ch 3, sc in the next ch-3 sp. Ch 3. In the corner ch-2 sp: (sc, ch 3, Picot, ch 3, sc). Rep from * around. Sl st to the first sc to join.

Fasten off.
Video Tutorial:
✂️ Finishing & Blocking
🧺 Blocking is Essential!
- Wet Blocking: For any thread doily, wet blocking is absolutely mandatory to open up the lace pattern and ensure the square lies perfectly flat.
- Soak the doily thoroughly in cool water and a mild detergent or fabric starch solution.
- Gently squeeze out excess water (do not wring!).
- Pin the doily out firmly onto a blocking board or foam mat, ensuring the corners are sharp and all the intricate lacework is clearly defined. Measure to ensure it forms a perfect square.
- Allow the doily to dry completely (this may take 24+ hours for heavily starched thread) before unpinning.
✨ Conclusion
Weave in all your ends securely on the back of the work.
Congratulations on completing your exquisite Garden Lattice Square Doily! This elegant piece is a true testament to your skill and will add a touch of handmade beauty to any setting.


