
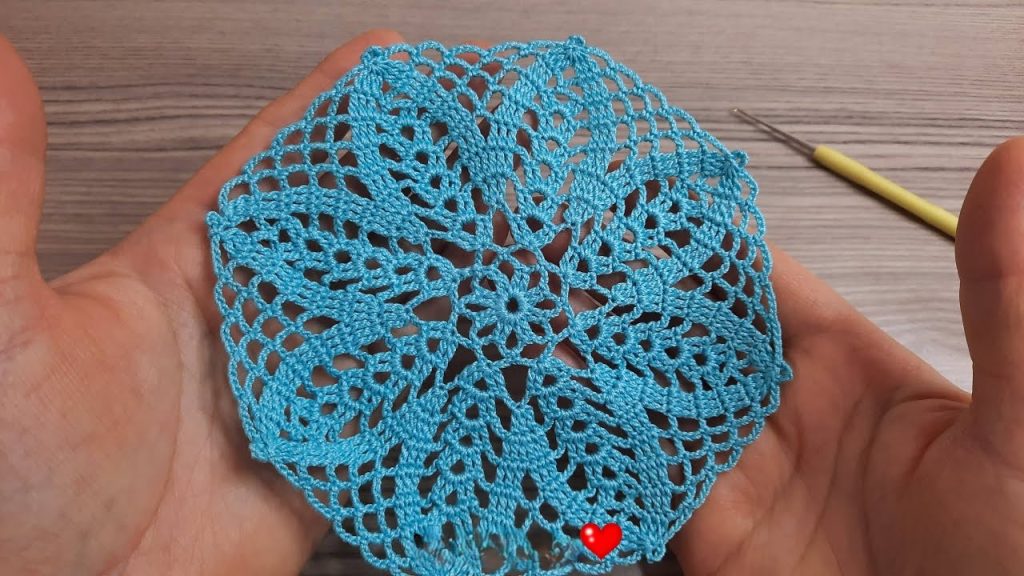
Welcome, lace enthusiasts! Get ready to hook a motif that is all about texture, lightness, and optical movement. This design uses strategically placed chain loops to create a mesmerizing, swirling pattern that draws the eye from the center out to the delicate border. The technique is perfect for adding an airy element to any project.
This pattern is written using U.S. Crochet Terminology.
✨ Materials You’ll Need
| Icon | Item | Notes |
| 🧶 | Yarn | Approx. 30–50 yards of a fingering weight yarn or a Size 10 cotton thread. The vibrant blue shown is beautiful, but any solid color will let the lace detail shine. |
| 鉤 | Crochet Hook | A hook size appropriate for your yarn. I recommend a 1.75 mm to 2.5 mm hook to maintain the intricate, fine gauge required for this lace. |
| ✂️ | Tools | Tapestry needle for weaving in ends, and sharp scissors. |
| 📏 | Gauge | Gauge is not critical, but the finished motif should measure approx. 4.5′′ to 5′′ across after blocking. |
Export to Sheets
📚 Stitches & Techniques
To successfully complete this pattern, you’ll need to know the following stitches and special abbreviations:
| Stitch | Abbreviation | Description |
| Chain | ch | Yarn over, pull through loop on hook. |
| Slip Stitch | sl st | Insert hook, yarn over, pull through work and loop on hook. |
| Single Crochet | sc | Standard single crochet. |
| Double Crochet | dc | Standard double crochet. |
| Treble Crochet | tr | Standard treble crochet (yarn over twice). |
| Picot | P | ch 3, sl st into the first ch made. |
Export to Sheets
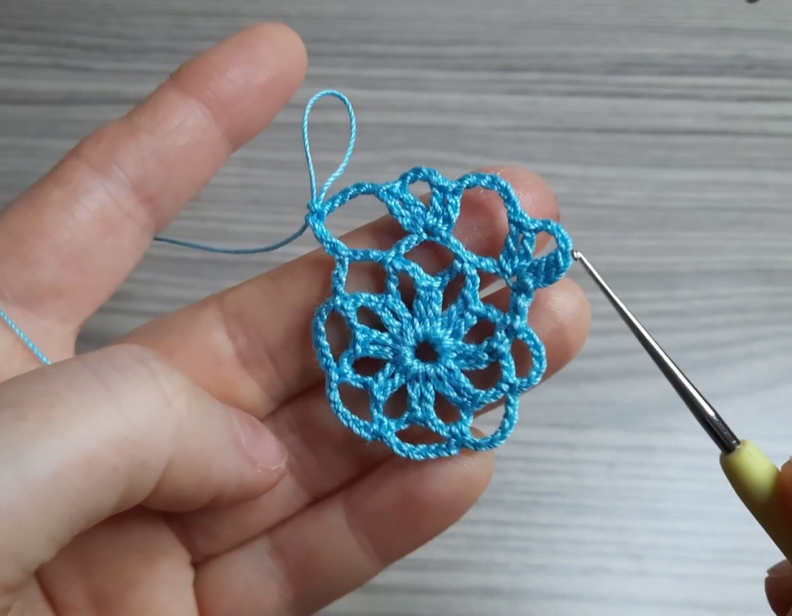
💠 Part 1: The Central Pinwheel (Rounds 1–4)
This section establishes the 8 points and the initial swirling structure.
Foundation:
- ch 6, sl st into the first ch to form a ring.
Round 1:
- ch 1 (does not count as a stitch).
- Work 16 sc into the ring.
- sl st to the first sc to join. (16 sc)
Round 2:
- ch 1 (does not count as a stitch).
- sc in the first st.
- ch 5.
- Skip 1 st.
- sc in the next st.
- Repeat from ** around.
- End with ch 5. sl st to the first sc to join. (8 ch-5 loops)
Round 3:
- sl st into the first ch-5 space until you reach the center (3rd ch).
- ch 1.
- sc in the center of the ch-5 space.
- ch 7.
- sc in the center of the next ch-5 space.
- Repeat from ** around.
- End with ch 7. sl st to the first sc to join. (8 ch-7 loops)
Round 4 (Creating the Spokes):
- sl st into the first ch-7 space until you reach the center (4th ch).
- ch 4 (counts as first tr).
- Work 4 tr in the same ch (center of the loop).
- ch 3.
- In the center (4th ch) of the next ch-7 space, work 5 tr.
- ch 3.
- Repeat from ** around.
- sl st to the top of the starting ch-4 to join. (8 spoke groups of 5 tr, 8 ch-3 spaces)
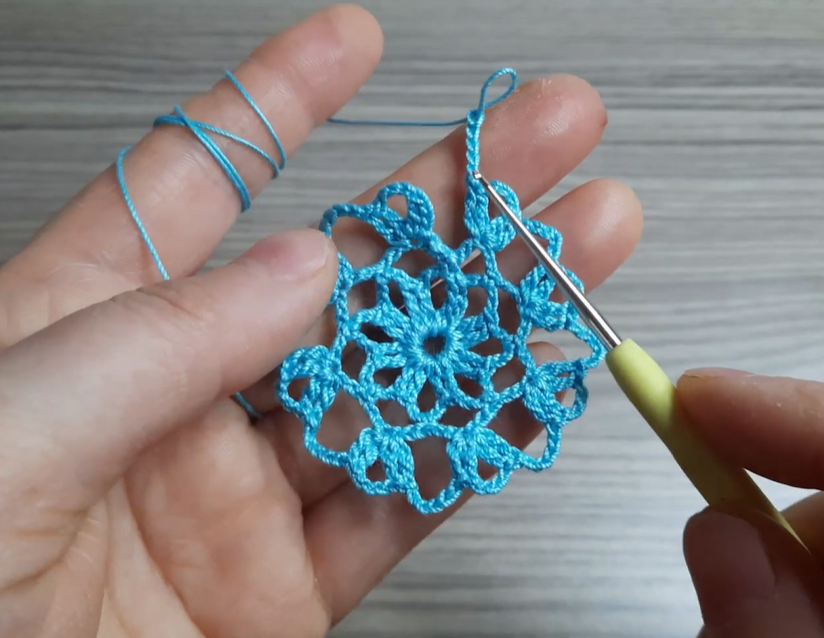
🌊 Part 2: The Webbed Expansion (Rounds 5–7)
This section transitions into the main open lace portion, increasing the size and complexity of the chains.
Round 5:
- ch 1 (does not count as a stitch).
- sc in the first tr.
- ch 3.
- dc in the center (3rd) tr of the 5-tr group.
- ch 3.
- sc in the last tr of the 5-tr group.
- ch 5.
- sc in the first tr of the next 5-tr group.
- Repeat from ** around.
- End with ch 5. sl st to the first sc to join. (8 dc, 16 ch-3 spaces, 8 ch-5 spaces)
Round 6:
- sl st into the first ch-3 space.
- ch 1.
- sc in the ch-3 space.
- ch 7.
- sc in the next ch-3 space.
- ch 9.
- sc in the ch-5 space.
- ch 9.
- Repeat from ** around, alternating ch-7 and ch-9 loops.
- End with ch 9. sl st to the first sc to join. (8 ch-7 loops, 8 ch-9 loops)
Round 7:
- sl st into the first ch-7 space until you reach the center (4th ch).
- ch 1.
- sc in the center of the ch-7 space.
- ch 5.
- sc in the center of the next ch-9 space.
- ch 7.
- sc in the center of the next ch-9 space.
- ch 5.
- Repeat from ** around.
- End with ch 5. sl st to the first sc to join. (8 ch-5 loops, 8 ch-7 loops)
🫧 Part 3: The Final Lacy Border (Rounds 8–9)
This final section adds a delicate picot edge to finish the motif and hold its shape.

Round 8:
- sl st into the first ch-5 space.
- ch 1.
- Work 3 sc in the ch-5 space.
- ch 3.
- Work 3 sc in the ch-7 space.
- ch 3.
- Work 3 sc in the next ch-7 space.
- ch 3.
- Repeat from ** around.
- sl st to the first sc to join.
Round 9 (Picot Edge):
- ch 1.
- sc in the first 3 sc.
- Picot (P) in the center (2nd ch) of the ch-3 space.
- sc in the next 3 sc.
- P in the center of the ch-3 space.
- sc in the next 3 sc.
- P in the center of the ch-3 space.
- Repeat from ** around, placing a sc in every stitch and a Picot in the center of every ch-3 space.
- sl st to the first sc to join.
Video Tutorial:
📌 Finishing and Blocking
- Secure Ends: Fasten off your yarn and use your tapestry needle to carefully weave in all loose ends on the wrong side of your work.
- Blocking (Essential!): Due to the high chain count, blocking is crucial to open up the pattern and reveal the intricate kaleidoscope design.
- Thoroughly dampen your motif (soaking works well for fine cotton).
- Gently squeeze out excess water.
- Pin the motif to a padded surface (foam board or towel), pulling gently but firmly on the 8 main points until the chains are taut and the center pattern is fully visible.
- Allow the piece to dry completely before unpinning.
Your beautiful Azure Kaleidoscope Lace Doily is complete! How do you plan to showcase this gorgeous piece of lace work?


