
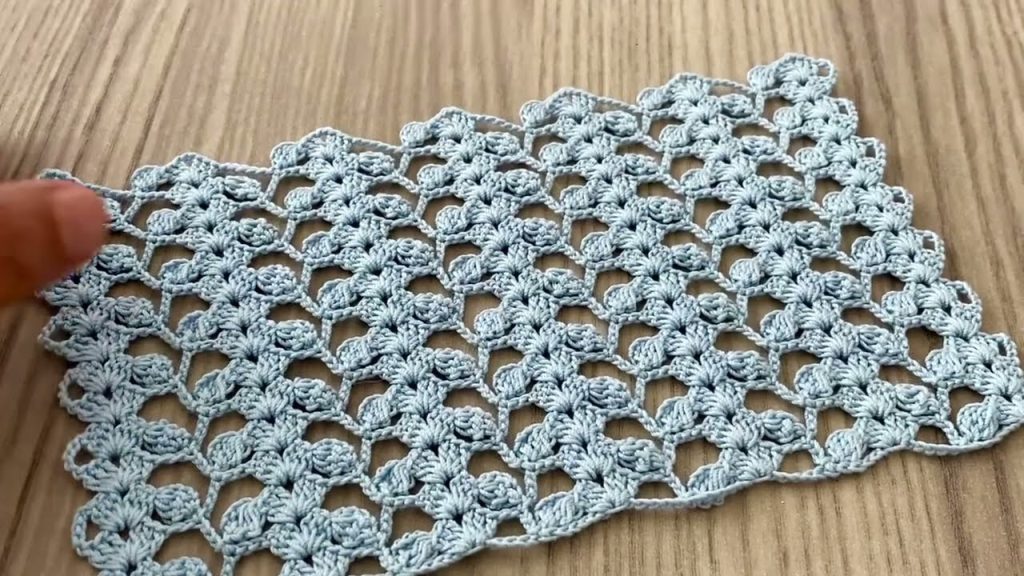
🌟 Introduction: Creating Continuous Texture
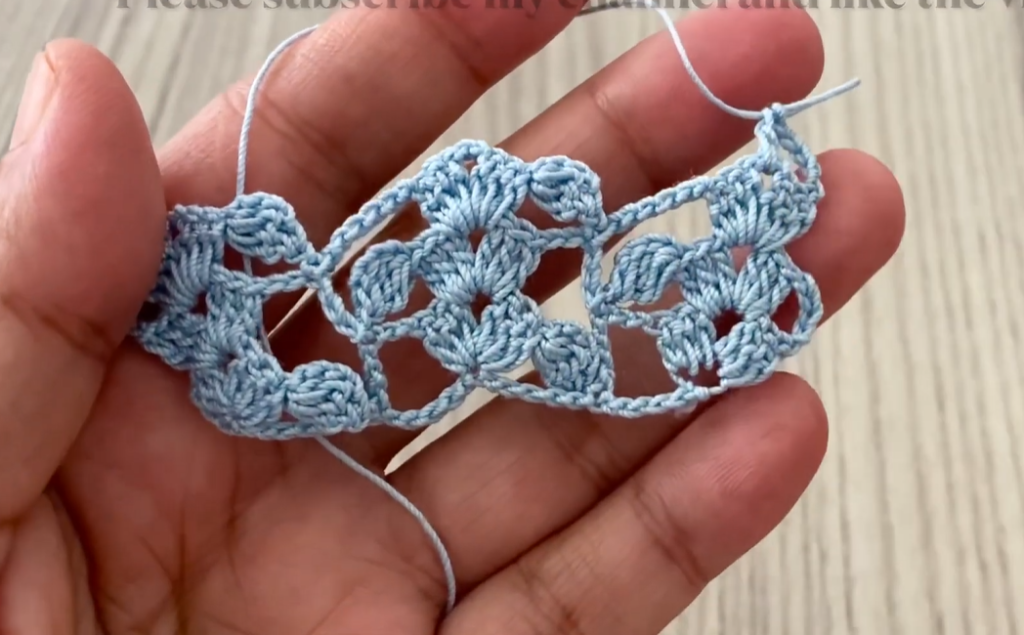
Welcome to a pattern that’s all about beautiful repetition! The stitch shown in the image creates a dense, shell-like cluster surrounded by open lattice work, resulting in an elegant, all-over fabric. This pattern is often called a Cluster Lace or Web Stitch. It’s easily adjustable to any size project—from a thin scarf to a full-sized blanket—simply by chaining more foundation stitches.
We will focus on the two-row repeat that builds the entire fabric, ensuring you master the movement between the solid clusters and the lacy chain spaces. We’ll be using standard US crochet terms.
Skill Level: Easy to Intermediate
Requires comfort with basic stitches and understanding of stitch placement in previous rows’ chain spaces.
🛍️ Materials: Your Essential Supplies
Since this is a repeating fabric pattern, you can use almost any yarn! The sample looks like a light fingering or sport weight yarn.
- Yarn: Choose a lightweight yarn (Fingering/Sport/DK weight) with good drape. Cotton, acrylic, or a cotton blend works wonderfully to define the texture. The sample uses a soft blue-grey.
- Hook: Select a hook size recommended for your yarn weight, or one size larger to ensure the lace remains airy and doesn’t pull too tight. (e.g., a 4.0 mm [US G/6] hook for a Sport weight yarn).
- Tapestry Needle: For weaving in ends.
- Scissors
📋 Abbreviations (US Terms)
- ch: chain
- sl st: slip stitch
- sc: single crochet
- dc: double crochet
- sk: skip
- sp: space
- ch-sp: chain space
- Cluster: (dc, ch 1, dc) worked into the same space
- V-Shell (VS): (2 dc, ch 1, 2 dc) worked into the same space
- **: Instructions between asterisks are repeated.
- ( ): Instructions in parentheses are worked into the same stitch or space.
📐 Pattern Instructions: The Whisper Web Stitch
This pattern is worked in rows and uses a stitch multiple of 6 plus 3 for the foundation chain.
Foundation Chain
- Chain a multiple of 6 plus 3.
- Example for a small sample: Ch $30 + 3 = 33$.
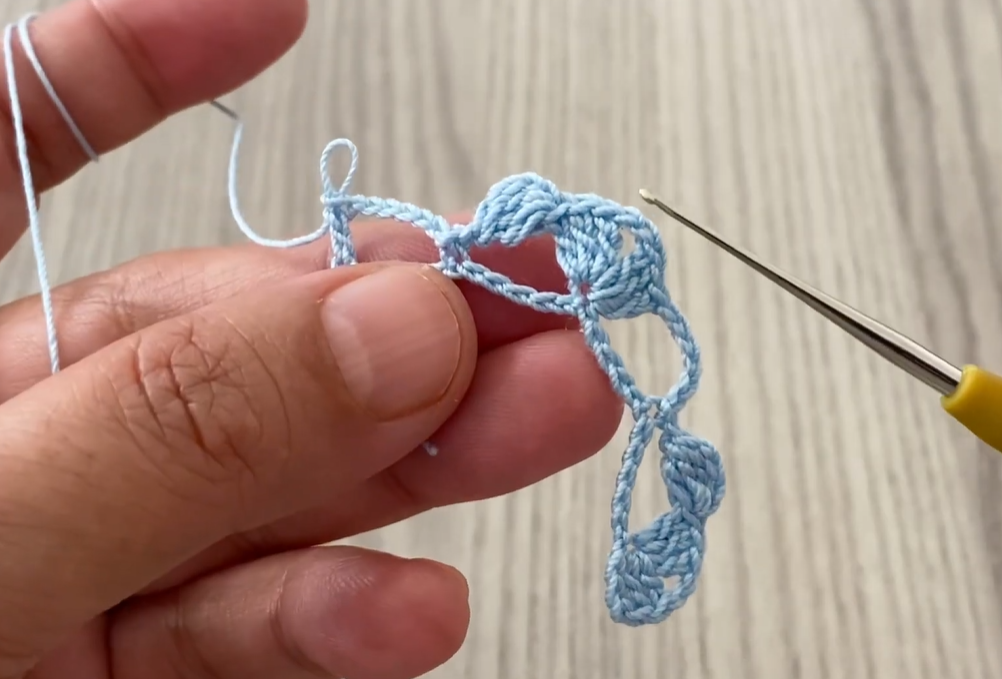
Row 1: Establishing the Clusters
- Ch 3 (counts as first dc). 2 dc in the 4th ch from hook. Ch 3, sl st into the same ch (this forms a picot-like shell tip). 2 dc in the same ch. This completes the first Shell Cluster.
- *Ch 3, sk 5 chs. Shell Cluster (2 dc, ch 3, sl st, 2 dc) in the next ch.*
- Repeat from * to * across the row until you have 6 chains remaining.
- Ch 3, sk 5 chs, dc in the last ch. Turn.
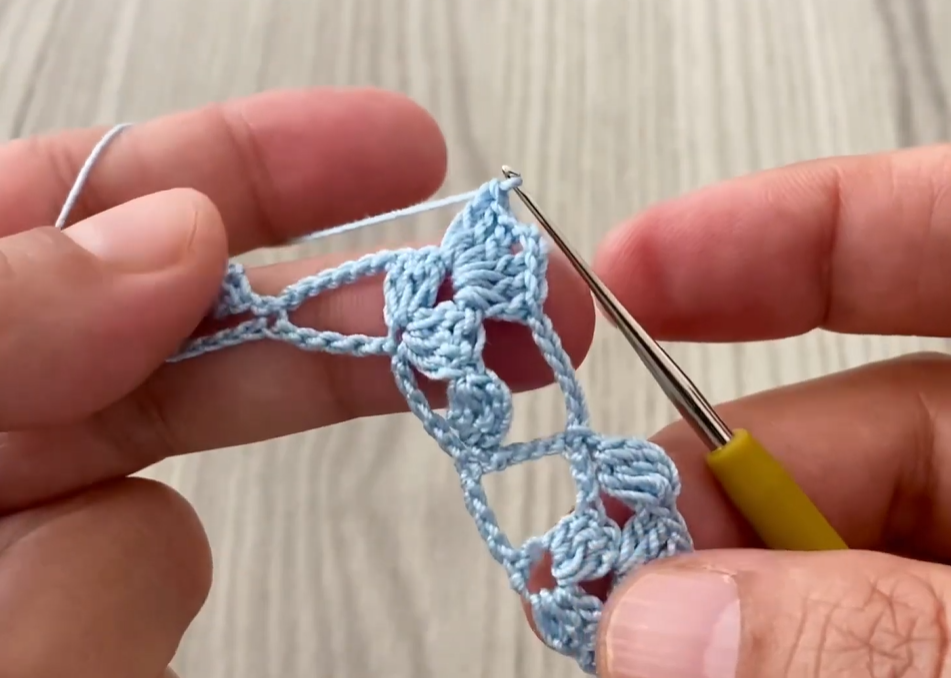
Row 2: Building the Lattice
- Ch 1 (does not count as a stitch), sc in the first dc.
- *Ch 5. Sc into the ch-3 sp (the picot-like tip) of the Shell Cluster.
- Ch 5. Sc in the center of the next ch-3 sp below.*
- Repeat from * to * across the row.
- End with ch 5, sc into the ch-3 sp of the final Shell Cluster.
- Ch 2, dc into the top of the turning ch 3 from the previous row. Turn.
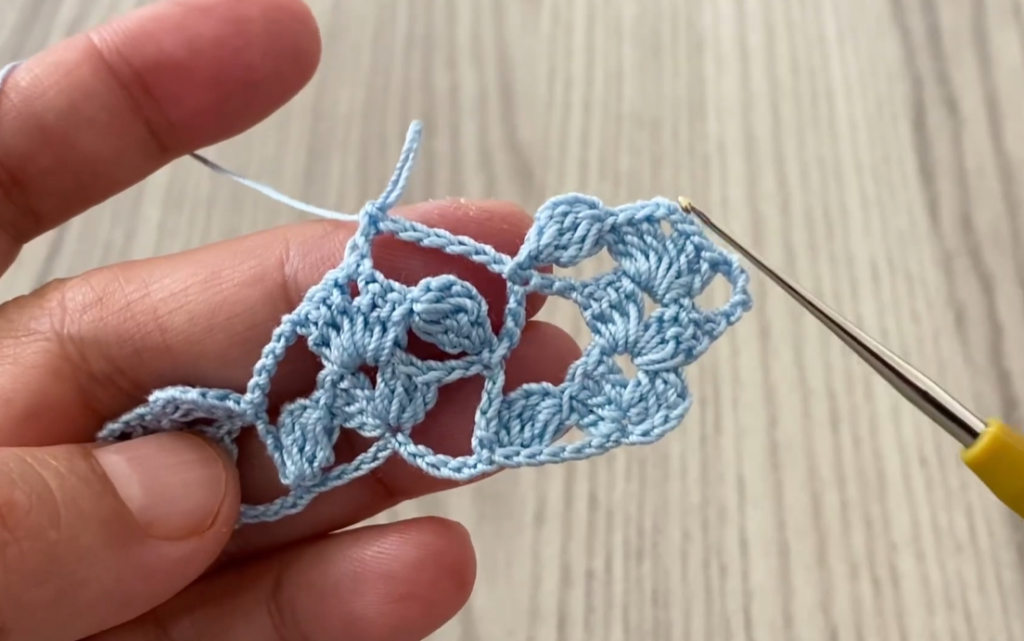
Row 3: Re-establishing the Clusters
This row places the new clusters over the chain loops of the previous row.
- Ch 3 (counts as first dc), 2 dc in the first sp (created by the ch 2/dc end from the previous row). Ch 3, sl st into the same sp. 2 dc in the same sp. This completes the first Shell Cluster.
- *Ch 3. Shell Cluster (2 dc, ch 3, sl st, 2 dc) in the center of the next ch-5 sp.*
- Repeat from * to * across the row.
- End with ch 3, dc in the last sc of the previous row. Turn.
🔁 The Repeat and Continuing the Fabric
The core of this pattern is the two-row repeat. The texture of the fabric is created by alternating the Shell Cluster Row (Row 3) and the Lattice Row (Row 2).
To Continue the Fabric:
- Repeat Row 2 (Lattice Row) and Row 3 (Shell Cluster Row) until your piece reaches the desired length.
Important Notes on Repeat:
- Row 2 (Lattice): The sc stitches anchor the long ch-5 loops into the ch-3 sps (the cluster tips) and the ch-3 sps (the space between clusters). The row must end with a ch 2, dc for height.
- Row 3 (Cluster): The Shell Clusters are always worked into the large ch-5 sps of the previous row. The row must end with a ch 3, dc into the final sc of the previous row.
Video Tutorial:
🧶 Finishing: Edging and Blocking
Final Edge
If you want the top edge to look similar to the bottom edge, work one final Lattice Row (Row 2) and then work a final round of sc stitches around the entire perimeter.
- Perimeter SC: Work a sc into every stitch and a set number of sc into each chain space (e.g., 3 sc in ch-3 sps, 5 sc in ch-5 sps) to create a neat, stable edge. Work (sc, ch 1, sc) into each corner to keep it square.
Blocking: The Final Touch
Blocking is highly recommended for this kind of lace to open up the webbed pattern and straighten the edges.
- Dampen: Wet the fabric completely or use steam.
- Pin: Gently stretch the piece, pinning the top and bottom edges (where the scallops are) and the side edges to ensure a straight, even shape.
- Dry: Allow the piece to dry completely before unpinning.
Enjoy watching your beautiful, lacy Whisper Web Fabric take shape! What project are you planning to make with this gorgeous stitch?


