
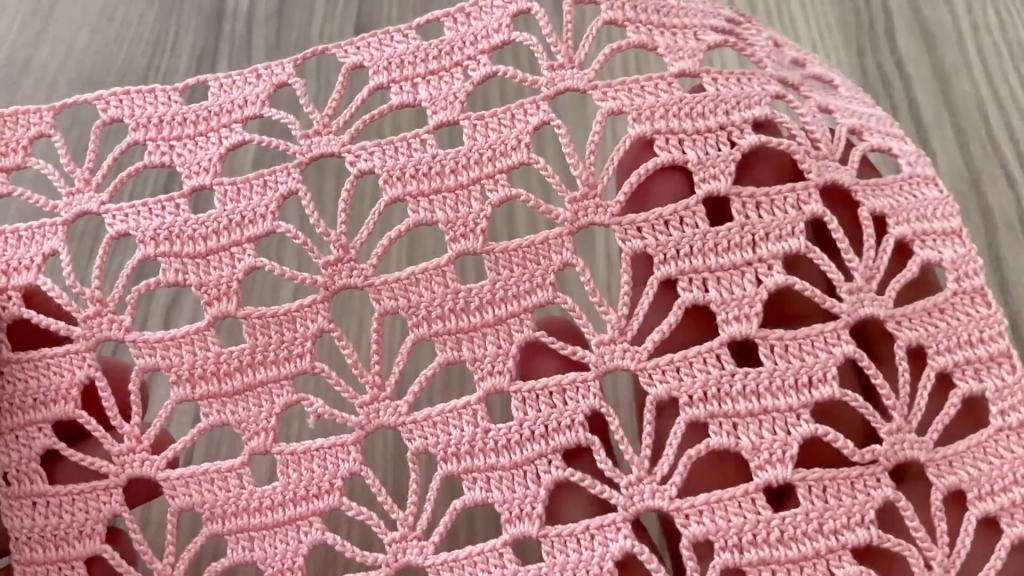
Hello, dear makers of beautiful things! The pattern featured in the video is a classic beauty—a perfect example of delicate lacework that adds an elegant, summery feel to any project. I have translated its sophisticated drape into the Ocean Tide Lace Stitch. This original design uses dramatic fan (shell) clusters interspersed with open mesh, creating a repetitive wave-like pattern that is fully reversible and remarkably airy. It’s the ultimate stitch for warm-weather projects like shawls, bohemian tops, or decorative runners.
If you love the movement and lightness of traditional lace, this detailed pattern is for you!

✨ Project Specifications
| Skill Level | Intermediate (Requires precise chain/stitch counting) |
| Gauge | Approximately 1 fan repeat (12 stitches) and 6 rows equal 4 inches (10 cm). Gauge should be loose for maximum drape. |
| Stitch Multiple | Multiple of 12 stitches, plus 3 for the foundation chain. |
| Recommended Projects | Summer Shawls, Lightweight Scarves, Beach Cover-Ups, Window Curtains, Table Runners. |
🧶 Materials and Sizing
Choosing the right yarn is vital for achieving the airy, flowy texture of lace.
- Yarn: Light Fingering (Size 1), Sport (Size 2), or DK (Size 3) weight yarn. A fiber with excellent drape, such as cotton, linen, silk, or a fine merino wool, is highly recommended. Avoid heavy or stiff yarns.
- Hook: Size G/6 (4.0 mm) or H/8 (5.0 mm), or one full size larger than recommended on your yarn label to ensure the mesh spaces are open and the fabric is not stiff.
- Notions: Tapestry needle for weaving ends, scissors, and T-pins for blocking.
📝 Essential Stitch Abbreviations (US Terms)
The pattern is built primarily on the Double Crochet (Dc) and a generous Shell to create the fan shape.
- Ch: Chain
- St(s): Stitch(es)
- Sl St: Slip Stitch
- Sc: Single Crochet
- Dc: Double Crochet
- Sk: Skip
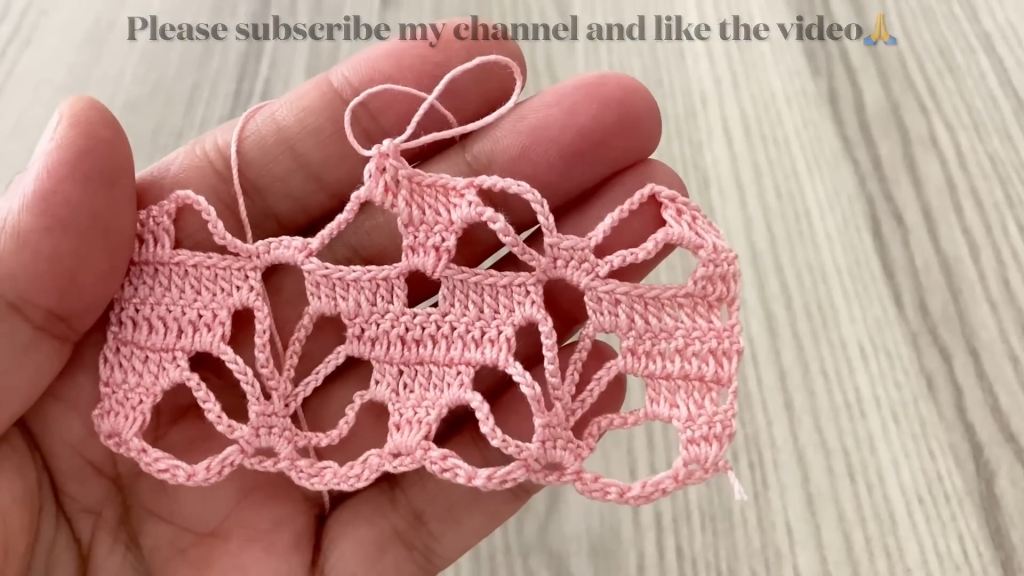
- Fan Shell: 7 Dc worked into the same stitch or space.
🌊 The Ocean Tide Lace Stitch Pattern
This stitch is achieved through a 4-Row Vertical Repeat that cleverly staggers the fan clusters to create a seamless, flowing wave.
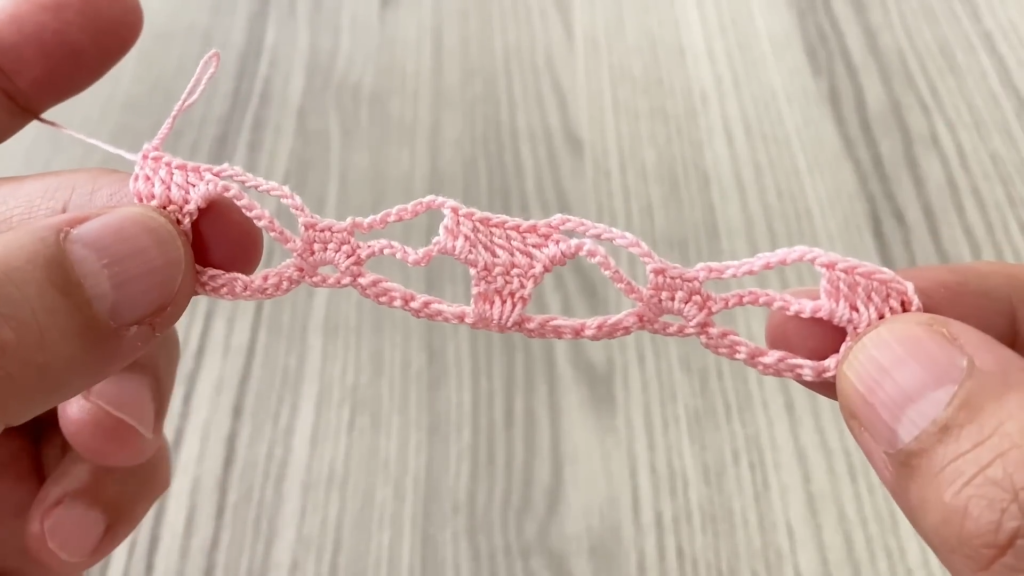
Foundation Chain
Chain a multiple of 12, plus 3 additional chains (e.g., 39, 51, 63, 75, etc., for your desired width).
Row 1 (Foundation Row – RS):
1 Dc in the 4th Ch from hook (Ch 3 counts as 1 Dc). 1 Dc in each Ch across. Ch 3 (counts as 1 Dc), turn.
(Your final stitch count will be the initial multiple of 12 + 1)
This row provides a smooth, solid edge to anchor the lace.
The 4-Row Repeat
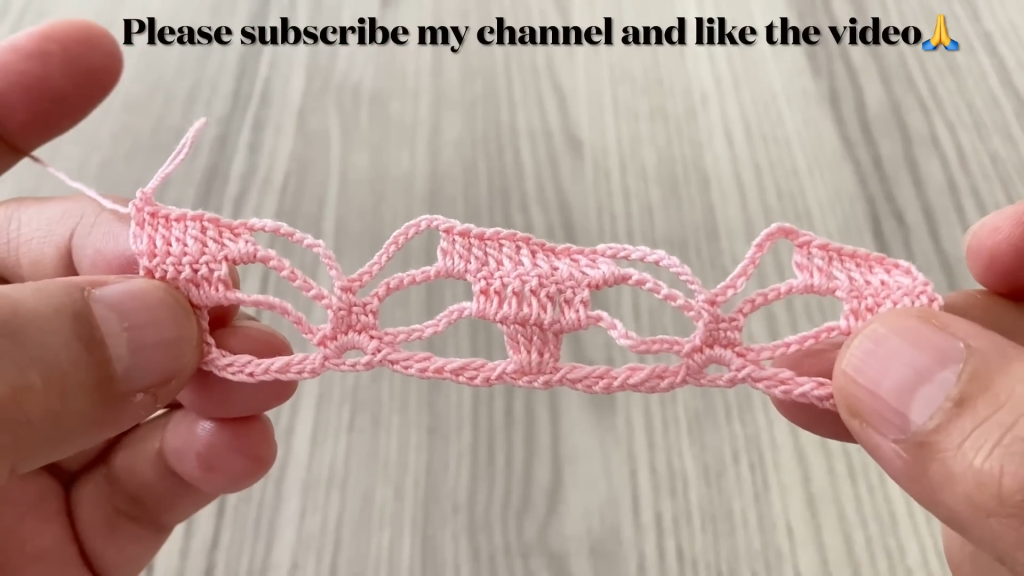
Row 2 (Fan Placement Row – WS):
1 Dc in the first St (top of Ch 3). 1 Dc in the next St.
Ch 3, Sk 3 Sts, 1 Sc in the next St. Ch 3, Sk 3 Sts, Fan Shell (7 Dc) in the next St.
Repeat from * to * across the row until 8 Sts remain.
Ch 3, Sk 3 Sts, 1 Sc in the next St. Ch 3, Sk 3 Sts, 1 Dc in the next Dc, 1 Dc in the top of the turning Ch 3. Ch 1 (does not count as a St), turn.
This row lays out the first layer of fan motifs, separated by airy chain loops and Sc anchors.
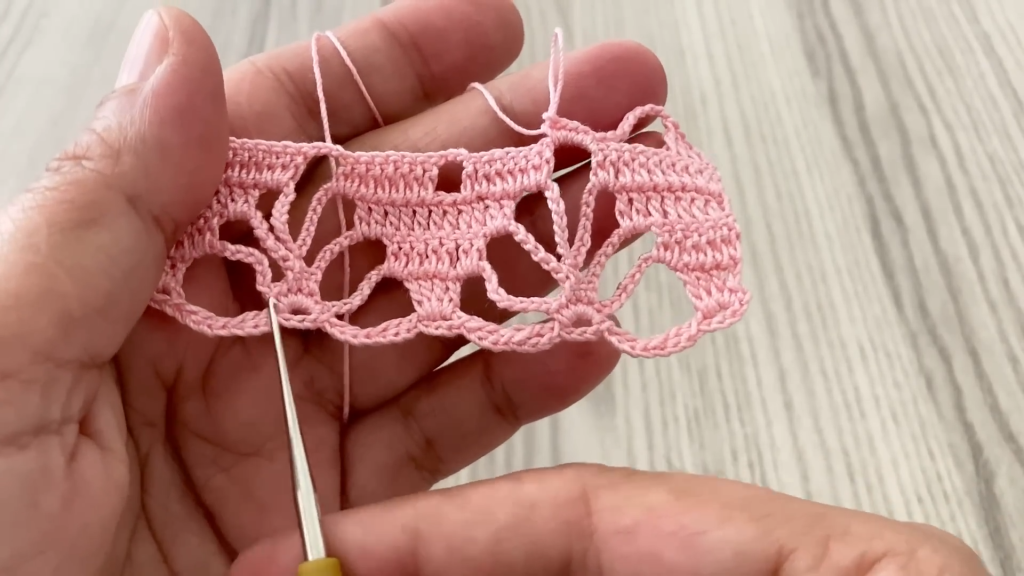
Row 3 (Trellis and Arch Row – RS):
1 Sc in the first 2 Dc.
Ch 3, 1 Sc in the next Ch-3 Sp. Ch 5, Sk 7 Dc (the Fan Shell). 1 Sc in the next Ch-3 Sp. Ch 3.
1 Sc in the central Dc of the next Fan Shell (the 4th Dc).
Repeat from * to * across the row until the final Sc anchor remains.
Ch 3, 1 Sc in the next Ch-3 Sp. Ch 5, Sk 7 Dc. 1 Sc in the next Ch-3 Sp. Ch 3. 1 Sc in the last 2 Dc. Ch 3 (counts as 1 Dc), turn.
This row creates the large center arch (Ch 5) that the next fan will be worked into, and the smaller connecting loops (Ch 3).
Row 4 (Shifted Fan Row – WS):
1 Dc in the first St (top of Ch 3).
3 Dc in the next Ch-3 Sp. 1 Dc in the Sc. 3 Dc in the next Ch-3 Sp. Fan Shell (7 Dc) in the Ch-5 Sp.
Repeat from * to * across the row until the final Ch-5 Sp remains.
3 Dc in the next Ch-3 Sp. 1 Dc in the Sc. 3 Dc in the next Ch-3 Sp. 1 Dc in the last Sc, 1 Dc in the top of the turning Ch 3. Ch 3 (counts as 1 Dc), turn.
This row fills in the large arch with the next fan, shifting the fan motif into the hollow of the row below to create the seamless wave.
Row 5 (Reverse Trellis Row – RS):
1 Dc in the first 7 Sts (the half fan).
Ch 3, 1 Sc in the next Ch-3 Sp. Ch 5, Sk 7 Dc (the Fan Shell). 1 Sc in the next Ch-3 Sp. Ch 3.
1 Sc in the central Dc of the next Fan Shell (the 4th Dc).
Repeat from * to * across the row until 6 Sts remain.
Ch 3, 1 Sc in the next Ch-3 Sp. Ch 5, Sk 7 Dc. Ch 3. 1 Dc in the last 7 Sts. Ch 3 (counts as 1 Dc), turn.
This row is structurally similar to Row 3, but the arch and chain positioning are reversed to set up for the next shift.
To Continue: Repeat Rows 2-5 until your project reaches the desired length.
💡 Pro-Tips for Perfect Drape
- Tension Consistency: Lace is very unforgiving when it comes to tension. Try to keep your hand loose, especially on the chains. If your work puckers, go up half a hook size. If it looks too loose, go down half a size.
- Counting the Fans: Always count the stitches in your Fan Shell (7 Dc) to ensure they are consistent. An uneven shell will disrupt the wave pattern.
- Working into Spaces vs. Stitches: Pay close attention to whether the instruction calls for working into the chain space (around the chain) or into the top loop of a stitch. Incorrect placement will disrupt the structure.
- Edge Management: To maintain a straight edge, always work the first stitch into the same stitch as the turning chain (or the stitch the turning chain is counting as), and work the last stitch into the top chain of the turning chain from the previous row.
Video Tutorial:
🛁 Finishing and Care
- Final Row: To finish your piece, end after a Row 5 repeat (the trellis row). You can fasten off here for a light, scalloped edge, or work one final row of Sc across the top edge for a slightly neater finish.
- Weaving Ends: Securely weave in all yarn tails using your tapestry needle. Due to the openness of the lace, weave the tails into the solid Fan Shell sections or along the edge DCs to ensure they are hidden.
- Blocking (Essential): Blocking is an absolute requirement for the Ocean Tide Lace Stitch! It opens up the chain spaces, smooths out any minor irregularities, and reveals the beautiful wave-like flow of the pattern.
- Method: Wet block or steam block the fabric. Pin the piece firmly to a blocking mat, gently stretching the width to open the lace arches. Ensure the long edges are straight and the corners are squared.
- Drying: Allow the piece to dry completely before unpinning.
Enjoy the luxurious lightness and graceful drape of your new Ocean Tide Lace project!


