
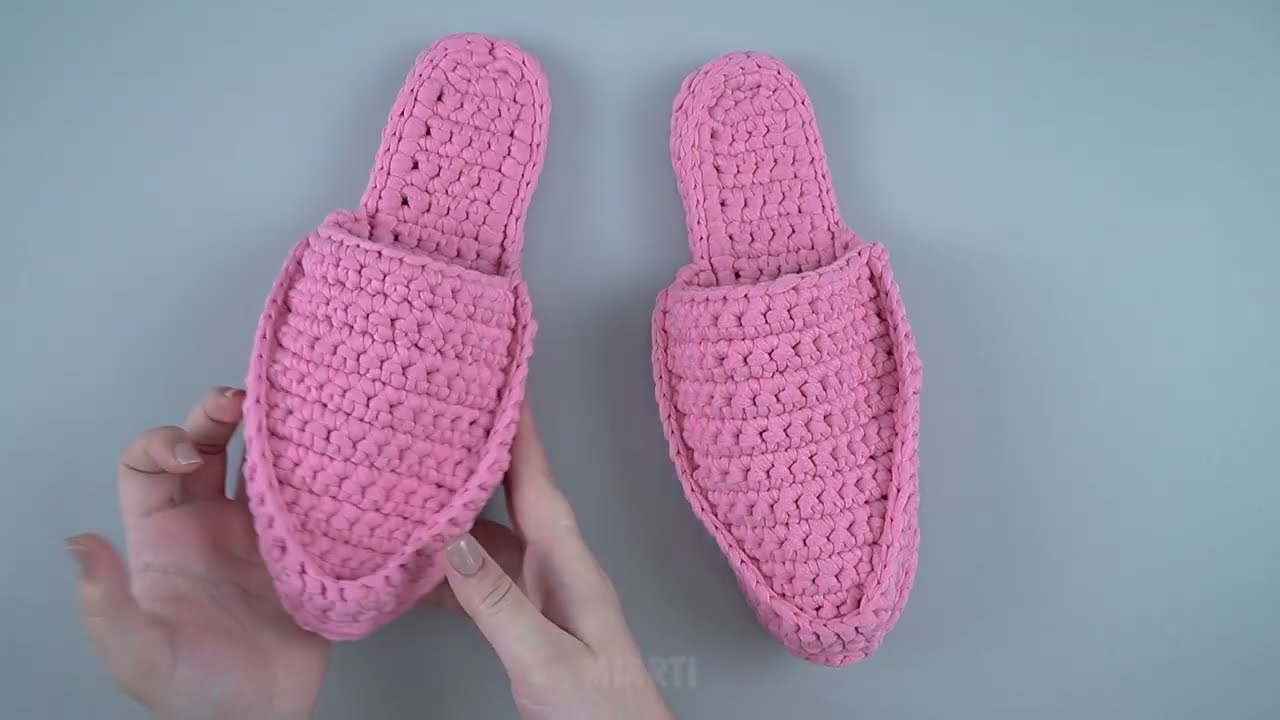
There’s nothing quite like slipping your feet into something warm, soft, and handmade after a long day. If you’ve ever wanted to create a pair of slippers that are both incredibly comfortable and stylish, you’ve come to the right place!
Inspired by the wonderful ribbed texture and simple construction of the slippers you saw, I’ve designed a pattern for what I like to call the “Cozy Ribbed All-Day Slippers.” This pattern is surprisingly straightforward, made in just two pieces—the sole and the upper—which are then joined together. The secret to that beautiful texture is a simple technique that’s perfect for a beginner but satisfying for any level of crocheter.
Let’s gather our supplies and get ready to make a little bit of comfort for your feet.
Materials You’ll Need:
The right yarn is key to making these slippers durable and comfortable.
- Yarn: Approximately 120-150 yards of a Super Bulky (size 6) weight yarn. For that signature plush look and feel, I highly recommend using a cotton or jersey-type yarn, often sold as “T-Shirt Yarn” or “Bulky Cotton.” The pink yarn in the image is a perfect example of this type.
- Crochet Hook: 8.0 mm (L/11) or size needed to obtain gauge. A large hook works well with the thick yarn to create a dense but flexible fabric.
- Yarn Needle: With a large eye for weaving in ends.
- Scissors
- Stitch Marker: Essential for working in the round on the sole.
Gauge:
Gauge is very important for slippers to ensure they fit correctly!
- Using the single crochet stitch with your chosen yarn and hook: 7 single crochet (sc) stitches and 8 rows = 4 inches (10 cm).
Take a moment to create a small swatch to check your gauge. If your swatch is too large, try a smaller hook. If it’s too small, try a larger hook.
Abbreviations:
- ch: chain
- st(s): stitch(es)
- sc: single crochet
- sl st: slip stitch
- inc: increase (2 single crochet in the same stitch)
- BLO: back loop only
- FO: fasten off
- PM: place marker
Special Stitch: Single Crochet in the Back Loop Only (sc BLO)
This is the stitch that creates the beautiful vertical ribs you see on the sides and top of the slippers.
- To make a sc BLO: Insert your hook into the back loop of the stitch only (instead of both top loops), yarn over, pull up a loop, yarn over, pull through both loops on the hook.
Pattern Notes:
- This pattern is written for a standard women’s size 7-8 US (EU 38-39). Notes are included for adjusting the size.
- The slippers are made in two separate parts: the sole and the upper (vamp).
- Ch 1 at the beginning of a row or round does not count as a stitch.
- The sole is worked in continuous rounds (spirals). Use a stitch marker to keep track of the first stitch of each round.
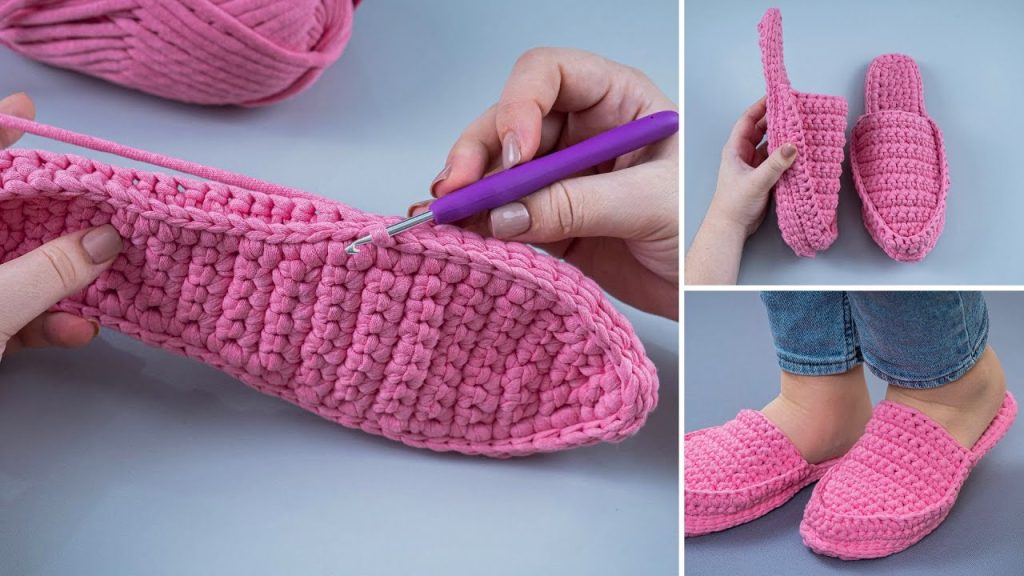
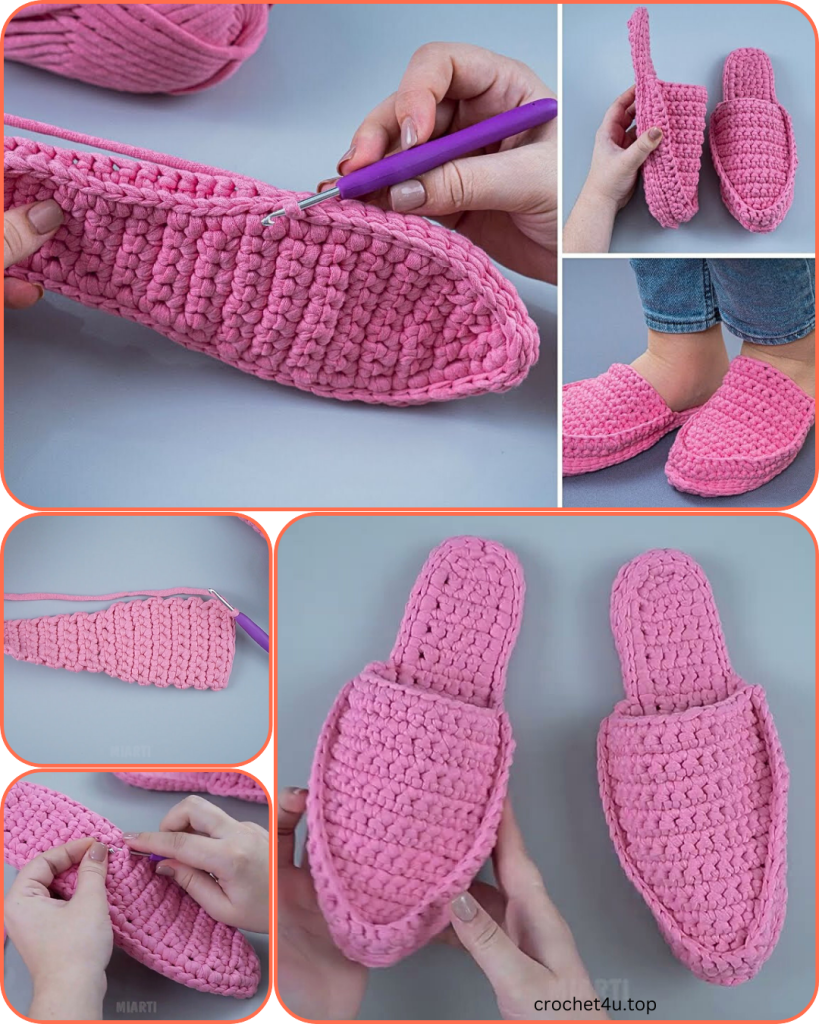
Part 1: The Sole (Make 2)
We’ll start with the base of the slipper, a sturdy oval sole with a built-in ridge for the sides.
Foundation Chain: Ch 17.
Round 1: Sc in the 2nd ch from the hook. Sc in the next 14 chains. 3 sc in the last ch. Now, working down the opposite side of the foundation chain, sc in the next 14 chains. 2 sc in the very first chain where you made your initial sc. Do not join. PM in the last stitch made. (34 sts)
Round 2: 1 inc in the first st. Sc in the next 14 sts. (1 inc) in each of the next 3 sts. Sc in the next 14 sts. (1 inc) in each of the next 2 sts. Do not join. PM in the last stitch made. (40 sts)
Round 3: Sc in the first 2 sts. Sc in the next 14 sts. (1 inc, sc in the next st) 3 times. Sc in the next 14 sts. (1 inc, sc in the next st) 2 times. Do not join. PM in the last stitch made. (46 sts)
Round 4: Sc in the first 2 sts. Sc in the next 16 sts. (1 inc, sc in the next 2 sts) 3 times. Sc in the next 16 sts. (1 inc, sc in the next 2 sts) 2 times. Do not join. PM in the last stitch made. (52 sts)
For a larger size, add more rounds of increases, placing stitches between the increases on the ends. For a smaller size, stop at Round 3 or 2.
Round 5 (The Ridge): Working in BLO, sc in each st around. Do not join. PM. This creates a vertical ridge that helps the sides of your slipper stand up. (52 sts)
Round 6-8: Sc in each st around, working in both loops as normal. Do not join. (52 sts per round)
After Round 8, sl st into the next stitch to join. FO, leaving a long tail for sewing.
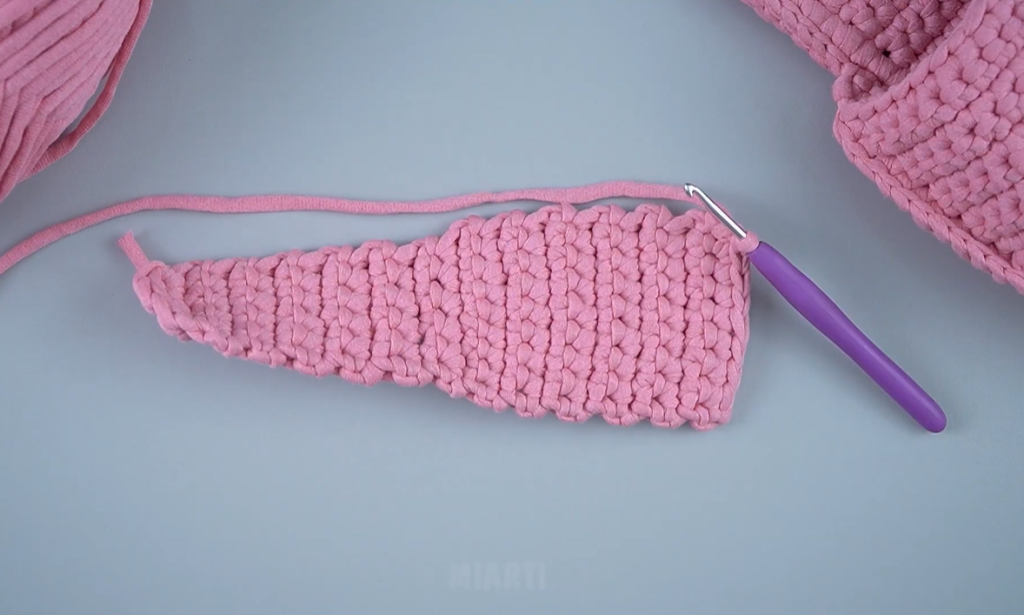
Part 2: The Upper (Vamp) (Make 2)
This is the top part of the slipper that will cover the toes and front of your foot.
Foundation Chain: Ch 12.
Row 1: Sc in the 2nd ch from the hook and in each ch across. (11 sc). Ch 1, turn.
Row 2: Sc in the BLO of each st across. (11 sc). Ch 1, turn.
Rows 3-18: Repeat Row 2. Your piece should measure approximately 10 inches (25 cm) long when you are finished. For a wider/narrower vamp, add or subtract rows as needed.
FO, leaving a long tail for sewing.
Part 3: Assembly
This is where the magic happens and your slipper takes shape!
- Take your sole and your vamp. Lay the vamp flat. You’ll notice it naturally wants to curl a little due to the sc BLO stitches.
- Find the center of the top of the vamp (the last row you crocheted). Using your fingers or a stitch marker, find the center stitch.
- Find the center of the toe end of the sole. To do this, you can fold the sole in half and mark the very center.
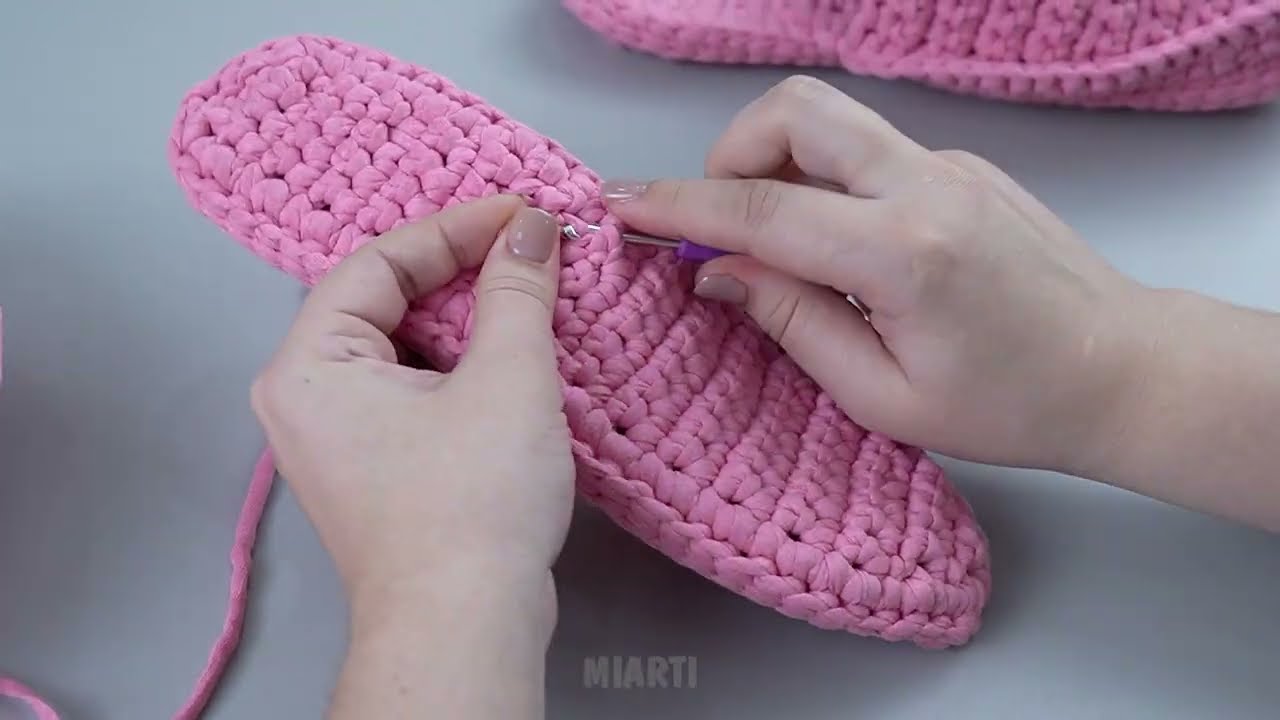
- Line up the center of the vamp with the center of the sole. Using your yarn needle and the long tail from the vamp, begin to sew the two pieces together. Use a simple whip stitch, going through the stitches on the bottom of the vamp and the stitches on the top of the sole’s side wall.
- Continue sewing down both sides of the vamp, stopping when you have about 6-8 stitches left on either side of the vamp to attach. The vamp should cover the toe and the front of the foot, leaving the back of the sole open for your heel.
- Once you’ve sewn the vamp onto the sole, use a yarn needle to sew the two sides of the vamp together right down the front seam, from the toe up. You can use a mattress stitch for an invisible seam.
- Weave in all your ends securely. Repeat all steps to create the second slipper.
Video Tutorial:
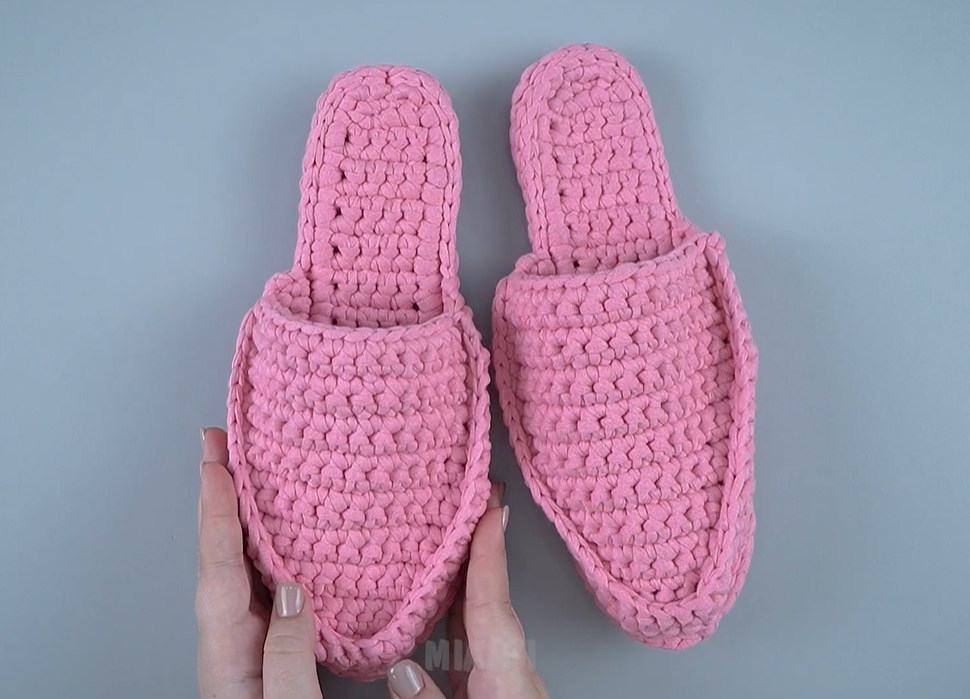
Congratulations!
You’ve done it! You now have a beautiful, handmade pair of Cozy Ribbed All-Day Slippers. This simple pattern creates a durable and stylish slipper that will keep your feet toasty and bring a sense of accomplishment every time you put them on.
Enjoy your new slippers and happy crocheting!


