
Hello, fellow makers! I’m so excited to share this pattern with you today. There’s something truly special about creating something small and sweet with your own hands, and these adorable knit booties are the perfect project for that. Whether you’re knitting a heartfelt gift for a new baby or creating a charming decorative piece to brighten up your home, this pattern is designed to be a relaxing and rewarding experience.
This pattern is written for one bootie, and it’s perfect for knitters of all skill levels, even if you’re a beginner looking for a fun new challenge. We’ll walk through every step, from casting on to adding that final, perfect bow.
Difficulty: Beginner-Intermediate
Finished Size:
- Approximately 3.5 inches long from heel to toe.
- Fits a small baby (0-3 months).
Materials
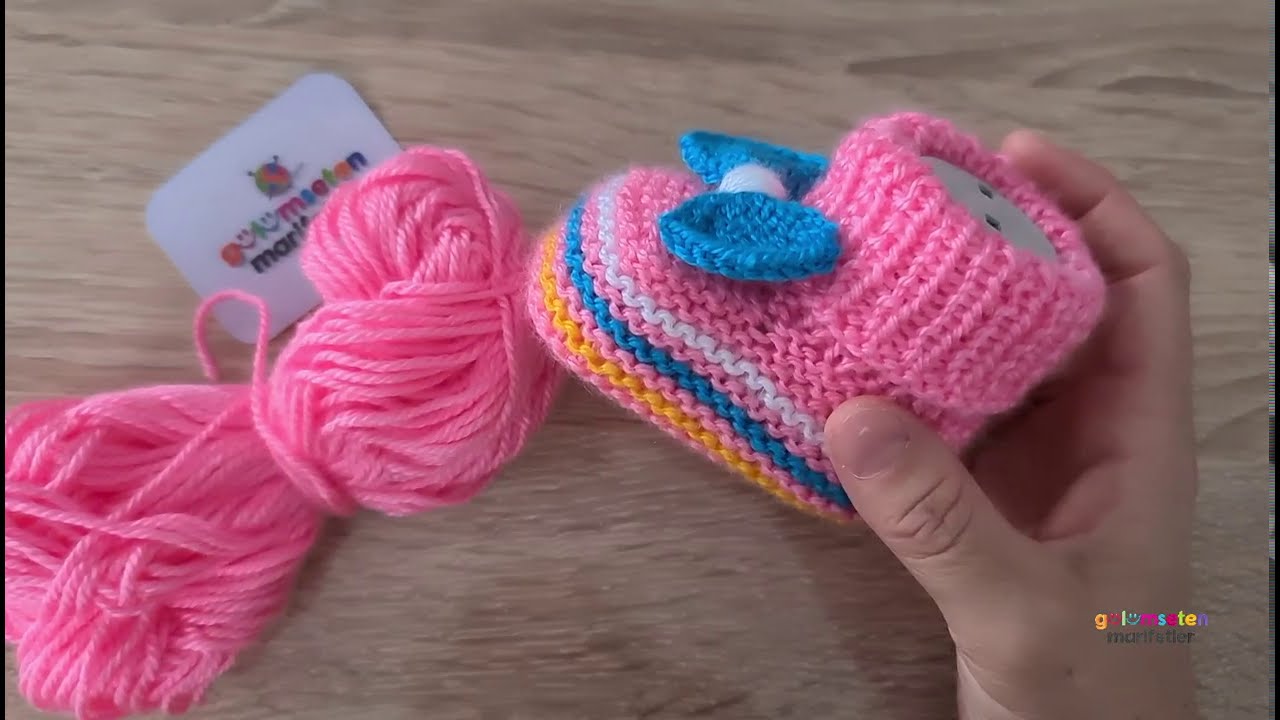
- Yarn: I used a light worsted weight yarn, also known as DK yarn. This weight creates a cozy yet firm fabric.
- Main Color (MC): Light pink (approx. 50g)
- Contrast Color 1 (CC1): Light yellow
- Contrast Color 2 (CC2): Light blue
- Bow Color (BC): Dark blue
- Needles: US size 5 (3.75 mm) straight knitting needles or circular needles.
- Accessories:
- A tapestry needle for seaming and weaving in ends.
- A small stitch holder or scrap yarn.
- Scissors.
Gauge
For this project, the gauge isn’t critical, but aim for a fabric that isn’t too loose. It should be dense enough to hold its shape well. Approximately 5 stitches = 1 inch in stockinette stitch.
Part 1: Knitting 101 – The Basics You Need to Know
If you’re new to knitting, don’t worry! This pattern uses just a few basic techniques.
- Cast On: This is how you create the first row of stitches on your needle. There are many ways to do it; a long-tail cast-on is a common choice and creates a neat, stretchy edge.
- Knit Stitch (K): A foundational stitch that creates the “V” shape in your fabric.
- Purl Stitch (P): A stitch that creates a small bump on your fabric.
- Knit Two Together (k2tog): This is a simple decrease stitch that helps shape your bootie. You simply insert your right needle into two stitches on your left needle at the same time and knit them as one.
- Garter Stitch: You create this by knitting every row. It produces a flat, ridged fabric that doesn’t curl.
- Stockinette Stitch: You create this by alternating a knit row with a purl row. It’s the classic smooth knitting fabric.
- 1×1 Rib Stitch: You create this by alternating a knit stitch with a purl stitch across the row. It’s a very stretchy fabric, perfect for cuffs.
- Bind Off: This is how you finish your project. You create a secure, final row of stitches that keeps your work from unraveling.
Part 2: The Bootie Pattern
The bootie is knit in one flat piece, starting from the sole and working up to the cuff. This makes it a perfect project for straight needles.
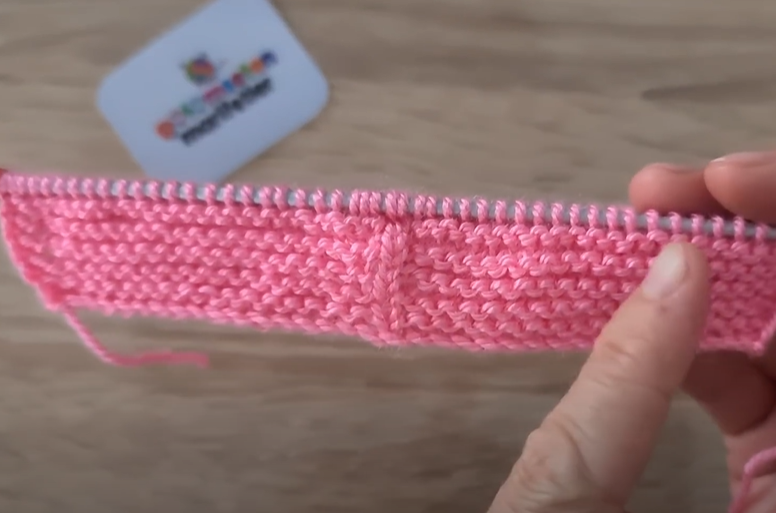
Step 1: The Sole (Main Color)
- Row 1: Using your Main Color (MC), cast on 27 stitches.
- Rows 2-8: Knit every row. This creates the garter stitch sole, which will be flat and sturdy.
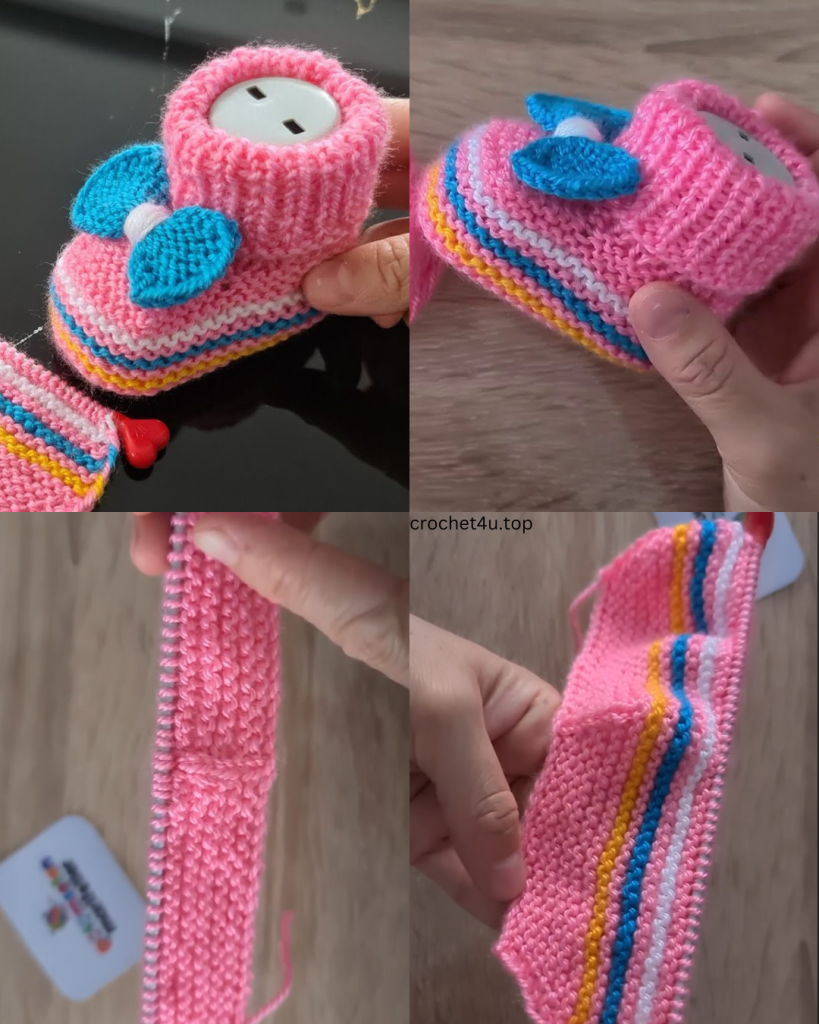
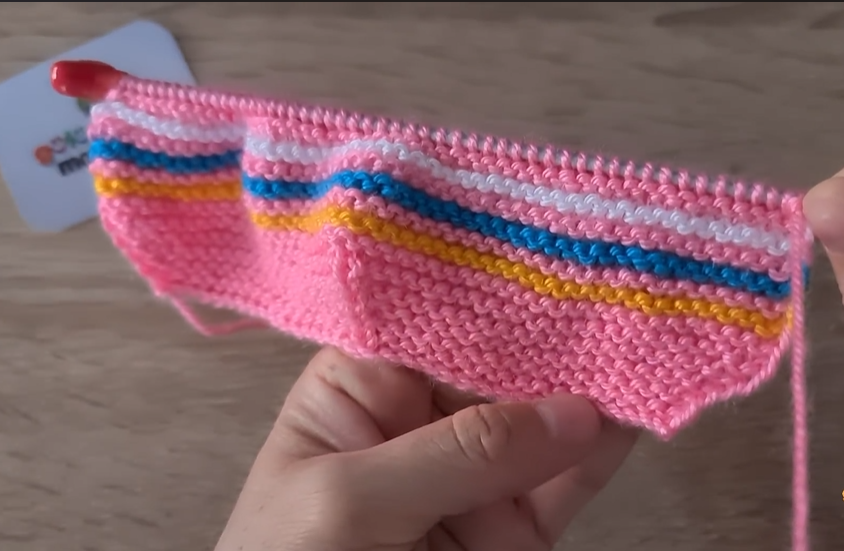
Step 2: The Stripes
- Row 9: Change to Contrast Color 1 (CC1). Knit all stitches.
- Row 10: Change to Contrast Color 2 (CC2). Knit all stitches.
- Row 11: Change back to Main Color (MC). Knit all stitches.
Step 3: The Body (Main Color) Now, we’ll switch to stockinette stitch for the body of the bootie.
- Row 12: Knit all stitches.
- Row 13: Purl all stitches.
- Rows 14-25: Repeat Rows 12 and 13 until you have completed Row 25.
Step 4: Shaping the Toe and Ankle This is where the bootie starts to take its unique shape.
- Row 26 (Decrease Row): Knit 10 stitches, then knit two stitches together (k2tog), knit 3 stitches, knit two stitches together (k2tog), knit 10 stitches. (You should now have 25 stitches.)
- Row 27: Purl all stitches.
- Row 28 (Decrease Row): Knit 9 stitches, knit two stitches together (k2tog), knit 3 stitches, knit two stitches together (k2tog), knit 9 stitches. (You should now have 23 stitches.)
- Row 29: Purl all stitches.
- Rows 30-33: Continue working in stockinette stitch (knit a row, purl a row) until you have completed Row 33.
Step 5: The Cuff (Main Color) The cuff will be a ribbed stitch, which creates a nice, stretchy opening.
- Row 34: Work in a 1×1 rib stitch: (knit 1, purl 1) across the row.
- Rows 35-40: Continue working in the 1×1 rib stitch until you’ve completed Row 40.
- Finishing: Bind off all stitches loosely, making sure not to pull the yarn too tightly. Cut the yarn, leaving a long tail of about 12 inches for seaming.
Part 3: Assembly & The Bow
Now for the final touches! This is where your flat piece becomes a beautiful bootie.
Step 1: Seaming
- Fold the knitted piece in half lengthwise, with the “wrong” side (the side with the purl bumps from the stockinette stitch) facing out.
- Using your tapestry needle and the long yarn tail, stitch the seam from the top of the cuff all the way down to the heel. Use a mattress stitch for an invisible seam that looks clean and professional.
- To create the rounded toe and heel, weave your needle in and out through the cast-on edge and the toe area. Pull the yarn tail tight to cinch it closed.
- Once seamed, turn the bootie right-side out.
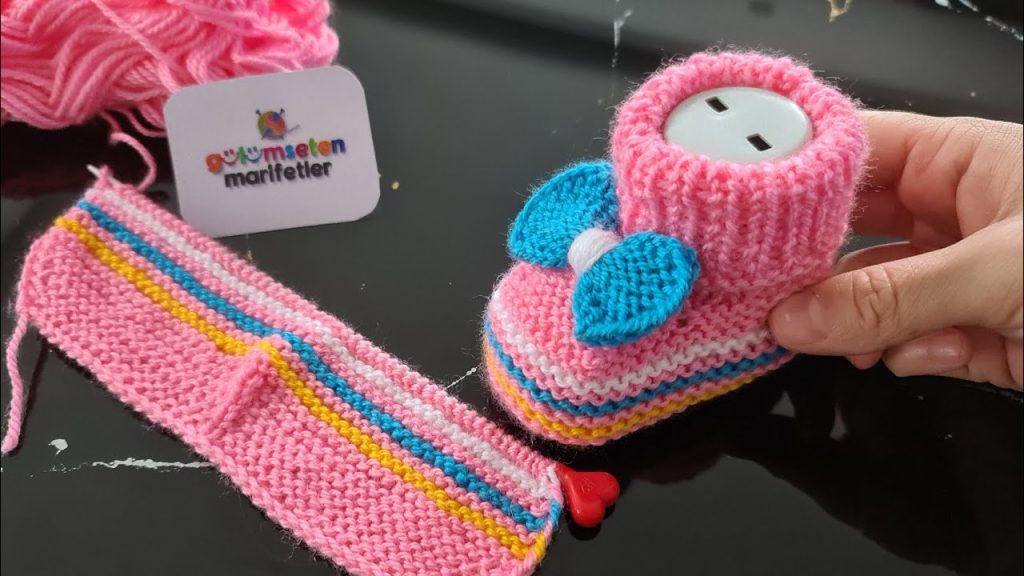
Step 2: The Bow This little accent makes the bootie truly special.
- Using your Bow Color (BC), cast on 10 stitches.
- Knit every row (garter stitch) for 4 rows.
- Bind off all stitches.
- Using a new piece of BC yarn, wrap it tightly around the center of the small rectangle to create the bow shape. Secure with a knot on the back.
- Sew the bow onto the front of the bootie, just above the striped section, using your tapestry needle.
Step 3: Finishing Touches
- Weave in any remaining yarn ends neatly on the inside of the bootie.
- Repeat the entire process to create a matching bootie for a pair!
Video Tutorial:
Troubleshooting and Customization
- Sizing Up or Down: To make the bootie larger, you can add a few extra stitches when casting on (e.g., 31 stitches instead of 27) and work a few more rows in the body and cuff. For a smaller size, simply reduce the stitch count and row count.
- Too Many or Too Few Stitches? If you have a different stitch count than the pattern, go back and carefully recount. You may have missed a decrease or added an extra stitch. It’s easy to fix on the next row!
- My Tension is Too Loose/Tight: If your bootie is too loose and floppy, try using a smaller needle size. If it’s too tight and stiff, go up a needle size.
Happy knitting! I hope you love creating these adorable little booties as much as I do. What colors will you choose for your first pair?


