
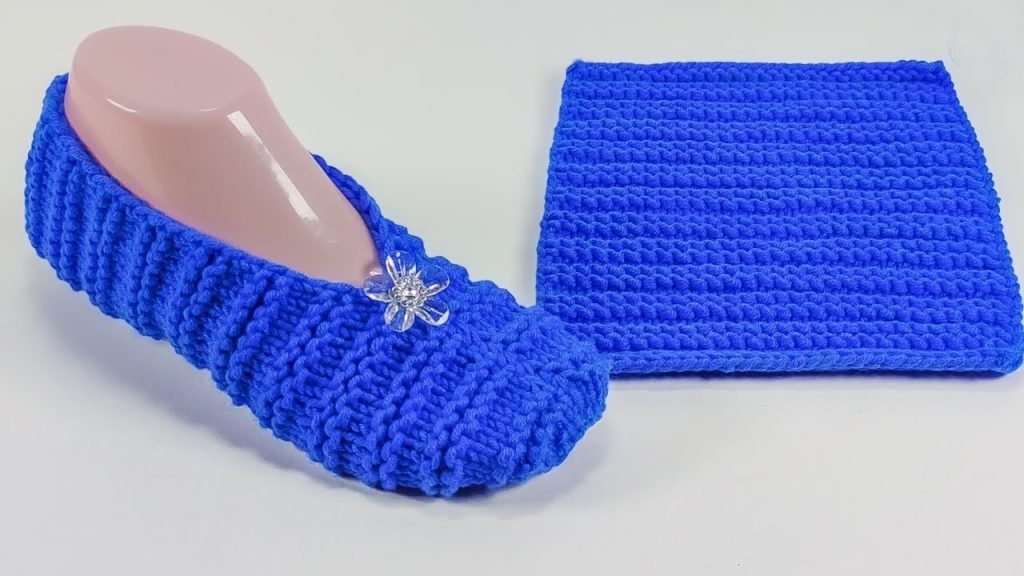
Hello, knitting enthusiasts! Prepare to create your next favorite pair of house slippers—the Sapphire Dream Slipper. This design is a masterclass in simplicity meeting comfort. It starts as a single knitted rectangle, mostly in the classic Garter Stitch (knit every row), and then, with just a few clever folds and seams, it transforms into a beautifully shaped, warm slipper.
This pattern is written for Adult Medium (Women’s US size 7-9 / EU 38-40), perfect for beginners looking for a satisfying project or experienced knitters wanting a quick, cozy make.
🛠️ Materials Needed
- Yarn: Approximately 150 – 180 yards (135 – 165 meters) of a soft, yet durable Worsted weight (Aran/10-ply) yarn.
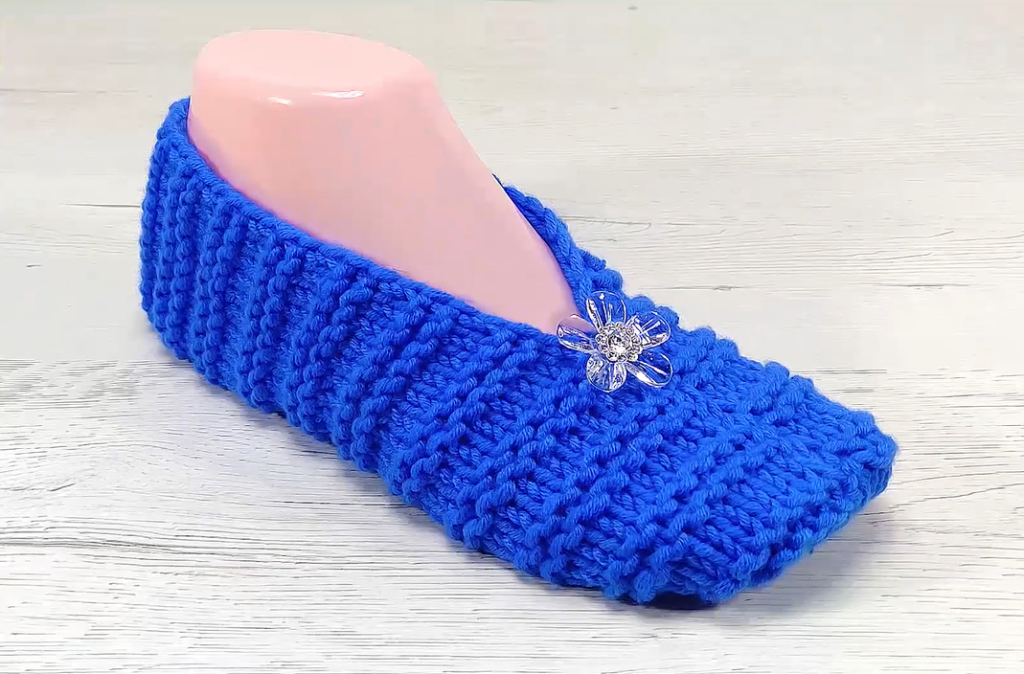
- The bright blue yarn in the photo appears to be a smooth, resilient acrylic or a sturdy wool blend.
- Needles: A pair of US size 8 (5.0 mm) straight knitting needles.
- A slightly larger needle size can make the garter stitch fabric softer and more pliable for slippers.
- Notions:
- Tapestry Needle with a blunt tip for robust seaming.
- Sharp Scissors.
- Embellishment (Optional): A small crystal flower or button for the toe.
📏 Gauge (Your Key to the Right Fit)
- Gauge: 16 stitches and 32 rows (16 garter ridges) equals 4 inches (10 cm) in Garter Stitch.
- Why Gauge is Crucial: For a slipper constructed from a rectangle, precise gauge ensures the final length and width of the folded piece are correct for the intended foot size. Always knit a swatch!
ℹ️ Key Techniques & Abbreviations
This pattern is entirely worked flat and relies on basic knitting stitches and a simple cast-off.
- K = Knit
- st(s) = Stitch(es)
- Garter Stitch: Knit every row.
- Cast On: Using the long-tail cast-on or knitted cast-on method.
- Bind Off: Standard bind-off.
💙 The Pattern: Sapphire Dream Slipper (Adult M)
This slipper starts as a simple rectangle. The shaping comes entirely from the seaming.
1️⃣ The Flat Rectangle (The Foundation)
We begin by knitting a long rectangle that will eventually become the entire slipper.
| Step | Instructions | Stitch Count |
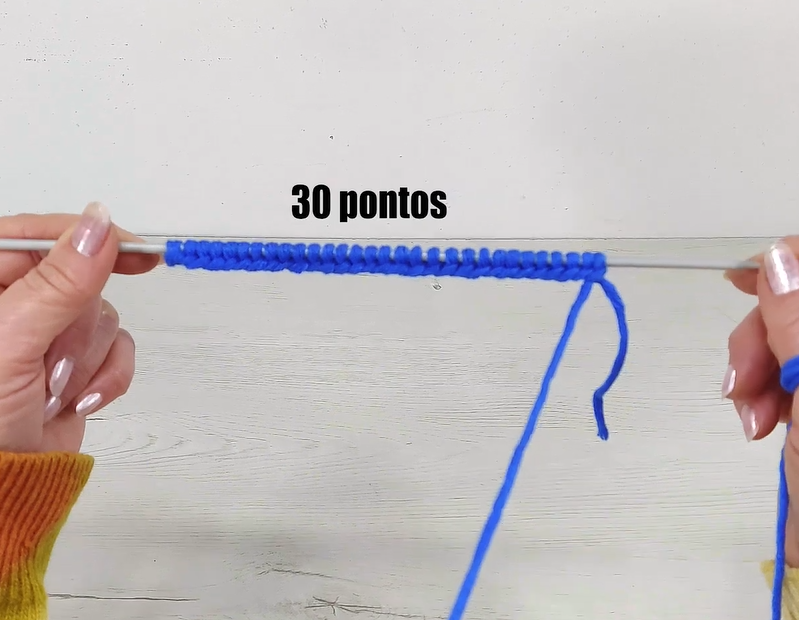
| Cast On | Cast on 34 stitches. | 34 sts |
| Rows 1–80 | Work in Garter Stitch (Knit every row) for 80 rows, or until the piece measures approximately 10 inches (25.5 cm) long. | 34 sts |
| Last Row | Bind off all 34 stitches loosely. FO, leaving a very long tail (at least 40 inches / 1 meter) for seaming. | Bind Off |
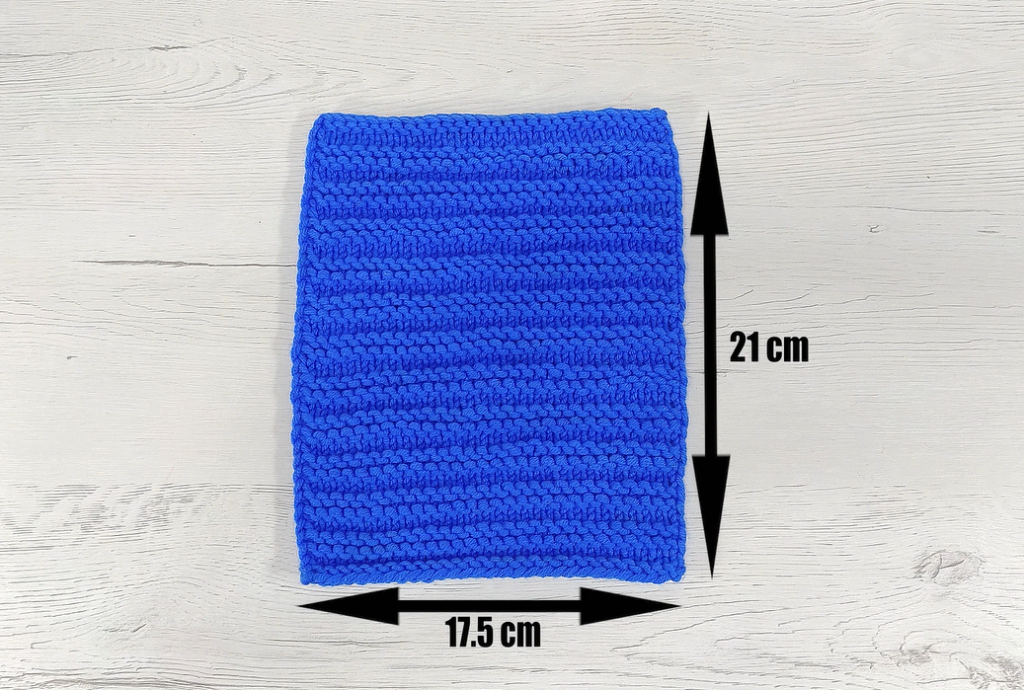
- Rectangle Dimensions Check: Your finished rectangle should be approximately 8.5 inches (21.5 cm) wide by 10 inches (25.5 cm) long.
🧵 Finishing and Seaming (The Transformation)
This is the most exciting part, where your flat rectangle magically becomes a slipper!
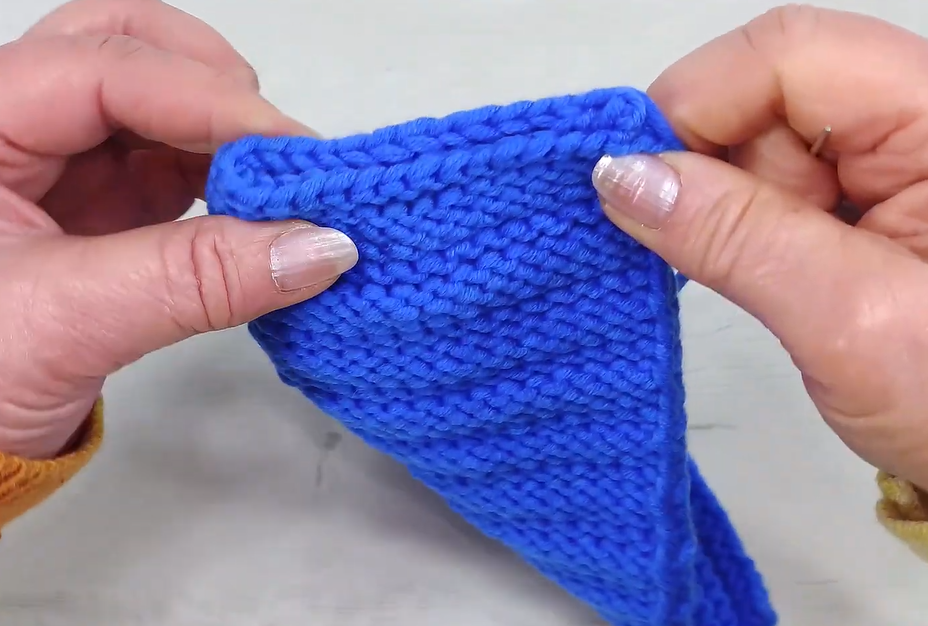
- Step 1: The First Fold (Toe Fold)
- Lay your knitted rectangle flat.
- Fold one of the shorter ends (one of your cast-on/bound-off edges) inwards by approximately 2.5 inches (6.5 cm). This forms the front of the slipper’s toe.
- Step 2: Seaming the Toe
- Using the long yarn tail from your bind-off, begin seaming.
- Starting from one side of the folded-over edge, seam upwards along the side of the toe. You will be seaming the raw edge of the folded section to the body of the rectangle.
- Continue across the top of the folded section, creating the top seam of the toe.
- Then, seam downwards along the other side of the toe.
- You should now have a neat, enclosed toe section.
- Step 3: The Second Fold (Heel and Cuff Fold)
- Now, take the other short end of your rectangle (the unseamed end) and fold it towards the toe. This fold will determine the height of your heel and the opening for your foot.
- Adjust this fold until the edges meet the sides of the toe section, and the opening for your foot feels appropriate (about 2-3 inches of gap for the foot to slip in).
- Step 4: Seaming the Heel and Sole
- Continue using your long yarn tail.
- Seam the back edge (the heel) of the folded piece together.
- Then, continue seaming along the bottom edge (the sole) of the slipper, running from the heel towards the toe, until you reach the base of your initial toe seam.
- Final Touches: Secure all seams firmly and weave in all remaining yarn ends discreetly on the inside of the slipper.
💎 Embellishment (Optional)
- Crystal Flower/Button: Using a sewing needle and matching thread, carefully attach the crystal flower or button to the top center of the toe section, as shown in the image. This adds a charming finishing touch.
- The Second Slipper: Repeat all steps exactly to create a matching pair!
Video Tutorial:
✨ Customization and Sizing
Adjusting Foot Length (Size)
The length of the rectangle (number of rows) directly impacts the overall foot size.
- For Size S/M (US 5-6): Reduce the number of rows in Section 1 by 8-12 rows (72-68 rows total) and adjust your initial toe fold accordingly.
- For Size L/XL (US 10-11): Increase the number of rows in Section 1 by 8-12 rows (88-92 rows total) and adjust your initial toe fold and heel fold as needed to match.
Adjusting Width (Girth/Foot Depth)
The cast-on stitch count determines the initial width of the rectangle, which translates to the overall girth and depth of the slipper.
- For a wider foot: Cast on 36 or 38 stitches. This will make the slipper wider and potentially taller, offering more room for the foot.
- For a narrower foot: Cast on 30 or 32 stitches. This will result in a more snug fit.
Enhancing Comfort and Durability
- Non-Slip Soles: Garter stitch can be quite smooth on certain floor types. To prevent slipping, apply liquid latex or non-slip fabric paint in dots or stripes to the bottom of the finished slipper. Allow it to dry completely.
- Reinforced Seams: For extra durability, especially for areas under heavy wear (like the sole), consider working a double seam or backstitching.


