
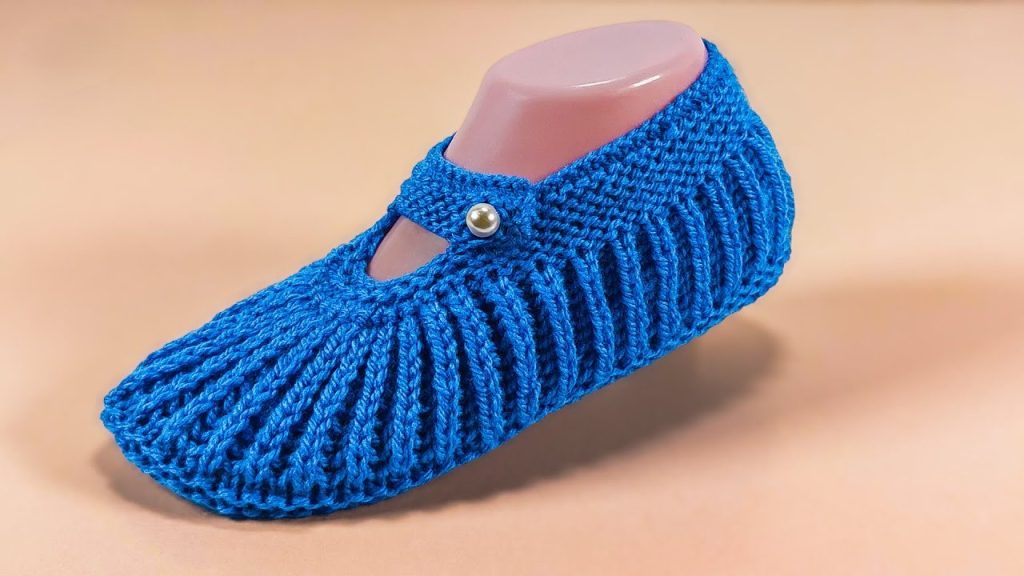
Welcome, elegant crafters! Today’s pattern is for the gorgeous Sapphire Mary Jane Slipper. This design is truly special, featuring stunning vertical ribbing that wraps around the entire foot and a secure strap closure finished with a pearl button. Despite its refined appearance, this slipper is worked in one flat piece and is perfect for intermediate knitters or adventurous beginners!
This pattern is written for Adult Medium (Women’s US size 7-9 / EU 38-40), with notes on how to adjust the length and width.
🛠️ Materials Needed
- Yarn: Approximately 150 – 180 yards (135 – 165 meters) of a soft, bulky Worsted weight (Aran/10-ply) yarn in your main color (Sapphire Blue).
- Needles: A pair of US size 8 (5.0 mm) straight knitting needles.
- Using a slightly larger needle helps the ribbing stretch comfortably.
- Notions:
- Tapestry Needle for robust seaming and weaving in ends.
- Scissors.
- One Pearl Button (approx. 1/2 inch or 12mm) for the strap closure.
- Stitch marker (optional, but helpful).
📏 Gauge (Vital for Ribbed Fabric)
- Gauge: 16 stitches and 32 rows equals 4 inches (10 cm) in Garter Stitch, measured before stretching.
- Tip: The ribbed texture will pull in tightly, so it’s essential to check the gauge in the plain Garter Stitch section to ensure correct length.
ℹ️ Key Techniques & Abbreviations
The distinctive vertical ribbing is achieved by working the piece sideways using Knit/Purl combinations that mimic 1×1 or 2×2 ribbing across the rows.
- K = Knit
- P = Purl
- st(s) = Stitch(es)
- RS = Right Side
- WS = Wrong Side
- K2tog = Knit two stitches together (a decrease).
- ssk = Slip, Slip, Knit (a decrease).
- M1 = Make 1 (a simple increase).
- Garter Stitch: Knit every row.
💖 The Pattern: Sapphire Mary Jane Slipper (Adult M)
The entire slipper is worked in one long strip. The rows determine the circumference around the foot, and the stitches determine the depth of the sole.
1️⃣ Toe/Instep Section (The Shaping Panel)
We start at the center toe, using a short section of Stockinette-based ribbing to create the gathered look. Cast on loosely.
| Row | Instructions | Stitch Count |
| Cast On | Cast on 34 stitches. | 34 sts |
| Rows 1–4 | Work in Garter Stitch (Knit every row). This forms the front edge that will be cinched. | 34 sts |
| Row 5 (RS) | K 1, *P1, K1*. Repeat from * to * across the row. | 34 sts |
| Row 6 (WS) | P 1, *K1, P1*. Repeat from * to * across the row. | 34 sts |
| Rows 7–18 | Repeat Rows 5 and 6 for 6 repeats (12 rows total). This creates the ribbed look over the toe. | 34 sts |
| Row 19 (RS) | Decrease Row: K 1, *K2tog, P2tog*. Repeat from * to * 8 times. K 1. | 18 sts |
| Row 20 (WS) | Purl all 18 stitches. | 18 sts |
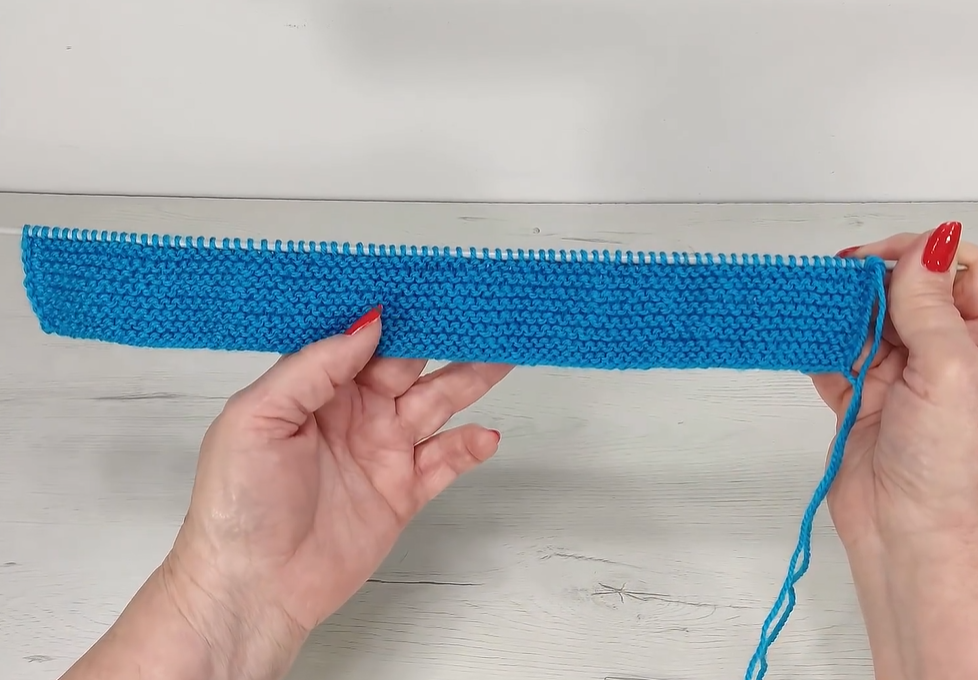
2️⃣ Foot and Sole Panel (The Main Ribbed Body)
This is the largest section, using Garter Stitch to create a dense, highly textured rib when folded.
| Row | Instructions | Stitch Count |
| Rows 21–60 | Work in Garter Stitch (Knit every row) for 40 rows (or until piece measures about 10 inches / 25 cm from the beginning of Row 21). This determines the circumference of your foot. | 18 sts |

3️⃣ Heel and Strap Panel (The Cuff)
Now we shape the heel and incorporate the Mary Jane strap.
| Row | Instructions | Stitch Count |
| Row 61 (RS) | Knit all 18 stitches. | 18 sts |
| Row 62 (WS) | Knit 8 sts. Cast on 10 stitches for the strap. Knit across the new 10 sts. Turn. (The remaining 10 stitches are for the back heel). | 28 sts |
| Row 63 (RS) | K 28 sts. | 28 sts |
| Row 64 (WS) | Buttonhole Row: K 2, K2tog, yo (yarn over), K to end. This creates a buttonhole for your pearl button. | 28 sts |
| Row 65 (RS) | Knit all 28 stitches. | 28 sts |
| Row 66 (WS) | Bind off 18 stitches (the strap). Knit the remaining 10 stitches. | 10 sts |
| Rows 67–86 | Work in Garter Stitch (Knit every row) for 20 rows. This forms the back heel. | 10 sts |
| Last Row | Bind off all 10 stitches loosely. FO, leaving a long tail (at least 30 inches / 75 cm) for seaming. | Bind Off |

🧵 Finishing and Assembly (The Fold)
This is the final step where the flat strip becomes a shoe.

- Step 1: Closing the Toe Tip:
- Thread the yarn tail from the Cast On edge onto your tapestry needle.
- Run the needle through the loops of the first 4 rows (the starting Garter Stitch section).
- Pull the yarn tightly to cinch the toe opening closed into a small, neat point. Secure the thread firmly on the inside.
- Step 2: Seaming the Body and Sole:
- Fold the entire piece in half lengthwise, aligning the top and bottom edges.
- Using the long tail from the final bind-off, start seaming the short edges of the back heel panel (Rows 66–86) together. This forms the back heel seam.
- Continue the seam along the entire bottom edge (the sole), running from the heel towards the toe, until you reach the base of the cinched toe tip. Use the mattress stitch for a clean, strong seam.
- Step 3: Attaching the Button:
- Try the slipper on your foot.
- Position the strap across the instep and mark the spot where the buttonhole lines up with the opposite side of the slipper opening (approximately at the top edge of Row 66).
- Sew your pearl button securely at this marked spot.
- Final Touches: Weave in all remaining yarn ends.
- The Second Slipper: Repeat the entire pattern, but place the buttonhole on the opposite side (Row 64: K to the last 4 sts, K2tog, yo, K2) so you have a mirrored pair.
Video Tutorial:
✨ Customization and Fit Tips
Adjusting Foot Length (Size)
The slipper length is controlled by the number of rows in Section 2 (Rows 21–60).
- For Size S/M (US 5-6): Reduce the length of the main body (Rows 21–60) by approximately 4–8 rows.
- For Size L/XL (US 10-11): Increase the length of the main body (Rows 21–60) by approximately 4–8 rows.
Adjusting Strap Length
- For a high instep: Cast on 2–4 extra stitches in Row 62 (cast on 12 or 14 instead of 10).
- For a narrow instep: Decrease the cast-on in Row 62 by 2 stitches (cast on 8 instead of 10).
Enhancing Durability
- Non-Slip Soles: Garter stitch can be slippery. Apply liquid latex or non-slip fabric paint in a dotted pattern to the sole of the finished slipper for traction.
- Embellishment: If you don’t use a button, you can secure the strap with a small, flat jewelry snap instead!


