
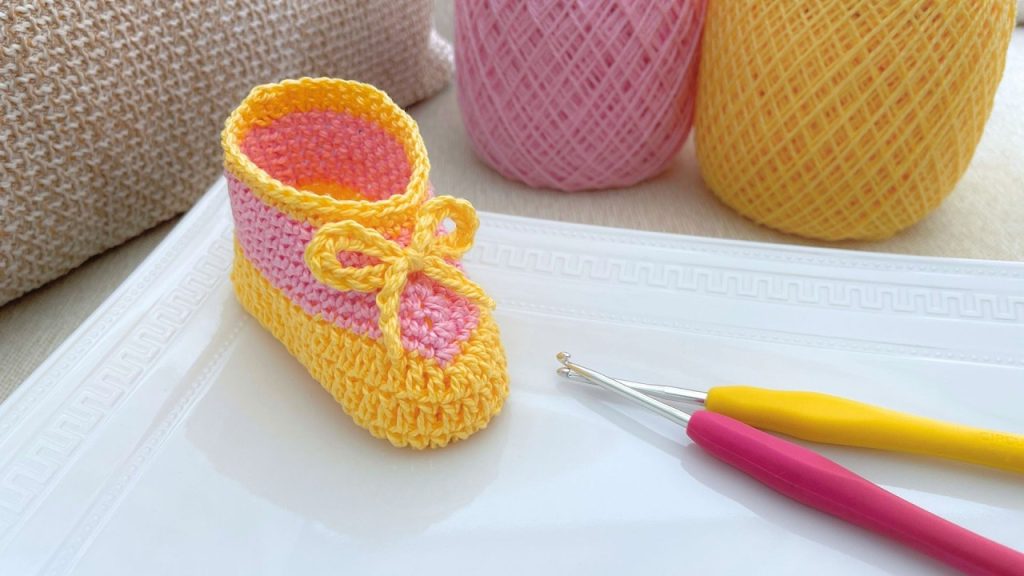
Welcome, crocheters! Today, we’re diving into a project that is as adorable as it is simple: The Charming No-Fuss Crochet Baby Bootie. This pattern is perfect for beginners or anyone looking for a quick and satisfying make. The design is unique because it uses minimal, strategic decreases in the front, making the shaping easy and eliminating the need for complex calculations often found in traditional shoe patterns.
This finished bootie fits babies approximately 0 to 3 months old (measuring about 19 cm in circumference before seaming).
🧶 Materials & Tools
Gather your supplies! We’re using two colors to achieve the beautiful contrasting cuff and body, but you can certainly use just one.
- Yarn: Light worsted or DK weight yarn (Category 3). Use a soft, baby-friendly acrylic or cotton blend.
- Color A (Cuff & Trim): Approx. 20g
- Color B (Main Body): Approx. 30g
- Hook: 3.5 mm or 4.0 mm crochet hook (or size needed to achieve a tight, dense fabric).
- Notions:
- Stitch marker
- Tapestry needle (for seaming and weaving ends)
- Scissors
- Measuring tape
📚 Abbreviations (US Terms)
Familiarize yourself with the stitches we’ll be using:
| Abbreviation | Stitch Name |
| ch | Chain |
| sl st | Slip Stitch |
| sc | Single Crochet |
| hdc | Half Double Crochet |
| st(s) | Stitch(es) |
| 3-st dec | Three-stitch decrease (a decrease worked over 3 stitches) |
Special Stitch: Three-Stitch Decrease (3-st dec)
- (Yarn over, insert hook into next st, pull up a loop) 3 times (you will have 4 loops on your hook). Yarn over, pull through all 4 loops on the hook.
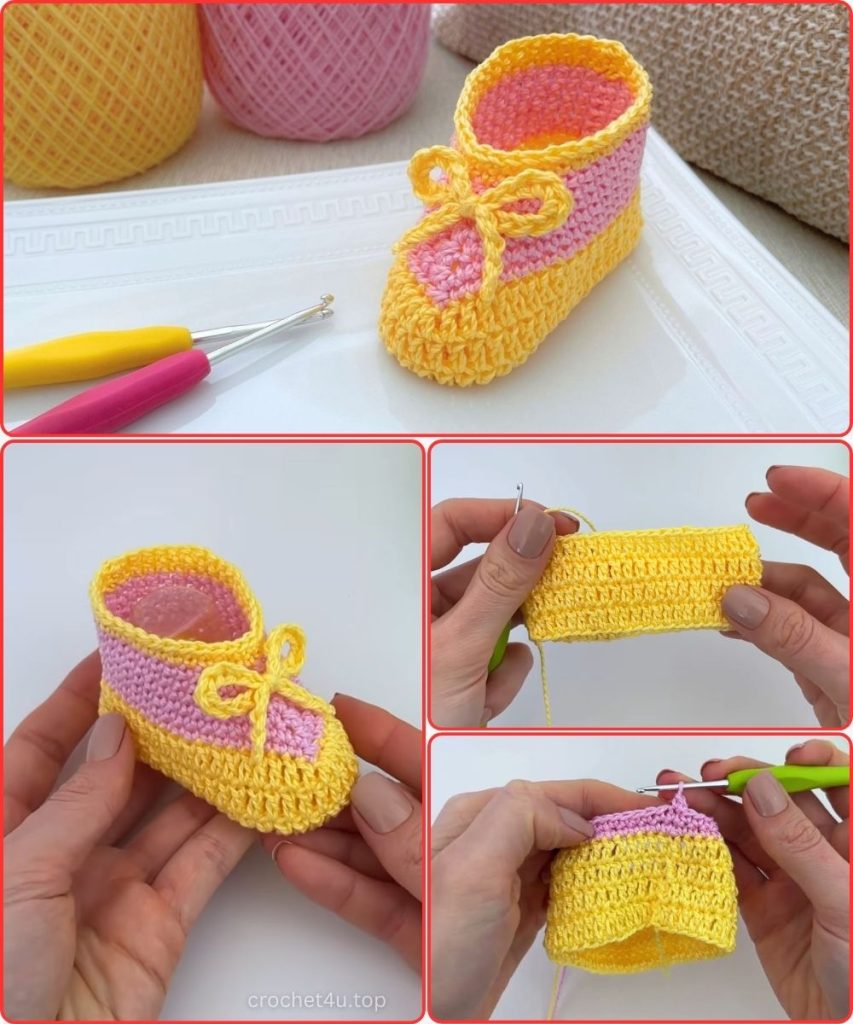
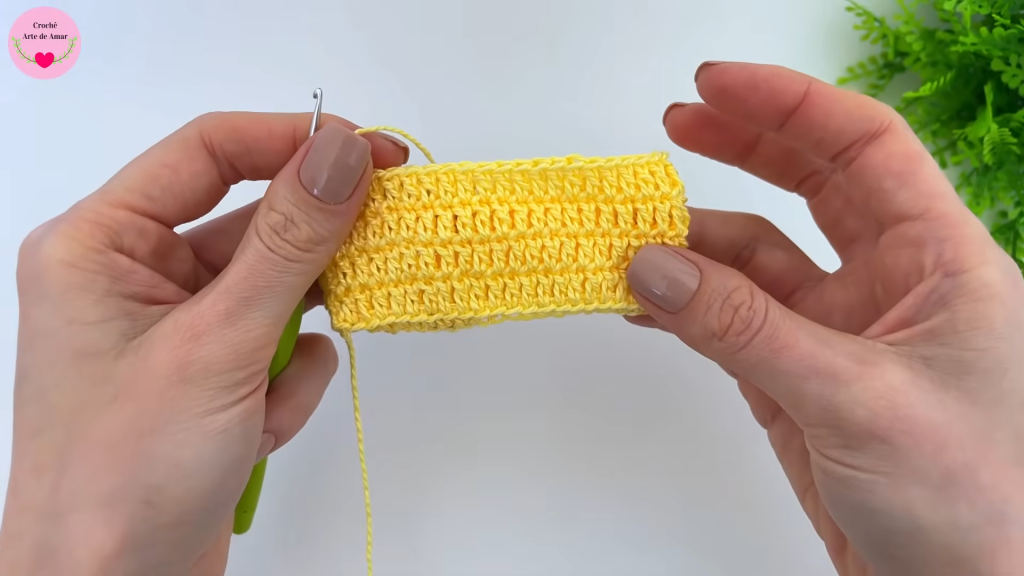
👣 Part 1: The Bootie Cuff (Color A)
The bootie is started with a long chain that is immediately joined to form a loop. Remember to leave a long tail (about 15-20 cm) at the beginning for seaming the sole later!

Foundation: With Color A, chain 45. (Note: The number of chains must be odd.)
Round 1:
- Carefully join the last ch to the first ch with a sl st to form a loop, being careful not to twist the chain.
- Ch 2 (counts as the first hdc).
- Hdc in the next st and in each ch around.
- Join with a sl st to the top of the beginning ch-2.(45 sts)
Rounds 2 – 4:
- Ch 2 (counts as the first hdc).
- Hdc in the next st and in each st around.
- Join with a sl st to the top of the beginning ch-2.(45 sts)
After Round 4, fasten off Color A and weave in the end securely. The cuff should measure approximately 3.5 cm in height.
🌈 Part 2: Main Body Decreases (Color B)
The shaping for the toe is achieved by working a series of decreasing single crochet rounds. The unworked stitches form the heel area and the side.

Round 5 (First Decrease Round):
- Join Color B with a sl st to the starting point of the previous round.
- Ch 1 (does not count as a stitch).
- Sc in the first st and in the next 20 sts. (21 sc total for the back/side).
- Work the 3-st dec over the next 3 sts (this forms the center of the toe).
- Sc in the remaining 21 sts to the end of the round.
- Join with a sl st to the first sc.(43 sts total)
Round 6:
- Ch 1. Sc in the first st and in the next 19 sts. (20 sc total).
- Work the 3-st dec over the next 3 sts (the center stitch should be the result of the previous decrease).
- Sc in the remaining 20 sts to the end of the round.
- Join with a sl st to the first sc.(41 sts total)
Round 7:
- Ch 1. Sc in the first st and in the next 18 sts. (19 sc total).
- Work the 3-st dec over the next 3 sts.
- Sc in the remaining 19 sts to the end of the round.
- Join with a sl st to the first sc.(39 sts total)
Rounds 8 – 10 (Continue Decreasing):
- Continue the established decrease pattern for 3 more rounds.
- In each subsequent round, the number of single crochet stitches worked on the back/side will decrease by 1, while the central 3-st dec remains the same.
| Round | SCs Before Dec | Center Dec | SCs After Dec | Total Sts |
| 8 | 18 sc | 3-st dec | 18 sc | 37 sts |
| 9 | 17 sc | 3-st dec | 17 sc | 35 sts |
| 10 | 16 sc | 3-st dec | 16 sc | 33 sts |
The total height of the body and cuff should be approximately 7 cm after Round 10.
After Round 10, fasten off Color B and weave in the end securely.
🎀 Part 3: Final Trim (Color A)
We will now add two final rows of single crochet in the cuff color to finish the top edge cleanly.
- Join Color A with a sl st to any point at the top opening.
- Round 11: Ch 1. Sc in each st around, working point-for-point over the existing stitches.
- Join with a sl st to the first sc.
- Round 12: Ch 1. Sc in each st around.
- Join with a sl st to the first sc.(33 sts total)
Fasten off Color A and weave in all remaining ends on the inside of the bootie, except for the long tail you left at the beginning.
🧵 Part 4: Seaming and Finishing
The final step is to turn your tubular work into a snug little bootie!
1. Prepare for Seaming:
- Turn the bootie inside out (wrong side facing you).
- Thread the long starting tail (Color A) onto your tapestry needle.
2. Shape the Heel:
- Starting at the join/base of the original foundation chain, count about 1 cm across the width.
- Work a running stitch (or zigzag stitch) through the loops of the foundation chain for that first 1 cm section.
- Pull the tail slightly to cinch and round the heel area.
3. Seam the Sole:
- Continue seaming from the heel cinch point all the way along the bottom edge toward the toe.
- Use the mattress stitch or a simple whipstitch, picking up one loop from each side of the foundation chain to create a flat, durable sole seam.
4. Shape the Toe Tip:
- Stop seaming when you reach the toe end, leaving about 1 cm unseamed.
- Work a running stitch through the stitches of this final 1 cm section.
- Pull the tail tightly to cinch and round the toe tip.
- Secure with a knot and weave the remaining tail into the inside stitches before trimming.
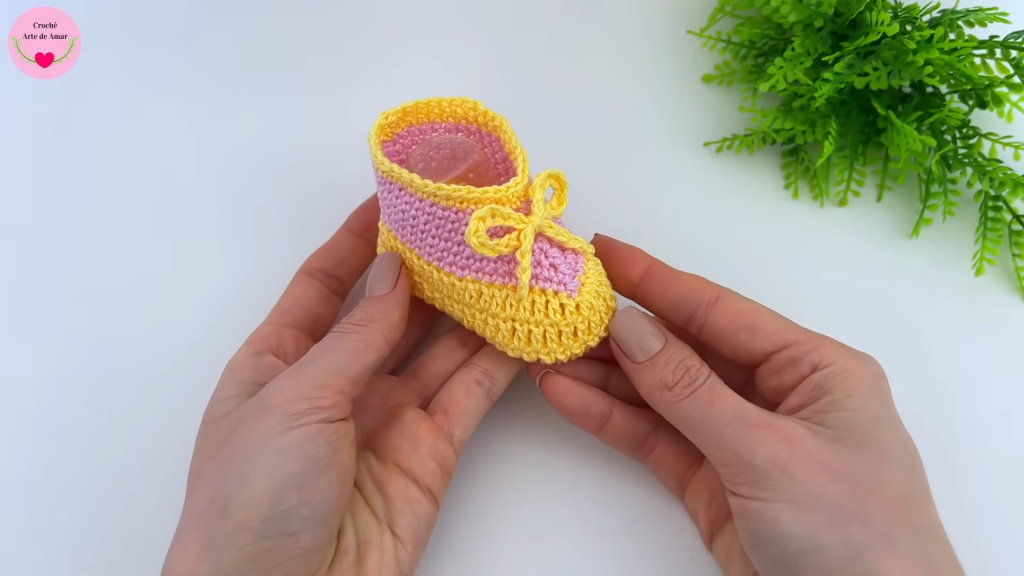
5. Final Presentation:
- Turn the bootie right side out. Gently model the shape with your hands.
Optional Decoration:
- For an extra touch, make a simple decorative bow using a thin chain (approx. 30-40 chains long). Tie the chain into a bow and sew or glue it to the center front of the bootie above the decreased section.
Repeat all steps to create the second matching bootie! Enjoy your beautiful, handmade creation!


