
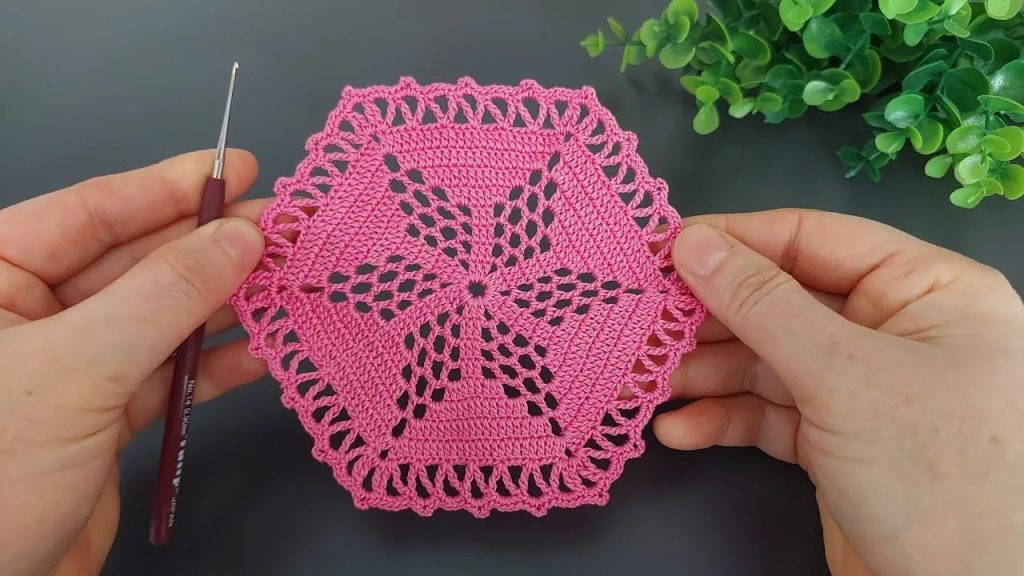
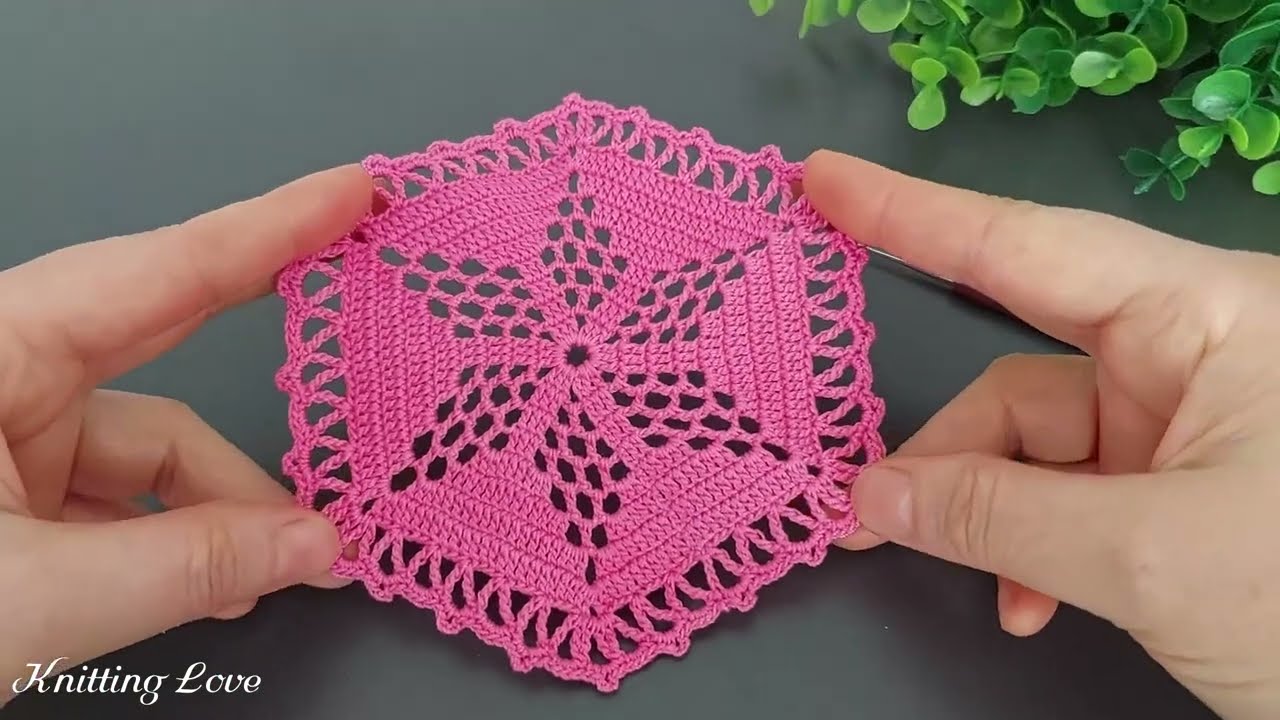
Hello, fellow makers! I’m so excited to share this pattern with you. This beautiful, lacy hexagon doily is a perfect project for anyone who loves to create elegant and functional pieces for their home. Whether you use it as a coaster, a doily for a small vase, or as part of a larger project, its intricate-looking design is surprisingly easy to create. This pattern is perfect for crocheters looking to expand their skills beyond the basics.
This pattern is written using US crochet terms.
Skill Level: Intermediate
Finished Size:
- Approximately 6 inches (15 cm) from point to point, when laid flat.
Materials You’ll Need
- Yarn: Approximately 30g of a fingering weight or sport weight yarn. Cotton or a cotton blend is highly recommended for this project. The natural fibers will hold the doily’s shape beautifully.
- Hook: A US size D/3 (3.25 mm) crochet hook, or the size needed to obtain gauge.
- Notions:
- A tapestry needle for weaving in ends.
- Scissors.
- A stitch marker (optional, but helpful for the beginning of the round).
Gauge: An Important First Step
For a project like this, gauge isn’t as critical for sizing, but it is important for the look and feel of the finished doily. A tight, even gauge will give you the sharp, defined stitches you see in the photo.
Gauge: 8 double crochet (dc) stitches = 1 inch (2.5 cm).
How to Check Your Gauge:
- Chain 10.
- Double crochet (dc) in the 4th chain from the hook and in each chain across.
- Your swatch should be approximately 1 inch wide. If it’s wider, try a smaller hook. If it’s narrower, try a larger hook.
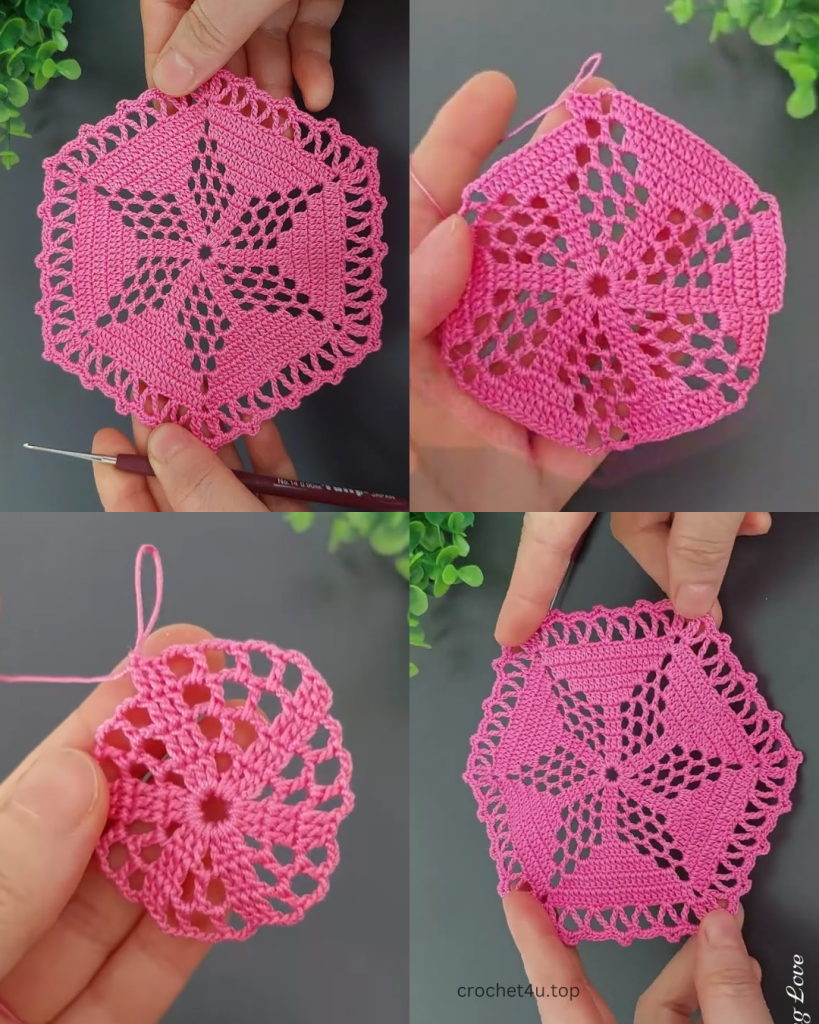
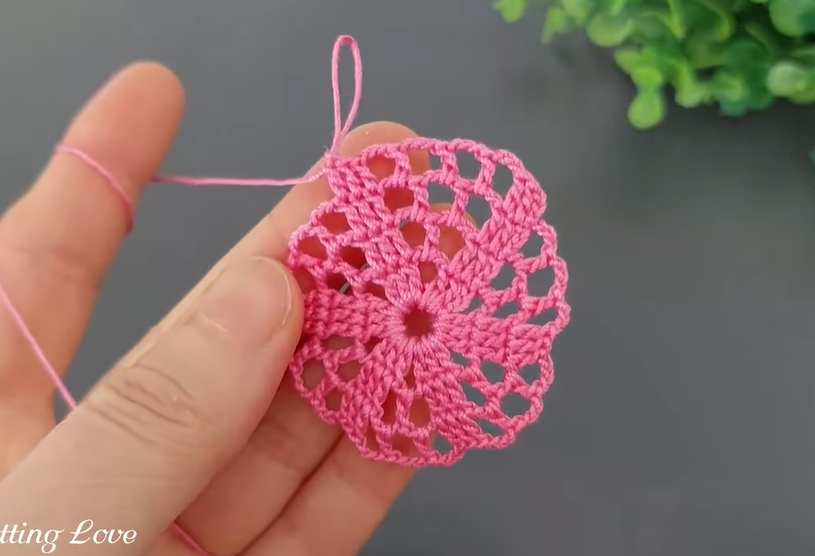
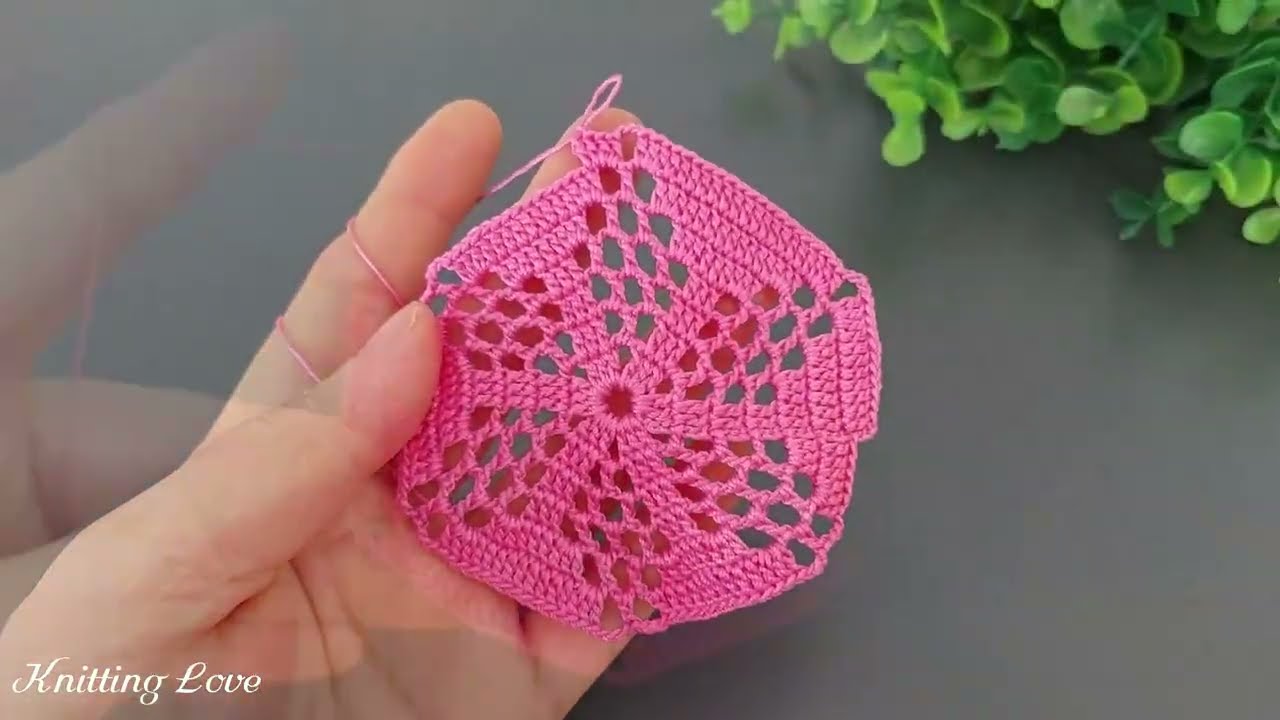
Crocheting the Doily: The Main Pattern
This doily is worked in the round from the center out. We’ll start with a small circle and then expand it into a hexagon.
Part 1: The Center Circle
- Round 1: Create a magic ring (or chain 4 and join with a slip stitch). Chain 3 (counts as the first double crochet), then work 11 double crochet (dc) into the ring. Join with a slip stitch (sl st) to the top of the beginning chain-3. (12 dc total)
- Round 2: Chain 3 (counts as the first dc). Work 1 dc in the same stitch. Work 2 dc in each stitch around. Join with a sl st to the top of the beginning chain-3. (24 dc total)
- Round 3: Chain 3 (counts as the first dc). Work 1 dc in the same stitch. Work 2 dc in each stitch around. Join with a sl st to the top of the beginning chain-3. (48 dc total)
Part 2: Forming the Hexagon
Now we will begin shaping the circle into a hexagon, creating the distinctive pointed shape.
- Round 4: Chain 3 (counts as the first dc). Work 1 dc in the same stitch. Work 2 dc in each stitch around. Join with a sl st to the top of the beginning chain-3. (96 dc total)
- Round 5: Chain 3 (counts as the first dc). Dc in the next 2 stitches. *2 dc in the next stitch, dc in the next 3 stitches*. Repeat from * to * around. Join with a sl st to the top of the beginning chain-3. (120 dc total)
Part 3: The Starburst Pattern
This is where the doily gets its signature look. We will use a combination of chain spaces and stitches to create the intricate starburst.
- Round 6: Chain 3 (counts as the first dc). Work 1 dc in the next 3 stitches. *Chain 3, skip 2 stitches, dc in the next 5 stitches*. Repeat from * to * around. Join with a sl st to the top of the beginning chain-3.
- Round 7: Chain 3 (counts as the first dc). Work 1 dc in the next 2 stitches. *Dc in the ch-3 space, chain 3, dc in the same ch-3 space, dc in the next 3 stitches*. Repeat from * to * around. Join with a sl st to the top of the beginning chain-3.
- Round 8: Chain 3 (counts as the first dc). Work 1 dc in the next 3 stitches. *Chain 3, skip 2 stitches, dc in the next 5 stitches*. Repeat from * to * around. Join with a sl st to the top of the beginning chain-3.
Part 4: The Lacy Edging
This beautiful edging gives the doily a finished and professional look.
- Round 9: Chain 1. Single crochet (sc) in the same stitch. *Chain 5, skip 2 stitches, sc in the next stitch*. Repeat from * to * around. Join with a sl st to the first sc.
- Round 10: Slip stitch (sl st) into the first ch-5 space. Chain 3 (counts as the first dc). Work 4 more dc in the same ch-5 space. *Sc in the next ch-5 space, chain 5, sc in the next ch-5 space, 5 dc in the next ch-5 space*. Repeat from * to * around. Join with a sl st to the top of the beginning chain-3.
- Round 11: Slip stitch into the first dc. Chain 1. Single crochet in the same stitch. *Chain 3, skip the next 2 dc, sc in the next dc, chain 3, skip the next 2 dc, sc in the next dc, chain 3*. Repeat from * to * around. Join with a sl st to the first sc.
- Final Round: Slip stitch into the first ch-3 space. *Chain 3, sl st in the same ch-3 space (picot stitch), 2 sc in the next ch-3 space, chain 3, sl st in the same ch-3 space, sc in the next ch-3 space*. Repeat from * to * around.
Video Tutorial:
Finishing
- Cut the yarn, leaving a tail of about 6 inches. Weave in the tail neatly using your tapestry needle.
- For a crisp finish, gently block your doily. Pin it to a blocking board, a piece of cardboard, or a towel, making sure to stretch out the points of the hexagon. Lightly mist it with water and let it dry completely.
This project is a perfect way to practice your tension and stitch consistency. You can also experiment with different colors or yarns for a completely unique look.
I hope you enjoy creating this beautiful doily. What color will you choose for your first one?


