
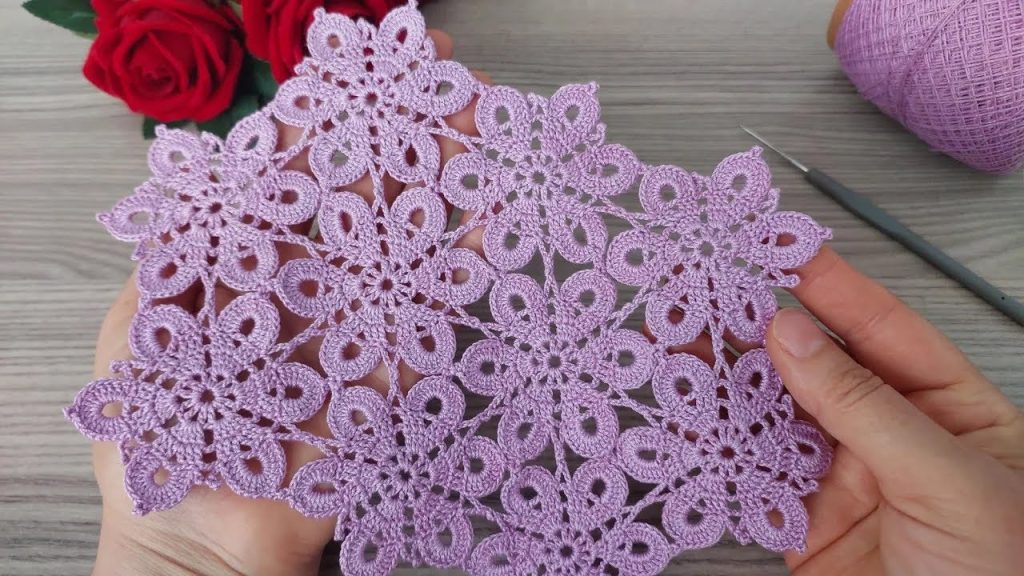
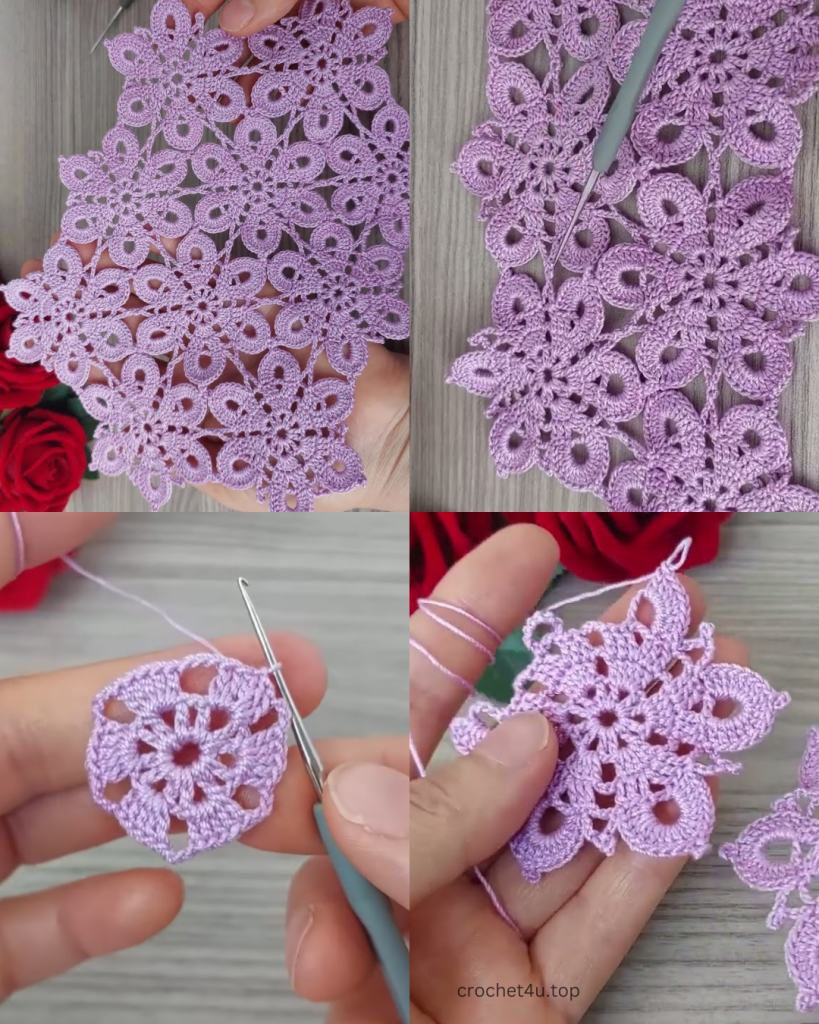
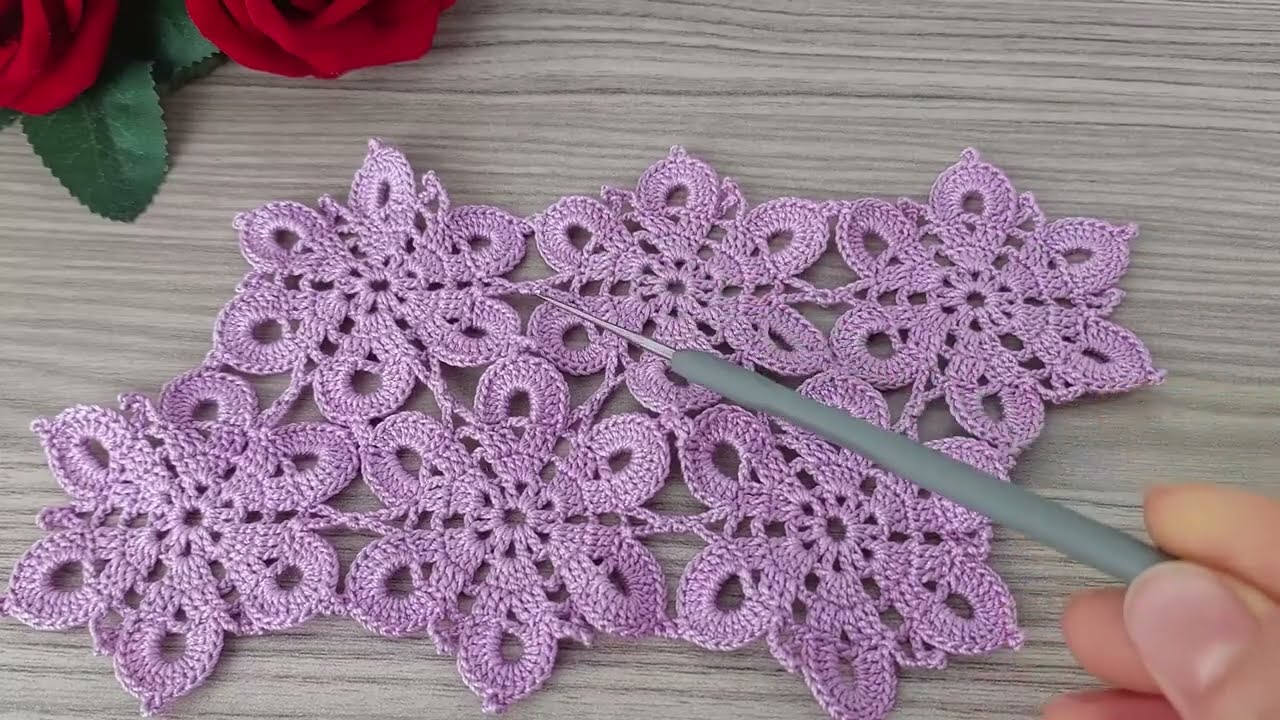
Hello, fellow makers! I’m thrilled to share this pattern with you. This beautiful floral motif is a fantastic project for anyone who loves to create intricate-looking lace pieces. While it may look complex, it’s built from simple stitches repeated in a thoughtful way, making it a perfect project for crocheters who are ready to move beyond the basics. This motif can be used in so many ways: as a decorative doily, joined together to create a stunning table runner or blanket, or even as a unique piece of home décor.
This pattern is written using US crochet terms.
Skill Level: Intermediate
Finished Size:
- Approximately 6-7 inches (15-18 cm) from point to point, when laid flat.
Materials You’ll Need
- Yarn: Approximately 30g of a fingering weight or thread yarn. A mercerized cotton yarn is highly recommended for this project, as it has a beautiful sheen and holds its shape exceptionally well.
- Hook: A steel crochet hook in a size appropriate for your thread. A US size 7 or 8 (1.5mm-1.65mm) hook is a good starting point.
- Notions:
- A tapestry needle for weaving in ends.
- Scissors.
- A stitch marker (optional, but helpful for the beginning of the round).
Crocheting the Motif: The Main Pattern
This motif is worked in the round from the center out. We’ll start with a small circle and then expand it to create the lacy flower petals.
Part 1: The Center and First Petal Layer
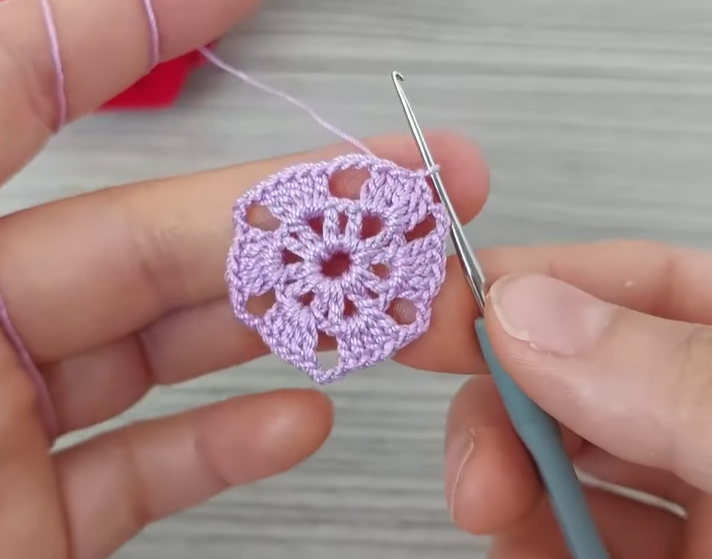
- Round 1: Create a magic ring (or chain 5 and join with a slip stitch). Chain 3 (counts as the first double crochet), then work 11 double crochet (dc) into the ring. Join with a slip stitch (sl st) to the top of the beginning chain-3. (12 dc total)
- Round 2: Chain 1. Single crochet (sc) in the same stitch. *Chain 5, skip 1 stitch, sc in the next stitch*. Repeat from * to * around. You should have 6 chain-5 loops. Join with a sl st to the first sc.
- Round 3: Slip stitch into the first ch-5 space. Chain 3 (counts as the first dc). Work 4 more double crochet (dc) in the same ch-5 space. *Sc in the next ch-5 space, then 5 dc in the next ch-5 space*. Repeat from * to * around. You will have 6 groups of 5 dc. Join with a sl st to the top of the beginning chain-3.
Part 2: The Lacy “Ring” Layer
This section creates the beautiful lacy rings between the petals.

- Round 4: Chain 1. Single crochet (sc) in the same stitch. *Chain 4, skip 2 stitches, sc in the next stitch, chain 4, skip 2 stitches, sc in the next stitch*. Repeat from * to * around. Join with a sl st to the first sc.
- Round 5: Slip stitch into the first ch-4 space. Chain 3 (counts as the first dc). Work 4 more dc in the same ch-4 space. *Chain 3, sc in the next ch-4 space, chain 3, then 5 dc in the next ch-4 space*. Repeat from * to * around. Join with a sl st to the top of the beginning chain-3.
Part 3: The Expanding Petals and Final Edging
This is where the motif grows into its final shape.
- Round 6: Chain 3 (counts as the first dc). Dc in the next 4 stitches. *Chain 3, sc in the next ch-3 space, chain 3, then dc in the next 5 stitches*. Repeat from * to * around. Join with a sl st to the top of the beginning chain-3.
- Round 7: Chain 3 (counts as the first dc). Dc in the next 4 stitches. *Chain 5, sc in the next ch-3 space, chain 5, then dc in the next 5 stitches*. Repeat from * to * around. Join with a sl st to the top of the beginning chain-3.
- Round 8: Chain 3 (counts as the first dc). Dc in the next 4 stitches. *Chain 7, sc in the next ch-5 space, chain 7, then dc in the next 5 stitches*. Repeat from * to * around. Join with a sl st to the top of the beginning chain-3.
- Final Round (The Picot Edging): Slip stitch into the next stitch. *Chain 3, slip stitch into the second chain from the hook (picot stitch), slip stitch into the next stitch*. Repeat from * to * around. When you reach a chain space, work 3-4 picot stitches along the chain to create a more decorative edge.
Video Tutorial:
Finishing
- Cut the yarn, leaving a tail of about 6 inches. Weave in the tail neatly using your tapestry needle.
- For a crisp, professional finish, block your motif. Pin it to a blocking board, a piece of cardboard, or a towel, making sure to stretch out the points of the petals. Lightly mist it with water and let it dry completely.
This project is a great way to practice your tension and stitch consistency. You can also experiment with different colors or yarns for a completely unique look.
I hope you enjoy creating this beautiful motif. How do you plan to use your finished piece?


