
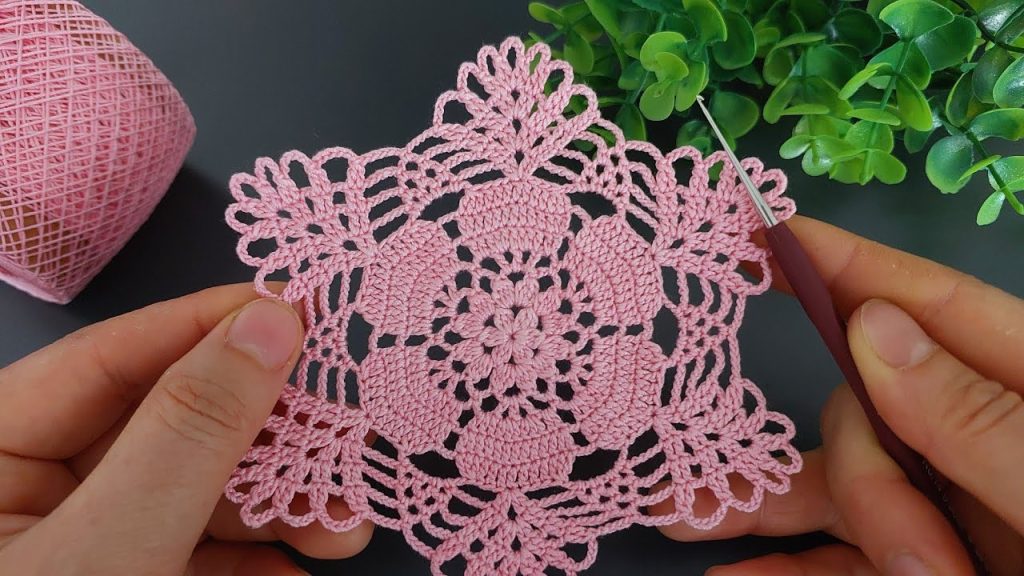
Hello, fellow makers! I’m delighted to share this pattern for a beautiful lacy doily that’s perfect for a wide range of projects. This doily is made up of a central flower motif surrounded by a delicate openwork design. The intricate details create a look that is both elegant and timeless, making it a fantastic way to add a professional, finished touch to your home decor.
This pattern is a great project for intermediate crocheters and a fun challenge for those new to working with lace. The repetition of the petal shape and the openwork design makes it easy to learn and to remember.
This pattern is written using US crochet terms.
Skill Level: Intermediate
Finished Size:
- Approximately 9 inches (23 cm) in diameter when blocked.
Materials You’ll Need
- Yarn/Thread: Approximately 50-100g of a fine crochet thread (Size 10 or 20). Mercerized cotton is highly recommended for its crisp stitch definition and durability.
- Hook: A steel crochet hook in a size appropriate for your chosen thread. For crochet thread (size 10), a US size 7 or 8 (1.5mm-1.65mm) hook is a good starting point. Adjust your hook to achieve the desired drape and density.
- Notions:
- A tapestry needle for weaving in ends.
- Scissors.
- A few stitch markers (optional, but helpful for repeats).
Gauge: Precision for Perfection
A consistent gauge is important for this project, as it ensures your doily will be the intended size and your stitches will have the right look and feel.
Gauge Swatch: 18 double crochet (dc) stitches and 10 rows = 4 inches (10 cm).
- How to Check Your Gauge:
- Chain 20.
- Work a double crochet (dc) in the 4th chain from the hook and in each chain across.
- Continue to work in rows of dc until you have 10 rows.
- Measure your swatch to check if it matches the gauge. If not, adjust your hook size and try again.
Crocheting the Doily: The Main Pattern
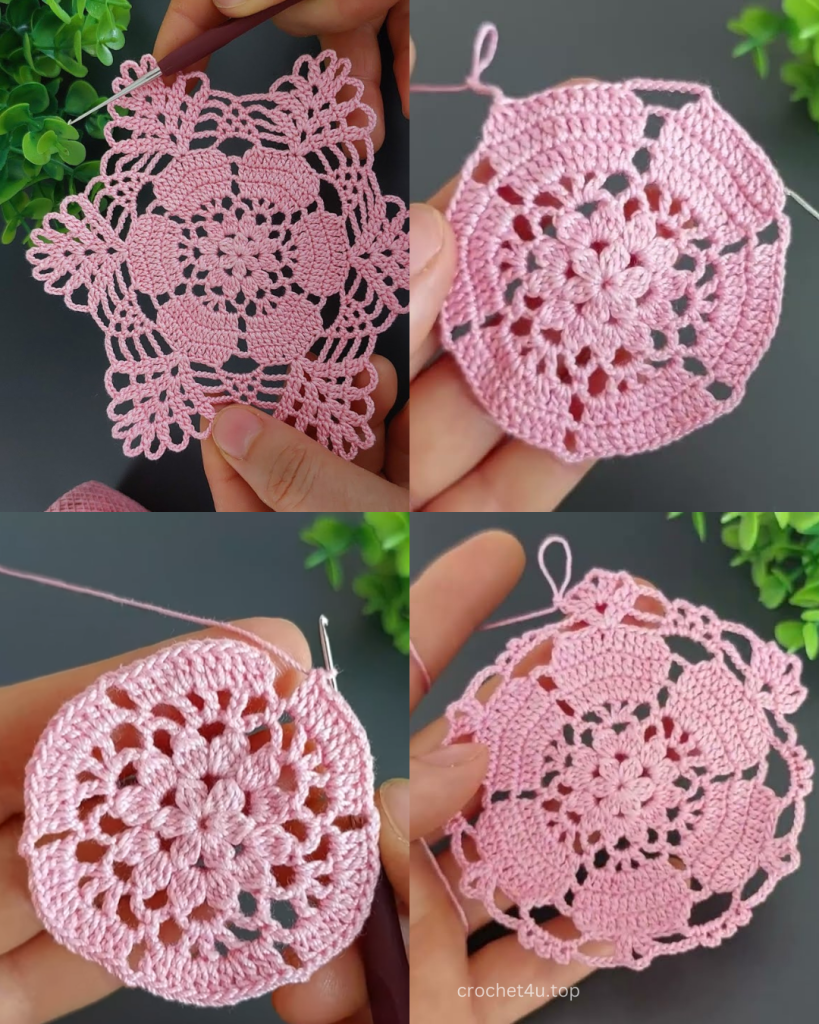
This doily is worked in the round from the center out.
Part 1: The Center Flower
We’ll start with a small circle that will serve as the base for the rest of the lace.

- Round 1: Create a magic ring (or chain 4 and join with a slip stitch). Chain 3 (counts as the first double crochet), then work 11 double crochet (dc) into the ring. Join with a slip stitch (sl st) to the top of the beginning chain-3. (12 dc total)
- Round 2: Chain 1. Single crochet (sc) in the same stitch. *Chain 5, skip 1 stitch, sc in the next stitch*. Repeat from * to * around. You should have 6 chain-5 loops. Join with a sl st to the first sc.
- Round 3: Slip stitch into the first ch-5 space. Chain 3 (counts as the first dc). Work 2 dc in the same ch-5 space. *(3 dc, ch 3, 3 dc) in the next ch-5 space. *****Repeat from * to * around. Join with a sl st to the top of the beginning chain-3. (36 dc and 6 ch-3 spaces)
Part 2: The Lacy Petals
This section will create the open, lacy effect that surrounds the center and shapes the petals.

- Round 4: Chain 3 (counts as a dc). Dc in the next stitch. *Chain 3, skip 2 stitches, dc in the next 2 stitches*. Repeat from * to * around. In each ch-3 space, work a corner: (2 dc, ch 2, 2 dc).
- Continue the pattern of (dc in next 2 stitches, ch 3, skip 2 stitches) along the sides, and a corner in each ch-3 space. Join with a sl st to the top of the beginning chain-3.
- Round 5: Slip stitch into the first 2 stitches to get to the next stitch. (Ch 3, 2 dc) in the same stitch. *Chain 2, skip the ch-3 space, 3 dc in the next 3 stitches*. Repeat from * to * along the sides. In each corner space, work (3 dc, ch 2, 3 dc). Join with a sl st to the top of the beginning chain-3.
Part 3: The Scallop Edging
This part creates the beautiful scallop border that gives the doily its final, elegant shape.
- Round 6: Slip stitch into the next 3 stitches to get to the corner space. (Ch 3, 2 dc, ch 2, 3 dc) in the corner space. *Dc in each of the next stitches. In each ch-2 space, work (sc, ch 3, sc). In each ch-3 space, work (sc, ch 3, sc).* Continue the pattern around, placing (3 dc, ch 2, 3 dc) in each corner space. Join with a sl st to the top of the beginning chain-3.
- Round 7 (Final Round): Slip stitch to the middle of the corner chain-2 space. *Chain 3, 4 dc in the same space. In the next ch-3 space, work (sc, ch 3, sc). In the next ch-3 space, work (sc, ch 3, sc).* Continue the pattern around, placing (5 dc) in each corner space and (sc, ch 3, sc) in each ch-3 space. Join with a sl st to the top of the beginning chain-3.

Finishing Your Doily
- Weave in all ends: Use your tapestry needle to carefully weave in any loose yarn tails. This step will give your doily a professional and clean finish.
- Blocking is key: For lace work, blocking is essential. It opens up the stitches, evens out the corners, and gives the piece its final, crisp shape.
- Gently hand wash your doily or mist it thoroughly with water.
- Lay it flat on a clean towel or a foam blocking mat.
- Carefully stretch and pin out the corners, making sure they are square.
- Allow it to air dry completely. This can take several hours or overnight.
Video Tutorial:
Project Ideas & Customization
- Blanket: You can join multiple squares together with a slip stitch or single crochet seam. This is a great way to create a heirloom-quality blanket.
- Table Runner: Join a series of these squares together in a line to create a stunning runner.
- Color: This pattern would look great in a wide variety of colors. Try a solid, a variegated yarn, or even a gradient to create a unique effect.
- Size: To make a larger or smaller square, you can use a different yarn weight and a corresponding hook size.
I hope you enjoy creating this beautiful doily. How do you plan to use your finished pieces?


