
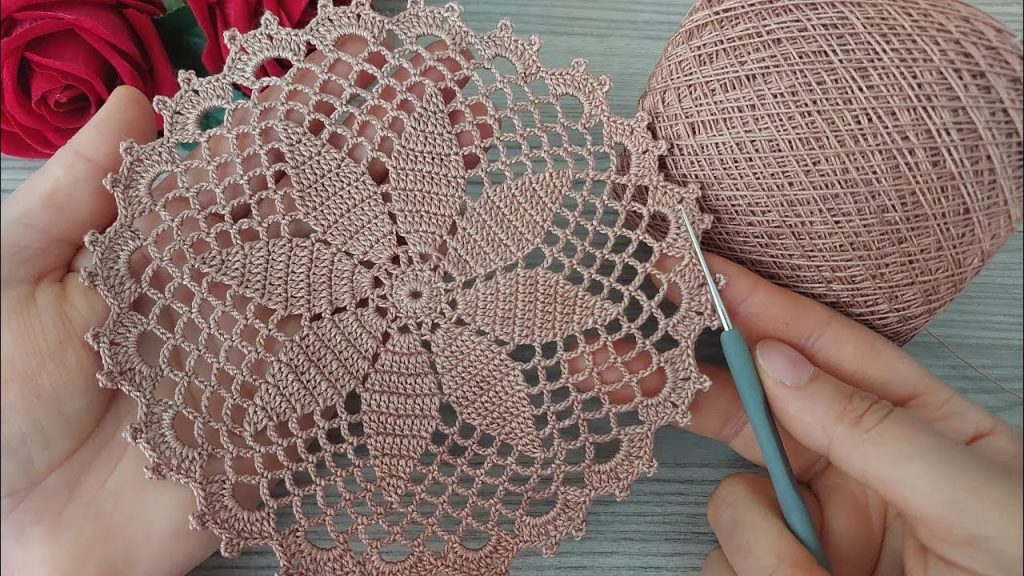
This guide will walk you through the creation of a stunning, intricate lace doily. This design features a central floral motif that radiates outward into a delicate, lacy border. While it may look complex, this pattern is broken down into manageable steps, making it achievable for an ambitious beginner or an intermediate crocheter.
The Right Tools for the Job
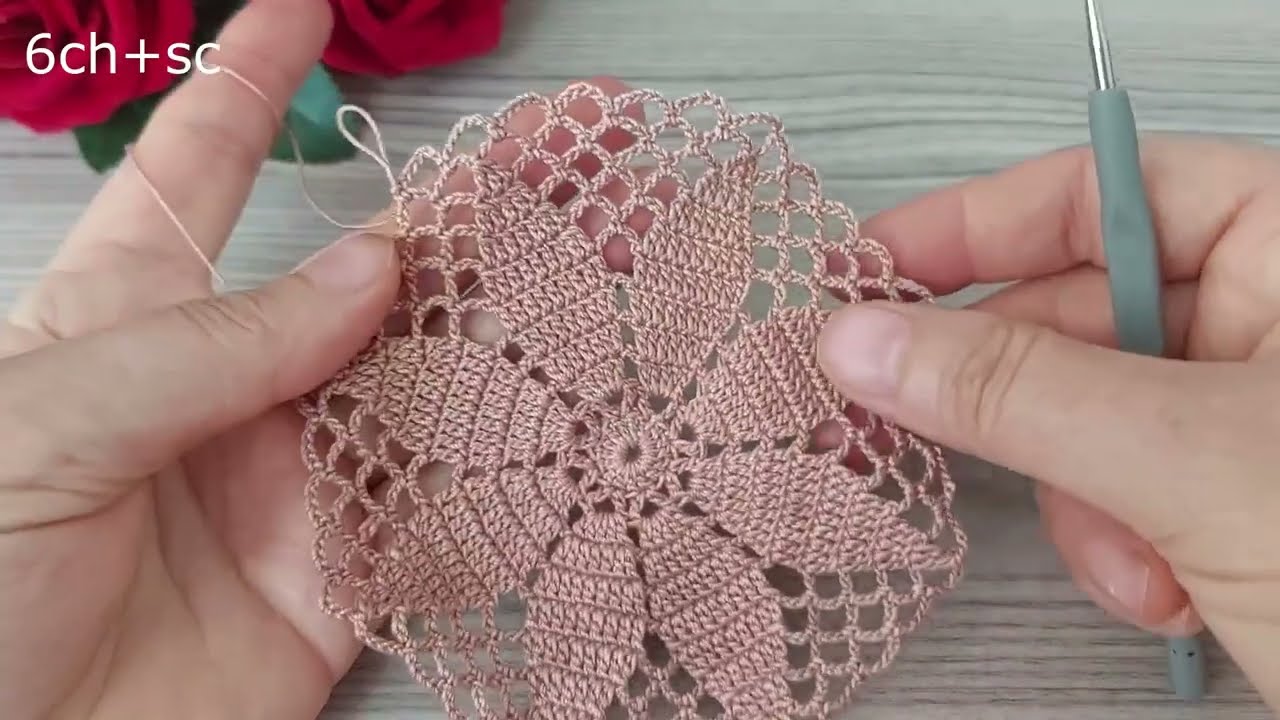
Using the correct materials is key to achieving the beautiful drape and fine detail seen in the image.
- Yarn: The piece in the photo is made with a fine thread, most likely size 10 crochet cotton. This thread is very thin, allowing for intricate lacework. The color appears to be a light dusty rose or mauve, which gives it a soft, vintage feel.
- Crochet Hook: A small steel crochet hook is essential for working with fine thread. A good starting size for size 10 thread is a 1.5mm to 1.75mm hook. Your personal tension will determine the best hook size for you. If your work feels too stiff, go up a size; if it’s too loose, go down.
- Scissors
- Tapestry Needle: This is a blunt-tipped needle used for weaving in all your ends for a clean, professional finish.
- Blocking Supplies: This is a crucial step! You’ll need a blocking mat, rust-proof pins, and a spray bottle of water. Blocking is a final process that shapes and sets your finished piece, making the lace pattern stand out beautifully.
Abbreviations (US Crochet Terms)
- ch: chain
- sl st: slip stitch
- sc: single crochet
- dc: double crochet
- tr: treble crochet
- ch-sp: chain space
- st(s): stitch(es)
- yo: yarn over
- [ ]: repeat instructions in brackets as directed
Pattern for One Doily
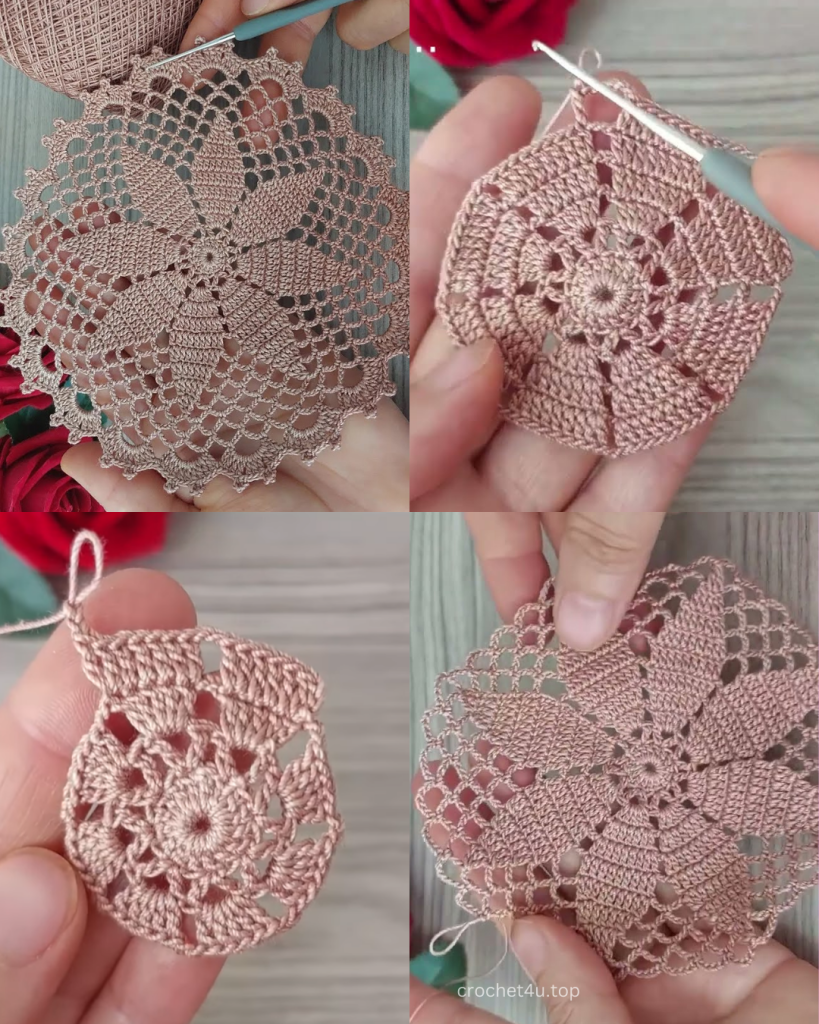
We will work in the round from the center outward. The pattern is designed to create a perfectly flat circle, but remember to check your work periodically to ensure it’s not cupping or rippling.
Round 1: The Center Begin with a magic ring or chain 6 and join with a sl st to form a ring. Ch 3 (counts as 1 dc), work 15 dc into the ring. Join with a sl st to the top of the beginning ch-3. (16 dc total)
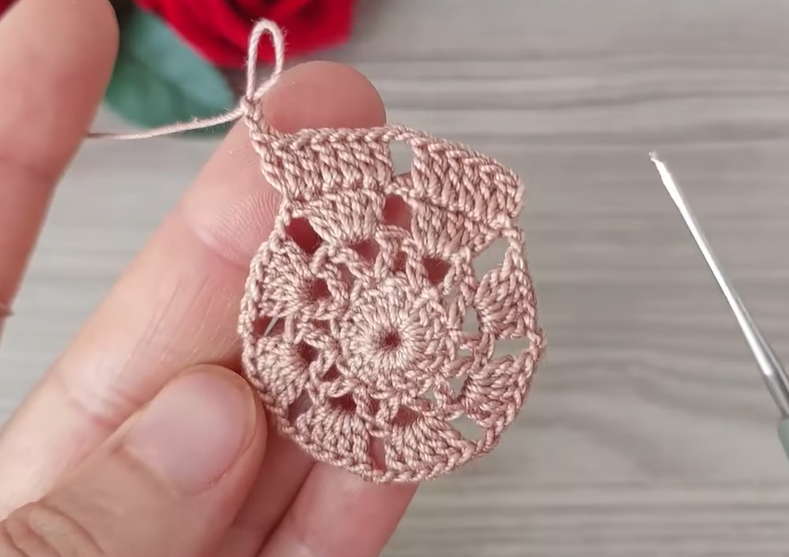
Round 2: Creating Petal Bases Ch 1, sc in the same st. Ch 4, skip 1 dc, sc in the next dc. Ch 4, skip 1 dc, sc in the next dc. Repeat from * to * 6 more times. Ch 4, join with a sl st to the first sc. (8 ch-4 loops)
Round 3: The First Layer of Petals Sl st into the first ch-4 loop. Ch 3 (counts as 1 dc), 2 dc, ch 3, 3 dc in the same ch-4 loop. This is a petal. [Ch 2, 3 dc, ch 3, 3 dc in the next ch-4 loop]. Repeat from * to * 6 more times. Ch 2, join with a sl st to the top of the beginning ch-3. (8 petals with ch-2 sps between them)
Round 4: Connecting the Petals Sl st into the next 2 dc and into the ch-3 sp of the first petal. Ch 3 (counts as 1 dc), 2 dc, ch 3, 3 dc in the same ch-3 sp. Ch 3, sc in the ch-2 sp between the petals, ch 3, [3 dc, ch 3, 3 dc] in the ch-3 sp of the next petal. Repeat from * to * 6 more times. Ch 3, sc in the last ch-2 sp, ch 3, join with a sl st to the top of the beginning ch-3.
Round 5: Building the Lacy Net Sl st into the next 2 dc and into the ch-3 sp of the first petal. Ch 3 (counts as 1 dc), 2 dc, ch 3, 3 dc in the same ch-3 sp. Ch 4, skip the ch-3 sp, sc in the next sc, ch 4, skip the ch-3 sp, [3 dc, ch 3, 3 dc] in the ch-3 sp of the next petal. Repeat from * to * 6 more times. Ch 4, sc in the last sc, ch 4, join with a sl st to the top of the beginning ch-3.
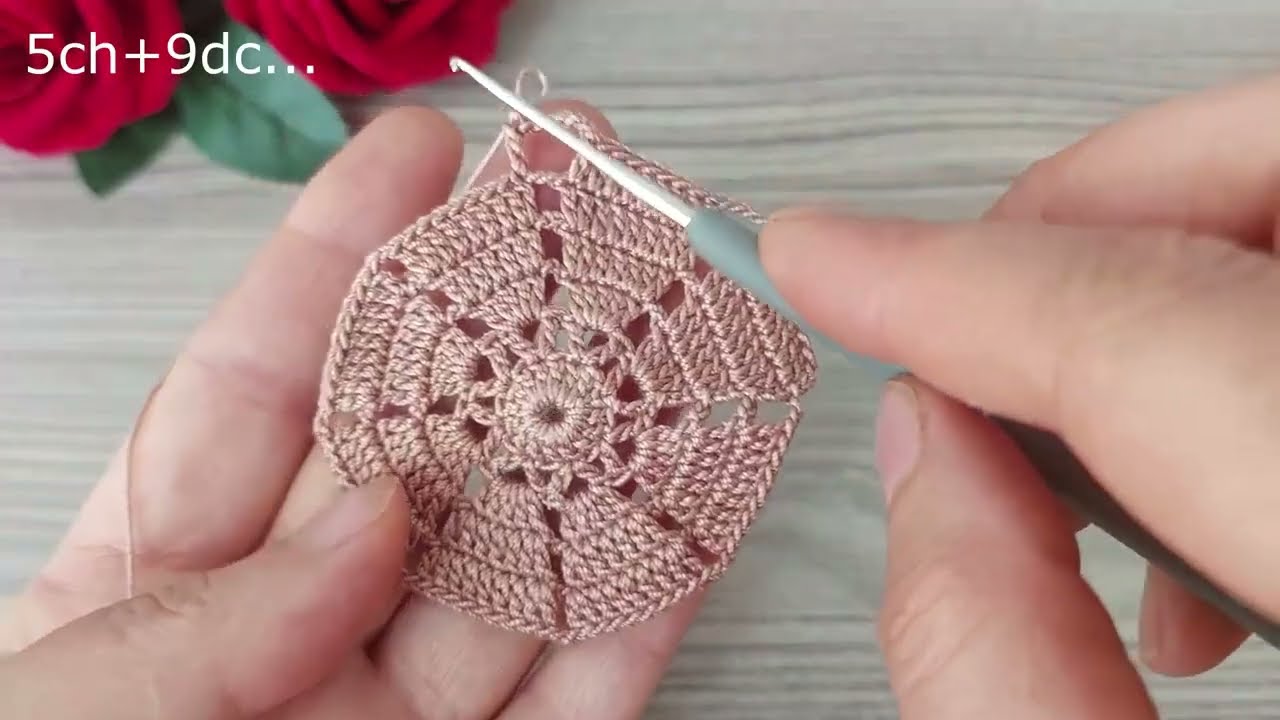
Round 6: Expanding the Mesh Sl st into the next 2 dc and into the ch-3 sp of the first petal. Ch 3 (counts as 1 dc), 2 dc, ch 3, 3 dc in the same ch-3 sp. Ch 5, sc in the next ch-4 sp, ch 5, sc in the next ch-4 sp, ch 5, [3 dc, ch 3, 3 dc] in the ch-3 sp of the next petal. Repeat from * to * 6 more times. Ch 5, sc in the next ch-4 sp, ch 5, sc in the last ch-4 sp, ch 5, join with a sl st to the top of the beginning ch-3.
Round 7: The Scalloped Edge This is the final round and where the doily gets its pretty, ruffled edge. Sl st into the next 2 dc and into the ch-3 sp of the first petal. Ch 1 (does not count as a st), [sc, hdc, 5 dc, hdc, sc] in the same ch-3 sp. [2 sc in the next ch-5 sp], [3 sc in the next ch-5 sp], [2 sc in the next ch-5 sp]. [sc, hdc, 5 dc, hdc, sc] in the next ch-3 sp. Repeat from * to * around the doily. After the final scallop, sl st to the first sc to join.
Fasten off and weave in all loose ends with your tapestry needle.
The Art of Blocking
Blocking is the final, essential step to turn your crocheted piece from a wavy, curled disc into a perfectly flat, elegant doily.
- Preparation: Gently soak your finished doily in lukewarm water for about 15-20 minutes. This fully saturates the fibers and allows them to relax.
- Dampening: Gently squeeze the excess water out of the doily. Do not wring or twist it! You can roll it up in a towel and press down to absorb most of the moisture. It should be damp, not dripping wet.
- Shaping: Lay your damp doily on a flat surface, like a foam blocking mat or an ironing board covered with a towel. Use your hands to gently stretch and shape the doily into a perfect circle.
- Pinning: Using rust-proof pins, carefully pin the doily in place. Pin each of the ‘points’ of the scallops around the outer edge, ensuring they are evenly spaced. This will open up all the lace patterns and give the piece its beautiful, crisp shape.
- Drying: Let the doily air dry completely, which may take a full day or more. Do not use heat to speed up the process. Once it is completely dry, unpin it.
Video Tutorial:
Your finished doily should now be perfectly flat and beautifully detailed. Enjoy your new handmade creation!


