
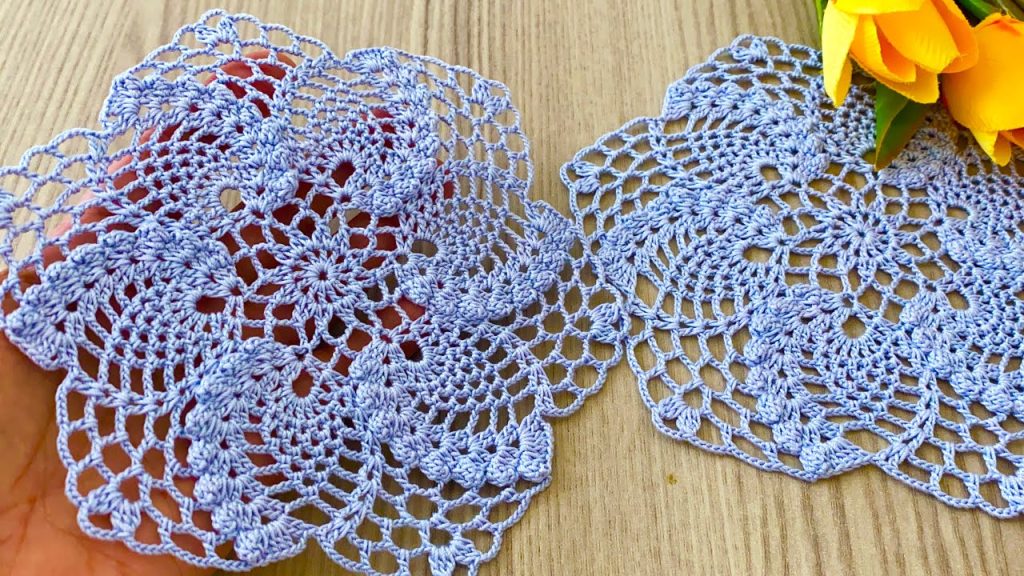
Bring the radiance of a summer sun into your décor with this gorgeous crochet square. Featuring a compact, solid floral center that blooms outward into a detailed lattice and picot edge, this motif is an intermediate challenge that yields spectacular results. These squares join seamlessly to create heirloom tablecloths, runners, or elegant cushions. The vibrant yellow yarn ensures a cheerful, modern look.
⭐️ Project Blueprint and Key Techniques
| Feature | Detail |
| Skill Level | Intermediate to Advanced Intermediate. Requires precise stitch placement and working with tr stitches in the round. |
| Stitches Used | Chain (ch), Slip Stitch (sl st), Single Crochet (sc), Double Crochet (dc), Treble Crochet (tr), Picot (ch 3,sl st into 1st ch). |
| Construction | Worked continuously in the round from the center, transitioning from a circle to a square. |
| Yarn Type | Fine cotton thread is mandatory for the crisp, open lace structure. |
| Final Product | A finished 8-round square motif ready for blocking and joining. |
Export to Sheets
🧵 Materials Selection & Precision Gauge
Yarn: The Canvas of Lace
- Weight: Crochet Thread Size 10 or a fine Lace Weight (Category 0) yarn. Using a fine thread is the only way to achieve the scale and delicacy seen in the image.
- Fiber: 100% Mercerized Cotton thread is highly recommended for its strength and exceptional stitch definition under tension.
- Color: A bright, sunny yellow (like the sample), or traditional white/ecru.
- Yardage: Approximately 40 to 50 yards per motif.
Hook: The Detailer
- Size: 1.5 mm to 1.75 mm (Steel Hook US 8 or 7). Choose a hook that results in tight, firm tension. Loose stitches will cause the lace to lose its geometry.
Notions & Blocking
- Tapestry Needle: Fine needle for weaving in ends.
- T-pins and Blocking Board: Essential. Blocking defines the square shape and opens up the lattice work.
Precision Gauge
The motif should measure approximately 6 inches×6 inches after blocking, using Size 10 thread. Consistency in stitch height is more important than achieving an exact gauge before the final round.
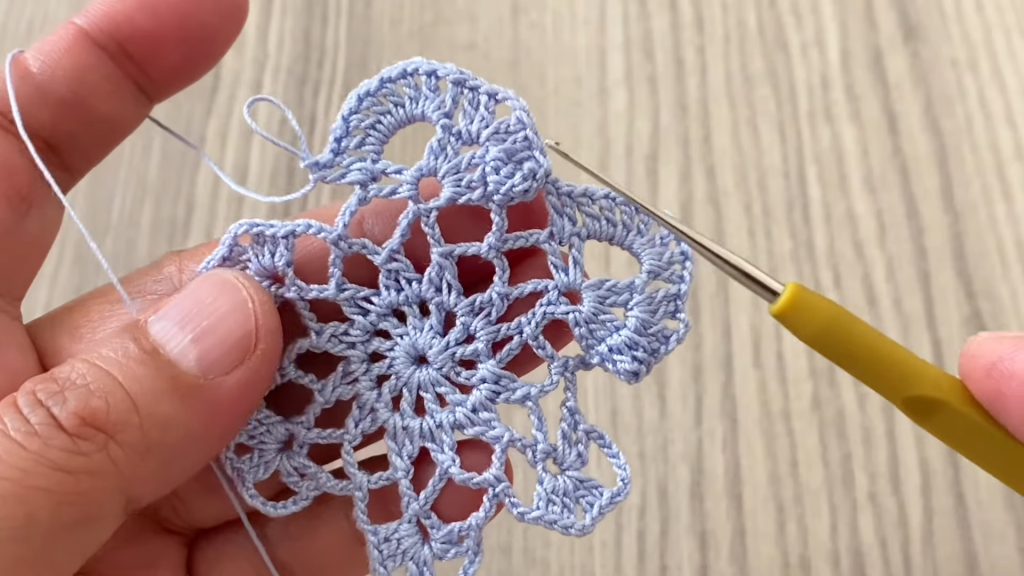
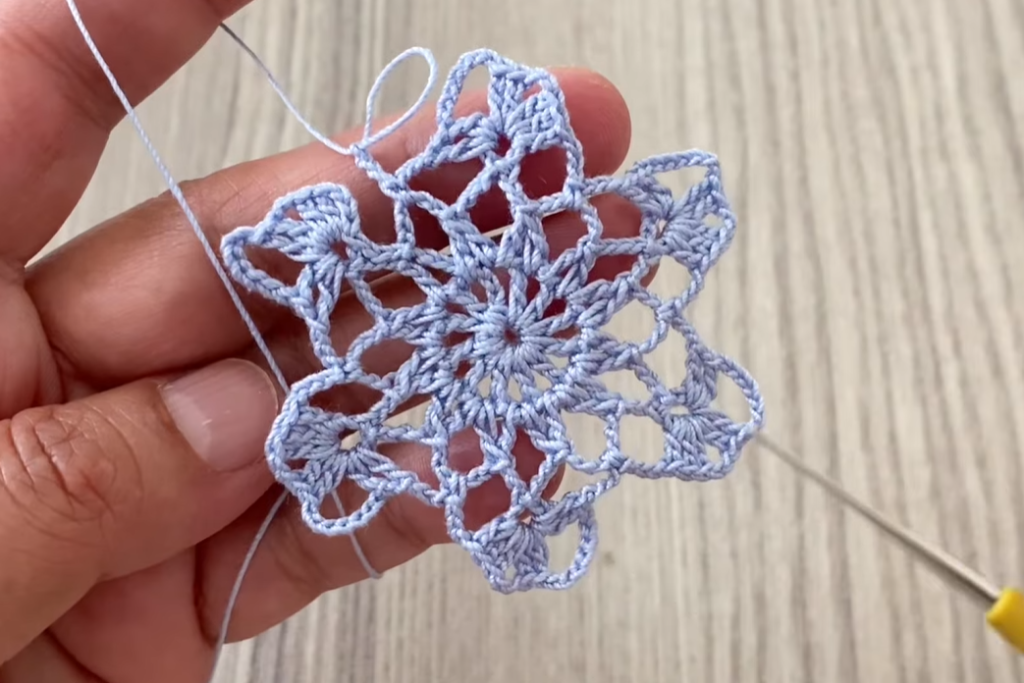
🌻 Pattern Instructions: The Center Flower
The motif starts with a closed floral design, which forms the anchor for the entire square.
Round 1 (Center Ring): ch 5, sl st to the first ch to form a ring. ch 3 (counts as dc), 15 dc into the ring. sl st to the top of the starting ch 3 to join. (16 dc)
Round 2 (Petal Foundation): ch 1 (sc in the first dc). ch 5. sc in the 4th dc from the hook. ch 5, sc in the 4th dc from the previous sc. Repeat this sequence 2 times more. ch 5, sl st to the first sc to join. (4 large ch 5 loops)
Round 3 (Solid Petals): sl st into the first ch 5 loop. ch 3 (counts as dc). Work 5 dc,ch 2,6 dc in the same loop. This forms the first petal. sl st into the next ch 5 loop. Work 6 dc,ch 2,6 dc in the same loop. Repeat this sequence 2 times more. sl st to the top of the starting ch 3 to join. (4 petals)
💠 Pattern Instructions: Shaping the Square
This section transitions the circular motif into a definitive square shape using strategic ch spaces and stitches.
Round 4 (Corner Setup): ch 1 (sc in the sl st join between petals). ch 6. sc into the ch 2 space at the top of the next petal. ch 6. sc into the sl st join between the next two petals.
- ch 7 (This is the Corner Loop). sc into the ch 2 space at the top of the next petal. ch 6. sc into the sl st join between the next two petals. Repeat the sequence from * 2 times more. ch 7 (final corner loop). sl st to the first sc to join. (4 corner loops, 8 side loops)
Round 5 (Lattice V-Stitch): sl st into the first 3 ch. ch 5 (counts as tr,ch 1). tr in the same space. ch 3. tr,ch 1,tr (V-stitch) into the center ch of the next ch 6 loop. ch 3. Repeat across the side until the corner loop.
Corner: In the ch 7 loop, work 2 tr,ch 2,2 tr. ch 3.
Continue the Side and Corner pattern 3 times more. sl st to the 4th ch of the starting ch 5 to join.
🌿 Pattern Instructions: The Final Edge
This final round closes the lattice and introduces the decorative picot border.

Round 6 (Picot Edge): sl st into the ch 1 space. ch 1 (sc in ch 1 space). ch 3, sc into the ch 3 space. ch 3.
- sc in the ch 1 space of the V-stitch. ch 3. sc into the ch 3 space. ch 3.* Repeat across the side until the corner.
Corner: In the ch 2 space, work 3 sc,Picot,3 sc. ch 3.
Continue the Side pattern 3 times more. sl st to the first sc to join.
Joining (Optional – If making a continuous piece): When working the final Picot in the corner, replace the final sl st with a sl st join into the corner Picot of a completed motif. Use sl st joins in place of the ch 3 spaces along the side where motifs meet.
Fasten off and weave in the end.
Video Tutorial:
🔨 Finishing and Legacy Blocking
Blocking is the absolute key to achieving the flat, sharp geometry of this lace square.
- Weave: Weave in all loose ends.
- Soak and Starch: Gently soak the motif in cool water. For a crisp finish, highly recommended for doilies, use a liquid starch solution. Squeeze out excess water.
- Tension Pinning: Lay the damp motif on a blocking board. Using T-pins, carefully pin out the motif, ensuring the four corner Picots are pulled taut to achieve a perfect 90-degree corner. Pull the inner lattice spaces gently open.
- Dry: Allow the piece to dry completely flat. This will take 12−24 hours.
Your Golden Sunburst Square is now ready! Will you be using this gorgeous motif to create a runner, or perhaps a beautiful decorative garland?


