

Hello, lovely crocheters!
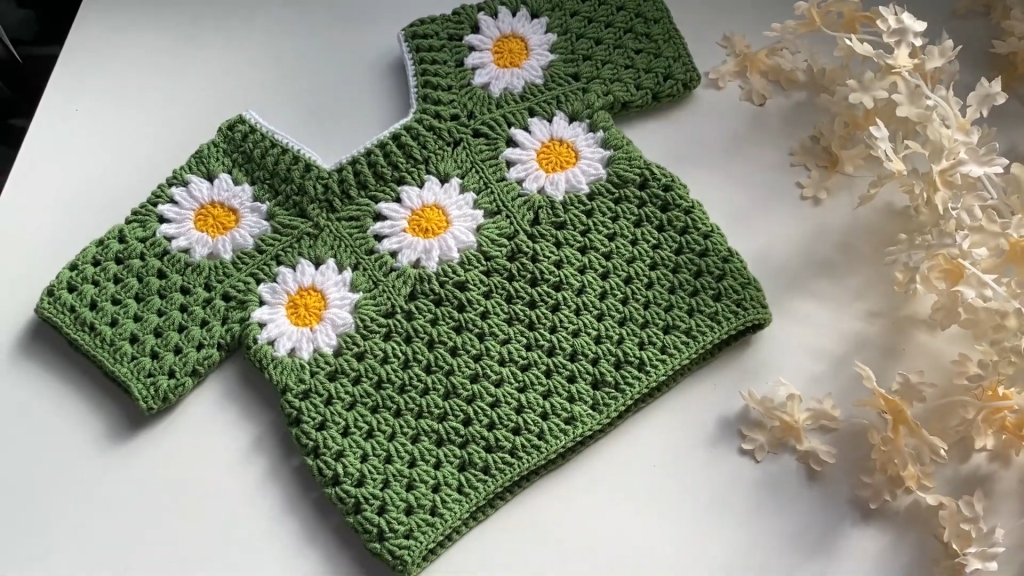
Today, we are diving into a project that perfectly captures the spirit of handmade fashion: a beautiful, custom-fit blouse constructed entirely from stunning Granny Squares. The motif we are using is a vibrant “Sunburst Bloom,” starting with a dense floral center and transitioning into a structured square for easy joining.
This pattern is far more than just connecting squares; it’s a complete guide to garment construction, covering the central motif, the seamless-looking joining method, the flattering ribbing at the hem, and two stylish sleeve options. This project allows you to mix and match colors or keep it monochromatic—the choice is yours!
Let’s gather our supplies and start building this charming, timeless piece of wearable art.
🧶 Materials & Tools You Will Need
Choosing the right yarn is essential for the drape and feel of your finished garment. Since this stitch creates a dense fabric, a light, smooth yarn is recommended.
- The Yarn:Light Worsted or DK Weight (Weight 3 or 4).
- Recommendation: Use a cotton or cotton blend for great stitch definition and a lightweight feel, ideal for a blouse.
- Color Planning: You will need at least three colors for the full “Sunburst Bloom” effect (Center, Petals, and Square Edge), plus a main color for the joining, hem, and sleeves.
- The Hook: A size appropriate for your chosen yarn, usually 3.5mm to 4.0mm.
- Tools:
- Measuring Tape (Essential for accurate sizing).
- Sharp scissors.
- Tapestry Needle (Crucial for joining the squares and weaving in ends).
- Stitch Markers (Helpful for marking round starts).
📝 Abbreviations & Key Terms (US Terminology)
- Ch: Chain
- St(s): Stitch(es)
- Sl St: Slip Stitch
- SC: Single Crochet
- DC: Double Crochet
- DTR: Double Treble Crochet (Yarn over 2 times)
- FPDC: Front Post Double Crochet
- BPDC: Back Post Double Crochet
- Magic Ring (MR): Adjustable ring foundation.
- DC Cluster (DCC): 3 DC worked together into the same stitch/space.
- 3-DTR-Cl: 3 Double Treble Crochet worked together into the same stitch. (Yarn over 2 times, insert hook, pull up loop, [Yo, pull through 2 loops] twice, leaving the last loop on hook. Repeat 2 more times in the same stitch. Yo, pull through all 4 loops on hook).
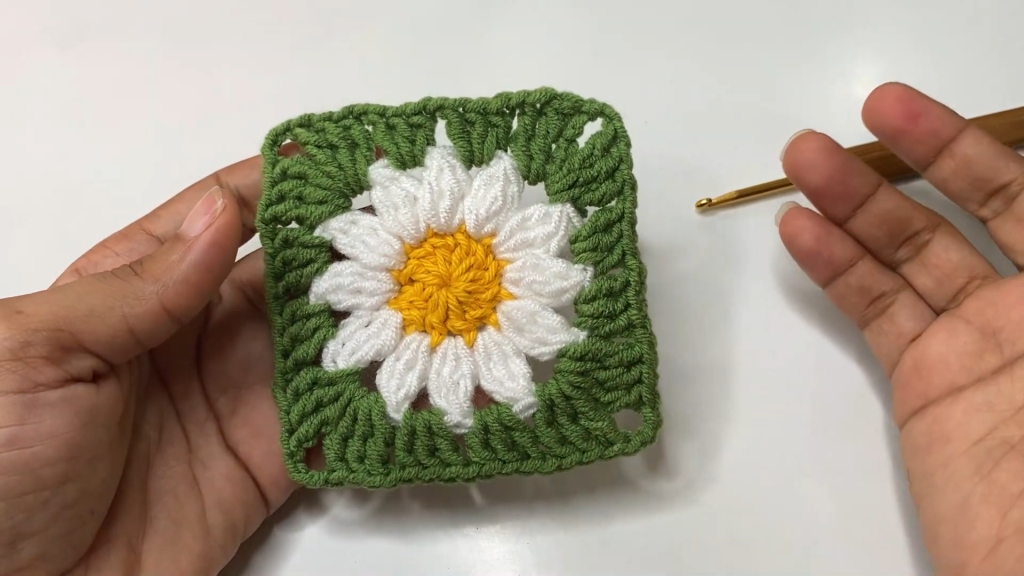
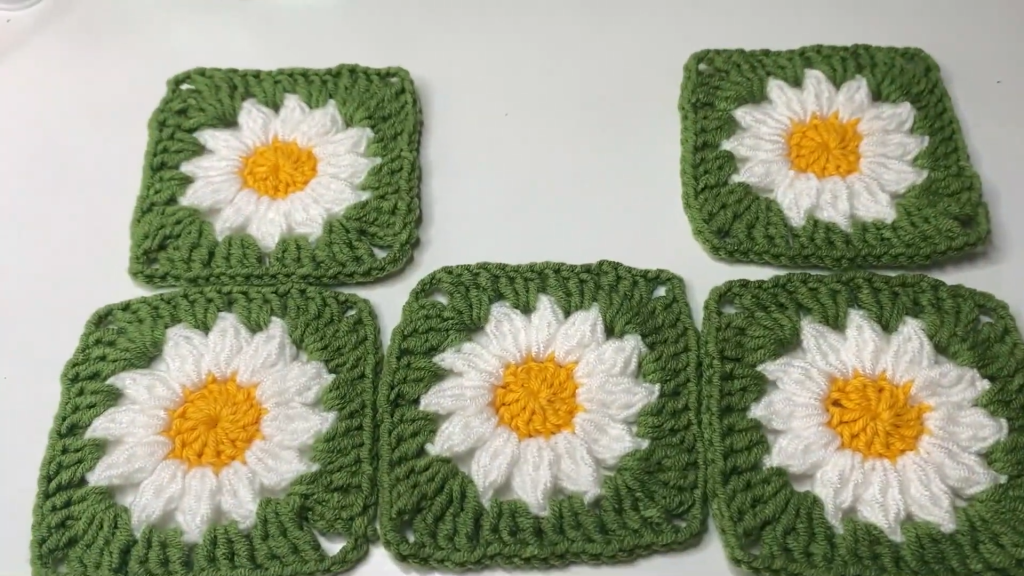
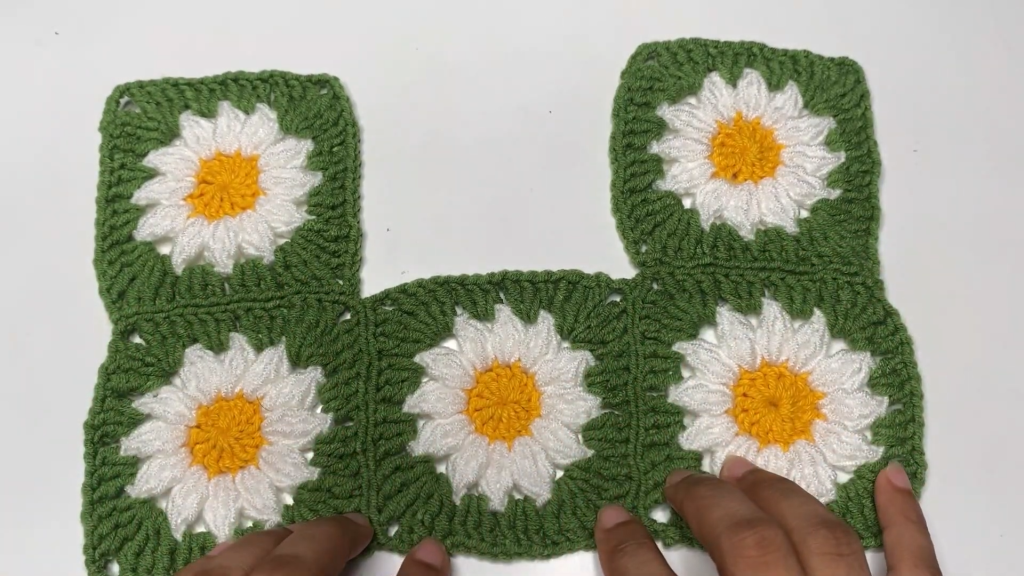
💠 The “Sunburst Bloom” Motif Pattern
This motif is built over three rounds, transitioning from a circle to a square.
Round 1: The Center (Color A – Yellow in video)
- Start with a Magic Ring (MR).
- Ch 3 (counts as first DC).
- Work 11 DC into the MR. (Total 12 DC).
- Pull the tail to tighten the ring. Sl St to the top of the starting Ch 3.
- Optional: Cut yarn and secure, or continue with Color B if desired. The video secures the yarn for a cleaner transition.
Round 2: The Petals (Color B – White in video)
- Attach Color B with a Sl St into the top of any DC from Round 1.
- Corner Start Cluster: Ch 3 (counts as first part of cluster). Yo 2 times, work 1 unfinished DTR into the same st. Yo 2 times, work 1 unfinished DTR into the same st. Yo, pull through all 4 loops on hook. (This forms a 3-DTR-Cl).
- Ch 2.
- Repeat: Work a 3-DTR-Cl into the top of the next DC from Round 1. Ch 2.
- Repeat Step 4 until you have worked 12 clusters.
- Sl St to the top of the first cluster to join. Fasten off Color B. (12 Clusters).
Round 3: Squaring the Motif (Color C – Green in video)
- Attach Color C with a Sl St into the first Ch-2 space.
- Side Cluster 1: Ch 4 (counts as first DTR). 2 DTR into the same Ch-2 space. (First 3-DTR-Cl is complete).
- Ch 1.
- Work a 3-DTR-Cl into the next Ch-2 space. Ch 1. (This forms the second side cluster).
- First Corner: Work (3-DTR-Cl, Ch 3, 3-DTR-Cl) into the next Ch-2 space. Ch 1.
- Side Section Repeat: [3-DTR-Cl into the next Ch-2 space, Ch 1] twice.
- Corner Repeat: [3-DTR-Cl, Ch 3, 3-DTR-Cl] into the next Ch-2 space. Ch 1.
- Repeat Steps 6 and 7 until you complete the round.
- End: After the last side cluster, Sl St to the top of the starting Ch 4 to join. Fasten off Color C.
- Finished Motif Size: The video’s motif measures approximately 9 cm (3.5 inches).
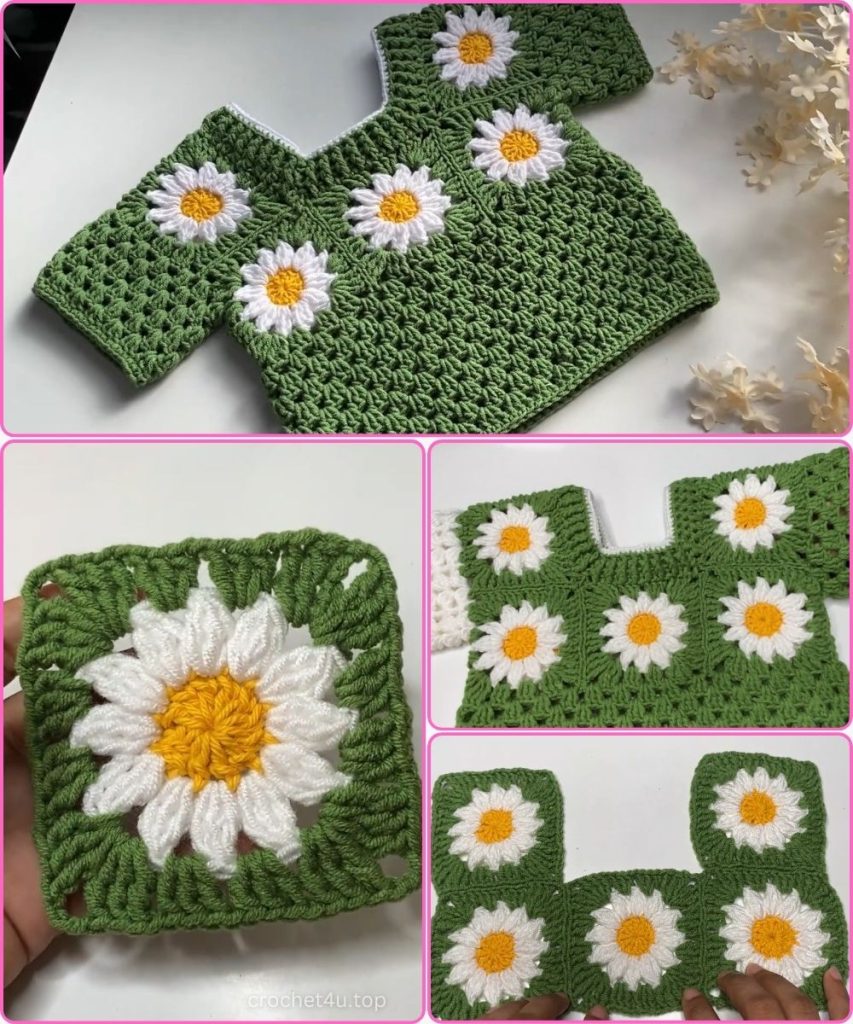
🧩 Assembly & Seaming
The blouse uses 5 motifs for the front and 5 for the back, joined in two rows of 5 squares each.
- Placement: Lay out your 10 motifs—five for the front and five for the back—in the desired pattern.
- Joining Technique (Needle/Whipstitch): The creator uses a tapestry needle to sew the motifs together for a nearly invisible seam.
- Thread your needle with a matching color yarn (or the square edge color).
- Align the squares, wrong sides together (or right sides facing up for a ridge).
- Join across the top of the DTR clusters and into the chain spaces. When crossing a chain space, take a stitch through the corresponding chain on each motif.
- At the Corners (Ch-3 spaces): Join with a stitch in one chain, then move to the next side. This ensures the corner remains flexible but securely joined.
- Shoulder Seams: Once the front and back rows are complete, align them and seam the side sections of the top motifs together to form the shoulder seams, leaving a space for the neck opening.
- Side Seams: Seam the sides together, leaving an opening of approximately 11 cm (4.3 inches) at the top for the armholes/sleeves.
📏 Torso Construction & Ribbing
The bottom edge is finished with a ribbed band to cinch the fabric slightly and provide structure.
- Round 1 (DC Foundation): Join your main color yarn with a Sl St at any point on the bottom edge.
- Ch 3 (counts as first DC).
- Work a DC in every DTR stitch and a DC into every Ch-1 space around the entire bottom circumference.
- Important: Where the squares join (at the bottom point of the seam), work a 3-DC Decrease over the corner stitches/spaces to reduce bulk and keep the edge straight.
- Sl St to the top of the starting Ch 3.
- Round 2 (Ribbing Setup):
- Ch 3 (counts as first DC).
- Alternate FPDC around the next stitch, and BPDC around the stitch after that.
- Repeat the [FPDC, BPDC] sequence around the entire circumference. Sl St to the top of the starting Ch 3.
- Round 3+ (Ribbing Repeat):
- Ch 3 (counts as first DC).
- Work FPDC over every FPDC below, and BPDC over every BPDC below. This maintains the ribbing texture.
- Repeat for 2-3 more rounds or until the ribbing reaches your desired height (the video shows 3 rounds). Sl St to join. Fasten off.
💪 Sleeve Option 1: The Lacy Shell Band (Preferred)
This option gives a dense, elegant band that matches the motif’s feel.
- Round 1 (DC Foundation): Join yarn in the armhole opening. Work a continuous round of DC evenly around the armhole edge. Sl St to join.
- Round 2 (Shell Setup):
- Ch 3 (counts as DC). 2 DC in the same stitch.
- Repeat: [Sk 2 stitches, 3 DC in the next stitch].
- Repeat this sequence around. Sl St to the top of the starting Ch 3.
- Round 3-6 (Shell Repeat):
- Sl St into the first 3-DC cluster’s center DC. Ch 3. 2 DC in the same stitch.
- Repeat: Work a 3 DC Cluster into the center DC of the next cluster below.
- Repeat until desired length (the video shows 6 rounds). Sl St to join.
- Final Edging: Ch 1. Work SC into every stitch around the sleeve opening. Sl St to join. Fasten off.
- Sleeve Option 2 (The Trellis Mesh, as shown in the second sleeve attempt in the video) is worked with alternating Ch 2 and DC in subsequent rounds until the desired length is reached, followed by 1-2 rounds of SC edging.
Video Tutorial:
✨ Finishing & Blocking
- Weaving Ends: Using your tapestry needle, securely weave in all loose ends on the wrong side of the fabric. Pay special attention to the ends from the motif changes.
- Blocking: This final step is highly recommended to even out the tension and ensure a beautiful drape.
- Gently wet the finished garment (if using natural fibers like cotton).
- Lay it flat on a towel or blocking mat.
- Pin the edges to your desired final shape and dimensions, ensuring the hem and sleeves are even.
- Allow the garment to air dry completely.
Enjoy your beautifully structured and eye-catching “Sunburst Bloom” blouse!


