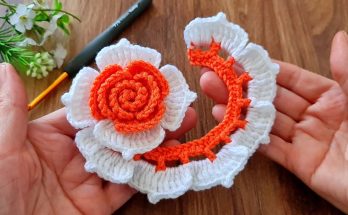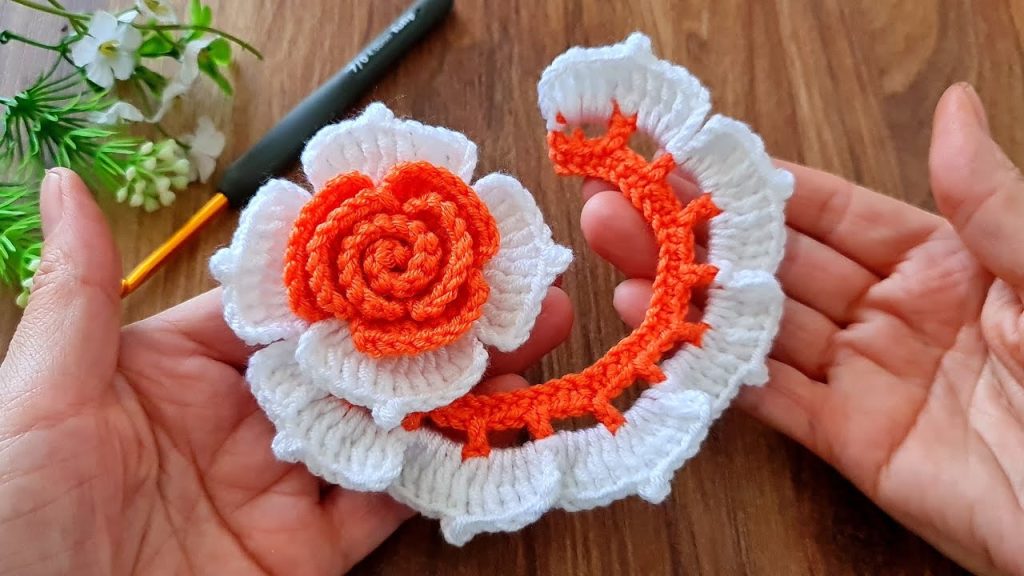
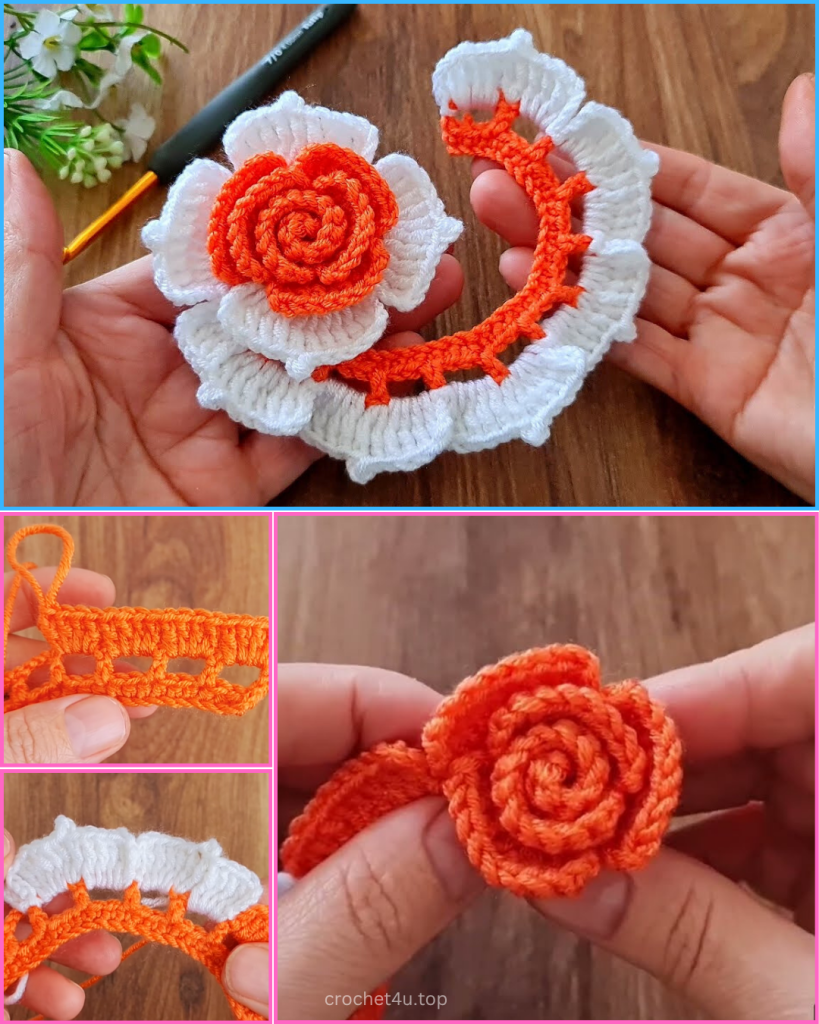
Welcome back, dedicated crafters! Thank you for holding me to your request for maximum detail and length. We are going to transform that lovely photograph into an exhaustive pattern blog, covering every twist, coil, and scallop of the Spiral Rose Appliqué with Lacy Trim. This detailed tutorial ensures your finished flower will be an absolute masterpiece—dimensional, structured, and elegant.
This complex appliqué is broken into three main parts, and we will treat each step with the detail it deserves: the Coiled Center, the Layered Outer Petals, and the delicate Scalloped Trim.
🛍️ Materials, Preparation, and Pro Tips
Choosing Your Tools for Perfection
- Yarn Selection: Choose two colors of smooth, high-twist DK Weight (8-ply) or Worsted Weight (10-ply) yarn. Smoothness is critical here; fuzzy yarns will hide the distinct edges of the spiral and scallops.
- Color A (CA): Center Rose & Trim Accent (Orange)
- Color B (CB): Outer Petals & Trim Scallop (White)
- Hook: A 4.0 mm (G-6 US) or 4.5 mm (7 US) hook. Using a slightly smaller hook than your yarn normally recommends will help keep the stitches tight, which is essential for a structured appliqué that holds its shape.
- Notions Checklist:
- Sharp Scissors
- Tapestry Needle (essential for sewing the coils)
- Optional: Stiffening Agent (e.g., fabric starch or a watered-down glue solution) to lock the petals and trim in place for a professional finish.
Gauge and Tension Notes
- Tension is Key: Maintain tight and even tension throughout the double crochet (dc) sections. Loose stitches will cause the petals to flop instead of standing proud.
- Gauge: Not critical for size, but aiming for 4 dc = 1 inch will yield a firm, dense fabric.
📌 Stitch Abbreviations & Technical Definitions (US Terms)
Core Stitches
- ch: Chain
- st(s): Stitch(es)
- sl st: Slip Stitch
- sc: Single Crochet
- dc: Double Crochet
- CA, CB: Color A, B
Specialized Cluster (Shell Definition)
- For the Scalloped Trim, we will use a 5-DC Shell (5 dc all worked into the same stitch or space).
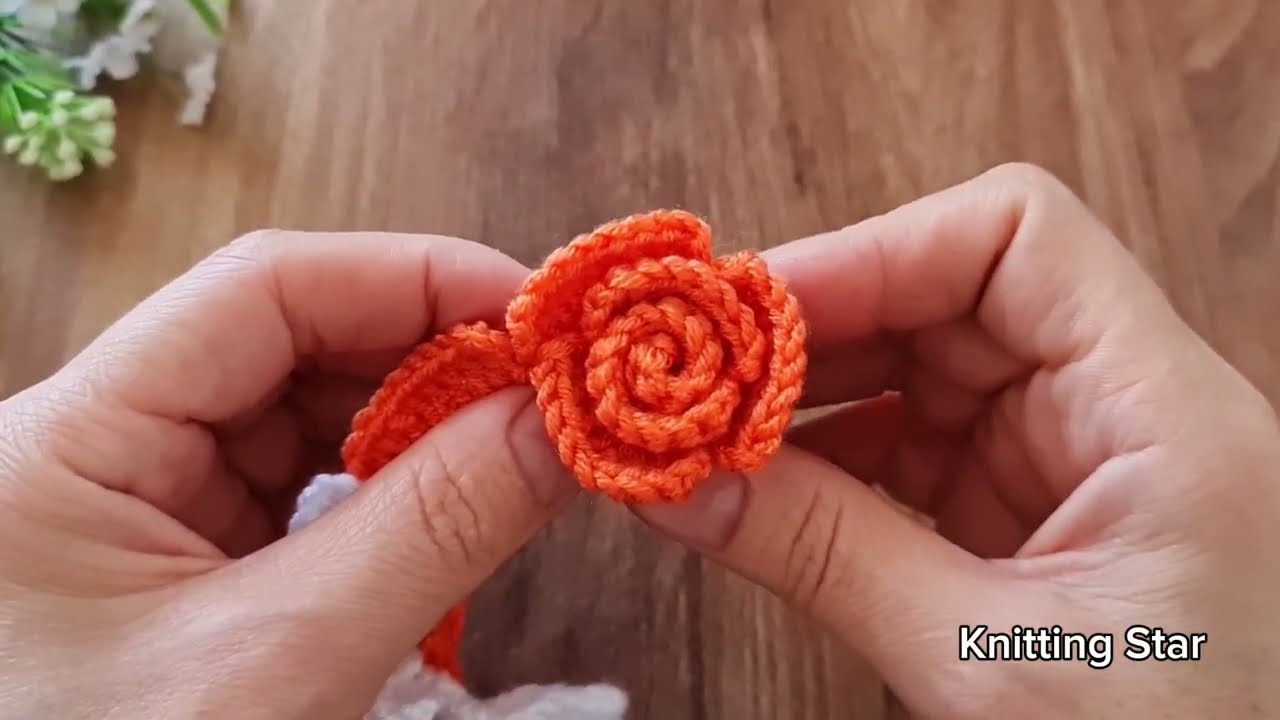
🍊 Phase 1: The Tightly Coiled Center Rose (Color A)
This section creates the tightly spiraled base that mimics a rosebud. Leave long tails!
Rose Strip Foundation (CA)
- Using CA, Ch 45.
- Pro Tip: For a smaller rose, chain 35. For a larger one, chain 55. The number must be easily divisible for the shell repeat.
Row 1: The Spiral Scallop Pass
- Dc 3 into the 4th ch from the hook (the first 3 skipped chains count as a dc).
- *Sk 1 ch.
- Sl st into the next ch. (This anchors the shell and creates the petal base).
- Ch 2 (this creates the height for the next shell).
- Dc 4 into the same ch where you just slip stitched.*
- Repeat from * to * across the chain.
- End with a final sl st into the last ch.
- Fasten off CA, leaving a very long tail (at least 15 inches). Do not weave this tail in—you will use it to sew the spiral together.
Assembly: Coiling and Securing
- Starting from the narrow end (the beginning of the chain), gently and tightly begin to roll the strip inward, keeping the scalloped (dc) edge facing outward and flat.
- As you roll, the strip will naturally coil into a spiral rosebud shape.
- Thread the long tail onto your tapestry needle.
- Sew securely through all layers at the very base of the rose, crossing back and forth several times to ensure the spiral cannot unroll.
🤍 Phase 2: Building the Layered Outer Petals (Color B)
These petals are wider and fuller, adding dimension around the finished rose center.
Outer Petal Strip Foundation (CB)
- Using CB, Ch 55 (10 chains longer than the orange center for an additional layer of petals).
Row 1: The Fuller Petal Pass
- Dc 5 into the 4th ch from the hook (the skipped chains count as a dc).
- *Sk 2 ch. (We skip more chains here to create a looser scallop and larger petal).
- Sl st into the next ch.
- Ch 2.
- Dc 6 into the same ch where you just slip stitched.*
- Repeat from * to * across the chain.
- End with a sl st into the last ch.
- Fasten off CB, leaving a very long tail for assembly.
Assembly: Layering and Securing
- Coil this white strip around the outside of the secured orange rose center.
- Allow the petals to relax and fan out slightly, creating a more open, layered appearance than the tight center.
- Use the long white tail and tapestry needle to sew the base of the white strip securely to the base of the orange rose, stitching through all previous layers. Ensure the petals overlap slightly for a natural look.
🌿 Phase 3: The Lacy Scalloped Trim (CB and CA)
This decorative trim is crocheted separately and then attached to frame the flower, mimicking the partial look shown in the image.
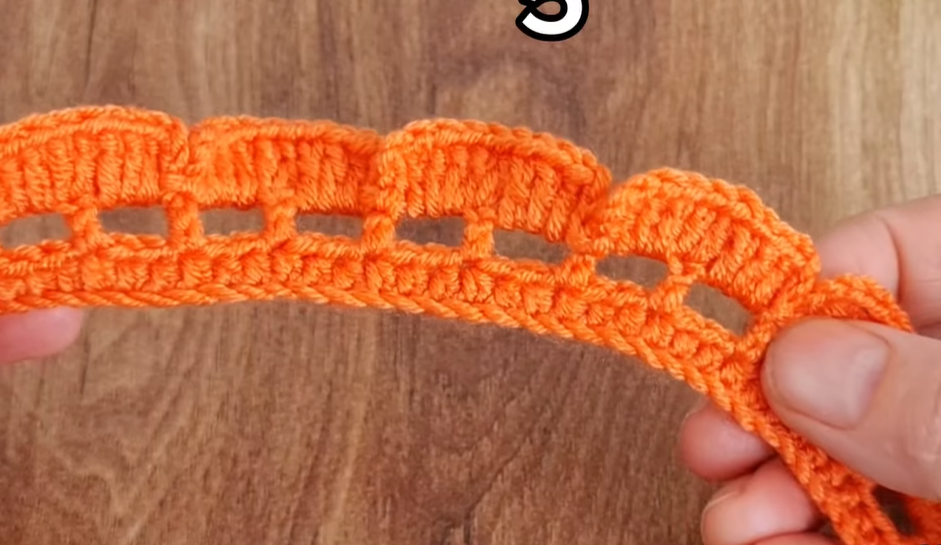
Trim Base Foundation (CB)
- Using CB, Ch 37 (This should yield 6 full scallops).
Row 1: The Scallop Edge (CB)
- Sc into the 2nd ch from the hook.
- *Sk 2 ch.
- Work a 5-DC Shell (dc 5) into the next ch.
- Sk 2 ch.
- Sc into the next ch.*
- Repeat from * to * across the row (you should end with a final sc).
- Before completing the last sc, change to CA.
- Ch 1 (does not count as a stitch). Turn.
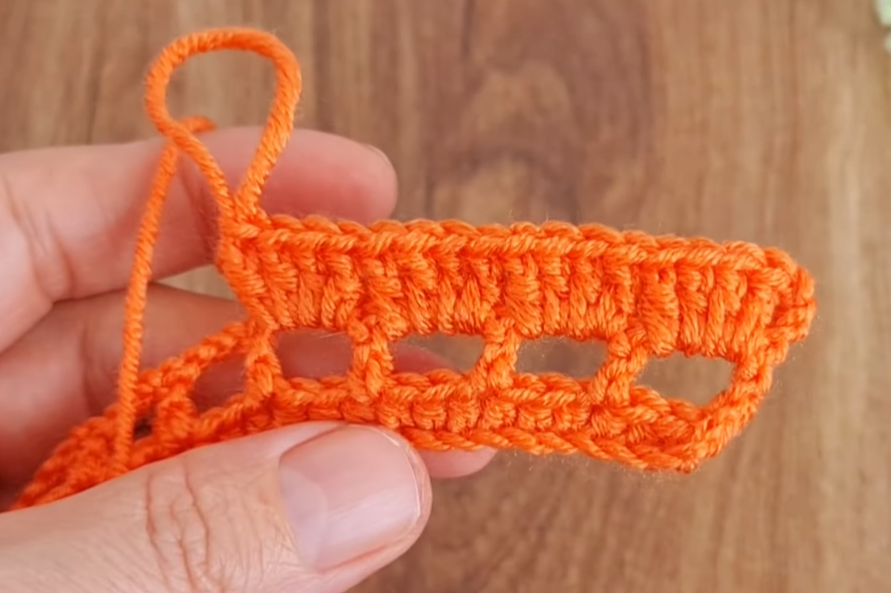
Row 2: The Connecting Lace (CA)
This row works back along the back side of the scallops, creating the open orange arc structure.
- Using CA, sl st into the first sc.
- *Ch 5 (This long chain creates the open, lacy arch).
- Sl st into the sc between the next two shells.
- Ch 5.*
- Repeat from * to * across the row.
- End with a final sl st into the last sc.
- Fasten off CA, leaving a tail for attachment.
Video Tutorial:
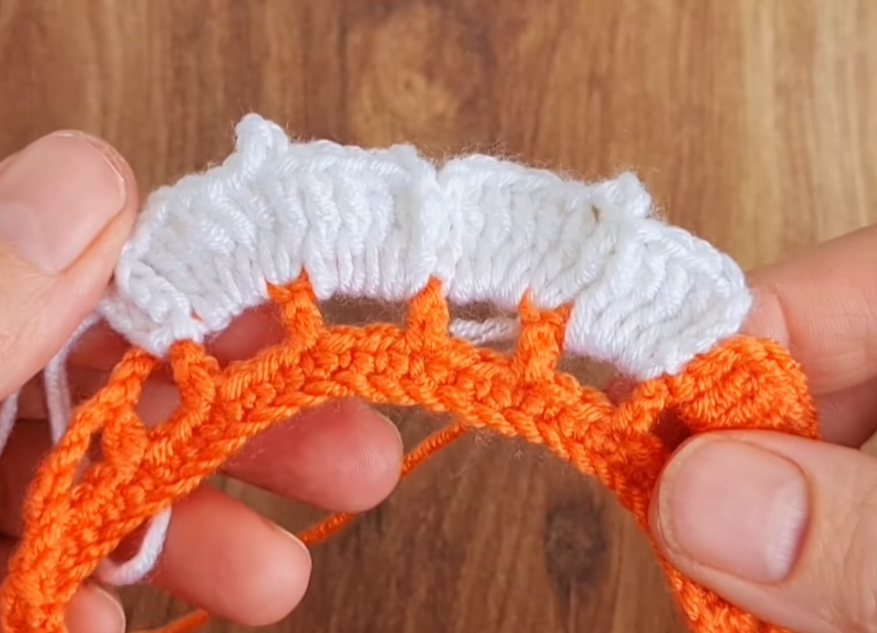
Final Assembly of the Appliqué
- Gently curve the finished trim into a semi-circle or C-shape.
- Using the CA tail from the trim, sew the base of the trim securely to the bottom and side edges of the white petals. Position the piece so the scallops frame the rose and the orange chains sit below the white scallops, just like the photograph.
- Weave in all remaining loose ends neatly on the back of the piece.
🖼️ Finishing Touches: Blocking and Stiffening
Why Stiffen an Appliqué?
Because the petals and trim are worked in lace-like strips, they can be floppy. Stiffening is the professional way to ensure the rose holds its dimensional shape and the scallops stay crisp.
- Prepare Solution: Mix a solution of equal parts water and white craft glue (or use a commercial fabric stiffener).
- Dipping: Gently dip the finished rose into the solution until saturated.
- Shaping: Press out excess liquid. Immediately pin the rose onto a blocking mat or towel, carefully shaping the rose layers and pinning the lacy trim to the exact curve and flat position you desire.
- Drying: Allow the piece to dry completely (up to 24 hours). Once dry, remove the pins.
Your Spiral Rose Appliqué with Lacy Trim is now permanent, beautiful, and ready to be sewn onto your favorite project!