🌟 Introduction
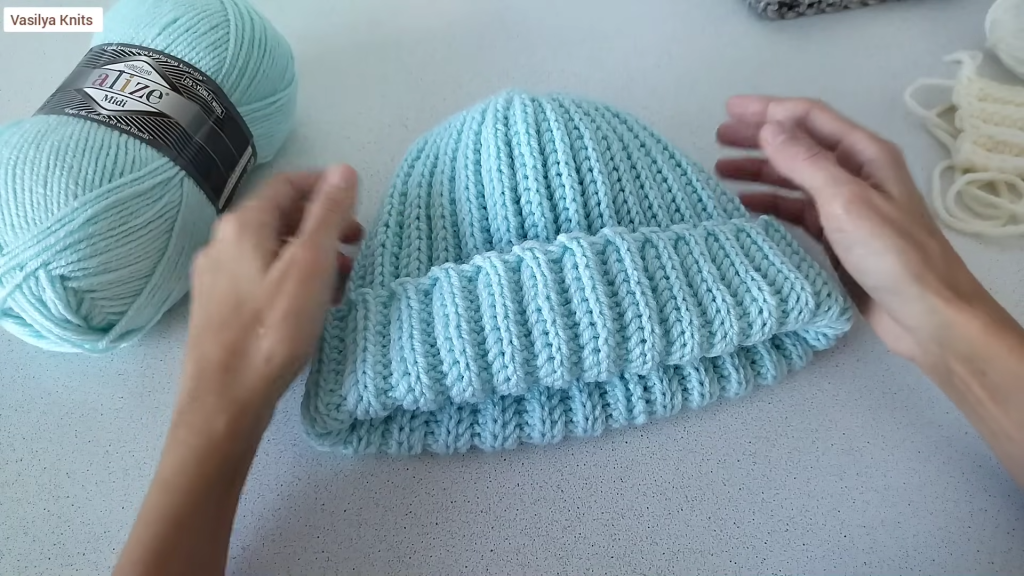
Embrace the cozy comfort of winter with the Winter Sky Slouch Beanie! This hat is designed for maximum warmth, featuring an extra-wide, luxurious fold-over cuff and an easy, stretchy vertical ribbing pattern. The entire hat is worked flat in a rectangle using the Half Double Crochet Back Loop Only (HDC BLO) technique, which creates a beautifully elastic, knit-look fabric. It’s a perfect project for relaxing and results in a stylish, deeply cuffed slouch that looks great on everyone.
Skill Level: Easy/Beginner-Friendly
Finished Size: Adult Medium (Approx. 20-22 inches head circumference, with significant stretch)
🧵 Materials & Gauge
✨ Materials Needed
- Yarn: Approximately 180-220 yards of Worsted Weight (Aran/10-ply) yarn. A soft acrylic or acrylic/wool blend is recommended for optimal stretch and comfort. (The sample image uses a lovely pale mint/light blue color.)
- Hook: Size J/10 (6.0 mm) crochet hook, or size needed to obtain gauge. (A slightly larger hook is used to maintain the slouch and stretch.)
- Notions: Yarn needle for seaming and weaving ends, and scissors.
📏 Gauge (Crucial for Sizing!)
- Ribbing (in HDC BLO): A 4-inch (10 cm) square should be 12 rows wide (counting the ridges) and 11 stitches tall (along the long edge/height).
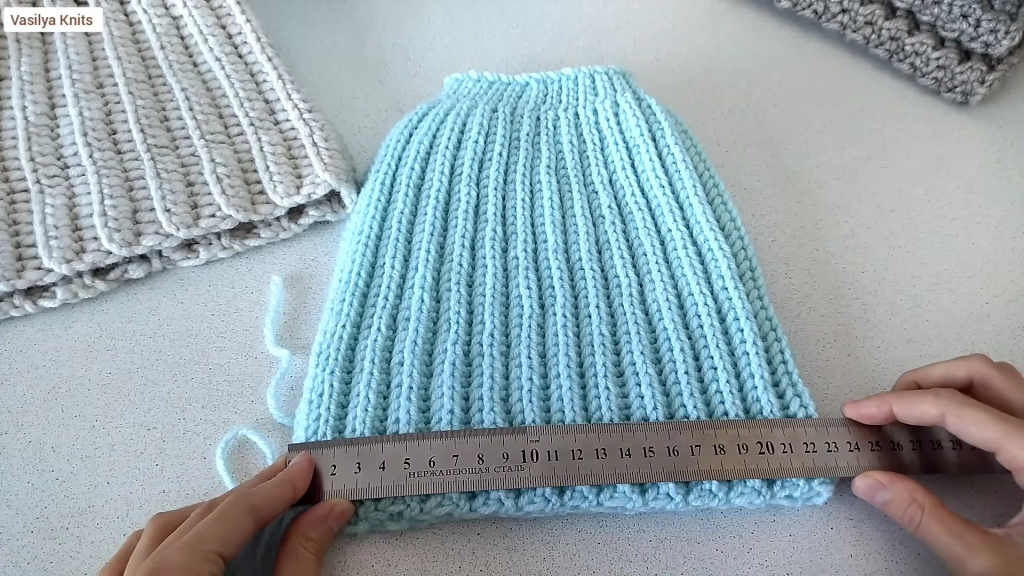
- Finished Rectangle Dimensions: The total finished rectangle (before seaming) should be approximately 14-15 inches wide (height of the hat, including cuff) by 18 inches long (circumference of the hat).
Note: The stitch count determines the height (from crown to brim), and the row count determines the circumference.
💡 Special Stitches & Abbreviations
📝 Pattern Abbreviations (US Terms)
| Abbreviation | Meaning | | Abbreviation | Meaning | | :—: | :— | :—: | :— | | ch | chain | | st(s) | stitch(es) | | sl st | slip stitch | | rep | repeat | | hdc | half double crochet | | BLO | Back Loop Only | | FO | Fasten Off | | CC | Cinch Closed |
⭐ Special Stitch (The Ribbing)
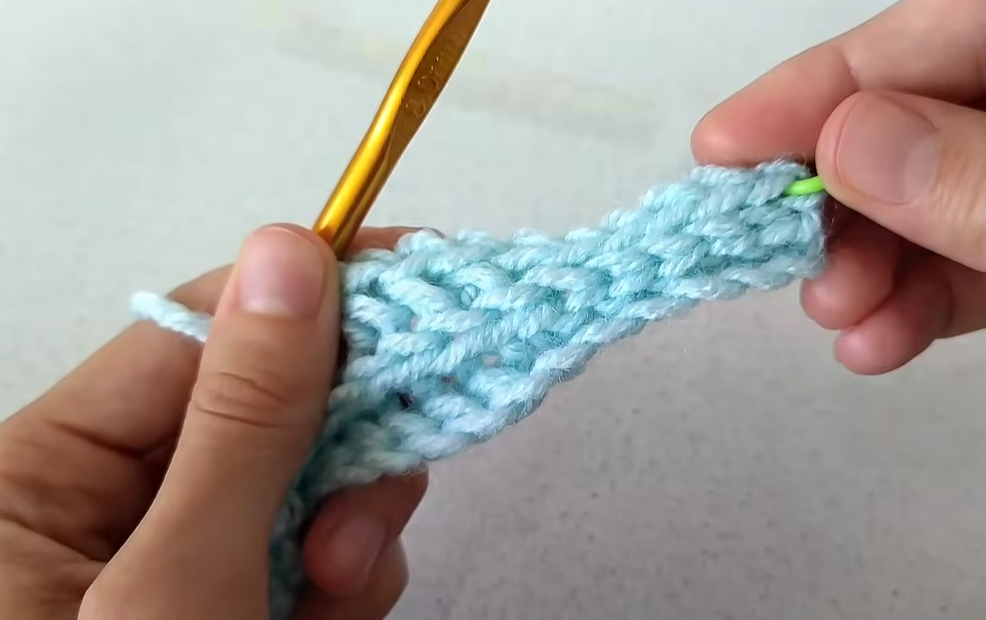
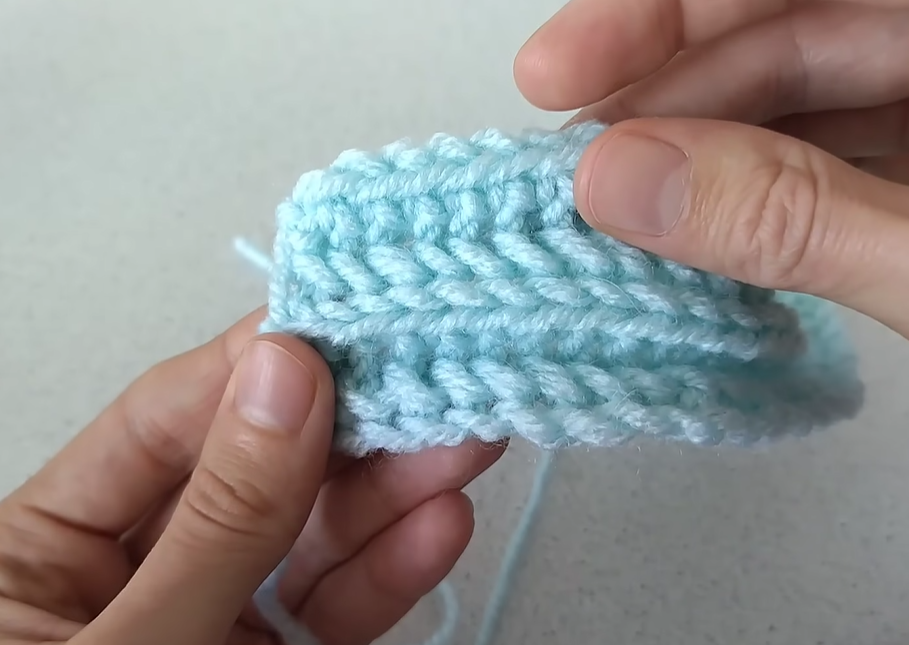
- HDC BLO: Yarn over, insert hook into only the back loop of the specified stitch, yarn over, pull up a loop (3 loops on hook), yarn over, pull through all 3 loops. This is the main stitch used for the entire hat.
- Seam Stitch: Work the final stitch of each row into BOTH loops of the final stitch of the previous row. This creates a sturdier, cleaner edge for seaming.
🧶 The Pattern: Winter Sky Slouch Beanie
Part 1: The Ribbed Rectangle (Worked Flat)
The wide cuff should be about 4 inches, and the body/slouch should be about 11 inches, totaling a 15-inch height before folding.
Foundation Chain: Ch 46 (adjust for height: 13 sts for the cuff, 32 sts for the body/slouch, 1 ch for the turning chain).
Row 1: Hdc in the 2nd ch from the hook, and hdc in each ch across. (45 hdc). Ch 1 (does not count as st), turn.
Rows 2 – 58 (or until desired length): HDC BLO in the first 44 sts. Work a standard HDC in BOTH loops of the last st (the seaming stitch). Ch 1, turn. (45 hdc)
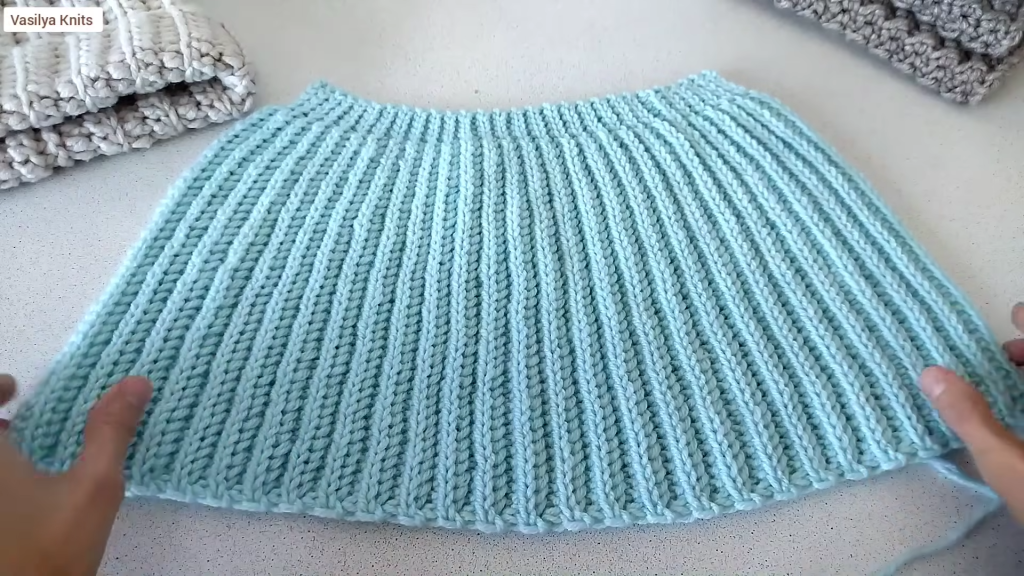
Measurement Check: The finished rectangle should measure approximately 18 inches long (the row edge, for circumference) by 15 inches wide (the stitch edge, for height). The number of rows needed (approx. 58) may vary based on your gauge. The row edge length must stretch comfortably around your head.
Fasten off, leaving a very long tail (approx. 25 inches / 65 cm) for seaming and closing the crown.
Part 2: Seaming and Crown Shaping
We will turn the flat rectangle into the hat shape.
Joining Row (Seam):
- Fold the rectangle in half, bringing the last row (Row 58) and the foundation chain edge (Row 1) together.
- Using the long tail and a yarn needle, whipstitch or mattress stitch the two vertical edges together. Work through both loops of the stitches along the seaming edges for a sturdy seam. Leave the long tail attached.
Cinching the Top (Crown Closure):
- Keep the working yarn (the long tail) threaded on the yarn needle.
- Weave the needle in and out through the tops of the rows along the open crown edge, placing the needle approximately every other row end all the way around the top opening of the cylinder (about 29 times).
- Pull the tail TIGHTLY to cinch the top opening completely closed.
- Reinforce the closure by stitching back and forth across the small remaining hole a few times to ensure it’s secure.
- Knot the yarn and weave the tail securely into the inside of the hat.
Video Tutorial:
✂️ Finishing & Styling
✨ Final Touches and Cuffing
- Weave in any remaining yarn tails securely on the inside of the hat.
- Cuff: Fold the bottom edge (the brim) of the hat up to create the wide cuff. The ribbing will naturally allow for a crisp, clean fold. The cuff should measure approximately 3-4 inches.
🧺 Blocking (Optional)
- Steam Blocking is Recommended: A light steam block can help the ribbing settle evenly, smooth out the crown closure, and enhance the overall slouch and drape.
- Place the hat over a head-shaped object (like a bowl or balloon). Gently apply steam (avoid direct iron contact, especially with acrylic yarn) to the fabric.
- Allow the hat to cool and dry completely before removing it from the form.
You have now created a wonderfully warm and effortlessly chic Winter Sky Slouch Beanie! Enjoy the beautiful texture and cozy fit.