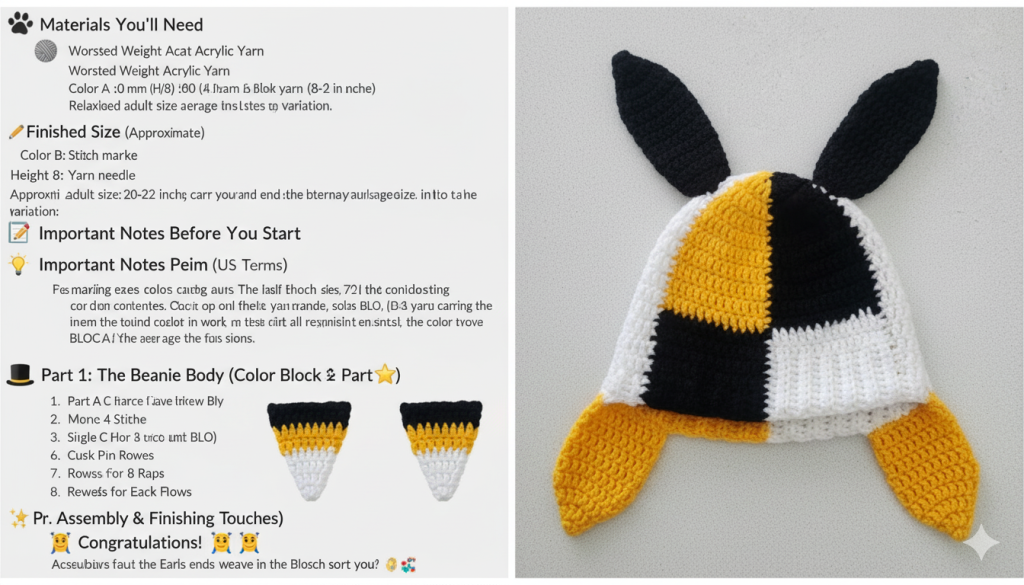
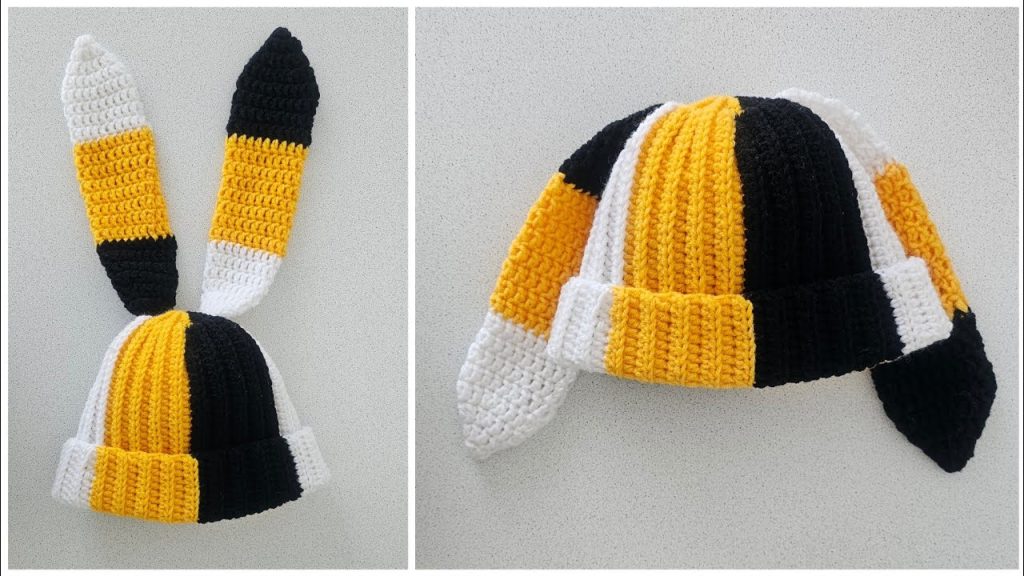
Hey there, fellow makers and hat lovers! Are you ready to dive into a project that’s as charming as it is cozy? Today, we’re going to create a super fun and eye-catching Color Block Critter Beanie inspired by the adorable cat/fox ear design with playful ear flaps and a bold, graphic aesthetic.
This hat isn’t just about keeping you warm; it’s a statement piece! With its distinct color blocking in black, white, and a vibrant yellow, plus those delightful perky ears and cozy ear flaps, you’ll be turning heads and spreading smiles wherever you go. This pattern is designed to be detailed and clear, guiding you through each color change and shaping technique to ensure your critter beanie turns out perfectly.
So, grab your hooks, choose your favorite three contrasting colors (or stick with this fabulous black, yellow, and white combo!), and let’s crochet some magic!
🧶 Materials You’ll Need
Let’s gather everything necessary to bring our critter beanie to life!
- Yarn: Worsted Weight (Aran / 10-ply) Acrylic Yarn. You’ll need three contrasting colors.
- Color A: Black (Approx. 100-120 yards)
- Color B: Yellow (Approx. 100-120 yards)
- Color C: White (Approx. 100-120 yards)
- Note on Quantity: These estimates are for an average adult-sized beanie. If you tend to crochet loosely or want a larger size, it’s always wise to have a little extra! The ear flaps and ears do consume a fair amount of yarn.
- Crochet Hook: 5.0 mm (H/8). This size generally works well with worsted weight yarn for a firm yet flexible beanie fabric.
- Stitch Marker: Absolutely essential for working in continuous rounds and marking the start/end of color sections.
- Yarn Needle (Tapestry Needle): For weaving in all those fabulous color change ends.
- Scissors: For snipping yarn.
- Measuring Tape: To check your hat’s circumference and height.
📏 Finished Size (Approximate)
This pattern is written for an average adult head size.
- Circumference (relaxed): 20-22 inches (51-56 cm)
- Height (from brim to crown, excluding ears): 8-9 inches (20-23 cm)
Remember that individual tension and yarn choice can affect the final size. Feel free to adjust by adding or subtracting rounds or using a different hook size.
📝 Abbreviations (US Terms)
Here’s a quick cheat sheet for the crochet terms used in this pattern:
- ch: chain
- sl st: slip stitch
- sc: single crochet
- hdc: half double crochet
- dc: double crochet
- inc: increase (2 stitches in the same stitch)
- dec: decrease (sc2tog or hdc2tog – single crochet two together / half double crochet two together)
- st(s): stitch(es)
- BLO: back loop only
- FO: fasten off
- MR: Magic Ring
💡 Important Notes Before You Start
Please read these tips carefully for the best results on your Critter Beanie:
- Color Changes: This pattern involves frequent color changes to achieve the striking block design. Always change colors on the last yarn over of the stitch before the new color section.
- Carrying Yarn: For the main beanie body, you will be carrying the unused colors behind your work to avoid a messy interior and reduce the number of ends to weave in. When you carry yarn, make sure it’s loose enough not to pucker your work, but not so loose that it creates big loops. You’ll switch between carrying the two colors not currently in use.
- Working in Rounds: The beanie is worked in continuous rounds (unless otherwise specified for the brim) using a stitch marker to keep track of the start of each round.
- Tension: Maintain consistent tension, especially with the color changes, to keep your fabric even and prevent gaps.
- Critter Ears: The ears are worked separately and then sewn onto the top of the hat.
- Ear Flaps: The ear flaps are crocheted directly onto the finished hat.
🌟 Let’s Get Crocheting! The Pattern
We’ll start with the main beanie, then add the ears and ear flaps.
🎩 Part 1: The Beanie Body (Color Blocked)
We’ll use Color A (Black), Color B (Yellow), and Color C (White). The hat will be divided into four sections of 15 stitches each.
Starting with the Crown (Color A – Black)
- Round 1: With Color A, create a MR. Ch 1 (does not count as st). Work 8 hdc into the MR. Pull tail to close. Place stitch marker in first hdc. (8 hdc)
- Round 2: Hdc inc in each st around. (16 hdc)
- Round 3: [1 hdc in next st, hdc inc in next st] repeat around. (24 hdc)
- Round 4: [1 hdc in next 2 sts, hdc inc in next st] repeat around. (32 hdc)
- Round 5: [1 hdc in next 3 sts, hdc inc in next st] repeat around. (40 hdc)
- Round 6: [1 hdc in next 4 sts, hdc inc in next st] repeat around. (48 hdc)
- Round 7: [1 hdc in next 5 sts, hdc inc in next st] repeat around. (56 hdc)
- Round 8: [1 hdc in next 6 sts, hdc inc in next st] repeat around. (64 hdc)
- Round 9:[1 hdc in next 7 sts, hdc inc in next st] repeat around. (72 hdc)
- At this point, your circle should be roughly 6-7 inches in diameter. If it’s too small/large, adjust by adding/removing an increase round.
Beginning the Color Block Sides (Maintaining 72 hdc)
Now we’ll divide the 72 stitches into four equal sections of 18 stitches (72 / 4 = 18). The color sequence for each round will be: Color C (White) for 18 sts, Color B (Yellow) for 18 sts, Color A (Black) for 18 sts, Color C (White) for 18 sts. (The image shows the black on one side and white on the other, so we will adapt the sequence slightly from the image to reflect a more balanced block approach that matches the example’s crown.)
- Color Changing Technique: When you are working the LAST stitch of a color, yarn over, insert hook, yarn over, pull up loop (3 loops on hook), drop current color, pick up NEW color, yarn over with NEW color and pull through all 3 loops. This completes the stitch with the new color. Carry the unused colors loosely behind your work.

- Round 10:
- With Color C: 1 hdc in next 18 sts.
- Switch to Color B: 1 hdc in next 18 sts.
- Switch to Color A: 1 hdc in next 18 sts.
- Switch to Color C: 1 hdc in next 18 sts. (72 hdc)
- Round 11 – 20 (or until desired height): Repeat Round 10.
- Continue for approximately 10-12 rounds, or until the hat measures about 6-7 inches from the center of the crown.
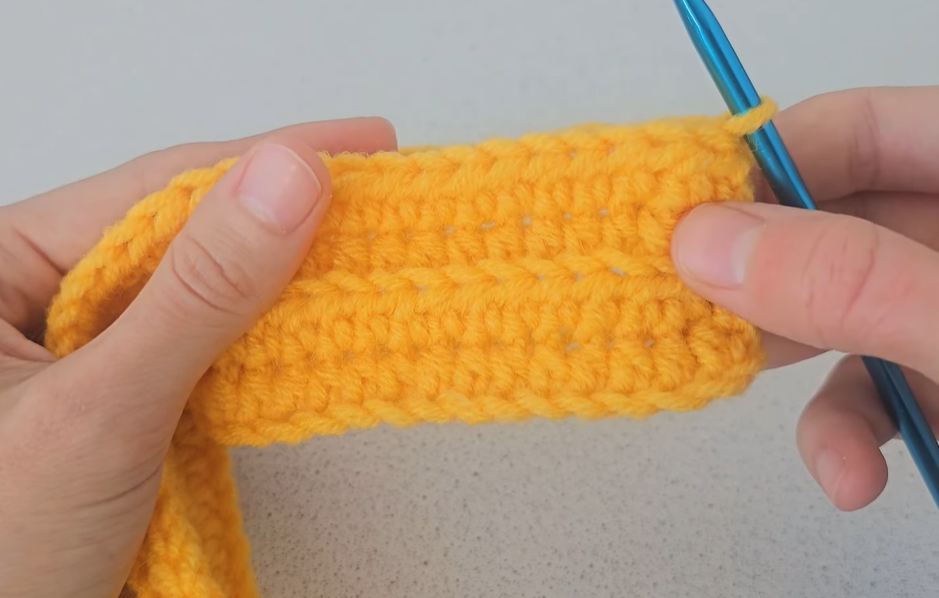
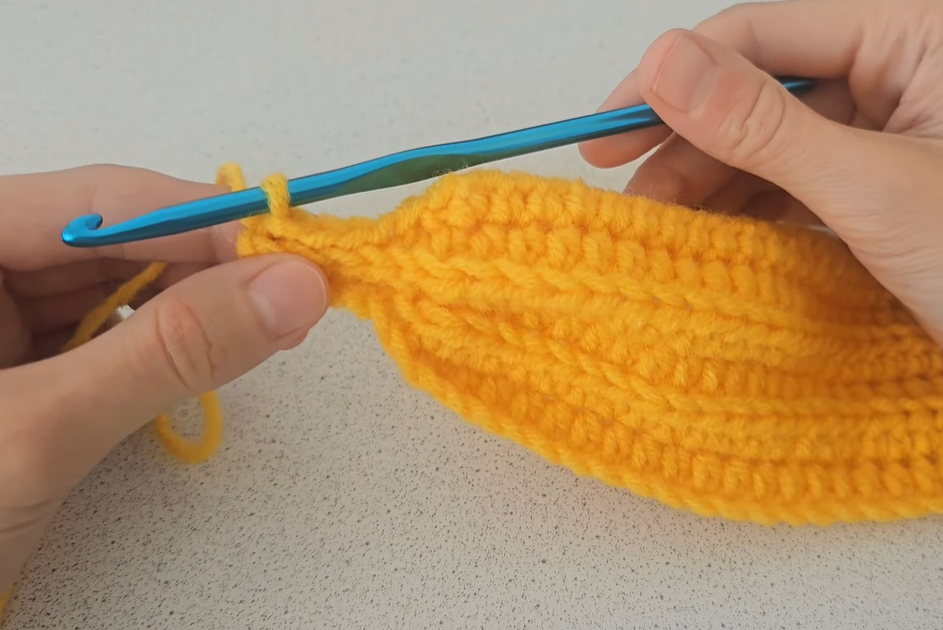
🎀 Part 2: The Ribbed Brim (Color Blocked)
We’ll now create a folded ribbed brim using sc in BLO. The color sections will remain the same.
- Brim Setup Round (Round 21):
- Work this round as sc instead of hdc. The color sections remain the same (18 sts per color).
- Color C: 1 sc in next 18 sts.
- Switch to Color B: 1 sc in next 18 sts.
- Switch to Color A: 1 sc in next 18 sts.
- Switch to Color C: 1 sc in next 18 sts. (72 sc)
- Brim Ribbing Rounds (Round 22 – 26):
- Work these rounds in BLO sc for a ribbed effect.
- Color C: 1 sc in BLO of next 18 sts.
- Switch to Color B: 1 sc in BLO of next 18 sts.
- Switch to Color A: 1 sc in BLO of next 18 sts.
- Switch to Color C: 1 sc in BLO of next 18 sts. (72 sc)
- Work about 5-6 rounds in BLO sc for a nice wide brim. At the end of the last round, sl st to the first sc to join, then FO Color A and Color B. Continue with Color C for the ear flap.
🐾 Part 3: The Critter Ears (Make 2)
These are worked separately and then sewn on. Each ear will be 3 colors!
First Ear (Black, Yellow, White)
- Row 1 (Color A – Black): Ch 7. Sc in 2nd ch from hook and in next 5 chs. Ch 1, turn. (6 sc)
- Row 2: Sc in each st across. Ch 1, turn. (6 sc)
- Row 3: Sc dec, 1 sc in next 2 sts, sc dec. Ch 1, turn. (4 sc)
- Row 4: Sc in each st across. Ch 1, turn. (4 sc)
- Row 5: Sc dec, sc dec. Ch 1, turn. (2 sc)
- Row 6: Sc in each st across. Ch 1, turn. (2 sc)
- Change to Color B (Yellow) on the last yarn over of the last stitch of Row 6.
- Row 7 (Color B – Yellow): Sc in each st across. Ch 1, turn. (2 sc)
- Row 8: Sc dec. Ch 1, turn. (1 sc)
- Row 9: Sc in st. (1 sc)
- Change to Color C (White) on the last yarn over of the last stitch of Row 9.
- Row 10 (Color C – White): Sc in st. FO. (1 sc)
Second Ear (White, Yellow, Black)
This ear will be the reverse color sequence to match the other side of the hat.
- Row 1 (Color C – White): Ch 7. Sc in 2nd ch from hook and in next 5 chs. Ch 1, turn. (6 sc)
- Row 2: Sc in each st across. Ch 1, turn. (6 sc)
- Row 3: Sc dec, 1 sc in next 2 sts, sc dec. Ch 1, turn. (4 sc)
- Row 4: Sc in each st across. Ch 1, turn. (4 sc)
- Row 5: Sc dec, sc dec. Ch 1, turn. (2 sc)
- Row 6: Sc in each st across. Ch 1, turn. (2 sc)
- Change to Color B (Yellow) on the last yarn over of the last stitch of Row 6.
- Row 7 (Color B – Yellow): Sc in each st across. Ch 1, turn. (2 sc)
- Row 8: Sc dec. Ch 1, turn. (1 sc)
- Row 9: Sc in st. (1 sc)
- Change to Color A (Black) on the last yarn over of the last stitch of Row 9.
- Row 10 (Color A – Black): Sc in st. FO. (1 sc)
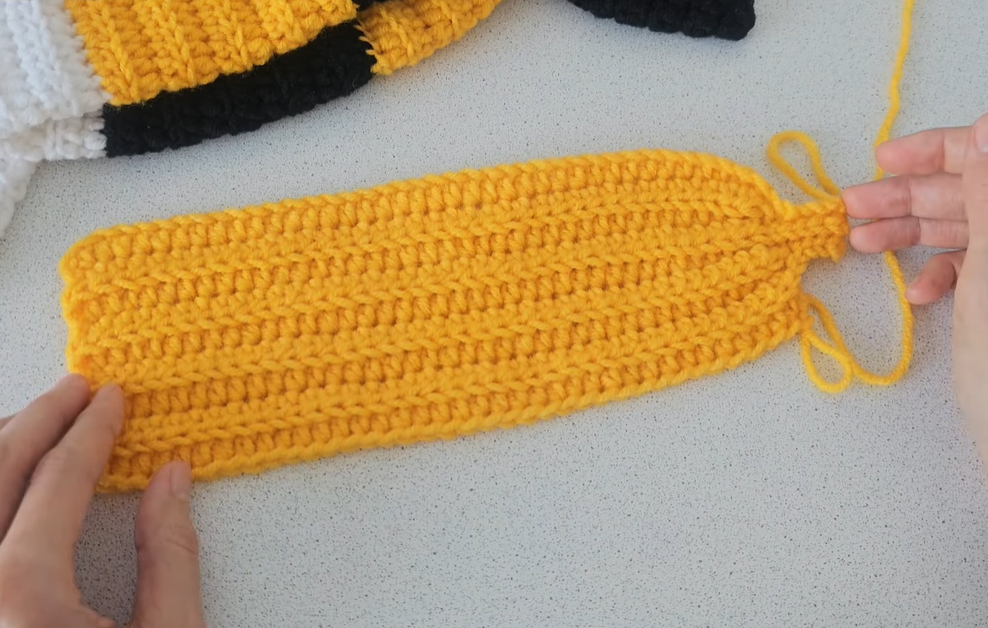
👂 Part 4: The Ear Flaps (Make 2)
These are worked directly onto the bottom edge of the hat.
First Ear Flap (Starts with Color C – White section, ends with Color B – Yellow)
- Attachment: Locate the seam where your color blocks meet the brim. For the first flap, start in the middle of a Color C (white) section of the brim, about 4-5 stitches from the seam with Color A (black). Join Color C with a sl st to the brim.
- Row 1: Ch 1. Work 12 sc evenly across the brim, centered on one of the white sections of the hat. Ch 1, turn. (12 sc)
- Row 2: Sc dec, 1 sc in next 8 sts, sc dec. Ch 1, turn. (10 sc)
- Row 3: Sc dec, 1 sc in next 6 sts, sc dec. Ch 1, turn. (8 sc)
- Row 4: Sc dec, 1 sc in next 4 sts, sc dec. Ch 1, turn. (6 sc)
- Change to Color B (Yellow) on the last yarn over of the last stitch of Row 4.
- Row 5 (Color B – Yellow): Sc dec, 1 sc in next 2 sts, sc dec. Ch 1, turn. (4 sc)
- Row 6: Sc dec, sc dec. Ch 1, turn. (2 sc)
- Row 7: Sc dec. Ch 1, turn. (1 sc)
- Row 8: Sc in st. FO. (1 sc)
Second Ear Flap (Starts with Color A – Black section, ends with Color B – Yellow)
- Attachment: Locate the seam where the other Color C (white) section meets the Color A (black) section of the brim. Join Color A with a sl st to the brim, about 4-5 stitches from this seam, centered over the black section.
- Row 1: Ch 1. Work 12 sc evenly across the brim, centered on the black section. Ch 1, turn. (12 sc)
- Row 2: Sc dec, 1 sc in next 8 sts, sc dec. Ch 1, turn. (10 sc)
- Row 3: Sc dec, 1 sc in next 6 sts, sc dec. Ch 1, turn. (8 sc)
- Row 4: Sc dec, 1 sc in next 4 sts, sc dec. Ch 1, turn. (6 sc)
- Change to Color B (Yellow) on the last yarn over of the last stitch of Row 4.
- Row 5 (Color B – Yellow): Sc dec, 1 sc in next 2 sts, sc dec. Ch 1, turn. (4 sc)
- Row 6: Sc dec, sc dec. Ch 1, turn. (2 sc)
- Row 7: Sc dec. Ch 1, turn. (1 sc)
- Row 8: Sc in st. FO. (1 sc)
✨ Part 5: Assembly & Finishing Touches
Almost there! Time to put all the pieces together.
- Attach Ears: Using your yarn needle and corresponding yarn colors, sew the base of each critter ear to the top of the beanie. Position them symmetrically above the ear flaps, aligning the black section of one ear with the black section of the hat and the white section of the other ear with the white section of the hat. Secure them firmly.
- Weave in Ends: This project has a fair number of ends from all the color changes! Take your time to carefully weave in all yarn tails on the inside of the hat using your yarn needle. Make sure they are secure and hidden.
- Block (Optional): If your hat feels a bit stiff or uneven, you can gently steam block it to help it relax and achieve its final shape.
Video Tutorial:
🎉 Congratulations!
You’ve done it! You now have an incredibly stylish and wonderfully unique Color Block Critter Beanie!