
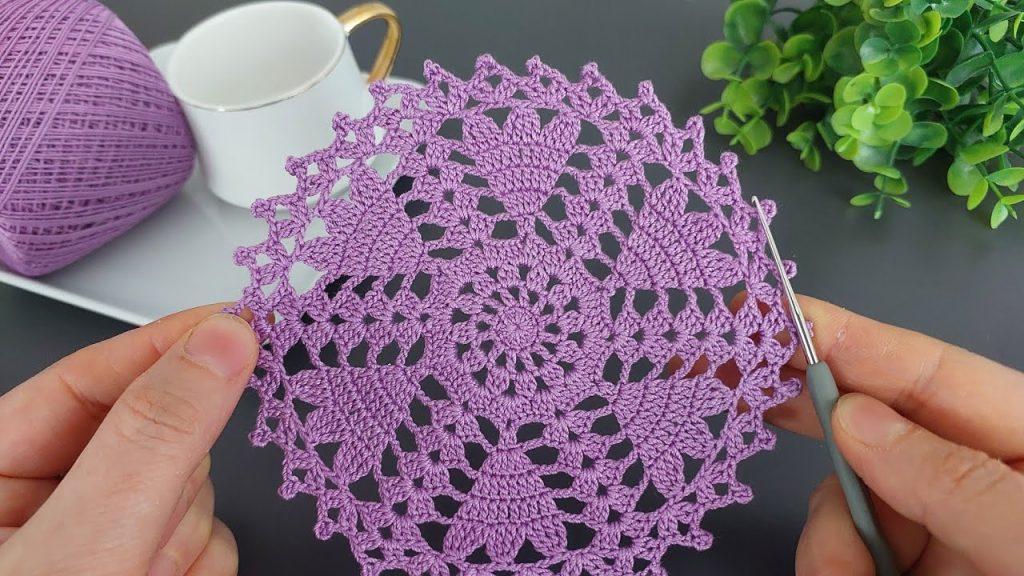
Welcome back! Your passion for beautiful, intricate lace is inspiring, and I’m delighted to provide another original pattern for you. This time, we’ll create a doily inspired by the stunning purple one you just shared. I’ve named it the Iris Star Doily because its central design features a star with bold, solid points surrounded by a delicate, lacy border.
This pattern is a fantastic project for an intermediate to advanced crocheter. It focuses on the beautiful contrast between solid texture and airy openwork, resulting in a piece that looks incredibly sophisticated.

Materials
- Yarn: Fine or fingering weight cotton yarn or crochet thread (approximately 75-100 yards). A vibrant color will beautifully highlight the star points.
- Hook: A crochet hook appropriate for your yarn weight. A 1.5 mm to 2.25 mm hook is a good starting point.
- Scissors
- Tapestry Needle for weaving in ends.
Special Stitches
- Popcorn (Pop): Make 5 double crochet (dc) in the same stitch. Remove your hook from the active loop. Insert your hook into the top of the first of the 5 dc, then pick up the dropped loop and pull it through the first dc. This creates a textured “pop” on the right side of your work.
- Cluster (Cl): (Yarn over, insert hook into the specified stitch or space, pull up a loop, yarn over, pull through 2 loops) 4 times in the same stitch/space. You will have 5 loops on your hook. Yarn over, pull through all 5 loops.
- Picot: Chain 3, slip stitch into the first chain.
- V-Stitch (V-st): (Dc, ch 1, dc) in the same stitch or space.
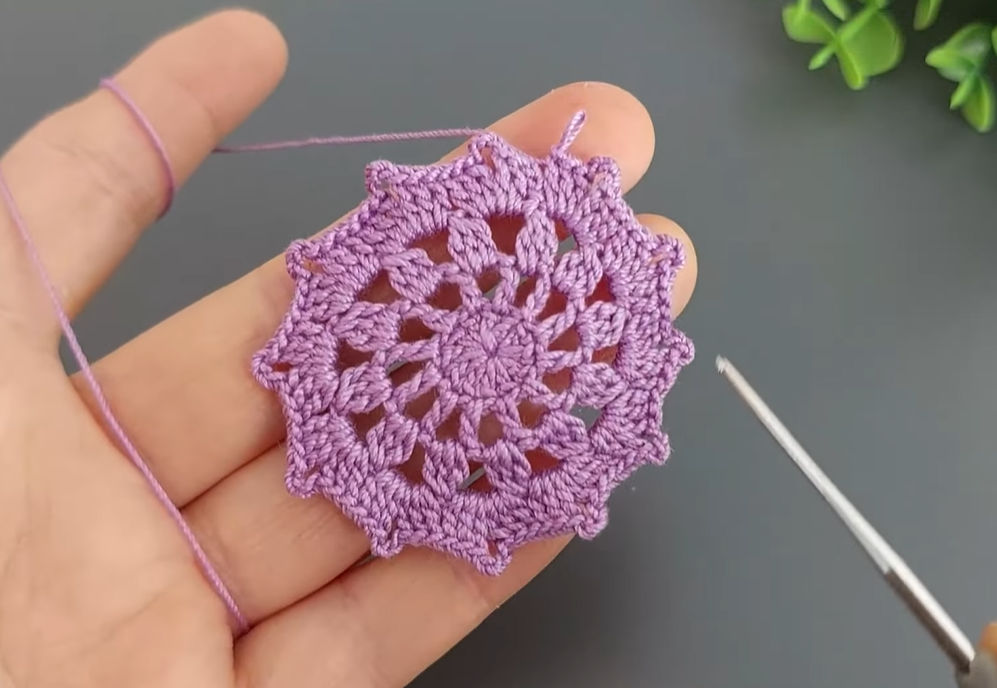
Part 1: The Central Core
We’ll begin by creating the solid foundation that will anchor the star.

Round 1: Make a magic ring. Chain 3 (counts as a dc), then make 15 dc in the ring. Join with a sl st to the top of the beginning ch-3. (16 dc)
Round 2: Chain 1 (does not count as a stitch). Sc in the same stitch. Chain 3, skip the next dc, sc in the next dc. Repeat from * to * 7 more times. Chain 3, skip the last dc, join with a sl st to the first sc. (8 sc, 8 ch-3 spaces)
Round 3: Slip stitch into the first ch-3 space. Make a Popcorn in the same space. Chain 3, Popcorn in the next ch-3 space. Repeat from * to * 6 more times. Chain 3, join with a sl st to the top of the beginning Popcorn. (8 popcorns, 8 ch-3 spaces)
Part 2: The Star Points
This is where the doily gets its distinctive shape, with eight solid points emerging from the center.
Round 4: Slip stitch into the first ch-3 space. Chain 3 (counts as a dc). Make 3 dc in the same space. Chain 2. In the next ch-3 space, make 4 dc. Repeat from * to * 6 more times. Chain 2, join with a sl st to the top of the beginning ch-3. (32 dc, 8 ch-2 spaces)
Round 5: Chain 3. Dc in the next 3 stitches. Chain 2, V-st in the next ch-2 space. Chain 2. Dc in the next 4 stitches. Repeat from * to * 6 more times, omitting the last dc group on the final repeat. Join with a sl st to the top of the beginning ch-3.
Round 6: Chain 3. Dc in the next 3 stitches. Chain 2, V-st in the next ch-2 space. Chain 2, V-st in the next ch-1 space. Chain 2, V-st in the next ch-2 space. Chain 2. Dc in the next 4 stitches. Repeat from * to * 6 more times, omitting the last dc group. Join with a sl st to the top of the beginning ch-3.
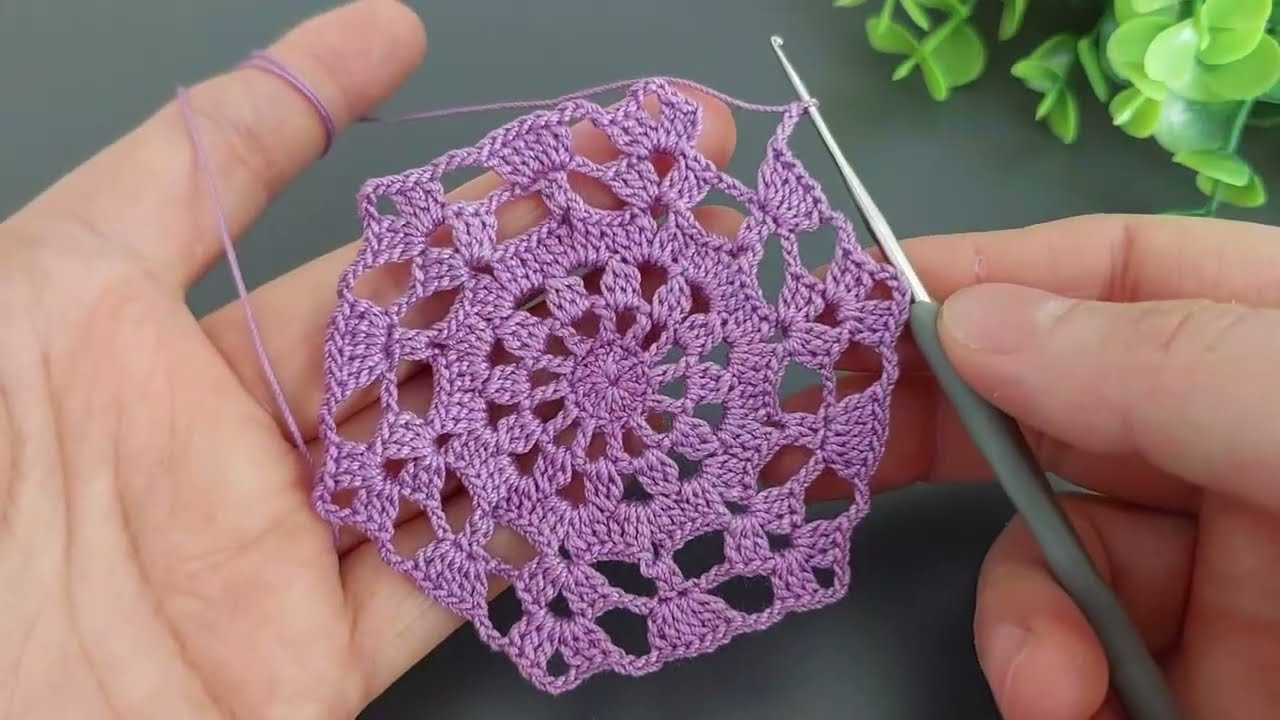
Part 3: The Lacy Connections
Now, we’ll create the airy lattice that connects the star points.
Round 7: Chain 1 (does not count as a stitch). Sc in the same stitch. Sc in the next 3 stitches. Chain 5. Sc in the next ch-2 space. Sc in the next ch-1 space. Sc in the next ch-1 space. Sc in the next ch-1 space. Sc in the next ch-2 space. Chain 5. Sc in the next 4 stitches. Repeat from * to * 6 more times. Join with a sl st to the first sc.
Round 8: Slip stitch into the next 2 sc. Chain 1 (does not count as a stitch). Sc in the same stitch. Chain 5, sc in the next ch-5 space. Repeat from * to * 3 more times. Chain 5, sc in the center of the next 4-sc group. Repeat from * to * around. Join with a sl st to the first sc.
Part 4: The Final Border
The last round adds a decorative, scalloped edge to finish the doily.
Round 9: Slip stitch into the first ch-5 space. Chain 3 (counts as a dc). (2 dc, Picot, 3 dc) in the same space. Chain 1. In the next ch-5 space, make a Cluster. Chain 1. In the next ch-5 space, make (3 dc, Picot, 3 dc). Repeat from * to * around. Join with a sl st to the top of the beginning ch-3.
Fasten off and weave in all ends securely.
Video Tutorial:
Finishing Your Doily: Blocking for Perfection
Blocking is a vital step for any lacy crochet project. It helps the stitches relax, opens up the pattern, and gives your doily a professional, finished look.
- Dampen it: Gently soak your doily in cool water, or use a spray bottle to get it thoroughly damp. Do not wring or twist it.
- Shape and pin: Lay the damp doily on a foam blocking mat or a thick towel. Gently stretch it into a perfect circle, making sure all the star points and scallops are evenly spaced. Use rust-proof pins to secure it in place.
- Dry: Leave the doily pinned until it is completely dry, which may take a day or two.
- Unpin: Carefully unpin the doily. It will now hold its beautiful, intricate shape.
Enjoy your new Iris Star Doily!


