
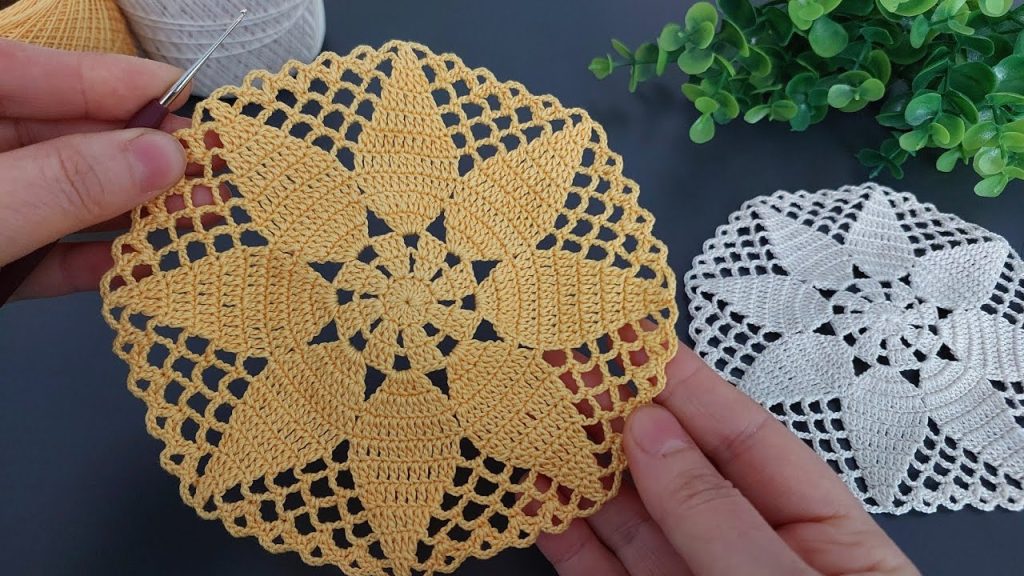
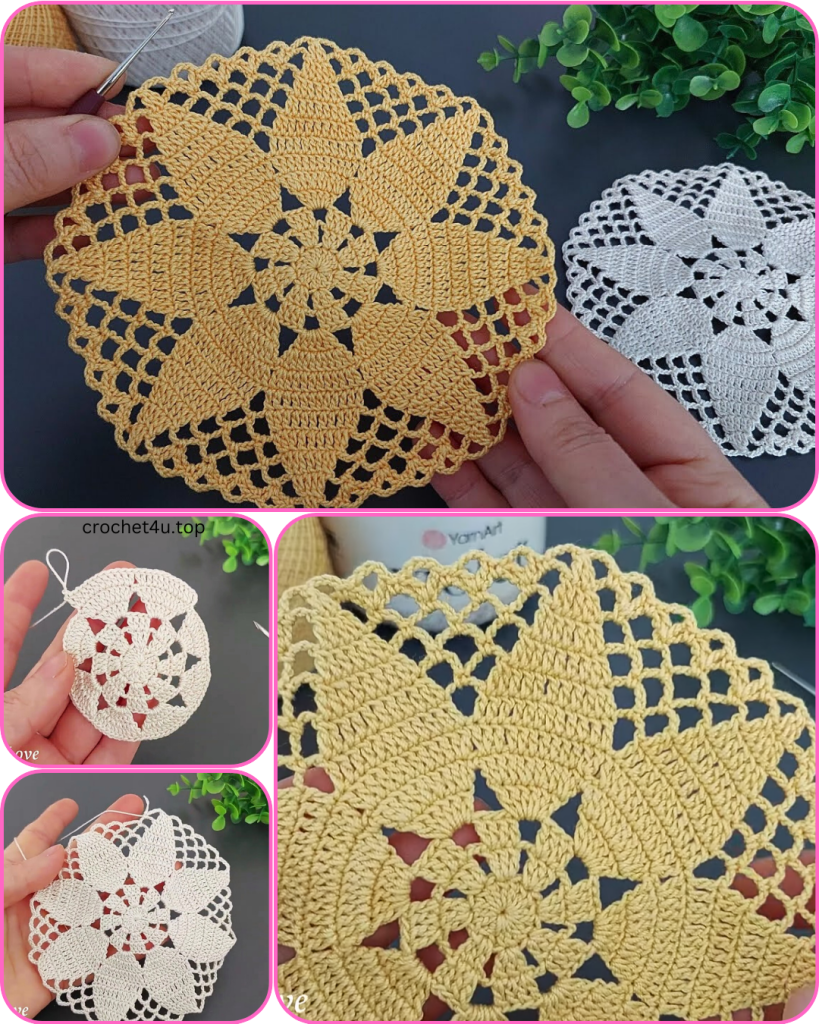
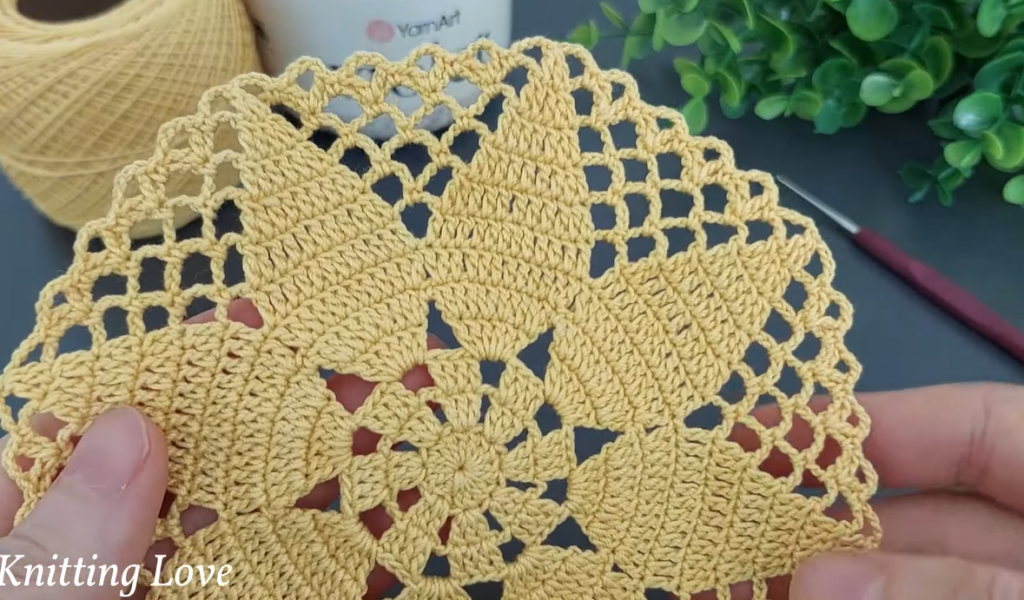
Welcome back! It’s clear you love beautiful, intricate lace, and I’m happy to provide another original pattern for you. This pattern is inspired by the stunning yellow doily you just shared, featuring a distinct, textured starburst center that transitions into a delicate, openwork border. I’ve named it the Celestial Star Doily because the central design looks like a star bursting from the middle.
This pattern is a joy to work up and is perfect for an intermediate crocheter. The combination of solid texture and airy lace makes for a sophisticated finished piece that’s ideal for table decor, or as a thoughtful handmade gift.
Materials
- Yarn: Fine or fingering weight cotton yarn or crochet thread (approximately 75-100 yards). Cotton is recommended for its excellent stitch definition.
- Hook: A crochet hook appropriate for your yarn weight. A 1.5 mm to 2.25 mm hook works well for this design.
- Scissors
- Tapestry Needle for weaving in ends.
Special Stitches
- Beginning Cluster (BCl): Chain 3 (counts as a double crochet), yarn over, insert hook into the same stitch or space, pull up a loop, yarn over, pull through 2 loops. (Yarn over, insert hook into the same stitch or space, pull up a loop, yarn over, pull through 2 loops) twice. You will have 4 loops on your hook. Yarn over, pull through all 4 loops.
- Cluster (Cl): Yarn over, insert hook into the specified stitch or space, pull up a loop, yarn over, pull through 2 loops. (Yarn over, insert hook into the same stitch or space, pull up a loop, yarn over, pull through 2 loops) 3 more times. You will have 5 loops on your hook. Yarn over, pull through all 5 loops.
- Picot: Chain 3, then slip stitch into the first chain.
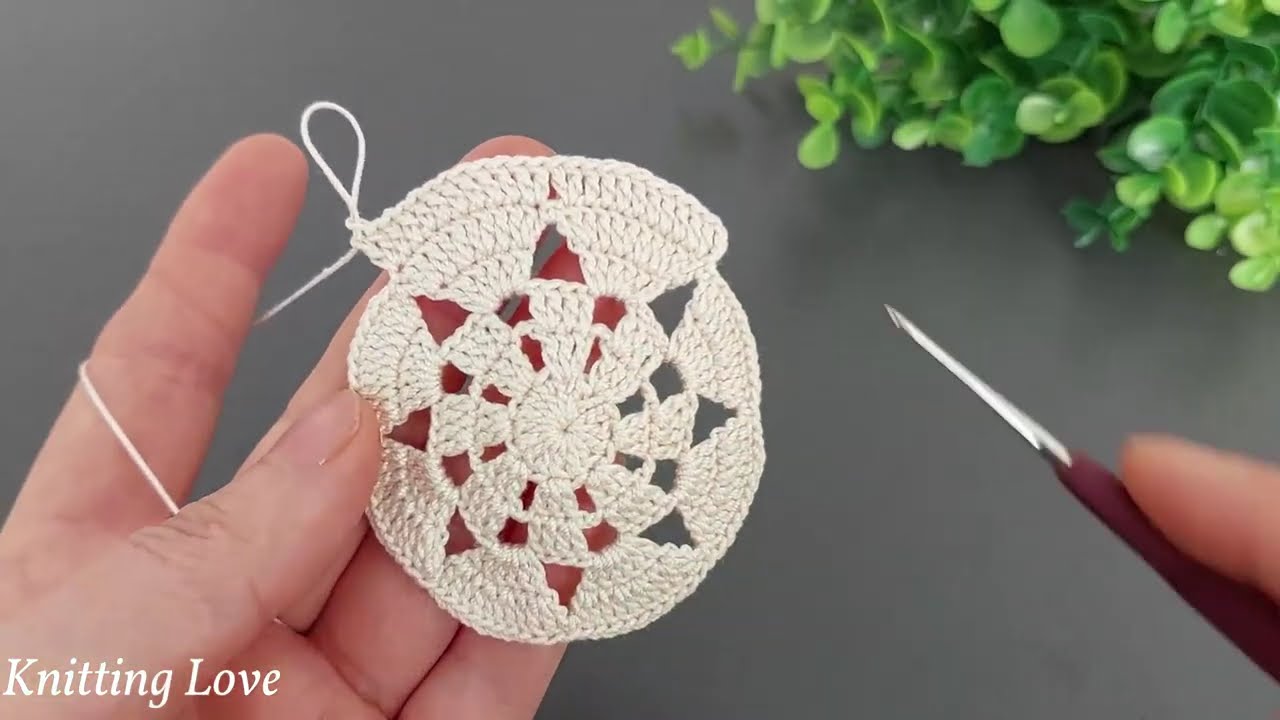
Part 1: The Solid Center
We’ll begin with a compact, solid core to set the foundation for the starburst.
Round 1: Make a magic ring. Chain 3 (counts as a dc), then make 15 dc in the ring. Join with a sl st to the top of the beginning ch-3. (16 dc)
Round 2: Chain 3. Dc in the same stitch. 2 dc in the next stitch. Repeat from * to * 14 more times. Join with a sl st to the top of the beginning ch-3. (32 dc)
Round 3: Chain 3. Dc in the next stitch. 2 dc in the next stitch, dc in the next 3 stitches. Repeat from * to * 7 more times. Join with a sl st to the top of the beginning ch-3. (40 dc)
Part 2: The Star Points
This section will create the eight distinct points of the star and the first layer of lace.
Round 4: Chain 1 (does not count as a stitch). Sc in the same stitch. Chain 5, skip 4 stitches, sc in the next stitch. Repeat from * to * 7 more times. Chain 5, skip the last 4 stitches, join with a sl st to the first sc. (8 ch-5 spaces)
Round 5: Slip stitch into the first ch-5 space. Make a BCl in the same space. Chain 5, skip the next sc. Make a Cl in the next ch-5 space. Repeat from * to * 6 more times. Chain 5, join with a sl st to the top of the beginning BCl. (8 clusters, 8 ch-5 spaces)
Round 6: Slip stitch into the first ch-5 space. Chain 1 (does not count as a stitch). In the same space, make (sc, ch 3, sc). Chain 5. In the next ch-5 space, make (sc, ch 3, sc). Repeat from * to * 6 more times. Chain 5, join with a sl st to the first sc.
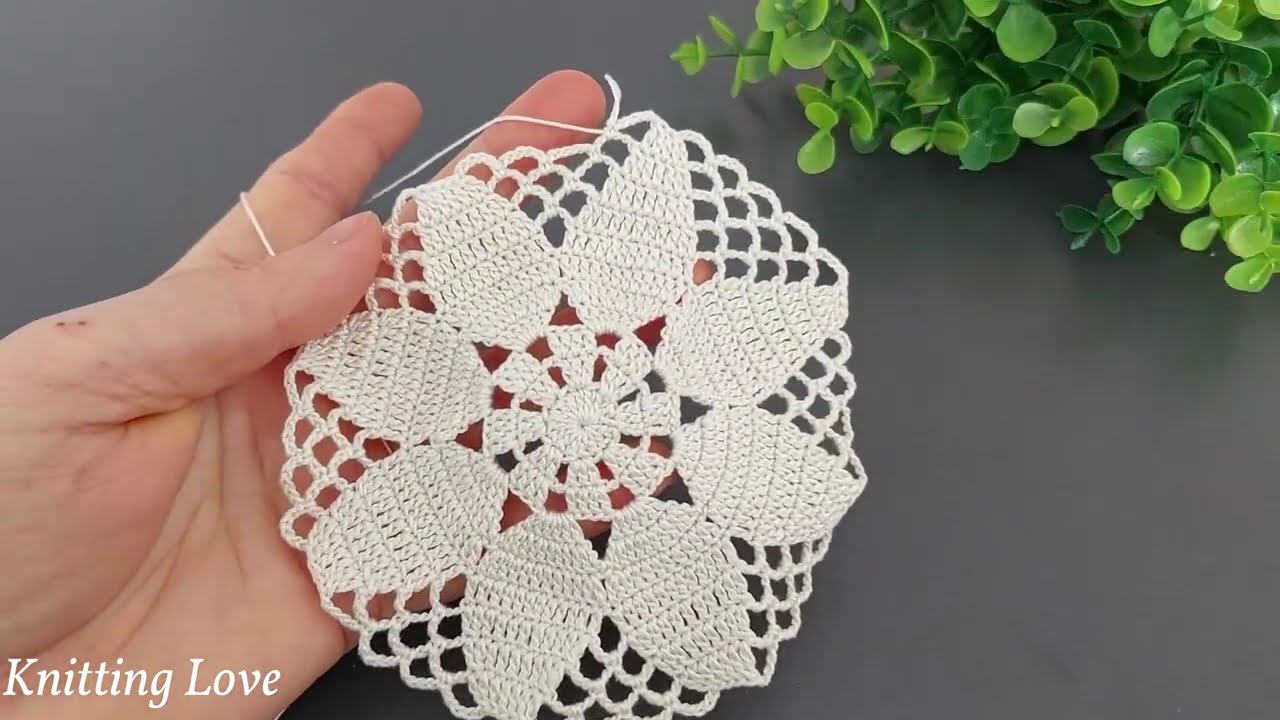
Part 3: The Lacy Border
The final rounds will add the delicate lattice and scalloped edge.
Round 7: Slip stitch into the first ch-3 space. Chain 3 (counts as a dc). Make 2 dc in the same space. Chain 1. 3 dc in the next ch-5 space. Chain 1. In the next ch-3 space, make (3 dc, ch 3, 3 dc) (this is a corner). Repeat from * to * 2 more times. Chain 1, 3 dc in the next ch-5 space. Chain 1, join with a sl st to the top of the beginning ch-3.
Round 8: Slip stitch into the next 2 dc and into the corner ch-3 space. Chain 3 (counts as a dc). (2 dc, ch 3, 3 dc) in the same space. Chain 1, skip 3 dc. In the next ch-1 space, make (dc, ch 1, dc). Chain 1, skip 3 dc. (3 dc, ch 3, 3 dc) in the next ch-3 space. Repeat from * to * 2 more times. Chain 1, V-st in the next ch-1 space. Chain 1, join with a sl st to the top of the beginning ch-3.
Round 9: Slip stitch into the next 2 dc and into the ch-3 space. Chain 1 (does not count as a stitch). In the same space, make (sc, Picot, sc). Chain 5, sc in the next ch-1 space. Chain 5, sc in the next ch-1 space. Chain 5. In the next corner ch-3 space, make (sc, Picot, sc). Repeat from * to * 2 more times. Chain 5, sc in the next ch-1 space. Chain 5, sc in the next ch-1 space. Chain 5, join with a sl st to the first sc.
Fasten off and weave in all ends securely.
Video Tutorial:
Finishing Your Doily: Blocking for Perfection
Blocking is a crucial step for any lacy crochet piece. It helps the stitches relax, opens up the intricate pattern, and ensures your doily is perfectly flat and symmetrical.
- Dampen it: Gently soak your doily in cool water or use a spray bottle until it’s saturated.
- Remove excess water: Gently squeeze the water out without wringing it. You can roll it in a clean towel to absorb more moisture.
- Shape and pin: Lay the doily on a foam blocking mat or a thick towel. Gently stretch it into a perfect circle, making sure all the star points and scallops are evenly spaced. Use rust-proof pins to secure it in place.
- Dry: Leave the doily pinned until it is completely dry. This could take a day or two.
- Unpin: Once totally dry, carefully remove the pins. You’ll be left with a crisp, beautiful doily ready to display.
Enjoy your new Celestial Star Doily!


