

Hello, fellow makers! I’m delighted to share this pattern for a beautiful lacy square that’s perfect for a wide range of projects. This motif features a simple central design surrounded by intricate lace and a delicate scalloped border. It’s a fantastic project for practicing your tension and stitch consistency. Whether you use it as a coaster, a dishcloth, or join several squares to create a stunning blanket or table runner, this project is both rewarding and fun.
This pattern is written using US crochet terms.
Skill Level: Intermediate
Finished Size:
- Approximately 6 x 6 inches (15 x 15 cm) when blocked.
Materials You’ll Need
- Yarn: Approximately 30g of a fingering weight or sport weight yarn. Cotton or a cotton blend is an excellent choice for this project, as it provides great stitch definition and is durable.
- Hook: A US size C/2 (2.75 mm) or D/3 (3.25 mm) crochet hook, or the size needed to obtain gauge.
- Notions:
- A tapestry needle for weaving in ends.
- Scissors.
- A stitch marker (optional, but helpful for the beginning of the round).
Gauge: Precision for Perfection
A consistent gauge is important for this project, especially if you plan to join multiple squares. It ensures your finished squares are the same size.
Gauge Swatch: 18 double crochet (dc) stitches and 10 rows = 4 inches (10 cm).
- How to Check Your Gauge:
- Chain 20.
- Work a double crochet (dc) in the 4th chain from the hook and in each chain across.
- Continue to work in rows of dc until you have 10 rows.
- Measure your swatch to check if it matches the gauge. If not, adjust your hook size and try again.
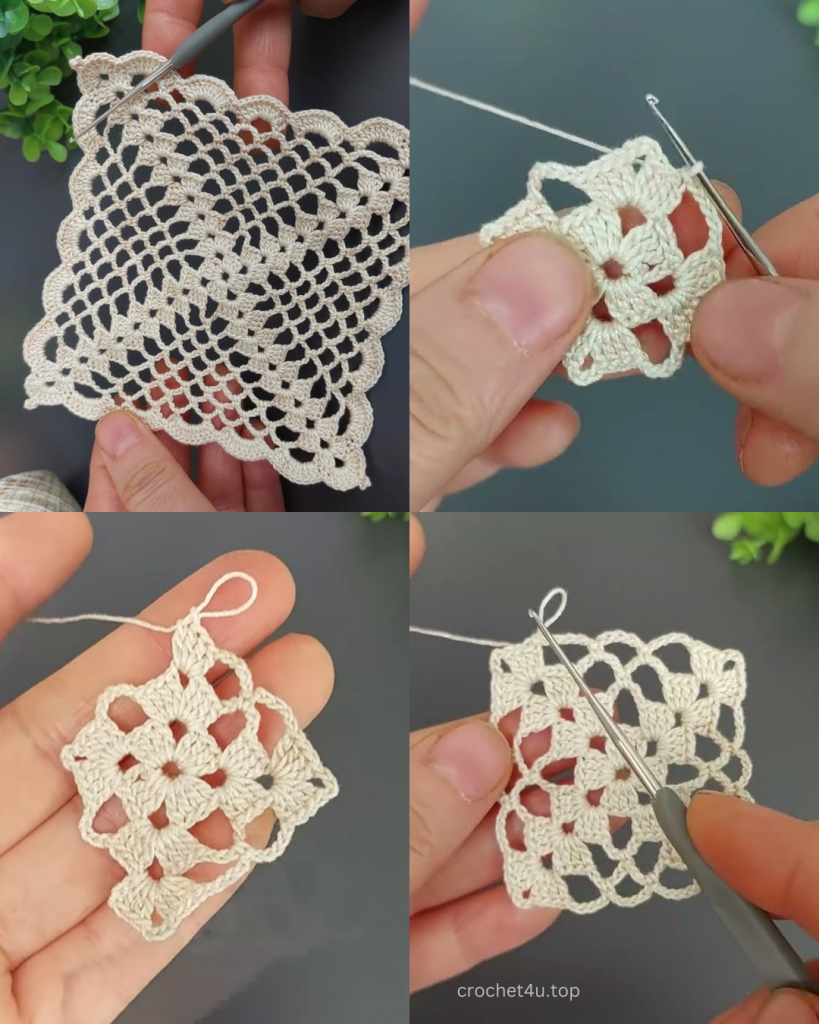
Crocheting the Square: The Main Pattern
This square is worked in the round from the center out.
Part 1: The Center Starburst
We’ll start with a small circle that will serve as the base for the rest of the lace.

- Round 1: Create a magic ring (or chain 4 and join with a slip stitch). Chain 3 (counts as the first double crochet), then work 11 double crochet (dc) into the ring. Join with a slip stitch (sl st) to the top of the beginning chain-3. (12 dc total)
- Round 2: Chain 1. Single crochet (sc) in the same stitch. *Chain 5, skip 1 stitch, sc in the next stitch*. Repeat from * to * around. You should have 6 chain-5 loops. Join with a sl st to the first sc.
- Round 3: Slip stitch into the first ch-5 space. Chain 3 (counts as the first dc). Work 2 dc in the same ch-5 space. *(3 dc, ch 3, 3 dc) in the next ch-5 space. *****Repeat from * to * around. Join with a sl st to the top of the beginning chain-3. (36 dc and 6 ch-3 spaces)
Part 2: The Lacy Corners
This section will create the open, lacy effect that surrounds the center and shapes the square.
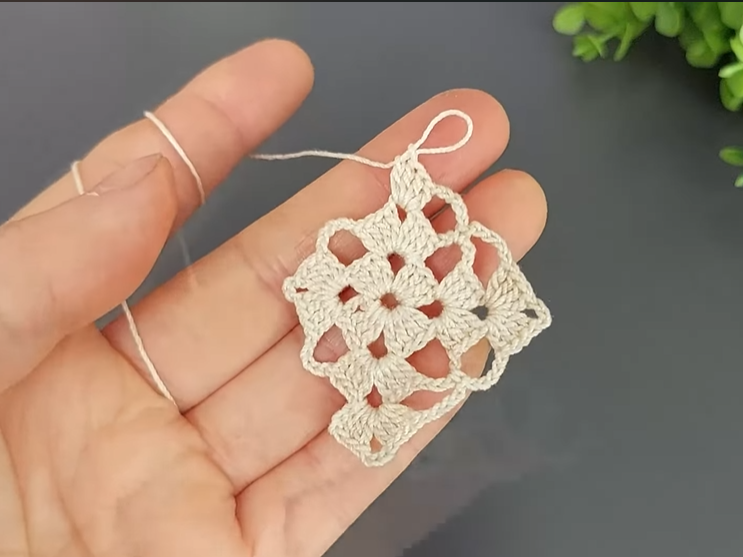
- Round 4: Chain 3 (counts as a dc). Dc in the next stitch. *Chain 3, skip 2 stitches, dc in the next 2 stitches*. Repeat from * to * around. In each ch-3 space, work a corner: (2 dc, ch 2, 2 dc).
- Continue the pattern of (dc in next 2 stitches, ch 3, skip 2 stitches) along the sides, and a corner in each ch-3 space. Join with a sl st to the top of the beginning chain-3.
- Round 5: Slip stitch into the first 2 stitches to get to the next stitch. (Ch 3, 2 dc) in the same stitch. *Chain 2, skip the ch-3 space, 3 dc in the next 3 stitches*. Repeat from * to * along the sides. In each corner space, work (3 dc, ch 2, 3 dc). Join with a sl st to the top of the beginning chain-3.
Part 3: The Scallop Edging
This part creates the beautiful scallop border that gives the square its final, elegant shape.
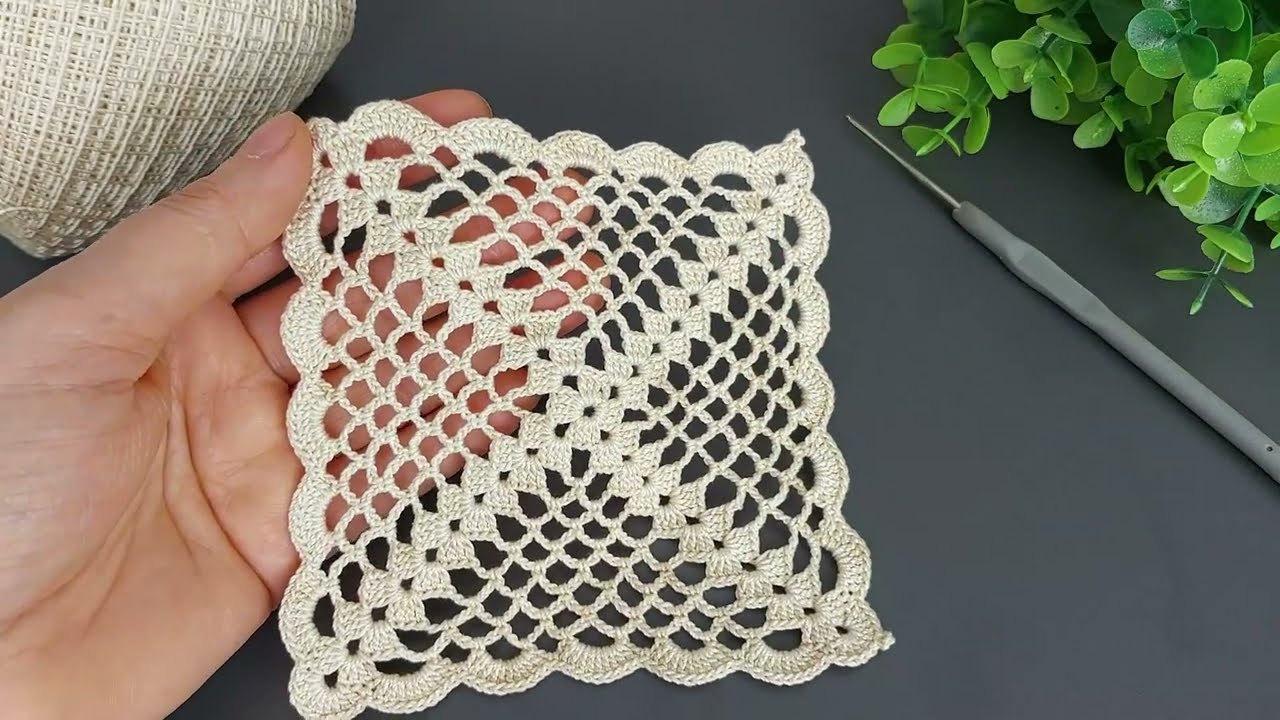
- Round 6: Slip stitch into the next 3 stitches to get to the corner space. (Ch 3, 2 dc, ch 2, 3 dc) in the corner space. *Dc in each of the next stitches. In each ch-2 space, work (sc, ch 3, sc). In each ch-3 space, work (sc, ch 3, sc).* Continue the pattern around, placing (3 dc, ch 2, 3 dc) in each corner space. Join with a sl st to the top of the beginning chain-3.
- Round 7 (Final Round): Slip stitch to the middle of the corner chain-2 space. *Chain 3, 4 dc in the same space. In the next ch-3 space, work (sc, ch 3, sc). In the next ch-3 space, work (sc, ch 3, sc).* Continue the pattern around, placing (5 dc) in each corner space and (sc, ch 3, sc) in each ch-3 space. Join with a sl st to the top of the beginning chain-3.
Finishing Your Square
- Weave in all ends: Use your tapestry needle to carefully weave in any loose yarn tails. This step will give your square a professional and clean finish.
- Blocking is key: For lace work, blocking is essential. It opens up the stitches, evens out the corners, and gives the piece its final, crisp shape.
- Gently hand wash your square or mist it thoroughly with water.
- Lay it flat on a clean towel or a foam blocking mat.
- Carefully stretch and pin out the corners, making sure they are square.
- Allow it to air dry completely. This can take several hours or overnight.
Video Tutorial:
Project Ideas & Customization
- Blanket: You can join multiple squares together with a slip stitch or single crochet seam. This is a great way to create a heirloom-quality blanket.
- Table Runner: Join a series of these squares together in a line to create a stunning runner.
- Color: This pattern would look great in a wide variety of colors. Try a solid, a variegated yarn, or even a gradient to create a unique effect.
- Size: To make a larger or smaller square, you can use a different yarn weight and a corresponding hook size.
I hope you enjoy creating this beautiful square. How do you plan to use your finished pieces?


