
🌟 Introduction
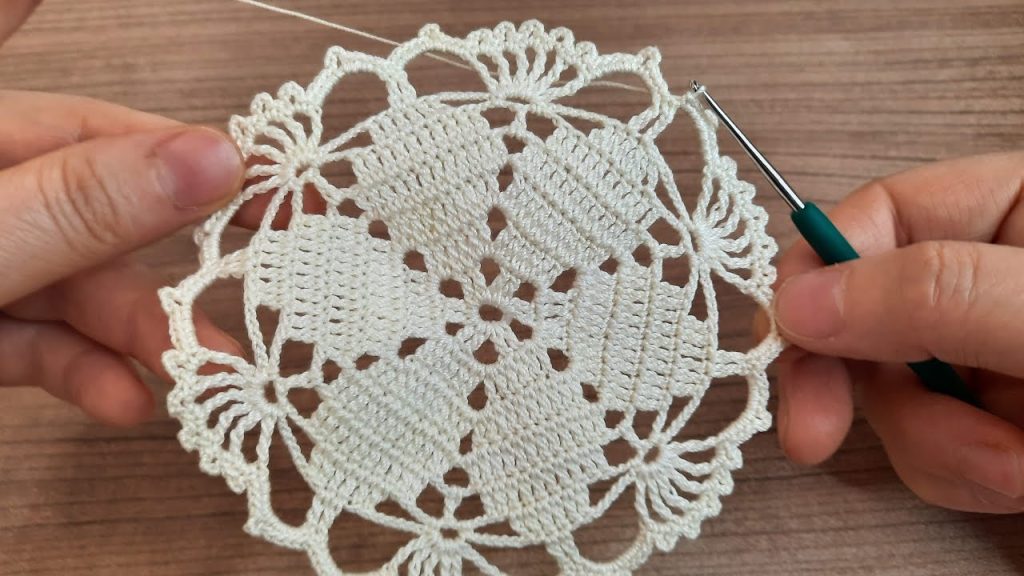
Blend the structure of a square with the softness of a circle with the Sunburst Square Doily! This captivating design features a dense, solid center shaped into a square using a filet crochet grid, which then explodes into a radiant, scalloped, circular lace border. It’s a wonderful intermediate project that offers great practice in shaping and combining different stitch types, resulting in an elegant piece perfect for coasters, centerpieces, or joining together for a unique runner.
Skill Level: Intermediate
Finished Size (approximate): 7 inches (18 cm) in diameter, when using thread.
🧵 Materials & Gauge
✨ Materials Needed
- Yarn/Thread: Approximately 60-90 yards of Size 10 Cotton Thread (Lace Weight/Fingering). Cotton thread is ideal for giving the dense center definition and the lace border crispness. (The sample is a lovely cream/ecru color.)
- Hook: Steel Crochet Hook Size 7 (1.65 mm) or size needed to obtain gauge.
- Notions: Small sharp scissors, tapestry needle for weaving in ends, and T-pins for blocking.
📏 Gauge (Crucial for Sizing!)
- Filet Center (Rounds 1-4): The center four Solid Squares should measure approximately 1.5 inches (3.8 cm) square.
- Overall Check: Your work must lie flat at the end of each round. If it curls, your tension is too tight; if it ruffles, it’s too loose.
💡 Special Stitches & Abbreviations
📝 Pattern Abbreviations (US Terms)
| Abbreviation | Meaning | | Abbreviation | Meaning | | :—: | :— | :—: | :— | | ch | chain | | st(s) | stitch(es) | | sl st | slip stitch | | rep | repeat | | sc | single crochet| | dc | double crochet | | ch-sp | chain space | | sk | skip | | Solid Sq| Solid Square | | Shell | Shell Stitch |
⭐ Special Stitches (Written Instructions)
- Solid Square (Solid Sq): Work 3 dc (e.g., in next 3 sts or over ch-2 sp).
- Shell: Work (5 dc) all into the indicated stitch or space.
Note on Filet Counting: A ch 3 at the beginning of a DC round always counts as the first DC.
💎 The Pattern: Sunburst Square Doily
Note: The pattern is worked in joined rounds. The square shaping and the 8-point lace border emerge simultaneously.
Part 1: The Solid Square Center
Foundation: Start with a Magic Ring (MR).
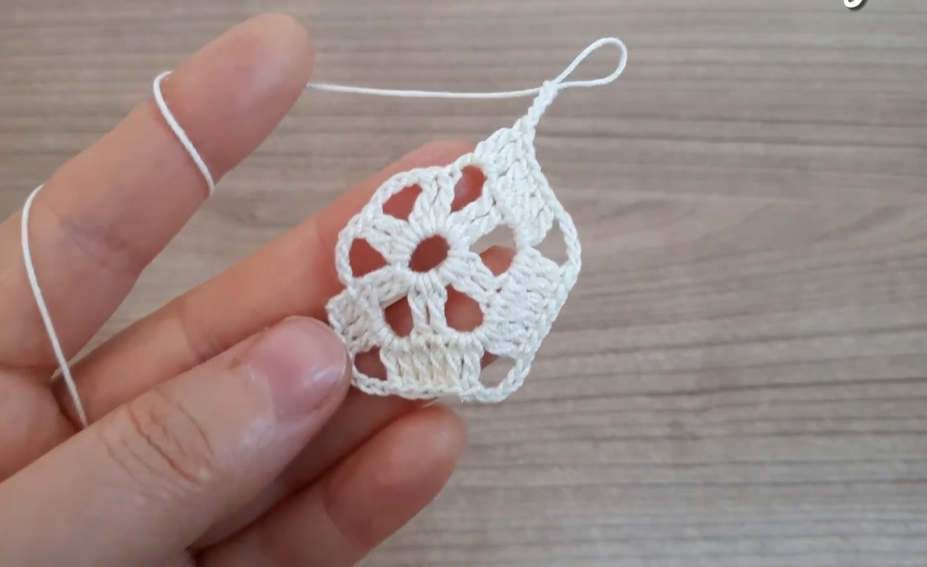
Round 1: Ch 3 (counts as 1 dc), 15 dc in ring. Sl st to top of starting ch-3 to join. (16 dc)
Round 2 (First Solid Squares): Ch 3, dc in the same st. [Corner] 2 dc in the next st, ch 3. 2 dc in the next st, 2 dc in the next st, ch 3. Rep from * 3 more times. Sl st to the top of the starting ch-3 to join. (4 Solid Sq blocks of 4 dc, 4 ch-3 sps)
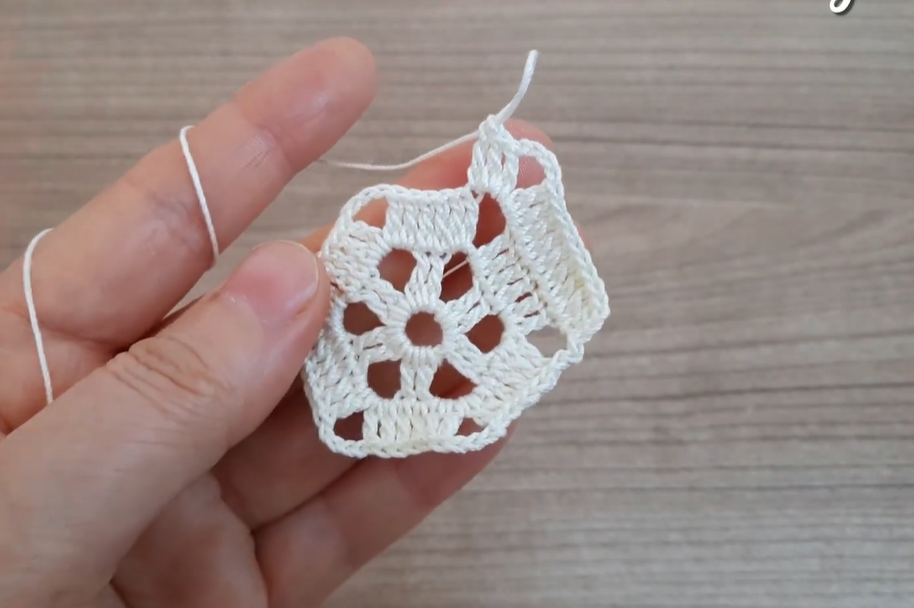
Round 3 (Expanding Solid): Ch 3, dc in the next 3 dc. [Corner] In the ch-3 sp work (2 dc, ch 3, 2 dc). Dc in the next 4 dc. Rep from * 3 more times. Sl st to the top of the starting ch-3 to join. (4 Solid Sq blocks of 8 dc, 4 ch-3 sps)
Round 4 (Final Solid Square): Ch 3, dc in the next 5 dc. [Corner] In the ch-3 sp work (2 dc, ch 3, 2 dc). Dc in the next 8 dc. Rep from * 3 more times, omitting the last 2 dc on final side. Sl st to the top of the starting ch-3 to join. (4 Solid Sq blocks of 12 dc, 4 ch-3 sps)
Part 2: Transition to Lace and Arches
Round 5 (Lace Separation): Ch 5 (counts as 1 dc, ch 2). Sk 2 dc, dc in the next dc. Ch 2, sk 2 dc, dc in the next dc. Rep from * 1 more time. [Corner] Ch 2, in the ch-3 sp work (dc, ch 3, dc). Ch 2, sk 2 dc, dc in the next dc. Rep from * around. Sl st to the 3rd ch of the starting ch-5 to join. (16 Open Sqs, 4 corner ch-3 sps)
Round 6 (Arch Base): Ch 1, sc in the same st. [Side] Sc in the ch-2 sp, sc in the dc. Rep from * 2 more times. [Point 1] Ch 5, sk ch-2 sp, sc in the corner ch-3 sp, ch 5. Sc in the next dc, sc in the ch-2 sp, sc in the dc. Rep from * along the next side until the corner. [Point 2] Ch 5, sc in the next ch-3 sp, ch 5. Rep from * around. Sl st to the first sc to join. (8 ch-5 arches)
Part 3: The Scalloped Border

Round 7 (Shell Setup): Sl st to the center sc of the side group. Ch 3, 4 dc in the same st (Shell). Ch 3, sc in the center of the first ch-5 arch. Ch 3, sc in the center of the next ch-5 arch. Ch 3. [Side/Shell] Shell in the center sc of the next side group. Rep from * 3 more times. Sl st to the top of the starting ch-3 to join. (4 Shells, 8 ch-3 sps, 8 sc)
Round 8 (Final Scallops): Sl st to the center dc of the Shell. Ch 1, sc in the same dc. [Scallop] Ch 3, 7 dc in the next ch-3 sp. Ch 3, sc in the next ch-3 sp. Ch 3. Sc in the center dc of the next Shell. Rep from * 7 more times. Sl st to the first sc to join.
Round 9 (Picot Edge): Ch 1, sc in the same st. Ch 3, sc in the next dc. (Ch 3, sc in the next dc) 6 more times (over the 7-dc Shell). Ch 3, sc in the next ch-3 sp. Rep from * around. Sl st to the first sc to join.
Fasten off.
Video Tutorial:
✂️ Finishing & Blocking
🧺 Blocking is Essential!
- Wet Blocking: Wet blocking is mandatory for this doily to define the square center and open the delicate lace scallops of the border.
- Soak the doily thoroughly in cool water, with liquid starch recommended for a crisp finish.
- Gently squeeze out excess water.
- Pin the doily out firmly onto a blocking board. Crucially, pin the four corners of the inner square taut (from Round 4/5) to define the square shape, and then pin the eight outer scallops evenly to maintain the overall circular diameter.
- Allow the motif to dry completely before unpinning.
✨ Conclusion
Weave in all your ends securely on the back of the work.
Congratulations! You have created the elegant Sunburst Square Doily, a perfect combination of geometric structure and delicate lace!


