🌟 Introduction
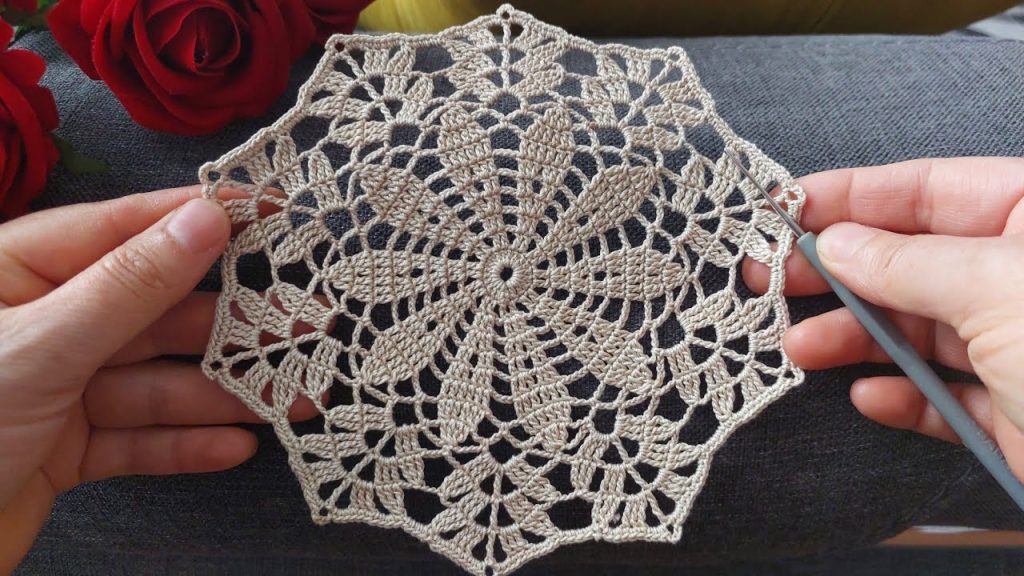
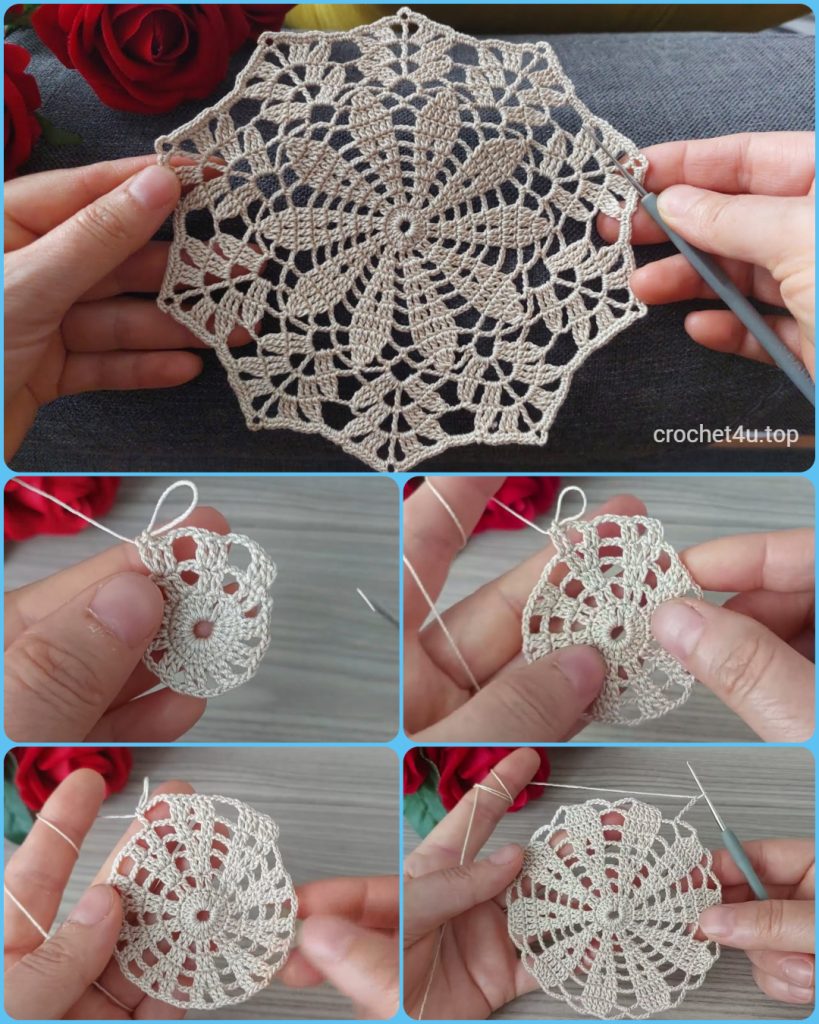
Elevate your decor with the striking Amethyst Starburst Doily! This design features a tight, textured center created with post stitches that mimic a radiating starburst, transitioning seamlessly into a delicate, eight-pointed lace border. Worked in a beautiful color, this doily is a rewarding project for the seasoned crocheter and makes a stunning piece of home decor.
Skill Level: Advanced Intermediate (Familiarity with post stitches and working in tight rounds is essential).
Finished Size (approximate): 8 inches (20 cm) in diameter, when using thread.

🧵 Materials & Gauge
✨ Materials Needed
- Yarn/Thread: Approximately 80-120 yards of Size 10 Cotton Thread (Lace Weight/Fingering). Using cotton thread ensures the excellent stitch definition required for the post stitches and the crispness of the lace. (The sample is a lovely lavender/amethyst purple.)
- Hook: Steel Crochet Hook Size 7 (1.65 mm) or size needed to obtain gauge. (Check your thread label for the recommended size.)
- Notions: Small sharp scissors, tapestry needle for weaving in ends, and T-pins for blocking.
📏 Gauge (Crucial for Sizing!)
- Rounds 1-4 (Central Disc) should measure approximately 1.5 inches (3.8 cm) in diameter.
- Crucial Check: The motif must lie perfectly flat. The density of the center requires careful tension; if it cups, your tension is too tight or you need more increases.
💡 Special Stitches & Abbreviations
📝 Pattern Abbreviations (US Terms)
| Abbreviation | Meaning | | Abbreviation | Meaning | | :—: | :— | :—: | :— | | ch | chain | | st(s) | stitch(es) | | sl st | slip stitch | | rep | repeat | | sc | single crochet| | dc | double crochet | | tr | treble crochet| | ch-sp | chain space | | MR | Magic Ring | | sk | skip | | Picot | Picot stitch | | BPdc | Back Post dc | | FPdc | Front Post dc | | Shell | Shell Stitch |
⭐ Special Stitches (Written Instructions)
- Picot: Ch 3, sl st back into the first chain.
- FPdc (Front Post Double Crochet): Yo, insert hook from front to back around the post of the indicated stitch, yo, pull up loop, yo, pull through 2 loops, yo, pull through last 2 loops. (This creates a raised ridge on the front of the work.)
- Shell: Work (dc, ch 2, dc) all into the indicated stitch or space.
🌸 The Pattern: Amethyst Starburst Doily (8-Point Repeat)
Note: The pattern is worked in joined rounds. The ch-3 at the beginning of DC rounds counts as the first dc. The starburst is created over 8 repeating sections.
Part 1: The Starburst Center (Post Stitch Rounds)
Foundation: Start with a Magic Ring (MR).

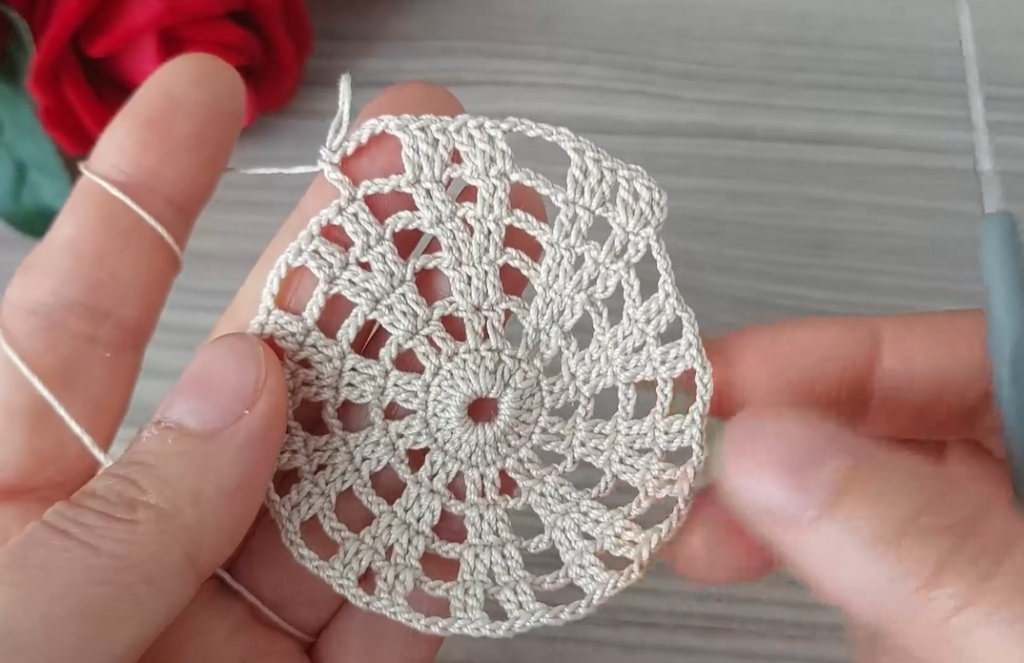
Round 1: Ch 3 (counts as 1 dc), 15 dc into MR. Sl st to the top of the starting ch-3 to join. (16 dc)
Round 2: Ch 3, dc in the same st. 2 dc in each st around. Sl st to the top of the starting ch-3 to join. (32 dc)
Round 3 (First Star Rays): Ch 3. Dc in the next 3 dc. FPdc around the next dc. Rep from * 7 more times. Sl st to the top of the starting ch-3 to join. (24 dc, 8 FPdc)
Round 4 (Expanding Rays): Ch 3. Dc in the next 3 dc. FPdc around the post of the FPdc below. Rep from * 7 more times. Sl st to the top of the starting ch-3 to join. (24 dc, 8 FPdc)
Round 5 (Final Solid Increase): Ch 3. Dc in the next dc, 2 dc in the next dc (increase). Dc in the next dc. FPdc around the post of the FPdc below. Rep from * 7 more times. Sl st to the top of the starting ch-3 to join. (32 dc, 8 FPdc)

Part 2: Transition to Lace and Arches
Round 6 (Mesh Separation): Ch 5 (counts as 1 dc, ch 2). Sk 2 dc, dc in the next st. Ch 2, sk 2 dc, dc in the next FPdc. Rep from * 7 more times. Sl st to the 3rd ch of the starting ch-5 to join. (16 dc, 16 ch-2 sps)
Round 7 (Large Arches): Ch 1, sc in the same st. Ch 4, sc in the next ch-2 sp, ch 4. Sc in the next dc. Ch 4, sc in the next ch-2 sp, ch 4. Rep from * 7 more times. Sl st to the first sc to join. (32 ch-4 sps)
Round 8 (Lace Points): Sl st into the first ch-4 sp. Ch 3, 2 dc in the same sp (Shell). Ch 3, sk sc, 3 dc in the next ch-4 sp (Shell). Ch 3. Sc in the next sc. Ch 3, 3 dc in the next ch-4 sp. Rep from * around. Sl st to the top of the starting ch-3 to join. (16 Shells, 16 ch-3 sps, 8 sc)
Part 3: The Final Scalloped Edge

Round 9 (Defining 8 Points): Ch 5 (counts as 1 dc, ch 2). Dc in the same st (V-st). Ch 3, sk Shell, sc in the next ch-3 sp. Ch 3, sk sc. Shell in the center dc of the next Shell. Rep from * 7 more times. Sl st to the 3rd ch of the starting ch-5 to join. (8 Shells, 16 ch-3 sps, 8 sc)
Round 10 (Final Picot Edge): Sl st to the ch-2 sp of the Shell. Ch 1, sc in the sp. [Corner Shell] Ch 3, 5 dc in the next ch-3 sp. Ch 3, sc in the next sc. Ch 3, 5 dc in the next ch-3 sp. Ch 3. Sc in the ch-2 sp of the next Shell. Rep from * 7 more times. Sl st to the first sc to join.
Round 11 (Finishing Touches): Ch 1, sc in the same st. Ch 3, sc in the next dc, (Ch 3, Picot, ch 3, sc in the next dc) 2 times. Ch 3, sc in the next dc. Ch 3, sc in the next sc. Ch 3, sc in the next dc, (Ch 3, Picot, ch 3, sc in the next dc) 2 times. Ch 3, sc in the next dc. Ch 3. Rep from * around. Sl st to the first sc to join.
Fasten off.
Video Tutorial:
✂️ Finishing & Blocking
🧺 Blocking is Mandatory!
- Wet Blocking: Wet blocking is absolutely mandatory to open the lace and define the points. The dense center requires this step to ensure the piece lies completely flat.
- Soak the doily thoroughly in cool water, adding liquid starch if you want a stiff finish.
- Gently squeeze out excess water.
- Pin the doily out firmly onto a blocking board. Ensure the 8 outer points are pulled taut and symmetrical. Pin out the inner lace sections to open the mesh.
- Allow the motif to dry completely before unpinning.
✨ Conclusion
Weave in all your ends securely on the back of the work.
Congratulations! You have completed the exquisite Amethyst Starburst Doily, a stunning example of textured lace crochet.


