
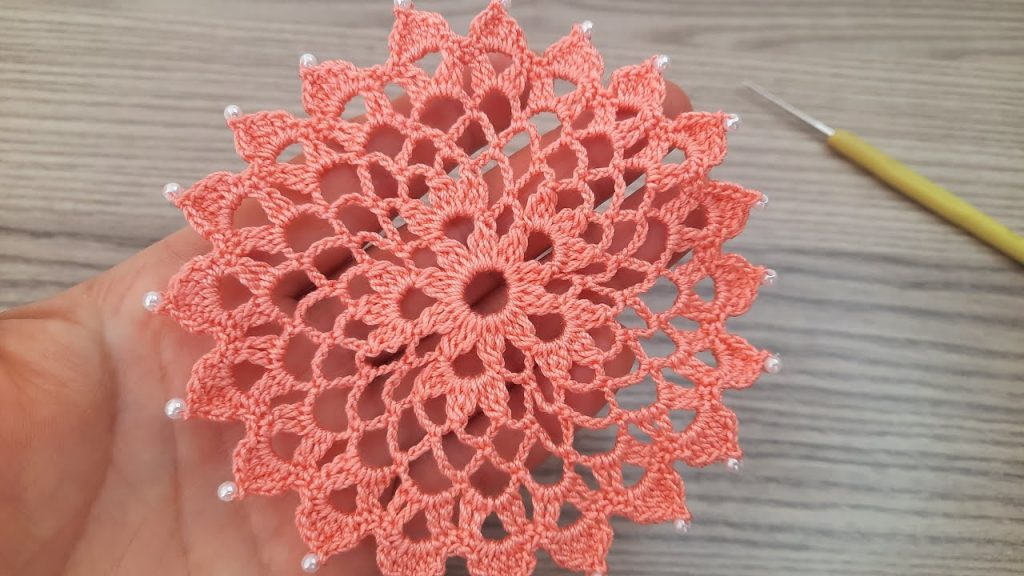
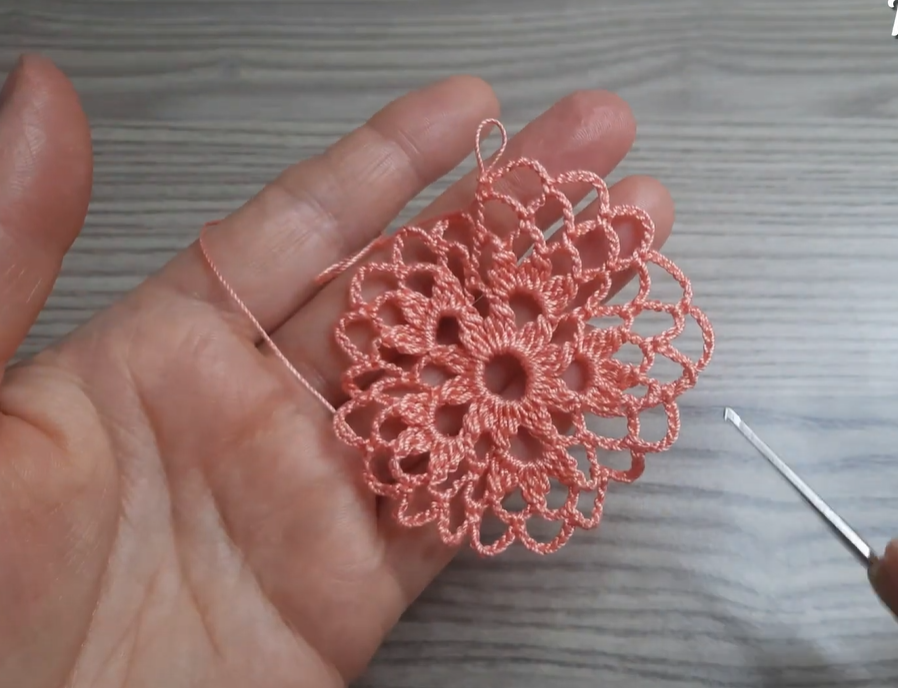
Welcome, crochet artists! Today’s project is a small, vibrant motif that combines intricate lacework with the sparkle of beads for a truly luxurious finish. This piece is perfect as a coaster, an ornament, or as a striking appliquéd decoration. The layered structure gives it wonderful dimension.
This pattern is written using U.S. Crochet Terminology.
✨ Materials You’ll Need
| Icon | Item | Notes |
| 🧶 | Yarn | Approx. 30–50 yards of fine thread yarn (Size 10 or similar cotton thread). The coral/salmon color is beautiful, but any solid color will work. |
| 鉤 | Crochet Hook | A very small steel hook. I recommend a 1.5 mm to 2.0 mm hook to achieve the fine lace gauge. |
| ⚪️ | Beads | Approx. 16 small seed beads or pearl beads that can fit over your working yarn/thread. You will need a fine needle/floss to pre-string them. |
| ✂️ | Tools | Tapestry needle, scissors, and a fine beading needle or dental floss for stringing the beads. |
| 📏 | Gauge | The finished motif should measure approx. 4′′ to 4.5′′ across after blocking. |
📚 Preparation, Stitches & Techniques
You must pre-string your beads onto your yarn/thread before starting the project. String at least 16 beads now.
| Stitch | Abbreviation | Description |
| Chain | ch | Yarn over, pull through loop on hook. |
| Slip Stitch | sl st | Insert hook, yarn over, pull through work and loop on hook. |
| Single Crochet | sc | Standard single crochet. |
| Double Crochet | dc | Standard double crochet. |
| Treble Crochet | tr | Standard treble crochet (yarn over twice). |
| Bead Stitch | BS | Slide a bead next to your hook, ch 1 to lock it in place. |
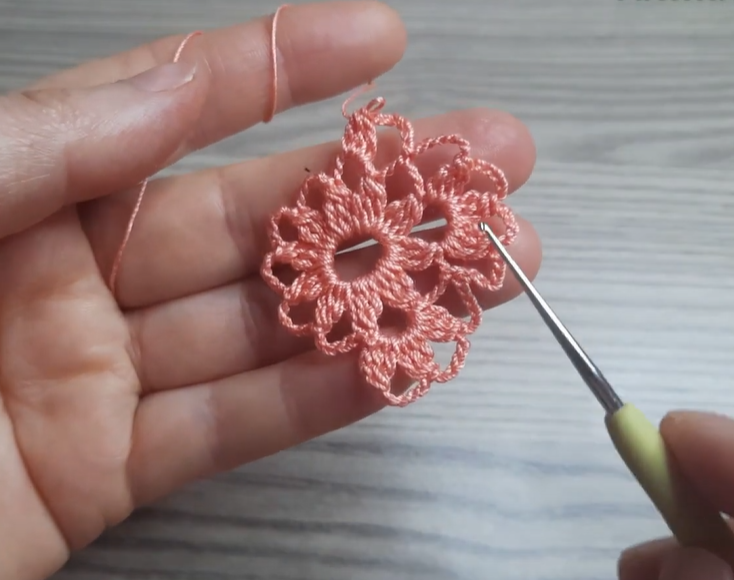
💠 Part 1: The Dense Center (Rounds 1–4)
We start with a tight center that will form the core of the starburst. We aim for 16 main spokes/petals.
Foundation:
- ch 6, sl st into the first ch to form a ring.
Round 1:
- ch 1 (does not count as a stitch).
- Work 16 sc into the ring.
- sl st to the first sc to join. (16 sc)
Round 2 (Petal Bases):
- ch 1.
- sc in the first st.
- ch 3.
- Skip 1 st.
- sc in the next st.
- Repeat from ** around.
- End with ch 3. sl st to the first sc to join. (8 ch-3 loops)
Round 3:
- sl st into the first ch-3 space.
- ch 3 (counts as first dc).
- Work 2 dc, ch 2, 3 dc in the same ch-3 space. (This is a Shell).
- sc in the next sc.
- Work 3 dc, ch 2, 3 dc in the next ch-3 space.
- sc in the next sc.
- Repeat from ** around.
- sl st to the top of the starting ch-3 to join. (8 Shells, 8 sc)
Round 4 (Opening the Center):
- sl st across the first 3 dc to reach the ch-2 space.
- ch 1 (does not count as a stitch).
- sc in the ch-2 space.
- ch 4.
- sc in the sc between the shells.
- ch 4.
- sc in the ch-2 space of the next shell.
- Repeat from ** around.
- End with ch 4. sl st to the first sc to join. (16 ch-4 loops)
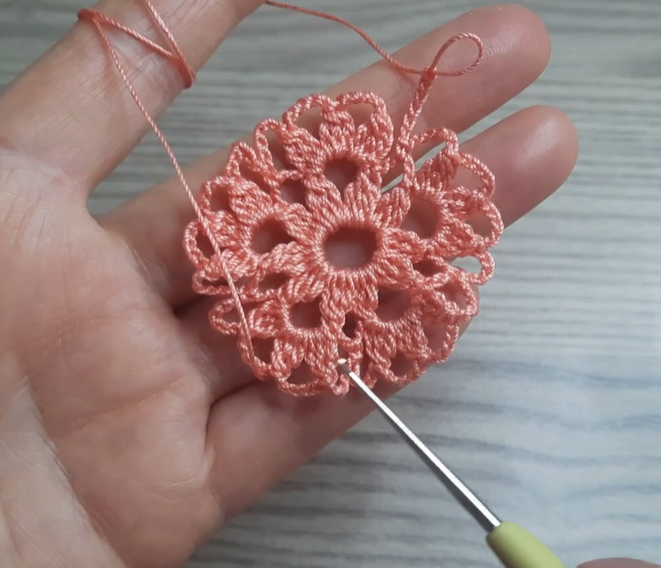
🕸️ Part 2: The Lacy Starburst (Rounds 5–7)
This section creates the open, spoked lace that forms the main star pattern.
Round 5:
- sl st into the first ch-4 space until you reach the center (2nd ch).
- ch 4 (counts as first tr).
- tr in the same ch (center of the loop).
- ch 5.
- In the center (2nd ch) of the next ch-4 space, work 2 tr.
- ch 5.
- Repeat from ** around.
- sl st to the top of the starting ch-4 to join. (16 clusters of 2 tr, 16 ch-5 loops)
Round 6:
- sl st into the next tr.
- ch 1.
- sc in the tr.
- ch 5.
- sc in the center (3rd ch) of the ch-5 space.
- ch 5.
- sc in the first tr of the next 2-tr cluster.
- Repeat from ** around.
- sl st to the first sc to join. (32 ch-5 loops)
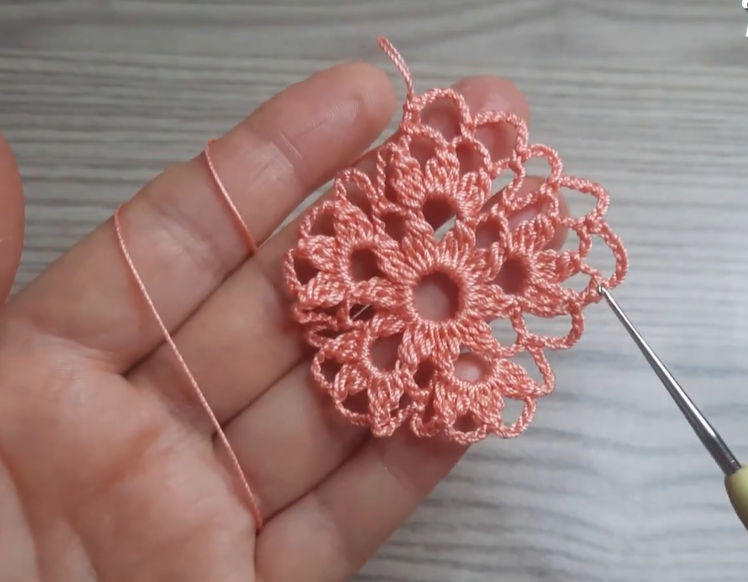
Round 7 (Star Points):
- sl st into the first ch-5 space until you reach the center (3rd ch).
- ch 5 (counts as dc + ch 2).
- dc in the same ch. (This is a V-Stitch).
- ch 4.
- sc in the center (3rd ch) of the next ch-5 space.
- ch 4.
- In the center (3rd ch) of the next ch-5 space, work (dc, ch 2, dc) (V-Stitch).
- Repeat from ** around.
- sl st to the 3rd ch of the starting ch-5 to join. (16 V-Stitches, 16 sc, 32 ch-4 loops)
💎 Part 3: The Final Beaded Edge (Round 8)
This round creates the sharp points and incorporates the pre-strung beads.
Round 8:
- sl st into the ch-2 space of the V-Stitch.
- ch 1 (does not count as a stitch).
- In the ch-2 space, work (sc, ch 1).
- ch 5.
- sc in the center (2nd ch) of the next ch-4 space.
- ch 3.
- sc in the center (2nd ch) of the next ch-4 space.
- ch 5.
- In the ch-2 space of the V-Stitch, work (sc, ch 1, sc).
- ch 5.
- sc in the center of the next ch-4 space.
- ch 3.
- sc in the center of the next ch-4 space.
- ch 5.
- The Star Point: In the ch-2 space of the next V-Stitch, work sc, ch 1, BS (Bead Stitch), ch 1, sc. (This is where the bead sits).
- Repeat the pattern around, placing a simple sc, ch 1, sc in one V-stitch and the sc, ch 1, BS, ch 1, sc in the next V-stitch, alternating them.
- sl st to the first sc to join.
Video Tutorial:
📌 Finishing and Blocking
- Secure Ends: Fasten off your thread and use your tapestry needle to carefully weave in all loose ends on the back side of your work.
- Blocking (Crucial!): Blocking is necessary to properly open up the lace and ensure the star points are defined.
- Dampen your motif thoroughly.
- Gently pin the motif to a padded surface. Pin out the 16 outer points (the V-stitches) until the piece is a perfect, flat circle and the beads are sitting right at the tips.
- Allow the piece to dry completely before unpinning.
Your gorgeous Coral Starburst Beaded Doily is now finished! What beautiful spot will this piece call home?


