
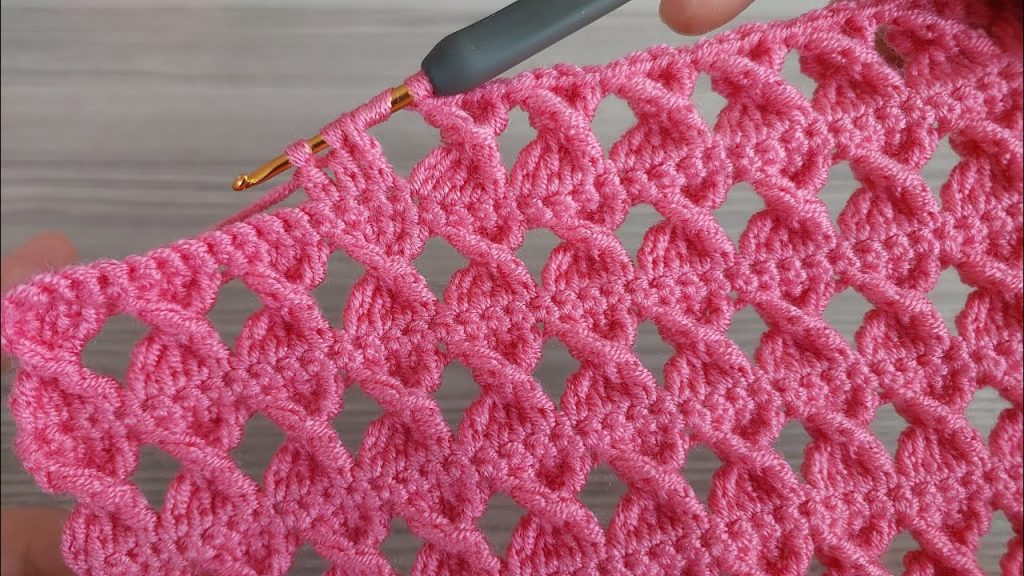
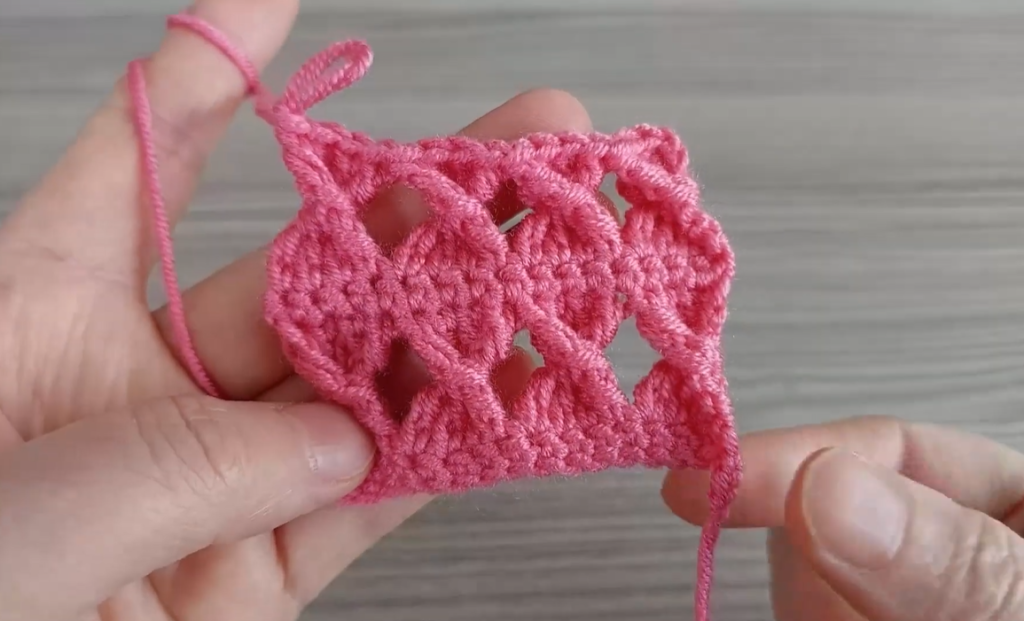
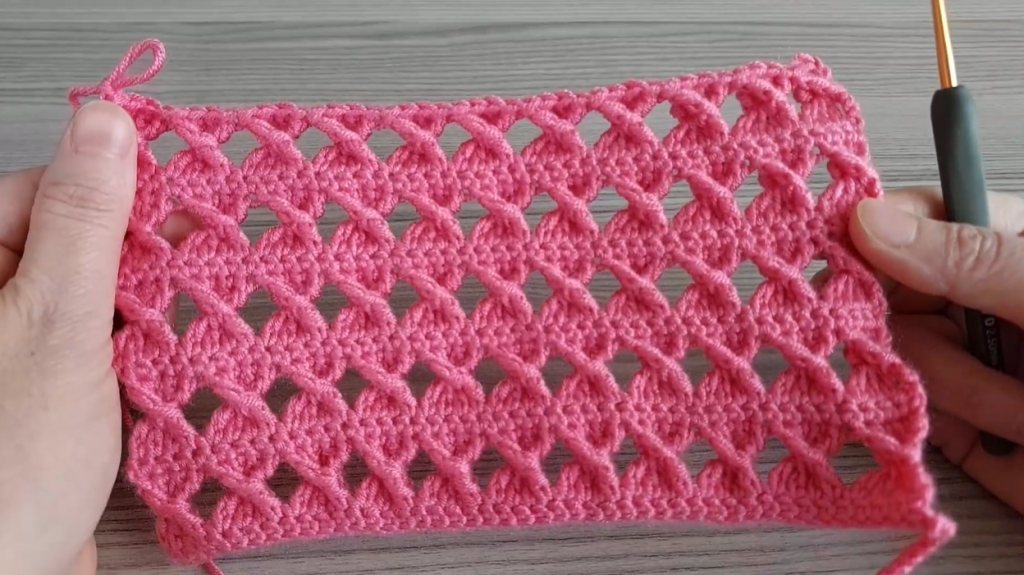
Welcome to a new pattern that’s sure to become your next favorite project! The beautiful swatch you see above—a rich, textured fabric featuring diagonal traveling double crochet stitches—is the focus of today’s deep dive. I call this elegant design the “Diamond Lattice Stitch.”
This pattern is a fantastic choice for projects that need substance and warmth, like scarves, cowls, blankets, and outerwear. Its dense texture and reversible nature make it a luxurious choice, and once you master the simple four-row repeat, you’ll find it incredibly relaxing to work up.
Grab your favorite cozy yarn, and let’s get started on this detailed journey!
🧶 What You’ll Need: Gathering Your Supplies 🧶
For a textured stitch like this, a yarn that holds its shape well is essential.
- Yarn: I recommend a Worsted Weight (Weight 4) or Aran Weight yarn. A wool or acrylic blend will show off the stitch definition beautifully and provide excellent warmth. The color in the image is a vibrant pink, but this pattern looks gorgeous in neutrals, too!
- Crochet Hook: A hook size appropriate for your yarn. For Worsted/Aran weight, a 5.0 mm (H/8) or 5.5 mm (I/9) hook is a great starting point.
- Scissors: For snipping your yarn.
- Tapestry Needle: For weaving in ends.
- Stitch Markers (Optional): Helpful for marking the edges of rows, especially when the texture makes the turning chain hard to spot.
📝 Decoding the Stitches: Your Crochet Vocabulary 📝
This pattern is built on a simple foundation, but the texture comes from one key specialty stitch. We’ll use US Crochet Terms.
| Abbreviation | Stitch Name | Description |
| ch | Chain | Yarn over, pull through loop on hook. |
| st(s) | Stitch(es) | |
| sl st | Slip Stitch | Insert hook, yarn over, pull through stitch and loop on hook. |
| sc | Single Crochet | Insert hook, yarn over, pull up a loop, yarn over, pull through both loops. |
| dc | Double Crochet | Yarn over, insert hook, pull up loop, [yarn over, pull through 2 loops] twice. |
| Bpdc | Back Post Double Crochet | Yarn over, insert hook from back-to-front-to-back around the post of the specified stitch, yarn over, complete the dc as normal. |
| Fpdc | Front Post Double Crochet | Yarn over, insert hook from front-to-back-to-front around the post of the specified stitch, yarn over, complete the dc as normal. |
| Fptr | Front Post Treble Crochet | Yarn over twice, insert hook from front-to-back-to-front around the post of the specified stitch, yarn over, complete the tr as normal. |
📏 Gauge & Pattern Repeat 📏
Gauge (Approximate):
Using a 5.0 mm hook and Worsted Weight yarn:
- Approximately 14 dc and 7 rows per 4 inches ($10 \text{ cm}$).
- One full pattern repeat (Rows 1-4) should measure about 2 inches ($5 \text{ cm}$) high.
Pattern Repeat:
The pattern is worked over a multiple of $4 + 2$ stitches for the starting foundation.
- For our detailed swatch, we will start with $\text{Ch } 34$ ($4 \times 8 = 32 + 2 = 34$).
- The turning chain of ch 3 at the start of rows counts as the first dc.
💖 The “Diamond Lattice Stitch” Pattern: Row by Row 💖
This beautiful texture is achieved through a 4-row repeat that alternates between solid double crochet rows and textured post-stitch rows.
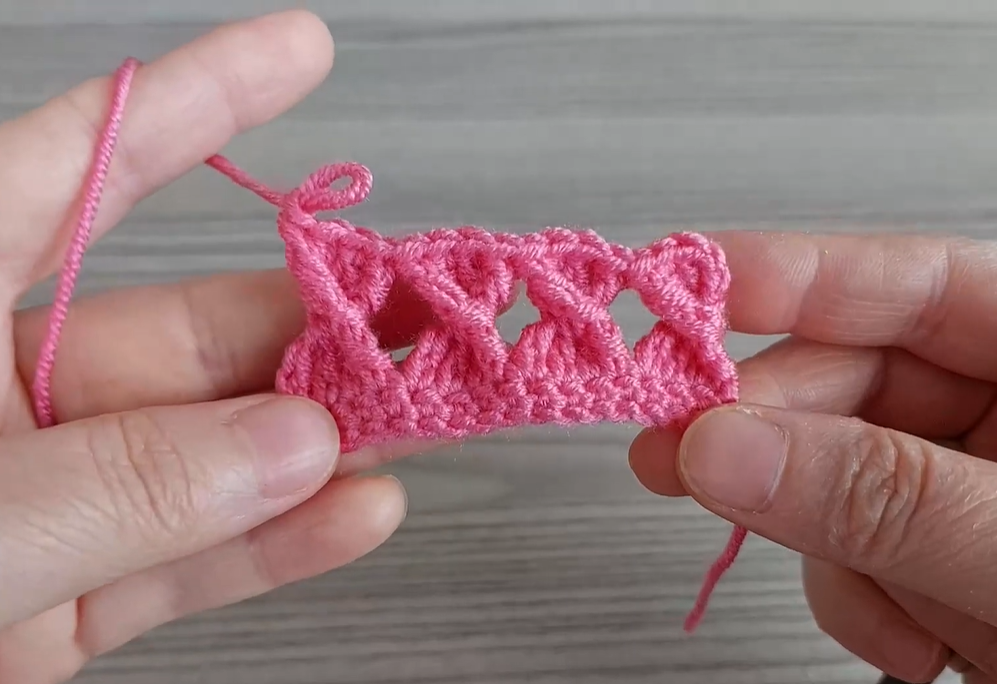
▶️ Foundation Row:
- Ch a multiple of $\mathbf{4 + 2}$. (For swatch, Ch 34).
Row 1 (RS – Solid Base):
- Dc in the 4th ch from the hook (the skipped 3 ch counts as your first dc).
- Dc in every ch across.
- Turn. (Total stitches: 32 dc).
This row provides the “posts” we will work into for the texture.
Row 2 (WS – Setting the Stage):
- Ch 3 (counts as 1 dc). Dc in the next dc.
- *Fpdc around the next dc. Bpdc around the next 3 dc.*
- Rep from * to * across the row until 2 sts remain.
- Fpdc around the next dc. Dc in the top of the turning ch-3.
- Turn.
This row sets up the alternating texture blocks for the traveling stitches.
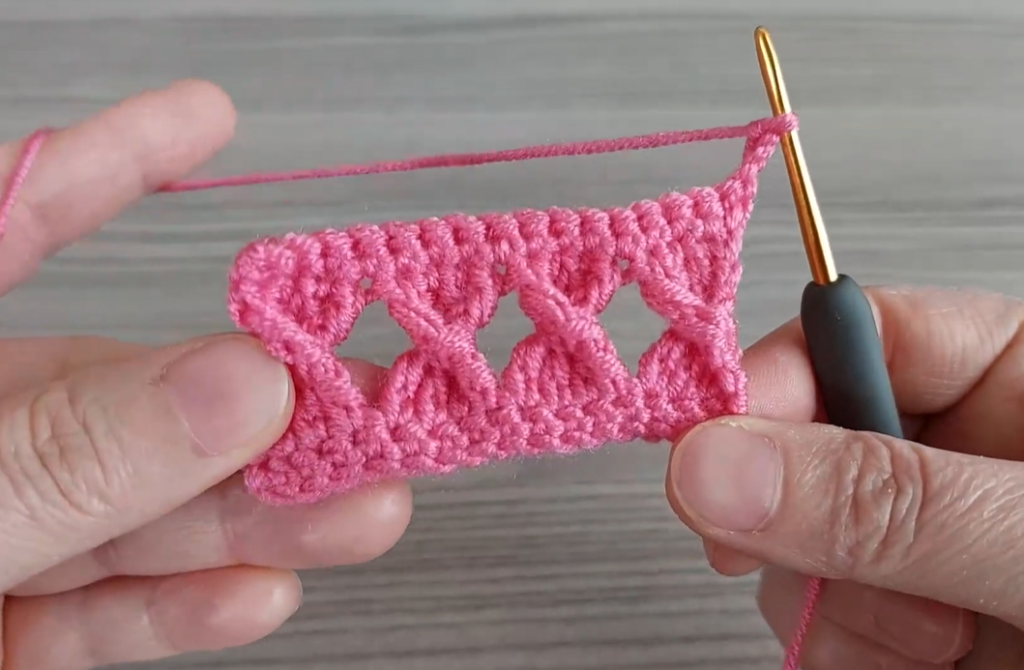
Row 3 (RS – Traveling Stitches – Diagonal Left):
- Ch 3 (counts as 1 dc).
- Sk the next st, dc in the next $\mathbf{3}$ sts.
- *Fptr around the skipped Fpdc from Row 1, crossing the three dc just made (This Fptr must be worked on the front of your work).
- Dc in the next $\mathbf{3}$ sts.*
- Rep from * to * across the row until you reach the last st (the turning ch-3).
- Fptr around the last Fpdc from Row 1 (this will be the third Fpdc from the end), crossing the dc just made.
- Dc in the top of the turning ch-3.
- Turn.
This row creates the first half of the diagonal diamond motif.
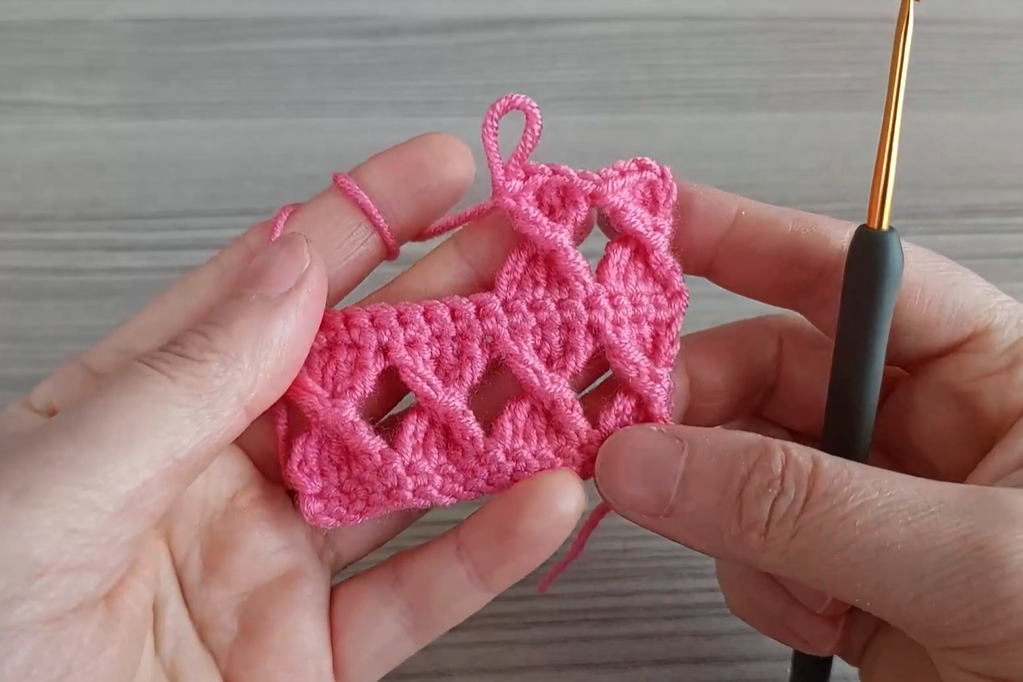
Row 4 (WS – Closing the Diamonds):
- Ch 3 (counts as 1 dc). Dc in the next $\mathbf{3}$ sts.
- *Dc in the next $\mathbf{4}$ sts.*
- Rep from * to * across the row, ensuring you work the last dc into the top of the turning ch-3.
- Turn. (Total stitches: 32 dc).
This solid row creates the foundation for the next diamond pattern and encloses the open space.
Row 5 (RS – Setting the Stage – Offset):
- Ch 3 (counts as 1 dc).
- Sk the next 2 sts, dc in the next 2 sts.
- Fptr around the skipped Fptr from Row 3, crossing the two dc just made.
- *Dc in the next 3 sts.
- Fptr around the next Fptr from Row 3.*
- Rep from * to * across the row until you reach the final 2 sts.
- Dc in the top of the turning ch-3.
- Turn.
This row uses the Fptr stitch to connect to the previously made diamond, creating the closed “X” shape.
Row 6 (WS – Solid Base):
- Ch 3 (counts as 1 dc). Dc in every st across.
- Turn. (Total stitches: 32 dc).
This row is your second solid base, preparing for the next set of traveling stitches.
Row 7 (RS – Traveling Stitches – Diagonal Right):
- Ch 3 (counts as 1 dc).
- Dc in the next 2 sts.
- *Fptr around the $\mathbf{3rd}$ dc post of Row 5 (the one that is not part of the Fptr), crossing the two dc just made.
- Dc in the next 3 sts.*
- Rep from * to * across the row until you reach the final 3 sts.
- Dc in the top of the turning ch-3.
- Turn.
This row completes the criss-cross and starts the next diamond pattern, traveling in the opposite diagonal direction.
Row 8 (WS – Closing the Diamonds):
- Ch 3 (counts as 1 dc). Dc in every st across.
- Turn. (Total stitches: 32 dc).
This row is your final solid row of the repeat.
🔄 The Repeat Sequence: Building the Fabric 🔄
To continue the Diamond Lattice pattern, you will now repeat Rows 5-8.
- Notice that Rows 5-8 are simply Rows 1-4, but offset to create the alternating diamond pattern.
- The Key: When repeating, the Fptr stitches should always cross over the plain dc stitches and land in the gaps created by the previous Fptr crossings. This ensures the continuous, seamless lattice effect.
Quick Repeat Guide:
- Repeat 1 (Initial Setup): Rows 1-4
- Repeat 2 (Offset): Rows 5-8
- Repeat 3 (Same as 1): Repeat Rows 1-4 (The diamond will align over the diamond from Repeat 1)
- Repeat 4 (Same as 2): Repeat Rows 5-8 (The diamond will align over the diamond from Repeat 2)
Continue in this $4$-row cycle until your project reaches the desired length.
Video Tutorial:
🚿 Finishing and Project Ideas 🚿
Blocking & Final Touches:
Because this is a very dense stitch, wet blocking is mandatory for the best result. After weaving in all ends:
- Gently soak your item in lukewarm water with a bit of wool wash (if using wool).
- Squeeze out excess water (do not wring!).
- Lay it flat on a towel or blocking mat, gently stretching and pinning the edges to open up those beautiful diamond spaces.
- Allow it to dry completely.
🌟 What to Make with This Stitch? 🌟
- A Statement Scarf or Cowl: The dense, wind-resistant fabric is perfect for cold weather.
- A Textured Throw: Imagine a solid-colored blanket with this striking pattern!
- A Bag or Purse: The thick fabric provides a sturdy, structural shape.
- Sleeve or Yoke Detail: Use it as a feature panel on a sweater or cardigan.
Happy stitching, and don’t forget to share your finished Diamond Lattice Stitch projects!


